Git and GitHub Workflow
In previous chapters, we learned how to use web-based vibe coding tools to write code. Each conversation could generate a new version of the code. But that raises an important question: if we want to return to an earlier version, is there a convenient way to do it? Is there a tool that can record our code at different stages so we can switch between versions freely?
That is exactly why version control software exists. In this chapter, we will introduce the most famous version control system, Git, and the most popular code hosting platform, GitHub. You will learn how to manage code with Git, how to download code from GitHub, how to upload your own work, and how to collaborate with others on larger projects.
Whether you are tracking changes in a personal project, synchronizing code with teammates, or contributing to open source, Git and GitHub are essential tools for modern developers. Once you understand them, you can manage code more confidently, create checkpoints whenever needed, move between different stages of a project, and keep every change traceable.
💡 Prerequisites
Before learning Git, it helps to understand:
This chapter focuses on the GitHub workflow and hands-on usage, while the links above cover the core fundamentals.
Quick start with Git
Before using Git, make sure you already understand the basics of the command line and Git itself. This chapter assumes you have that foundation and moves directly into installation, configuration, and practical GitHub collaboration.
How to install Git
We will briefly walk through installation on the three major operating-system families.
Windows
- Go to the official Git download page and download the installer that matches your system. In most cases, the x64 installer is recommended.
- Double-click the installer and follow the setup wizard:
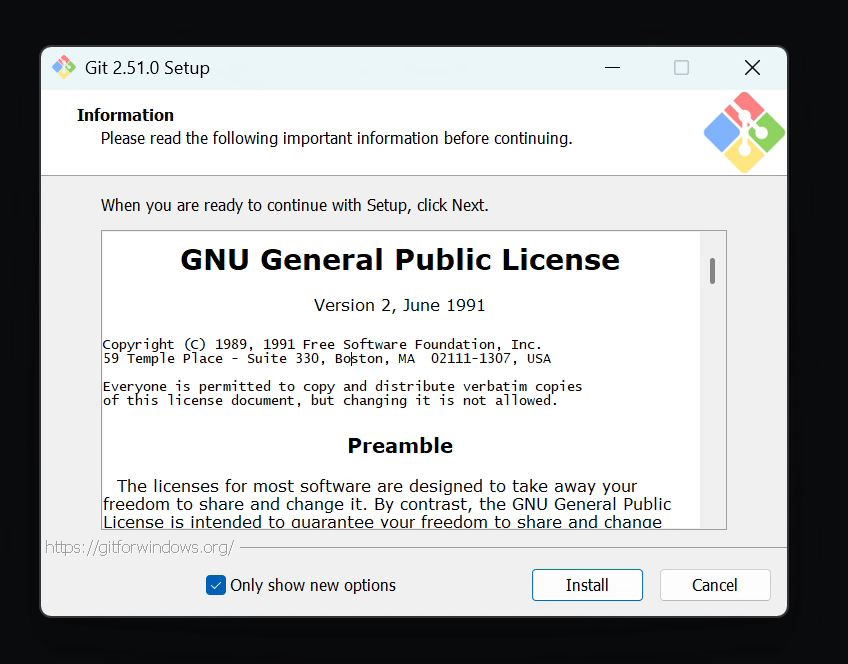
- In most cases, keeping the default settings is fine. If you customize them, pay attention to:
- Default editor: you can keep Vim, or choose Visual Studio Code if you already have it installed.
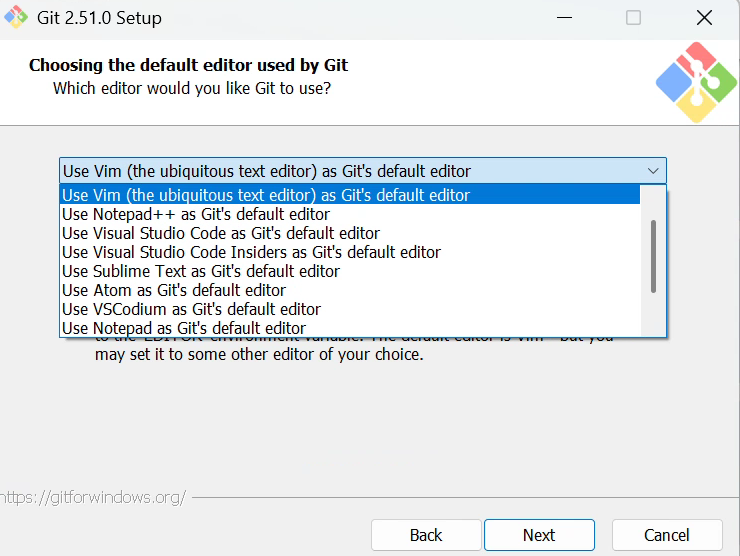
- How Git is used from the command line: a practical default is the option that adds Git to the command line and third-party software without overcomplicating the system setup.

- Default editor: you can keep Vim, or choose Visual Studio Code if you already have it installed.
- In most cases, keeping the default settings is fine. If you customize them, pay attention to:
- After installation, right-click on the desktop. If you see
Git Bash Here, the installation succeeded.

macOS
On macOS, you can first run git --version in Terminal to check whether Git is already installed. If it is not, macOS often prompts you to install the developer tools automatically.
- Method 1: install with Homebrew If you have Homebrew, open Terminal and run
brew install git - Method 2: install Xcode tools You can also install Xcode or the Xcode Command Line Tools from Apple. Git is included as part of that toolchain.
Linux
Most Linux distributions install Git through the system package manager:
- Ubuntu / Debian:
sudo apt update
sudo apt install git- CentOS / RHEL:
sudo yum install gitTo verify the installation, run git --version. If a version number appears, Git is ready.
Initialize Git identity
After installing Git, the first thing you should do is configure your user information. Run the following commands in the terminal and replace the values with your own:
# Set the global username shown in commit history
git config --global user.name "Your Name"

# Set the global email, ideally the same one you use on GitHub
git config --global user.email "your.email@example.com"
Git writes this information into every commit as the author identity. When you inspect the version history, you can clearly see who changed what and communicate more easily in collaborative projects.
You can confirm the configuration with:
git config --listWhat is GitHub?
GitHub is a code hosting platform built on top of Git. It provides remote storage for Git repositories and adds collaboration tools such as Issues, Pull Requests, and Projects. In simple terms, Git is the local version-control tool, while GitHub is the remote code warehouse and collaboration layer.
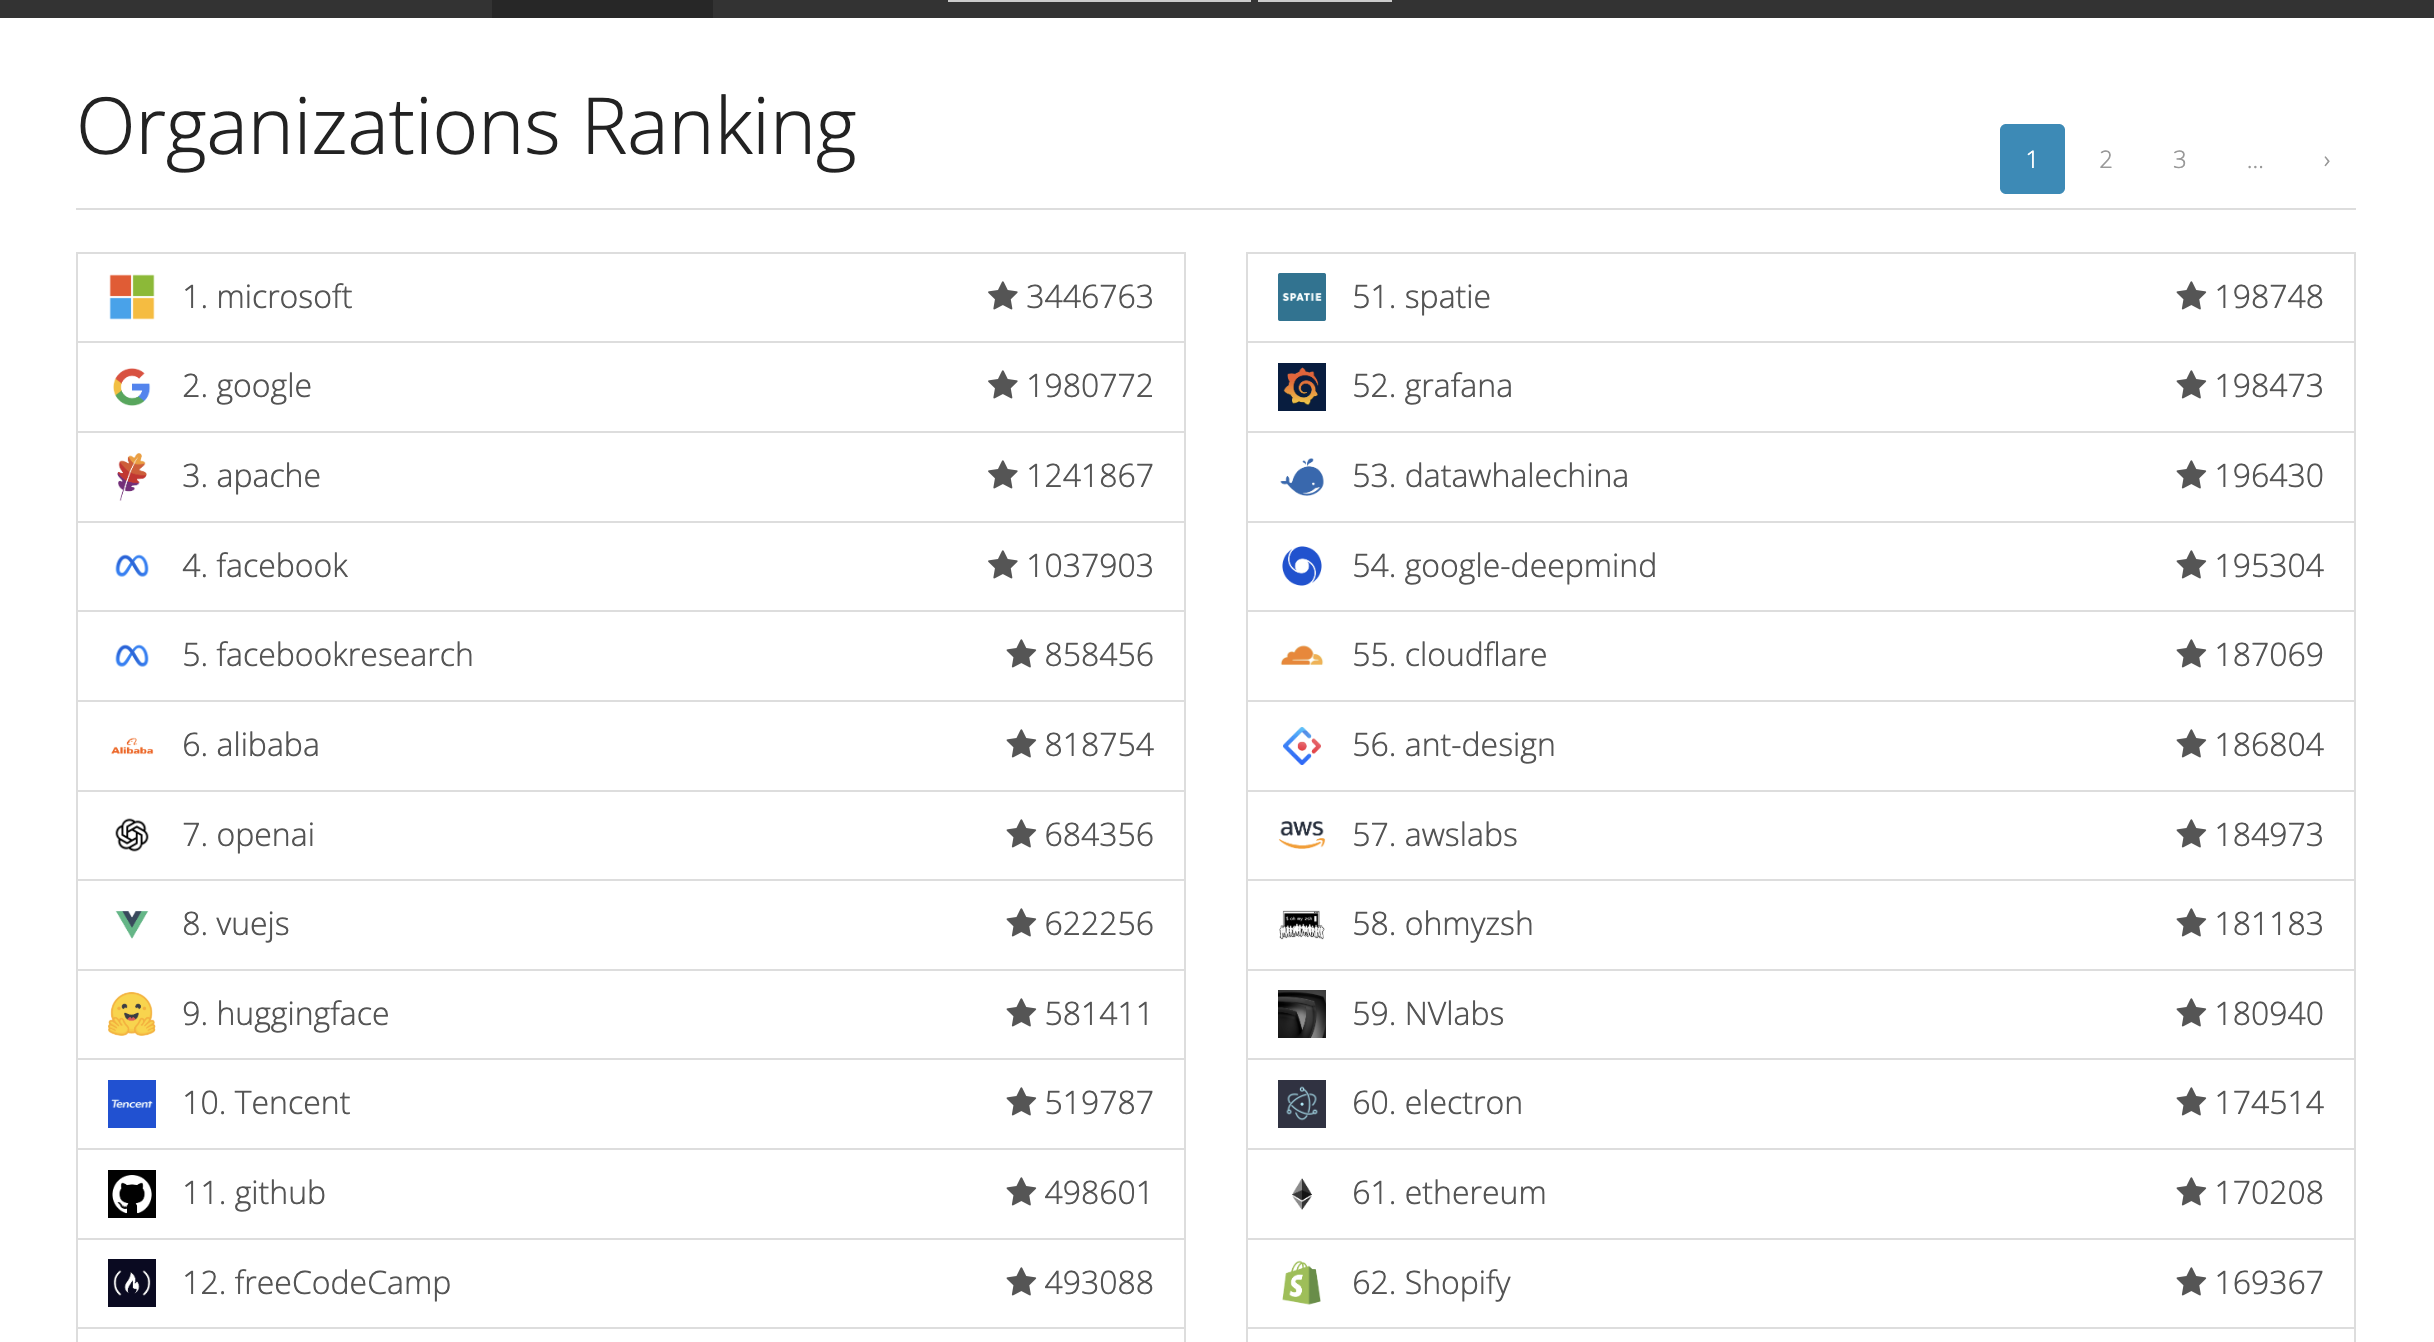
GitHub is also the world's largest and most influential open-source community. The idea of open source is that anyone can download and run the source code of a project. That allows people around the world to inspect each other's work, improve it, and build new things on top of it.

Large companies often open-source tools and tutorials on GitHub as part of their technical strategy. In the GitHub ecosystem, the number of stars a project receives is one of the most visible indicators of trust and influence.
In this course, many supporting resources and assignments are also published in GitHub repositories. By learning to upload your own work there, you gradually build the workflow you will use for real application development later.
Create a GitHub account
- Visit GitHub and click
Sign upin the top-right corner.
- Enter your email address, create a password, and complete the verification steps.
- Confirm your email, and your account is ready.
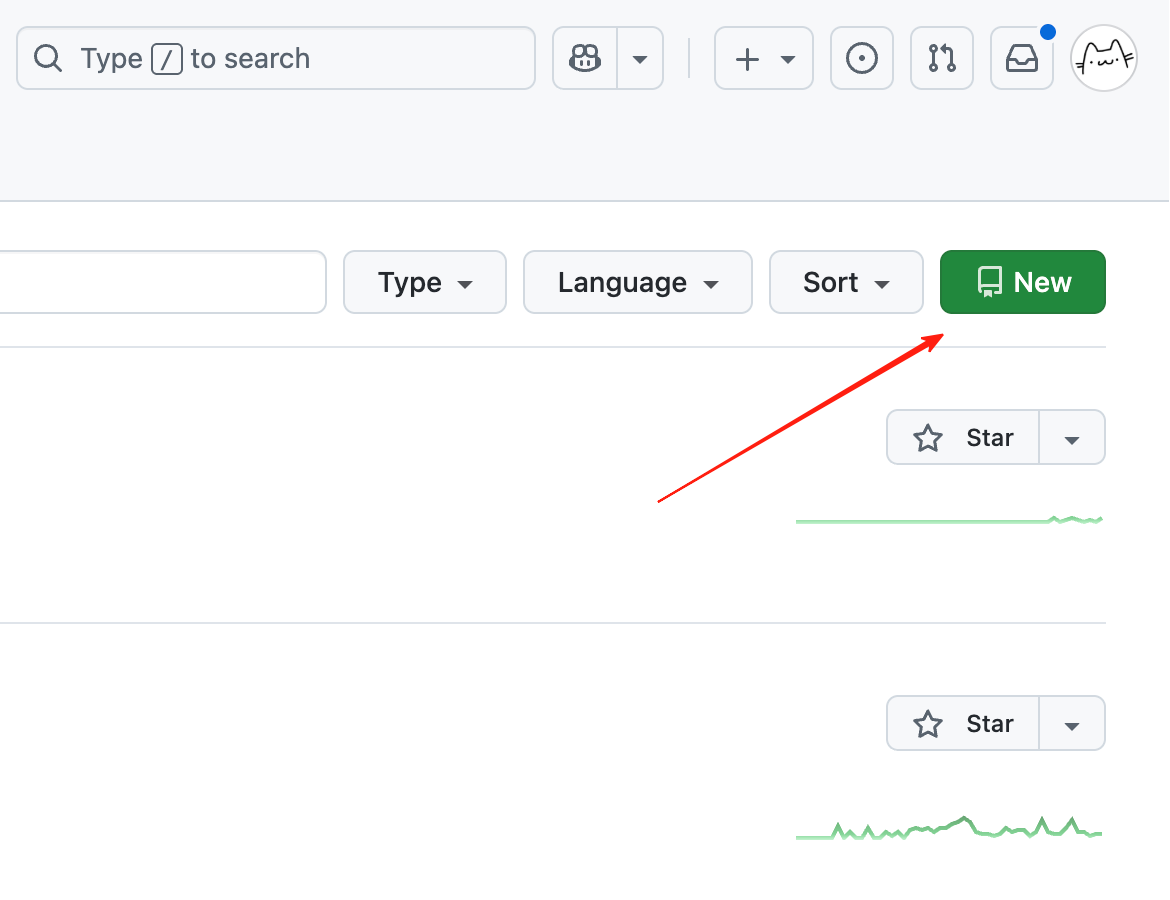
Create your first repository on GitHub
Next, let's create your first repository, often shortened to repo.
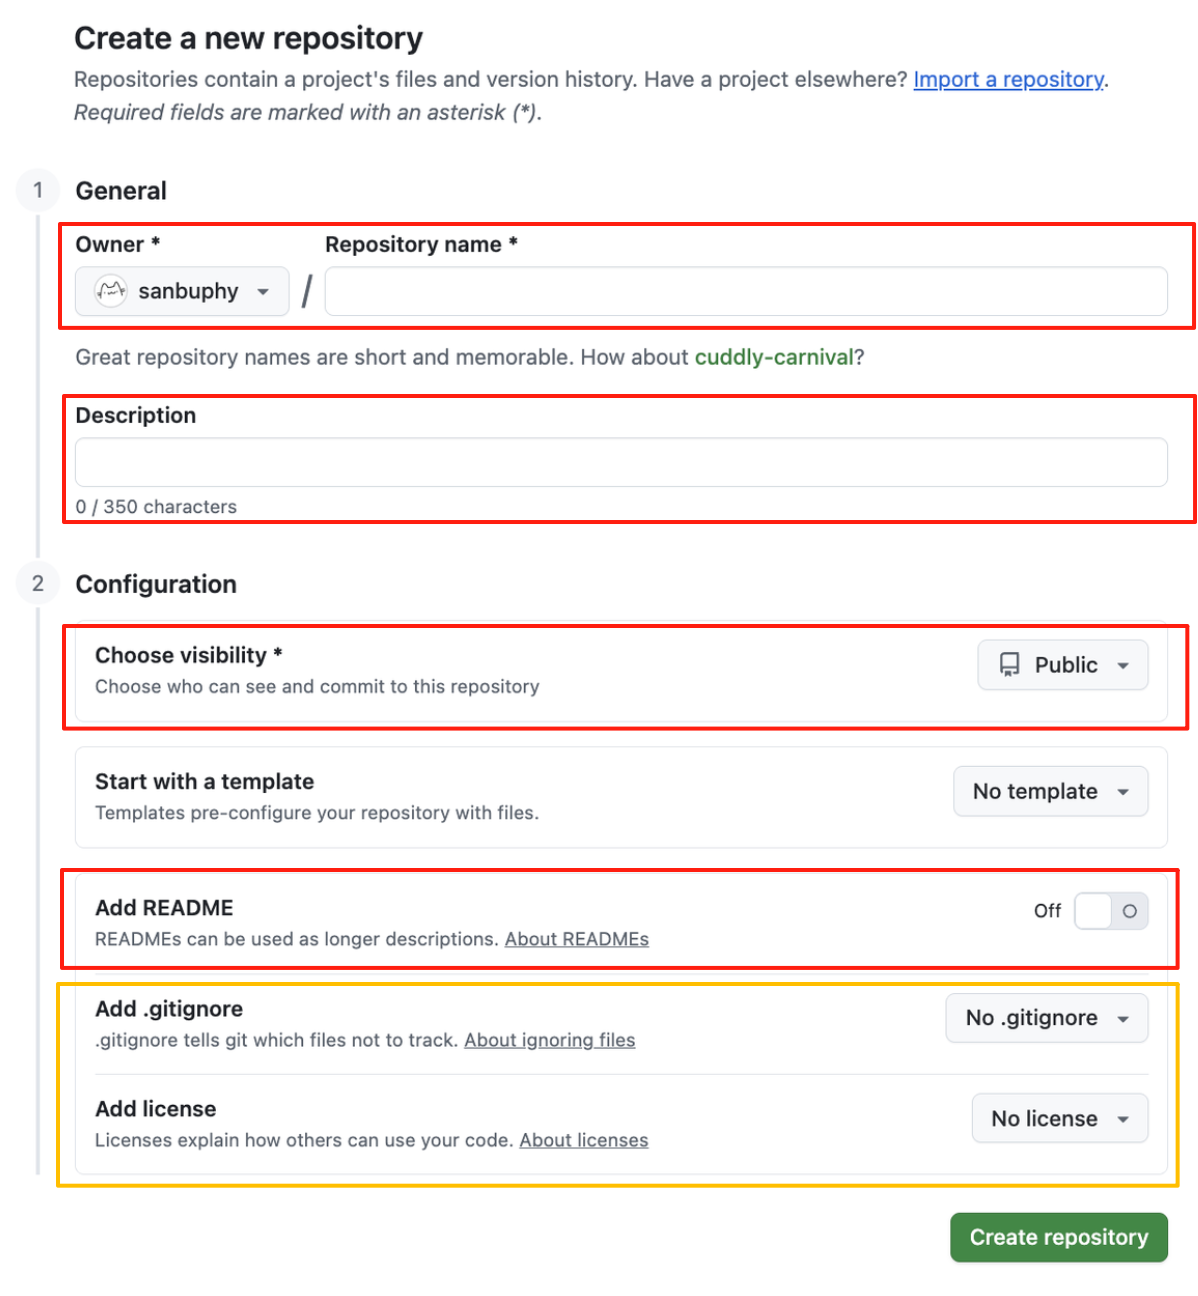
When creating a repository, the main fields mean:
- Repository name: the public-facing name of the repository
- Description: a short explanation of what the repository is for
- Visibility:
Private: only you and people you explicitly invite can see itPublic: anyone can see it
- README: it is good practice to add a README. Think of it as the repository's introduction and usage guide.
- .gitignore and license:
.gitignoretells Git which files or folders should not be tracked, such as temporary files, dependency folders, or local secrets.licensedetermines how others are allowed to use your open-source code.
For your first repository, it is reasonable to check Add README, set the visibility to Private, and fill in a name and description you like. Then click Create repository.
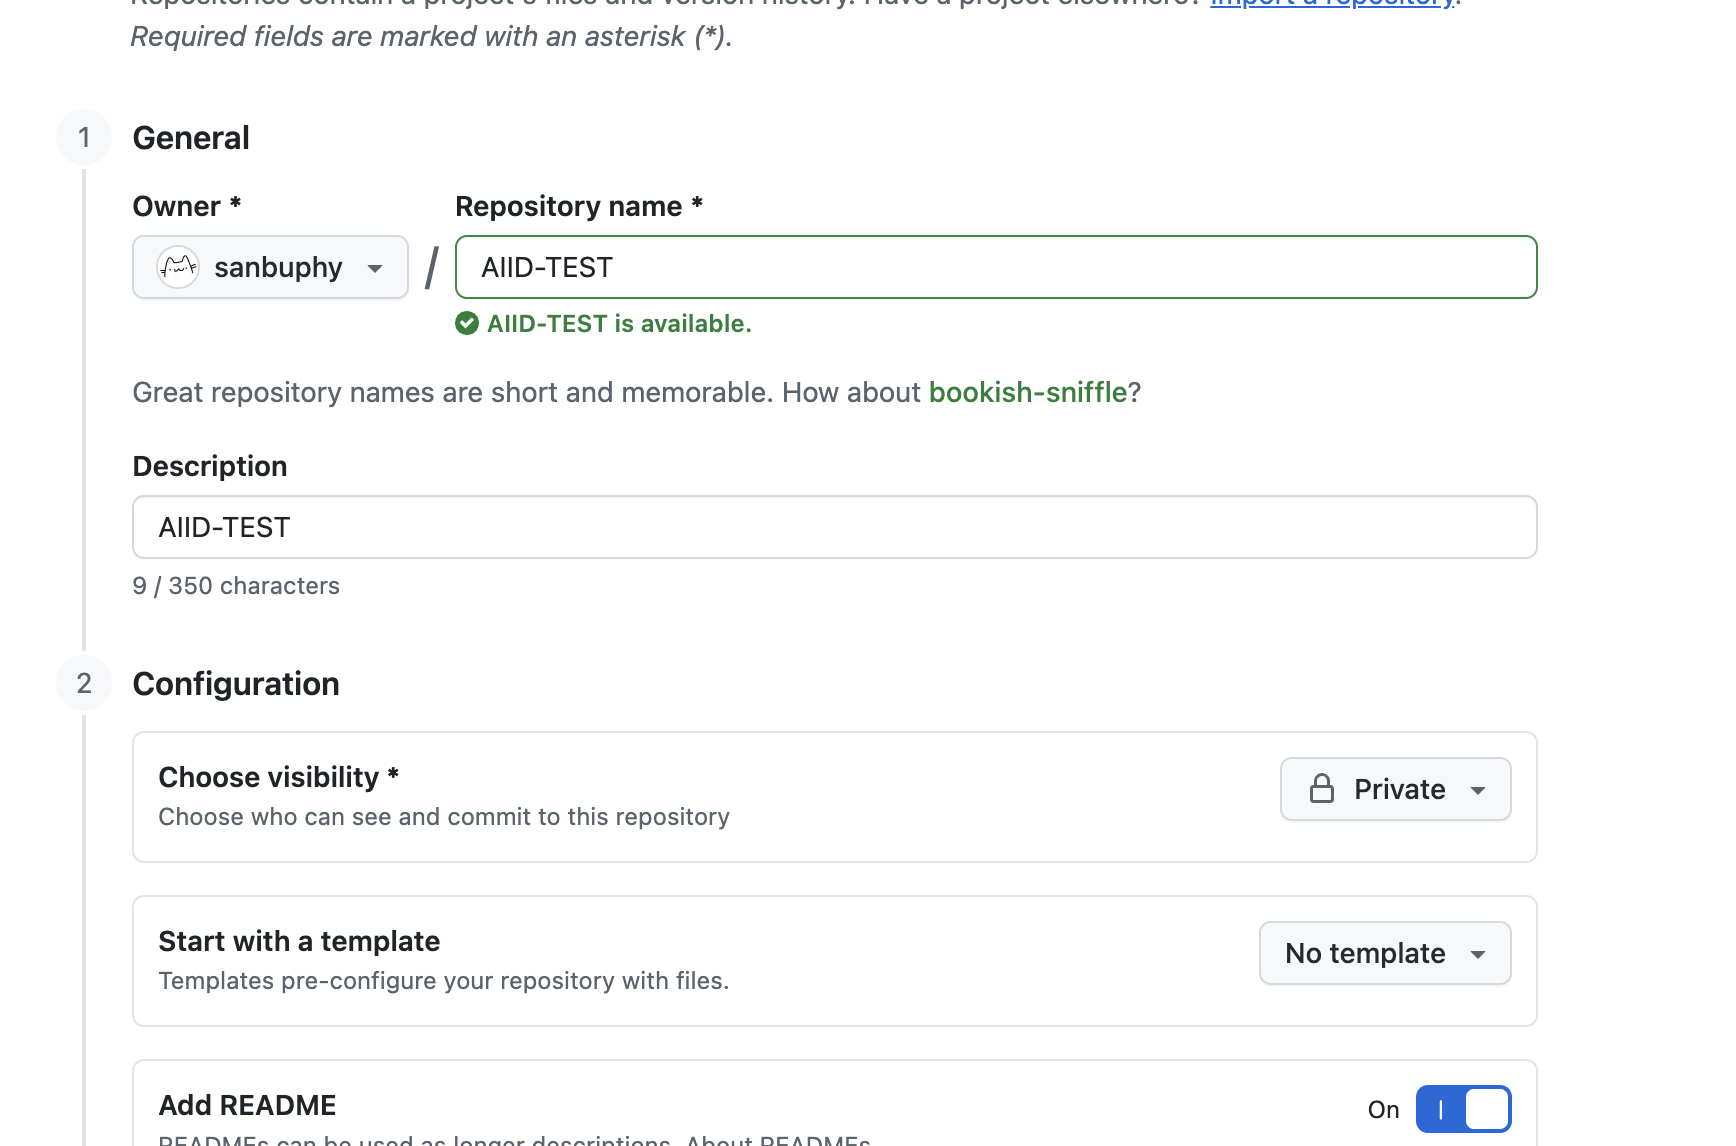
You will now have a clean repository, ready for your files.
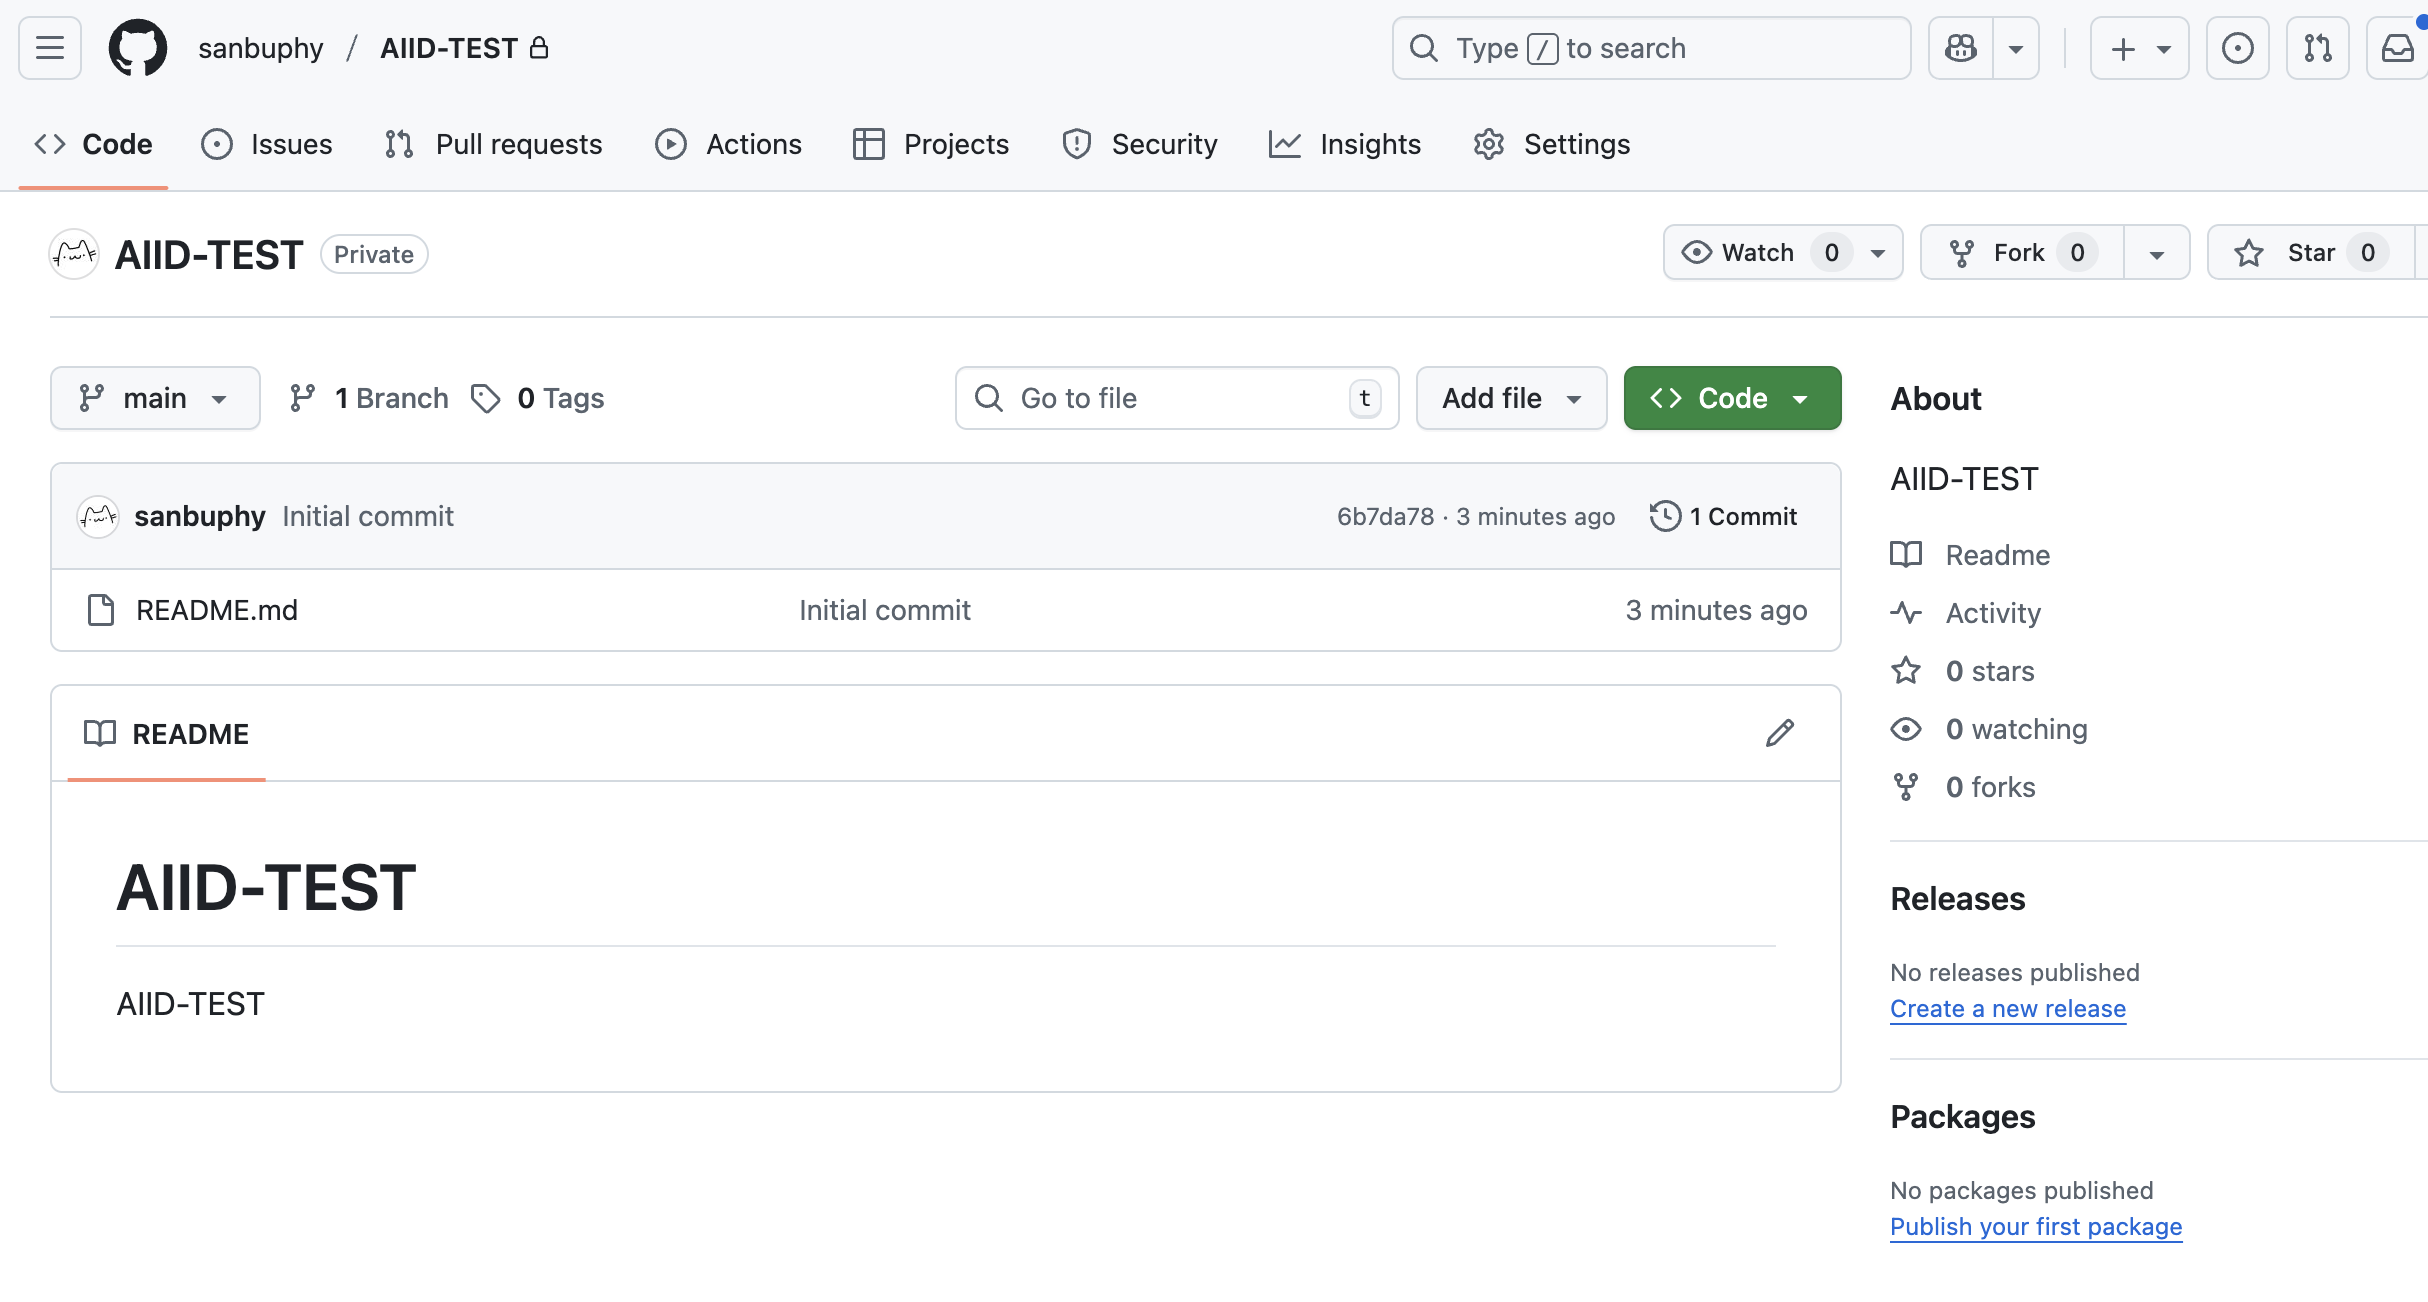
To download a repository, you use git clone, which requires the repository URL. You can find that by clicking the green Code button. GitHub usually shows both HTTPS and SSH options.
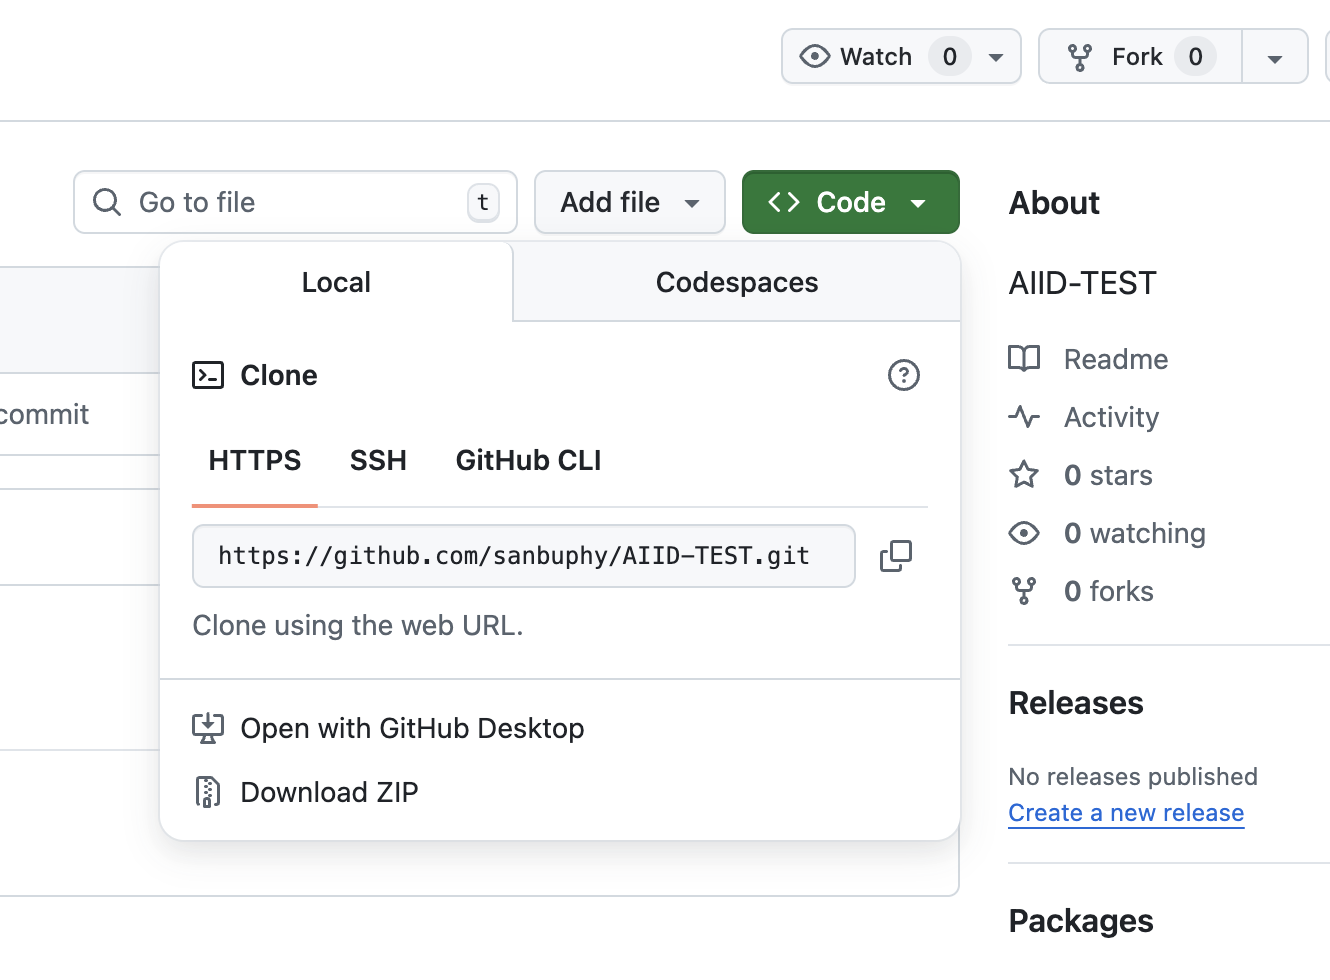
In general, HTTPS is fine for temporary downloads or quick testing, but for your own daily development workflow, SSH is usually the better experience.
Bind local SSH to GitHub
In GitHub, "binding SSH" means connecting your local machine's SSH public key to your GitHub account so GitHub can recognize your device through the SSH protocol. Once set up, you can clone, pull, and push securely without re-entering passwords every time.
In plain language: it is like giving your device a special access card for GitHub.
💡 What is SSH?
Why use SSH authentication?
GitHub supports two major protocols for repository operations:
- HTTPS: usually requires a password or Personal Access Token for pushes
- SSH: uses a key pair, so you do not need to repeat authentication constantly
SSH binding is the prerequisite for using GitHub with SSH. You must upload your local SSH public key to GitHub so GitHub can verify your machine.
The core logic: SSH key pairs
SSH authentication depends on a key pair:
- Private key: stored on your local machine, never shared
- Public key: uploaded to GitHub
When you perform a Git operation over SSH:
- Your machine signs the request with the private key
- GitHub checks it against the public key you uploaded
- If the match succeeds, the operation is allowed
The actual steps
The core workflow is simple: generate a key pair → upload the public key to GitHub.
Generate an SSH key pair locally
- Use Trae to help generate it Prompt:
Help me create the SSH key needed for GitHub login. My email is your_email@gmail.com. Please return the public key for me to copy.
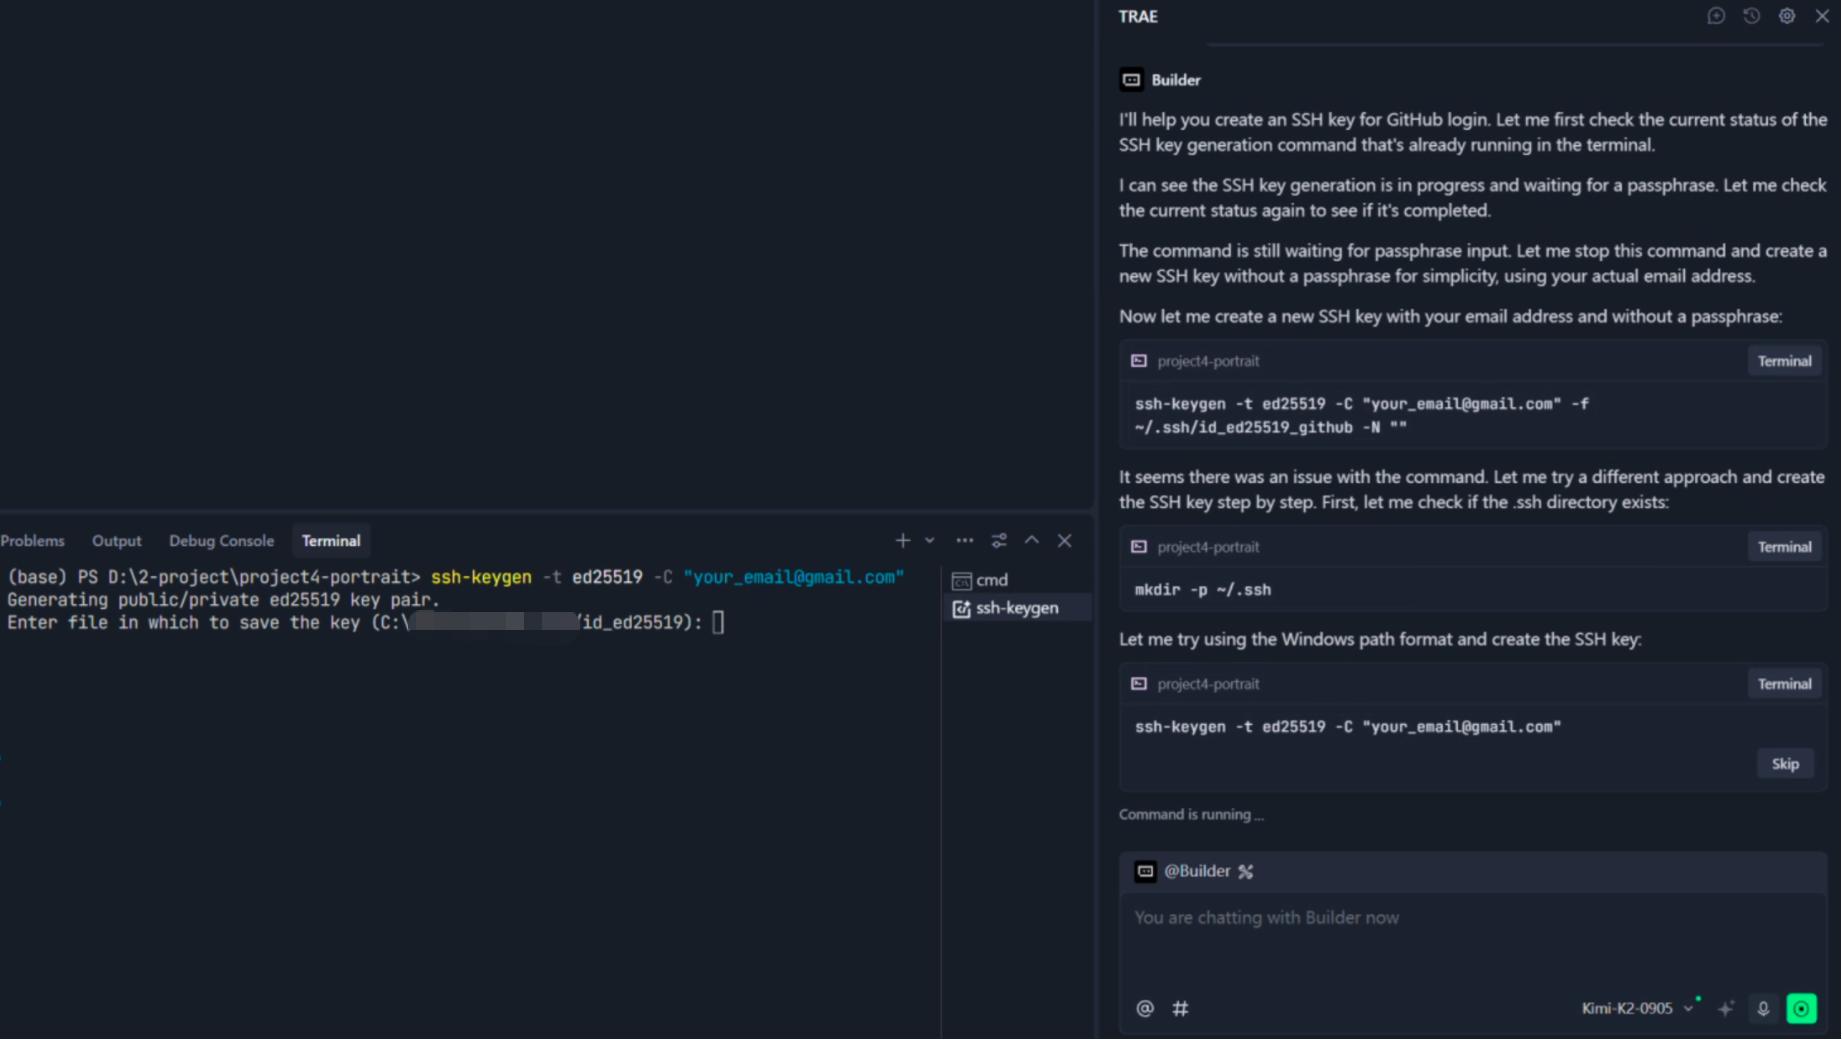
After entering the prompt, you may still need to press
Enterin the terminal pane so the command can continue. Once Trae finishes, it will show you the public key to copy.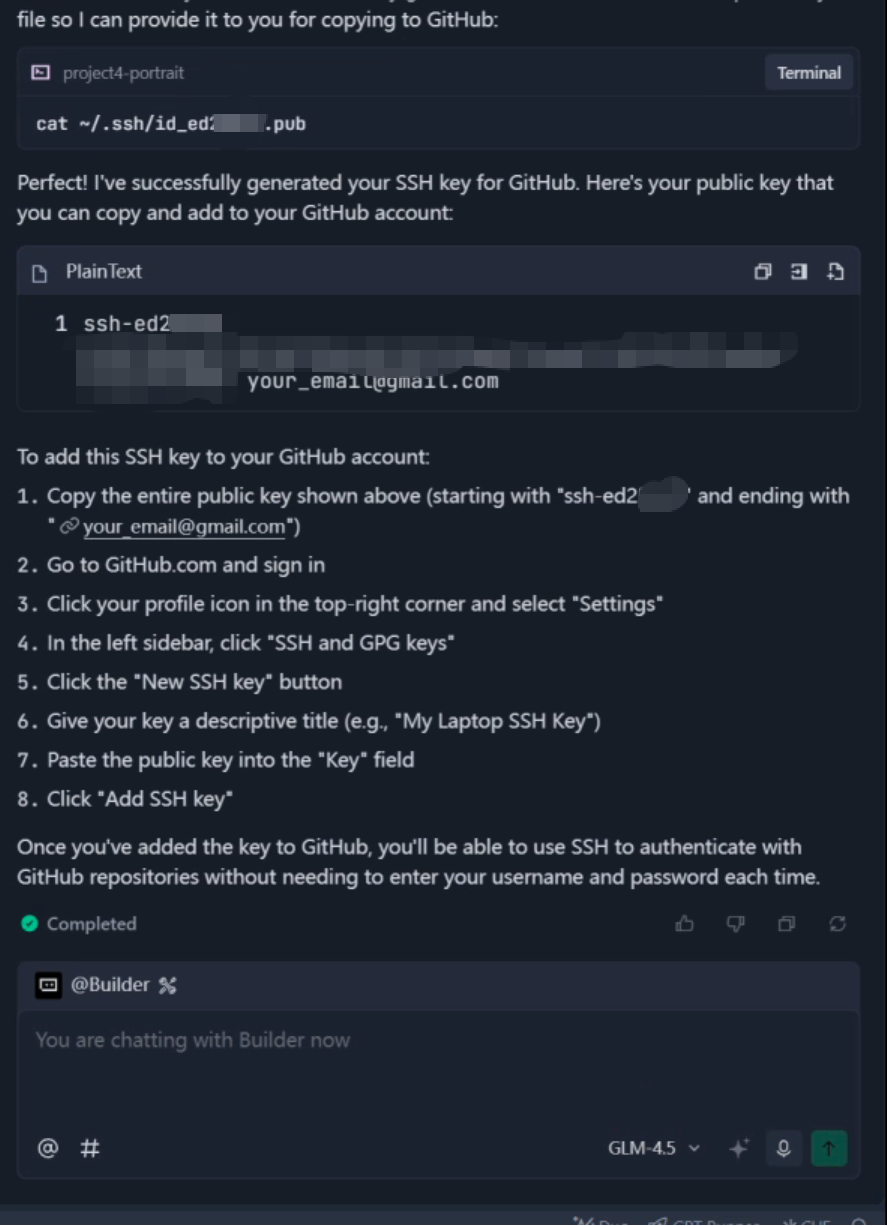
Generate it manually Open your terminal and run
ssh-keygen -t ed25519 -C "your_email@example.com"PressEnterto accept the defaults unless you want a custom path or passphrase. This creates:id_ed25519: your private key, which must stay localid_ed25519.pub: your public key, which you will upload to GitHub
- Use Trae to help generate it Prompt:
Upload the public key to GitHub
This is the binding step itself.
- Copy the public key:
- On Windows, open
C:\Users\<your>\.ssh\id_ed25519.pub - On macOS/Linux, run
cat ~/.ssh/id_ed25519.pub
- On Windows, open
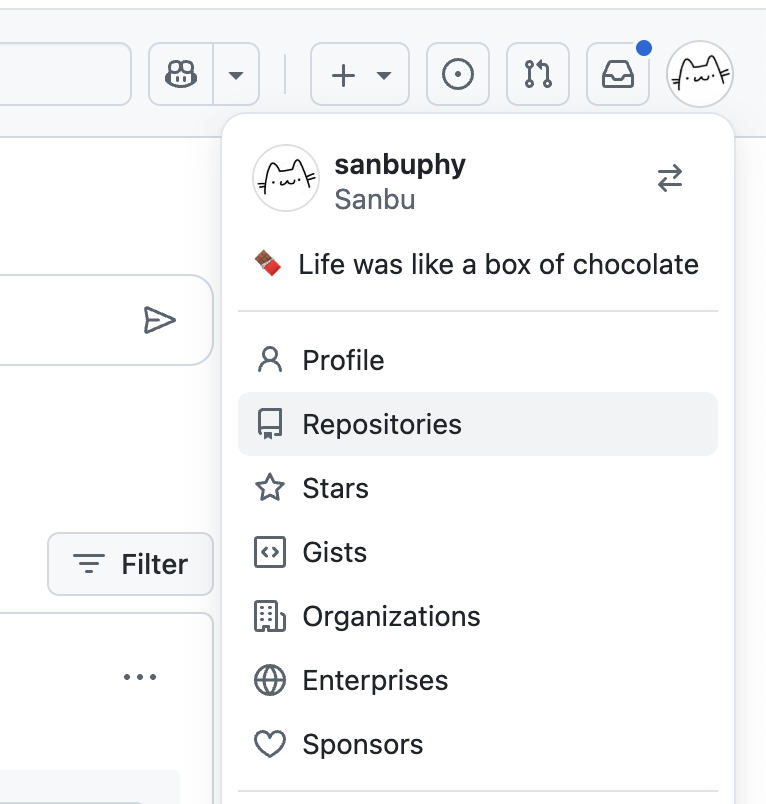
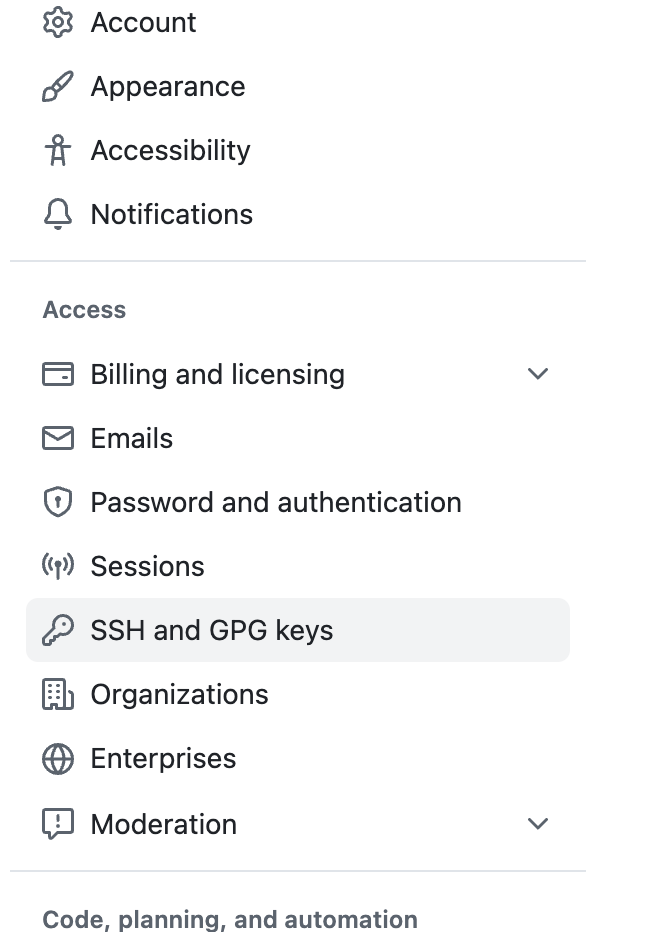
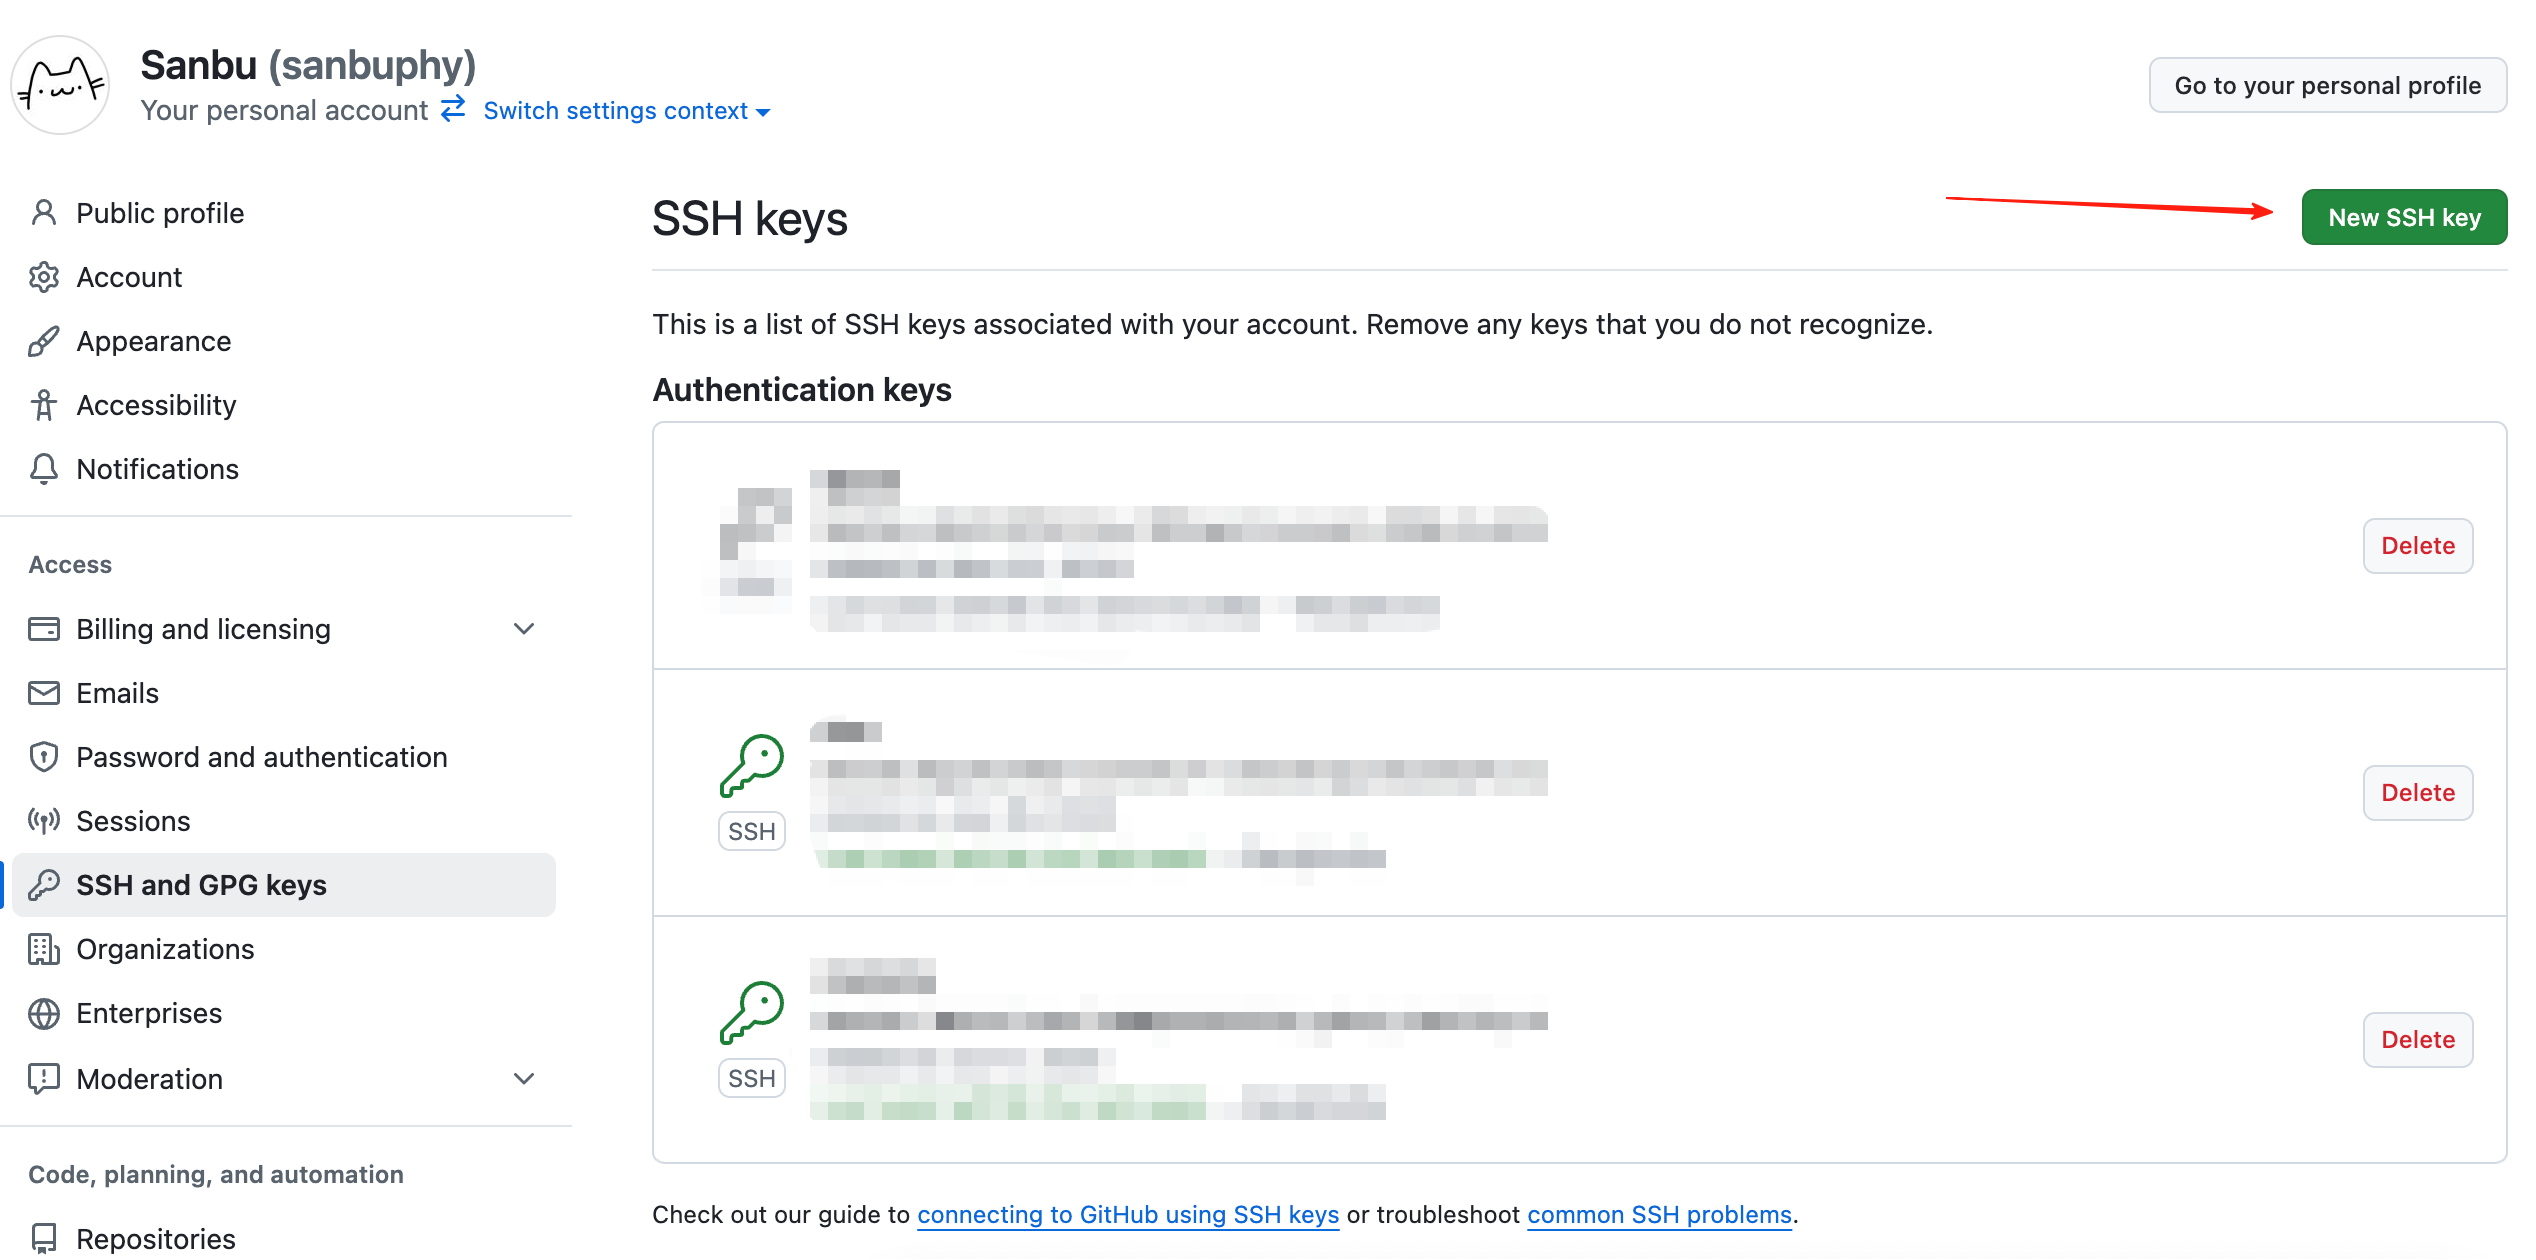
- In GitHub, go to your avatar →
Settings→SSH and GPG keys→New SSH key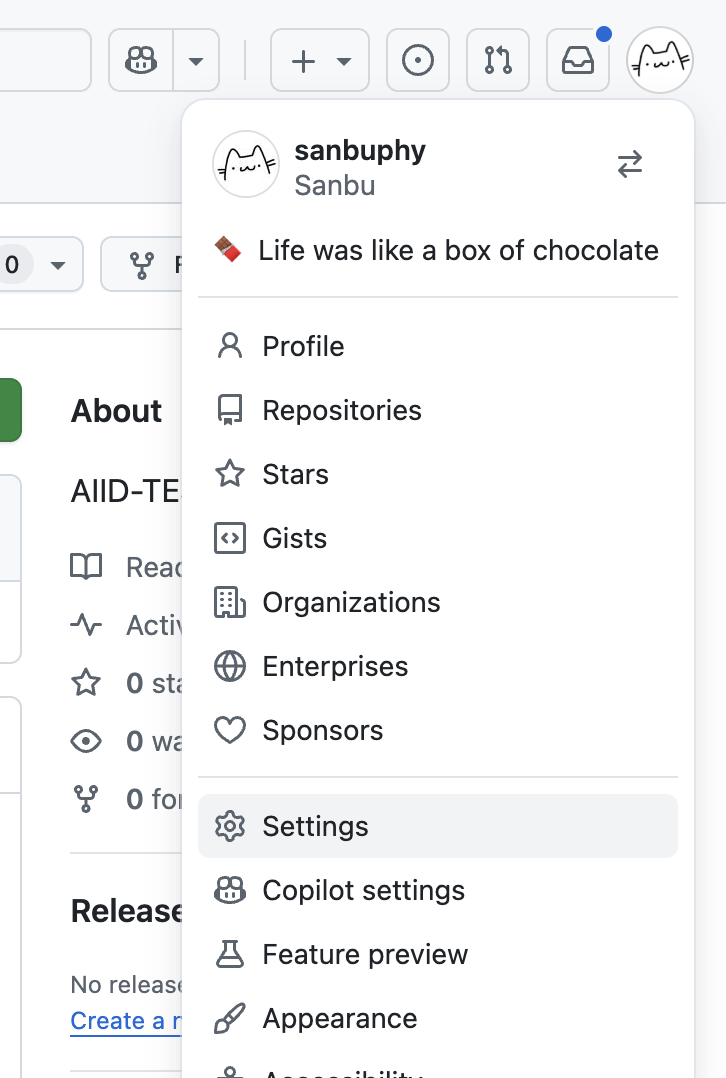
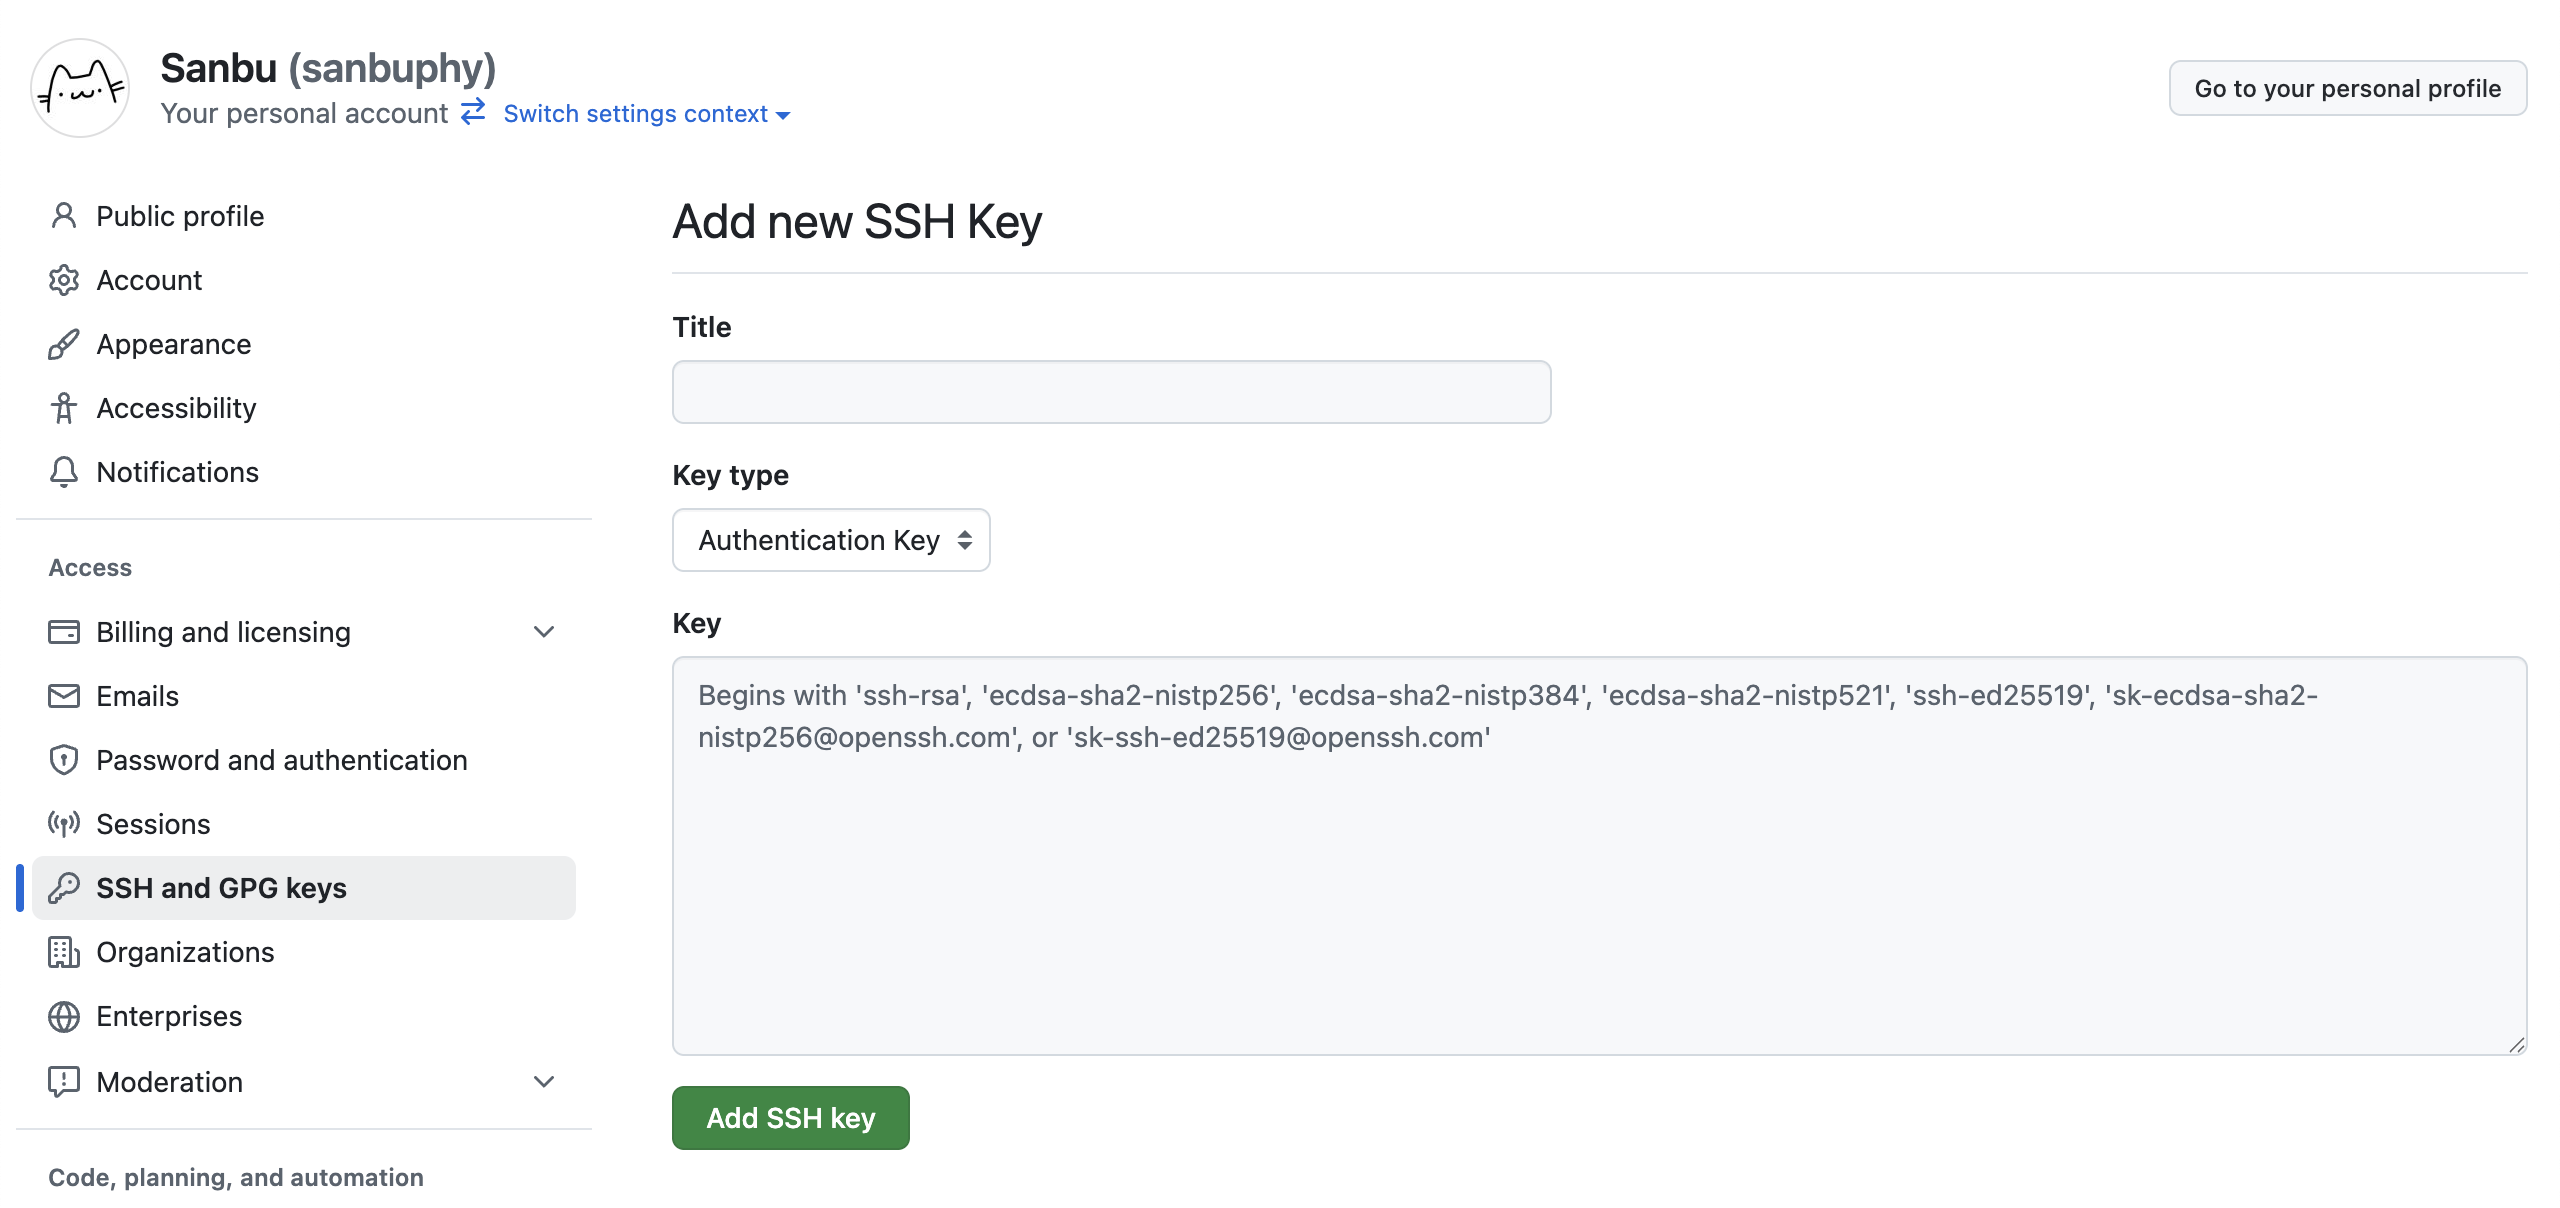
- Enter a title and paste the public key.
- Copy the public key:
- Verify the binding
Run ssh -T git@github.com
If you see a message similar to Hi [your GitHub username]! You've successfully authenticated..., the setup worked.
Important notes
- If you use multiple devices, create a separate SSH key pair for each one and upload each public key to the same GitHub account.
- Never share your private key.
- After setting up SSH, use SSH repository URLs such as
git@github.com:username/repository.git, not HTTPS URLs. - If you cloned a repository over HTTPS earlier, you can switch it with
git remote set-url origin <new-ssh-url>
Use Trae for GitHub operations
Now that we have covered Git, GitHub, SSH, and the setup process, you can start asking Trae to help with Git operations.
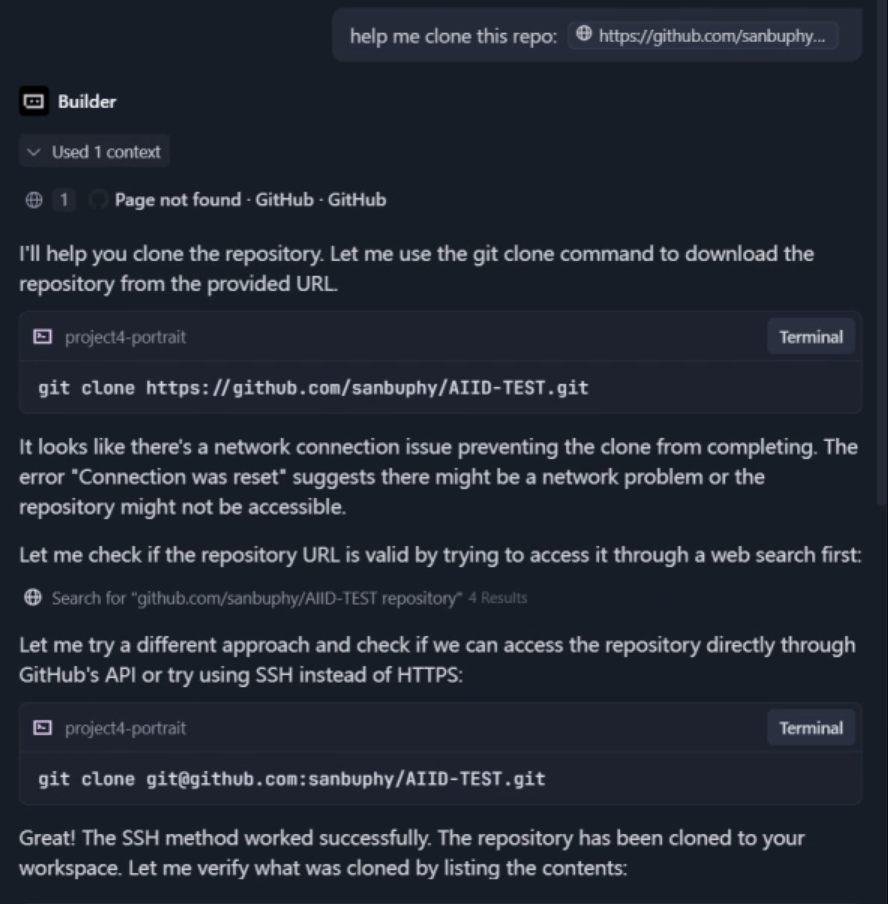
git clone: download an existing repository
You can directly tell Trae which repository URL you want to clone.
git pull: fetch the latest remote updates
Before editing, especially in a shared repository, you should pull the latest changes first.
Always include the folder name and its relative or absolute path so you do not pull in the wrong repository by mistake.
Prompt: Help me pull this repository AIID-TEST in ./AIID-TEST.
git commit and git push: stage, save, and upload your updates
After you modify files locally, you can ask Trae to detect the changes and help you push them to GitHub.
Prompt: I finished. Commit and push to the repository AIID-TEST in ./AIID-TEST.
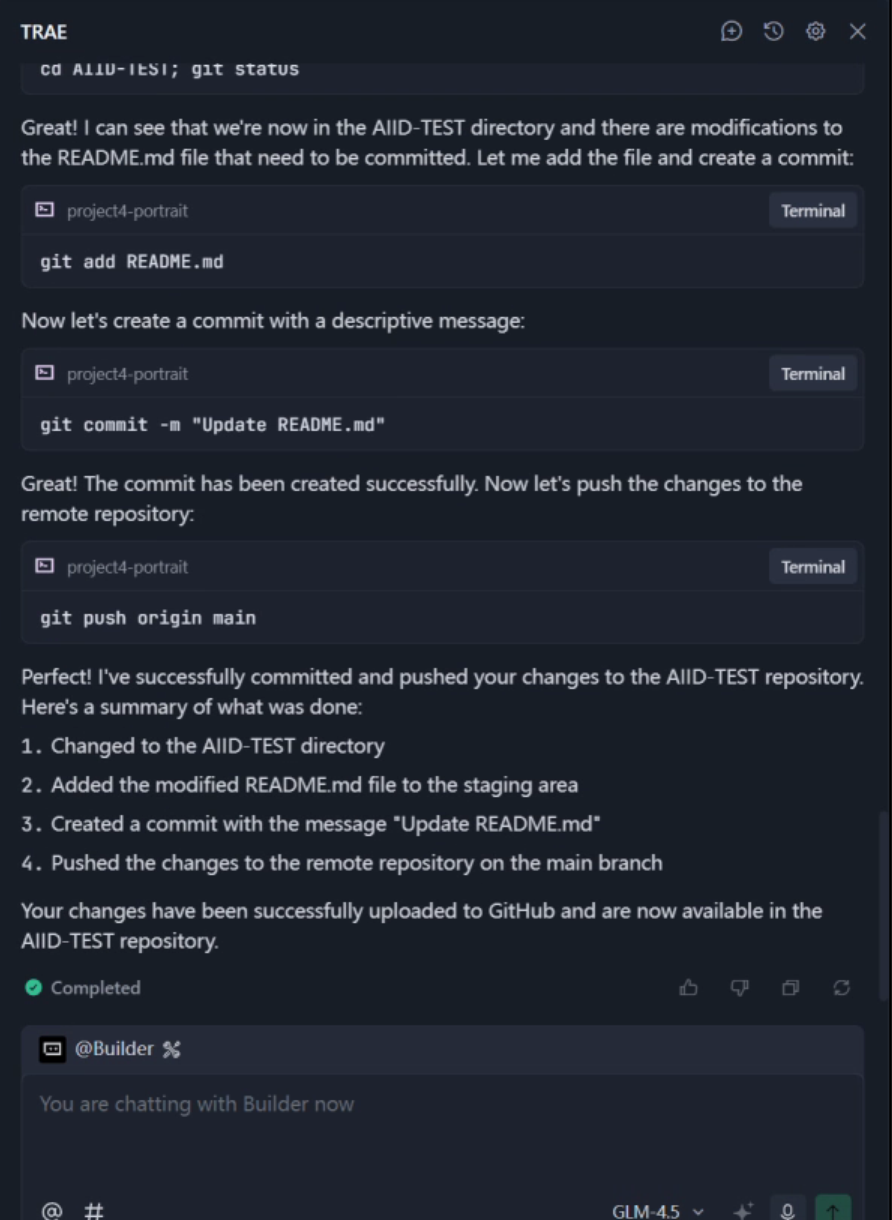
If the push succeeds, you will be able to see the updated content on GitHub immediately.
References
- Pro Git book: https://git-scm.com/book/en/v2
- GitHub Docs: https://docs.github.com/en