From Design Prototype to Project Code
Core Question
How can you turn a prototype from a design tool into frontend code that actually runs in the browser?
1. Three main paths from prototype to code
After finishing a UI design in tools like Figma or MasterGo, a practical question naturally appears: how do you turn that structured design into real frontend code?
In practice, there are three common paths:
| Path | Method | Characteristics | Best for |
|---|---|---|---|
| Path 1 | Use multimodal models to recreate code directly from screenshots | Flexible, no specific platform required | Fast prototype validation, simple pages |
| Path 2 | Export usable code through the platform itself or plugins | High fidelity, strong editability | Existing Figma or MasterGo workflows |
| Path 3 | Combine the design platform with MCP-based export | Highly automated, customizable | Deeply integrated design-to-dev workflows |
This chapter walks through all three so you can choose the one that fits your project.
Prerequisite
Before starting this chapter, it is helpful to first read Figma and MasterGo Basics.
2. Path 1: use multimodal AI to recreate code directly
Models with vision capabilities are naturally suited to turning images into code. All you need to do is upload screenshots of the design and ask the model to generate the implementation.
2.1 Workflow
Capture the design
- Export the designed page from Figma or MasterGo as PNG or JPG
- Make sure the screenshot contains the complete layout
Choose a multimodal AI model
- You can use Gemini, Qwen, Claude, or any model that accepts image input
- The example below uses Gemini
Write a prompt
Generate the corresponding HTML/CSS code from this design image.
Requirements:
- Use modern CSS layout techniques such as Flexbox or Grid
- Make it responsive for different screen sizes
- Include all visible UI elements
- Match colors and font sizes as closely as possible
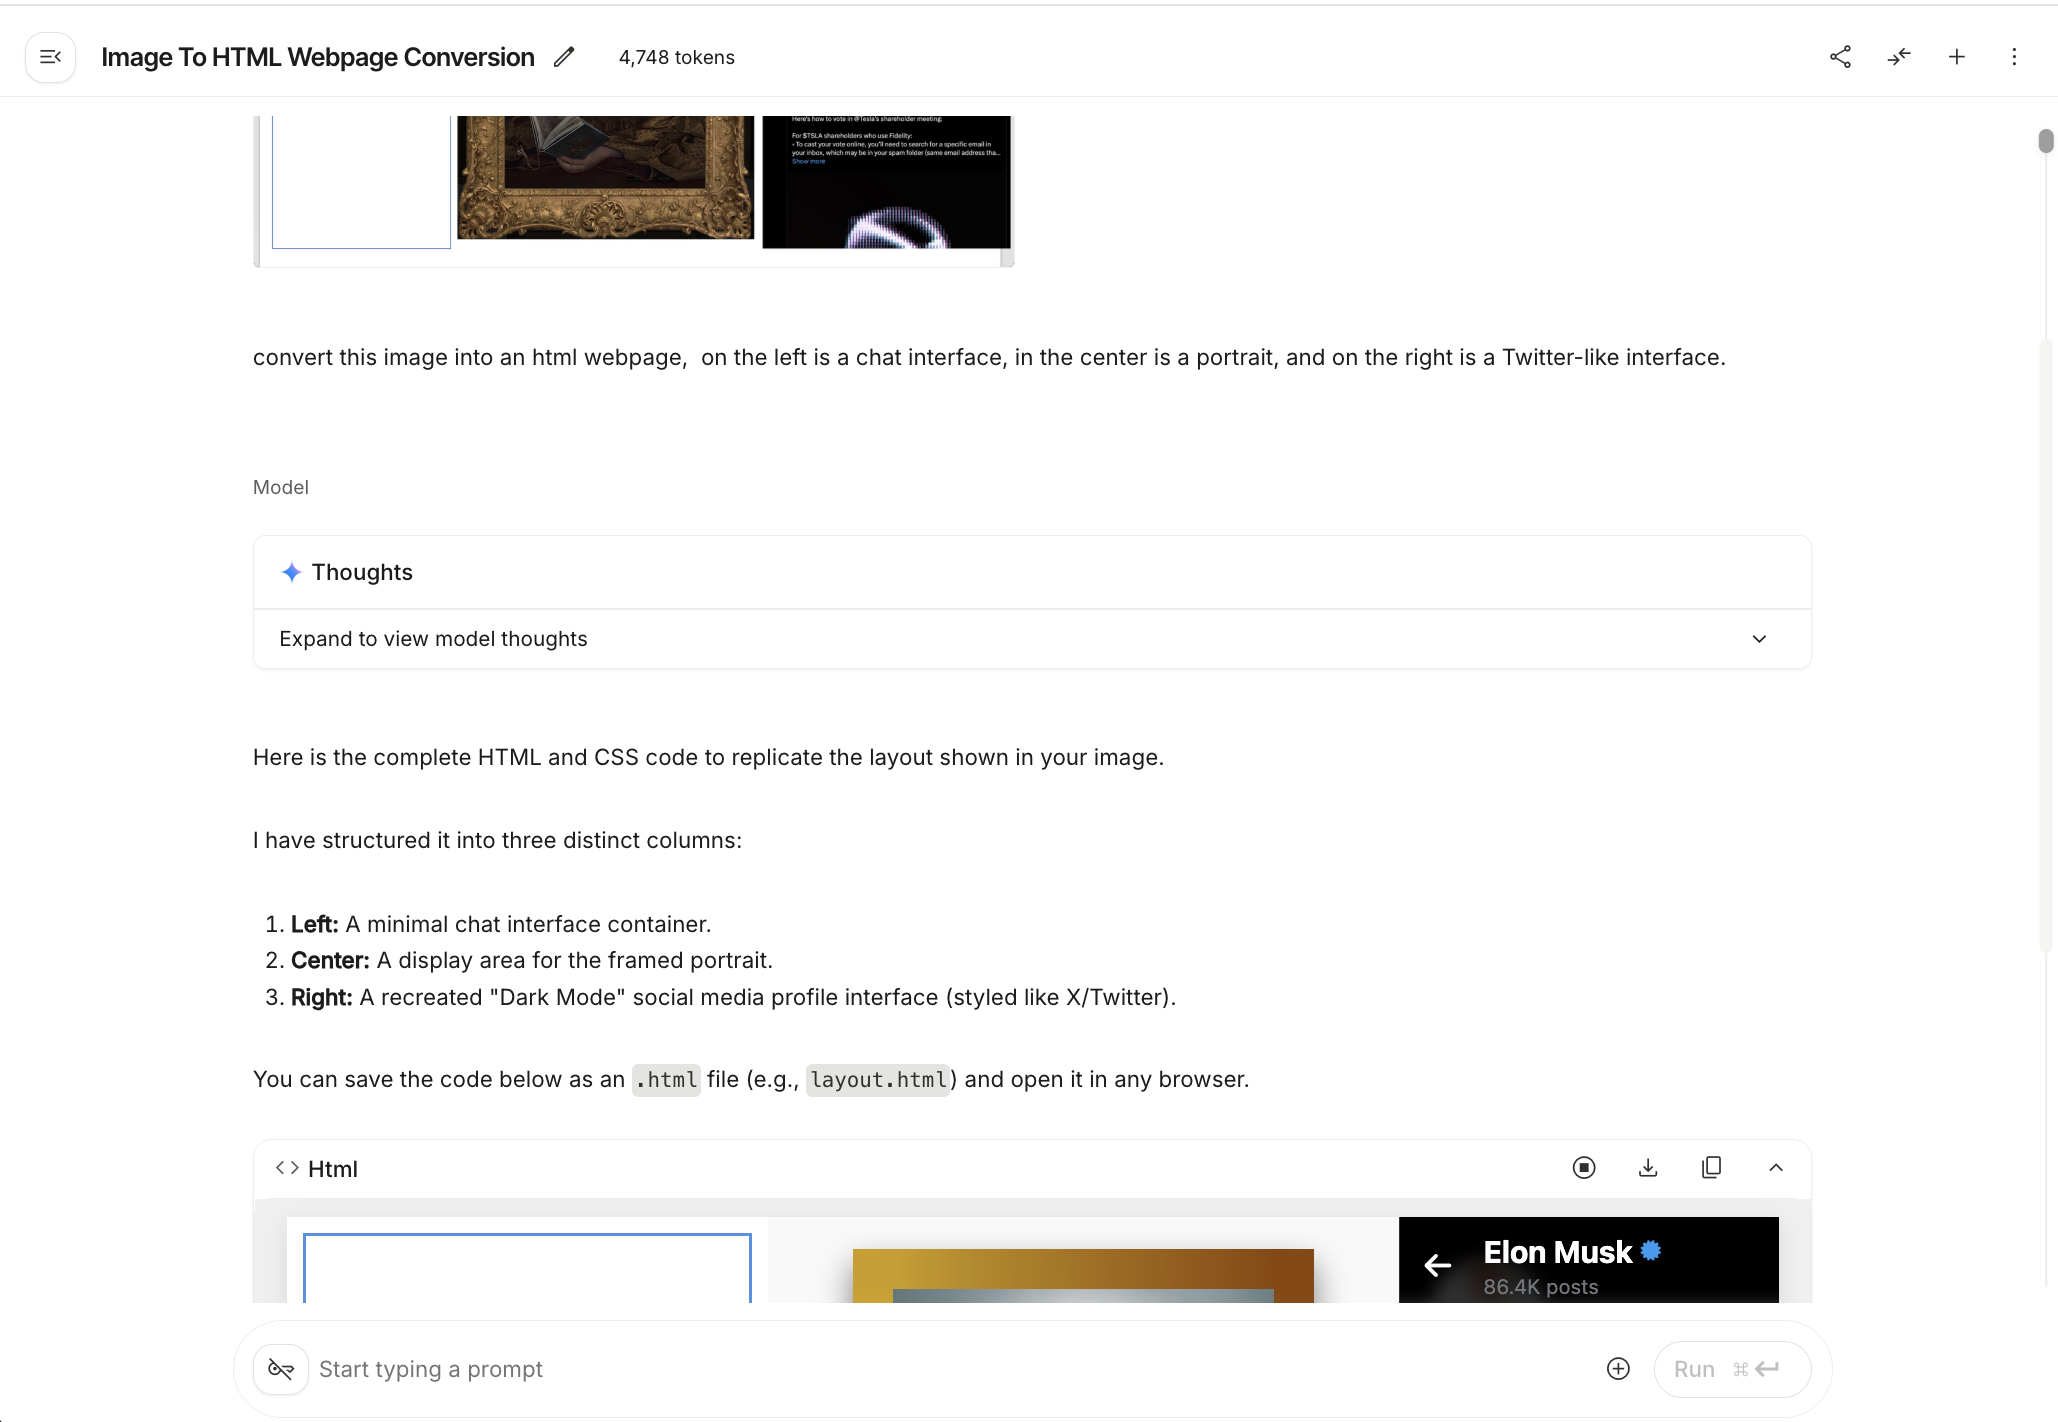
- Save the generated code
- Ask the model to return complete HTML
- Save it as a single
.htmlfile for easy local testing - Later, you can convert it into a React or Vue structure inside your local IDE
2.2 Common issues and solutions
Design-to-code is never fully automatic. Here are a few issues you may run into:
| Problem | Solution |
|---|---|
| Uneven layout | Describe the layout problem clearly and ask the model to adjust CSS margin and padding |
| The page is cut off | Check whether the viewport is set correctly and ask for responsive breakpoints |
| Colors are inaccurate | Use a color picker on the design and provide the exact values |
| Fonts do not match | Specify a font family or ask for a Google Fonts replacement |
Tip
It is often easier to generate plain HTML first, then import that result into your local IDE and convert it into a React or Vue project afterward.
2.3 Generate pages with MasterGo AI
MasterGo also provides strong AI page generation features and can generate usable webpage code from a reference image.
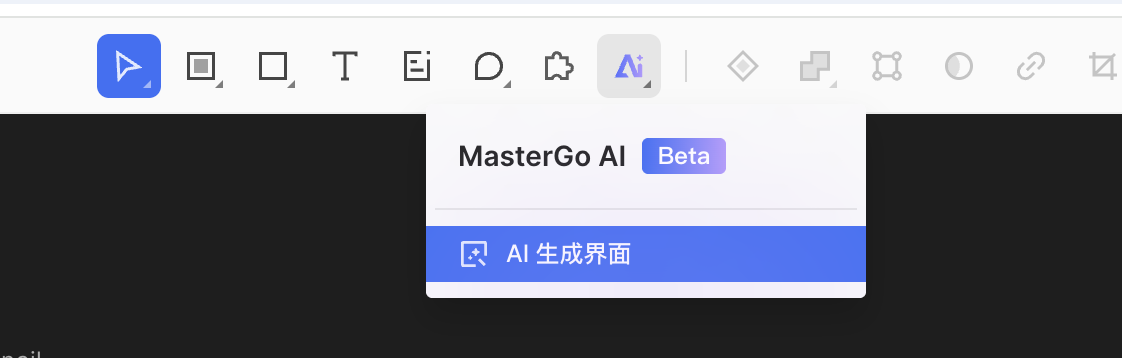
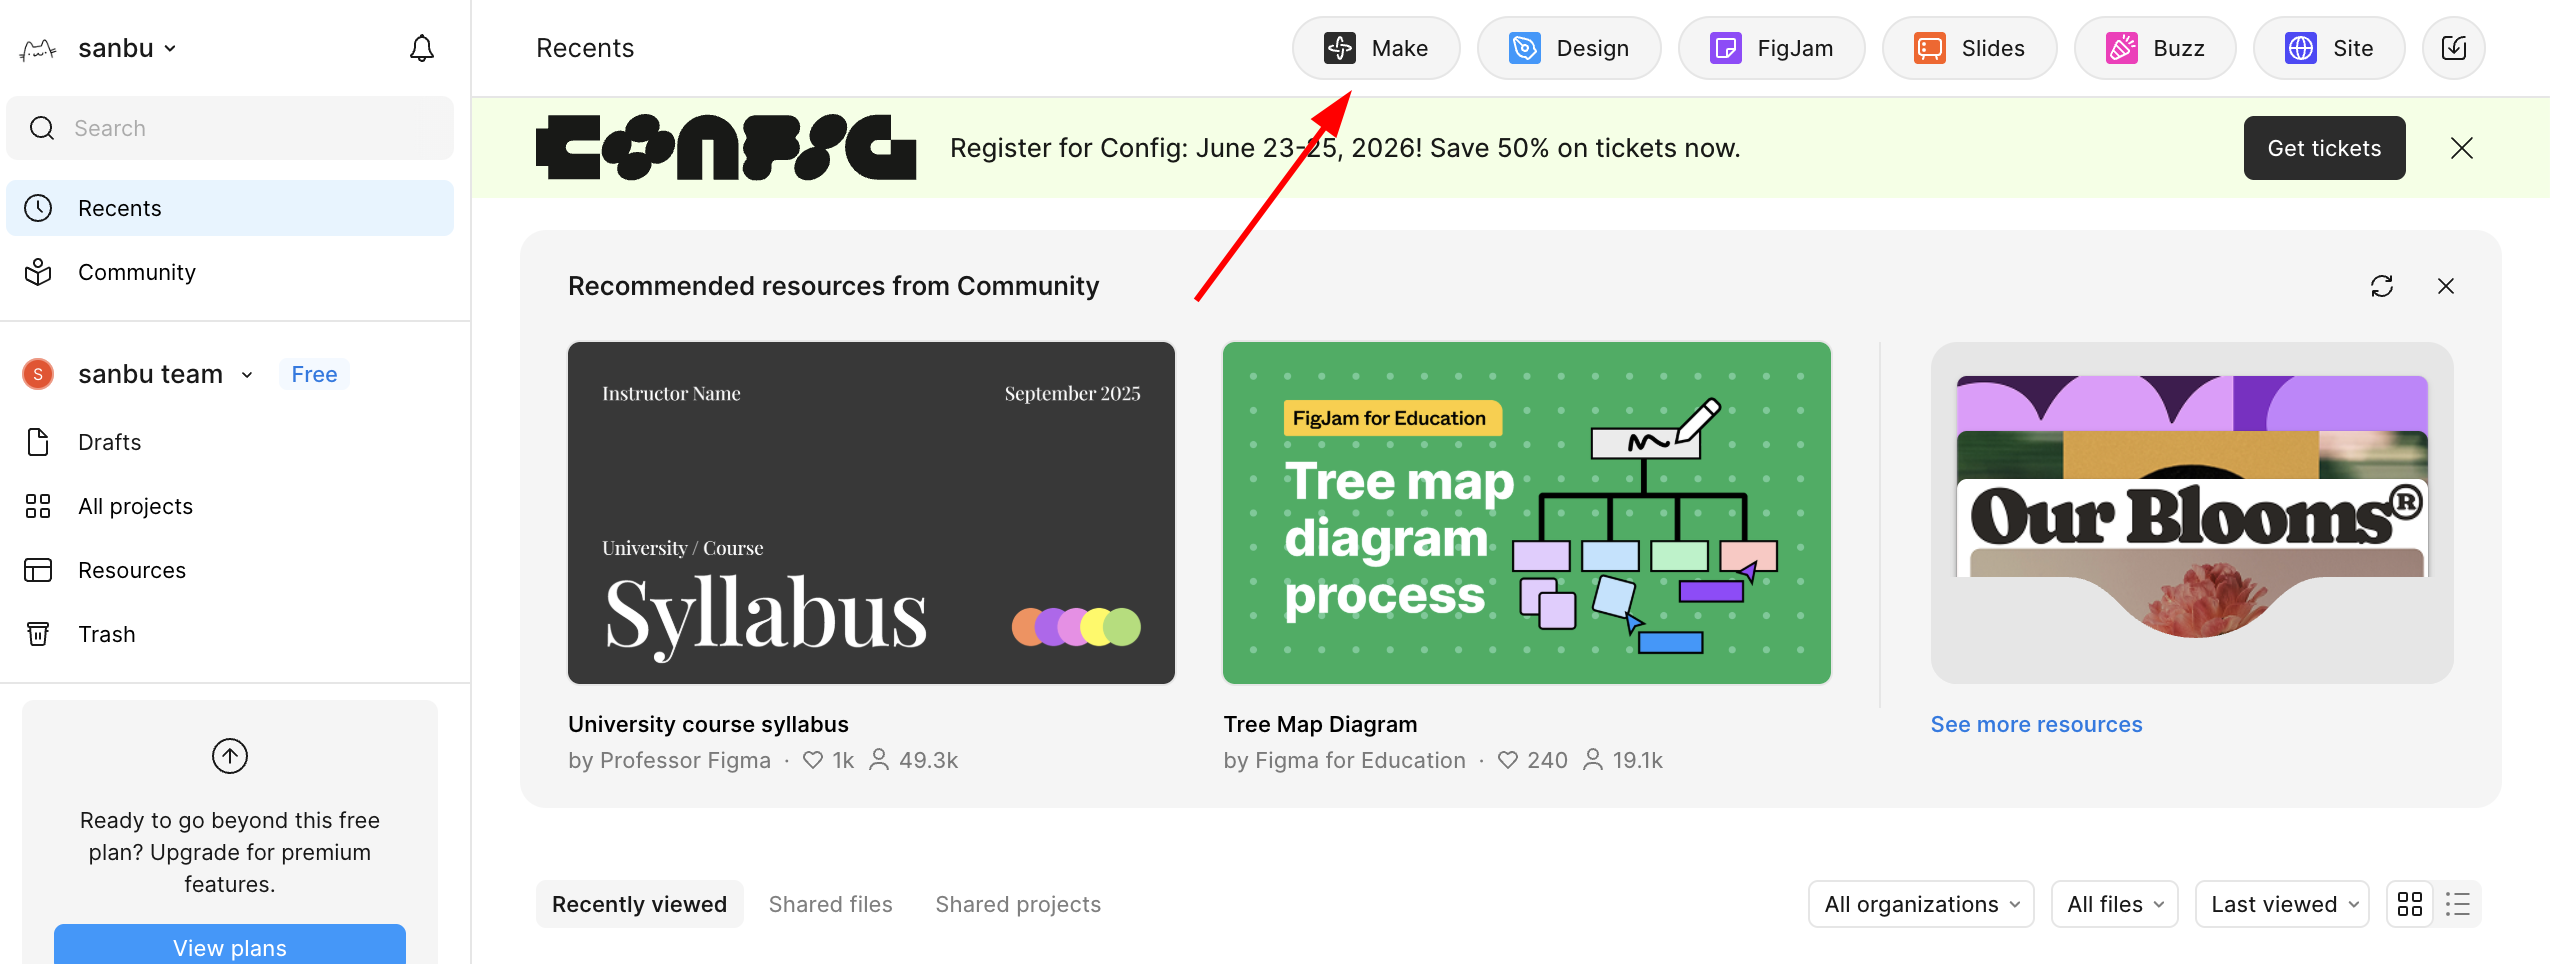
Find the AI entry
In the top toolbar of the MasterGo editor, you can find the AI tool entry:
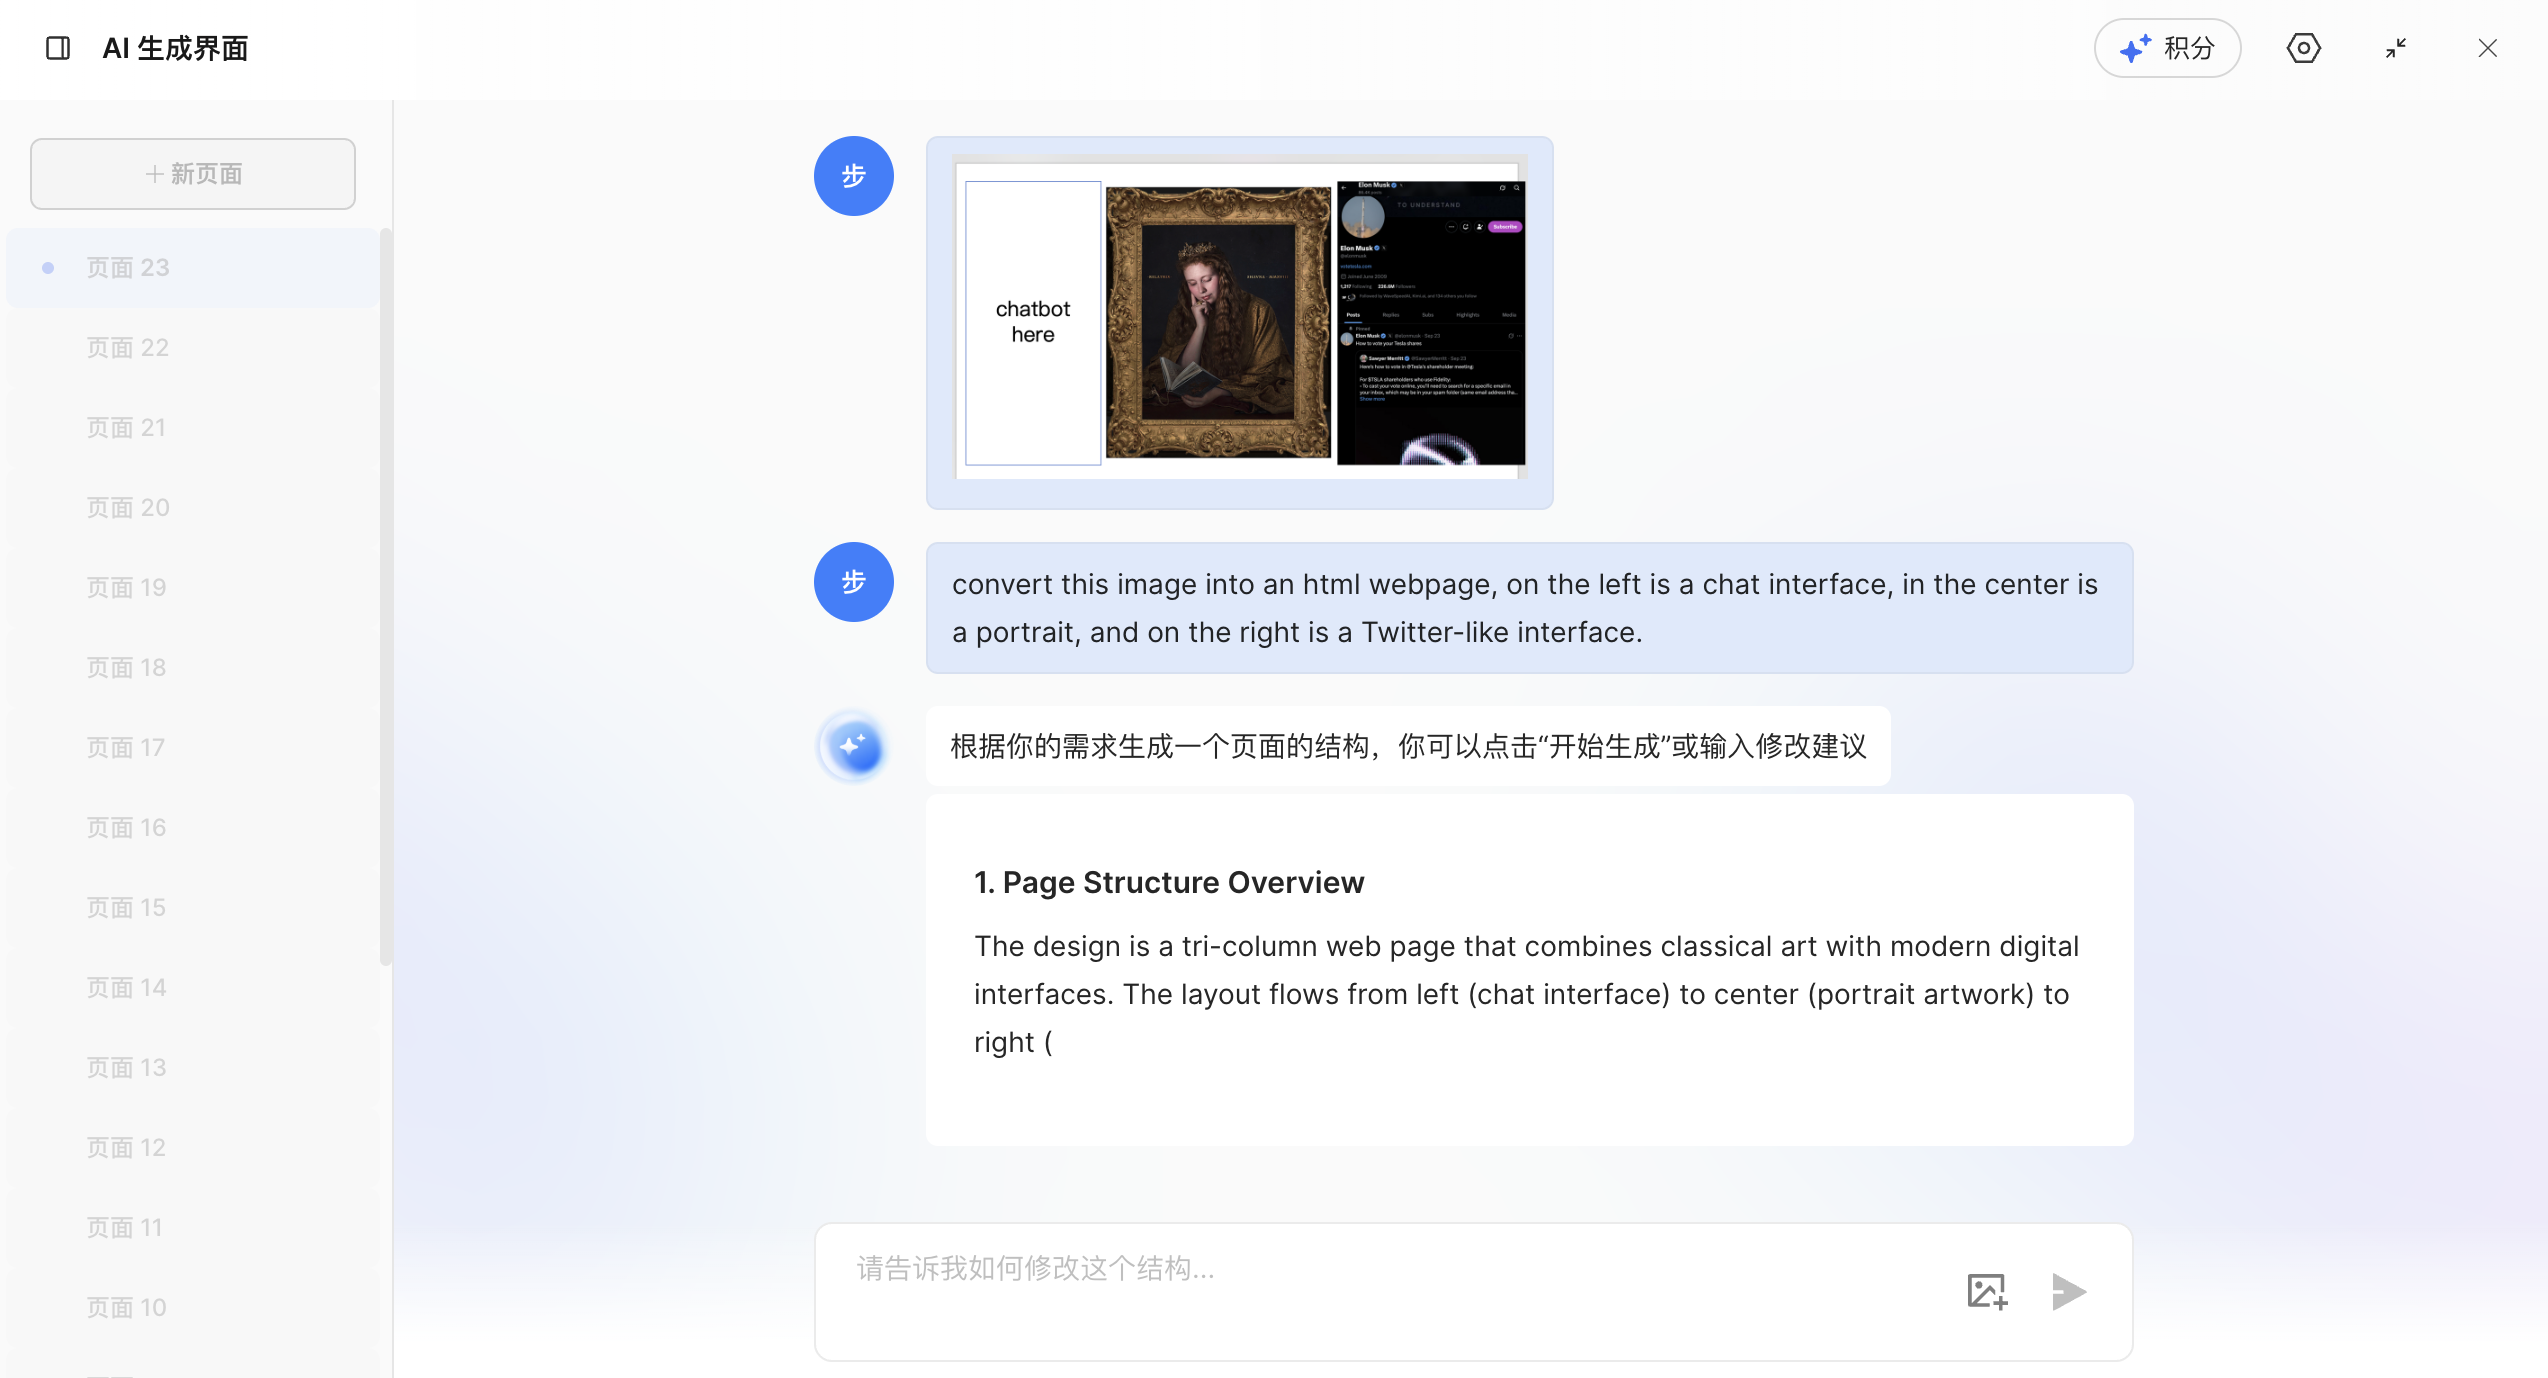
Generation flow
Upload a reference image
- Upload the design reference image
- Add a text description of what you want
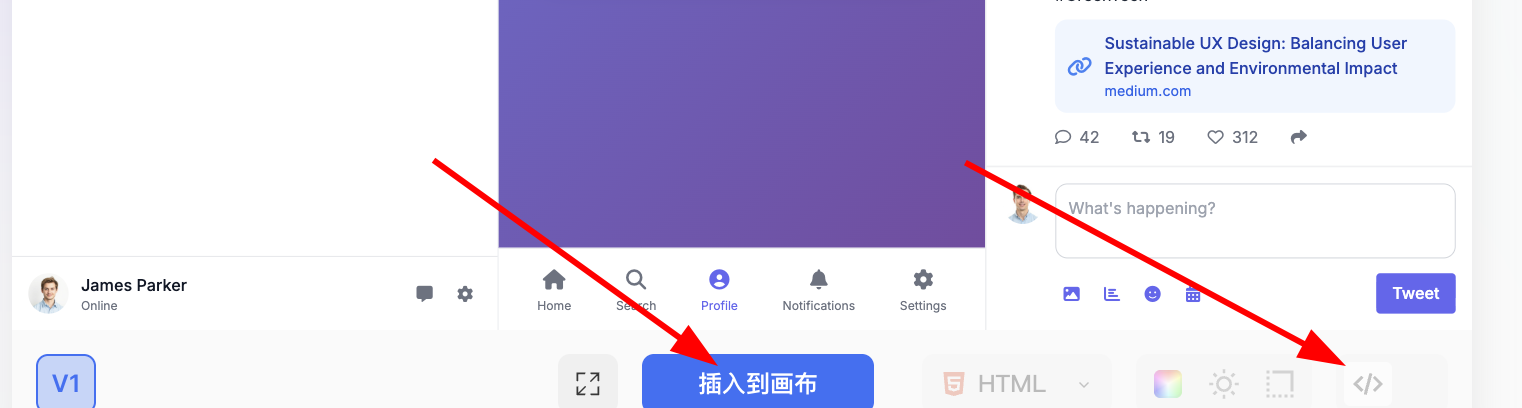
Inspect the generated result
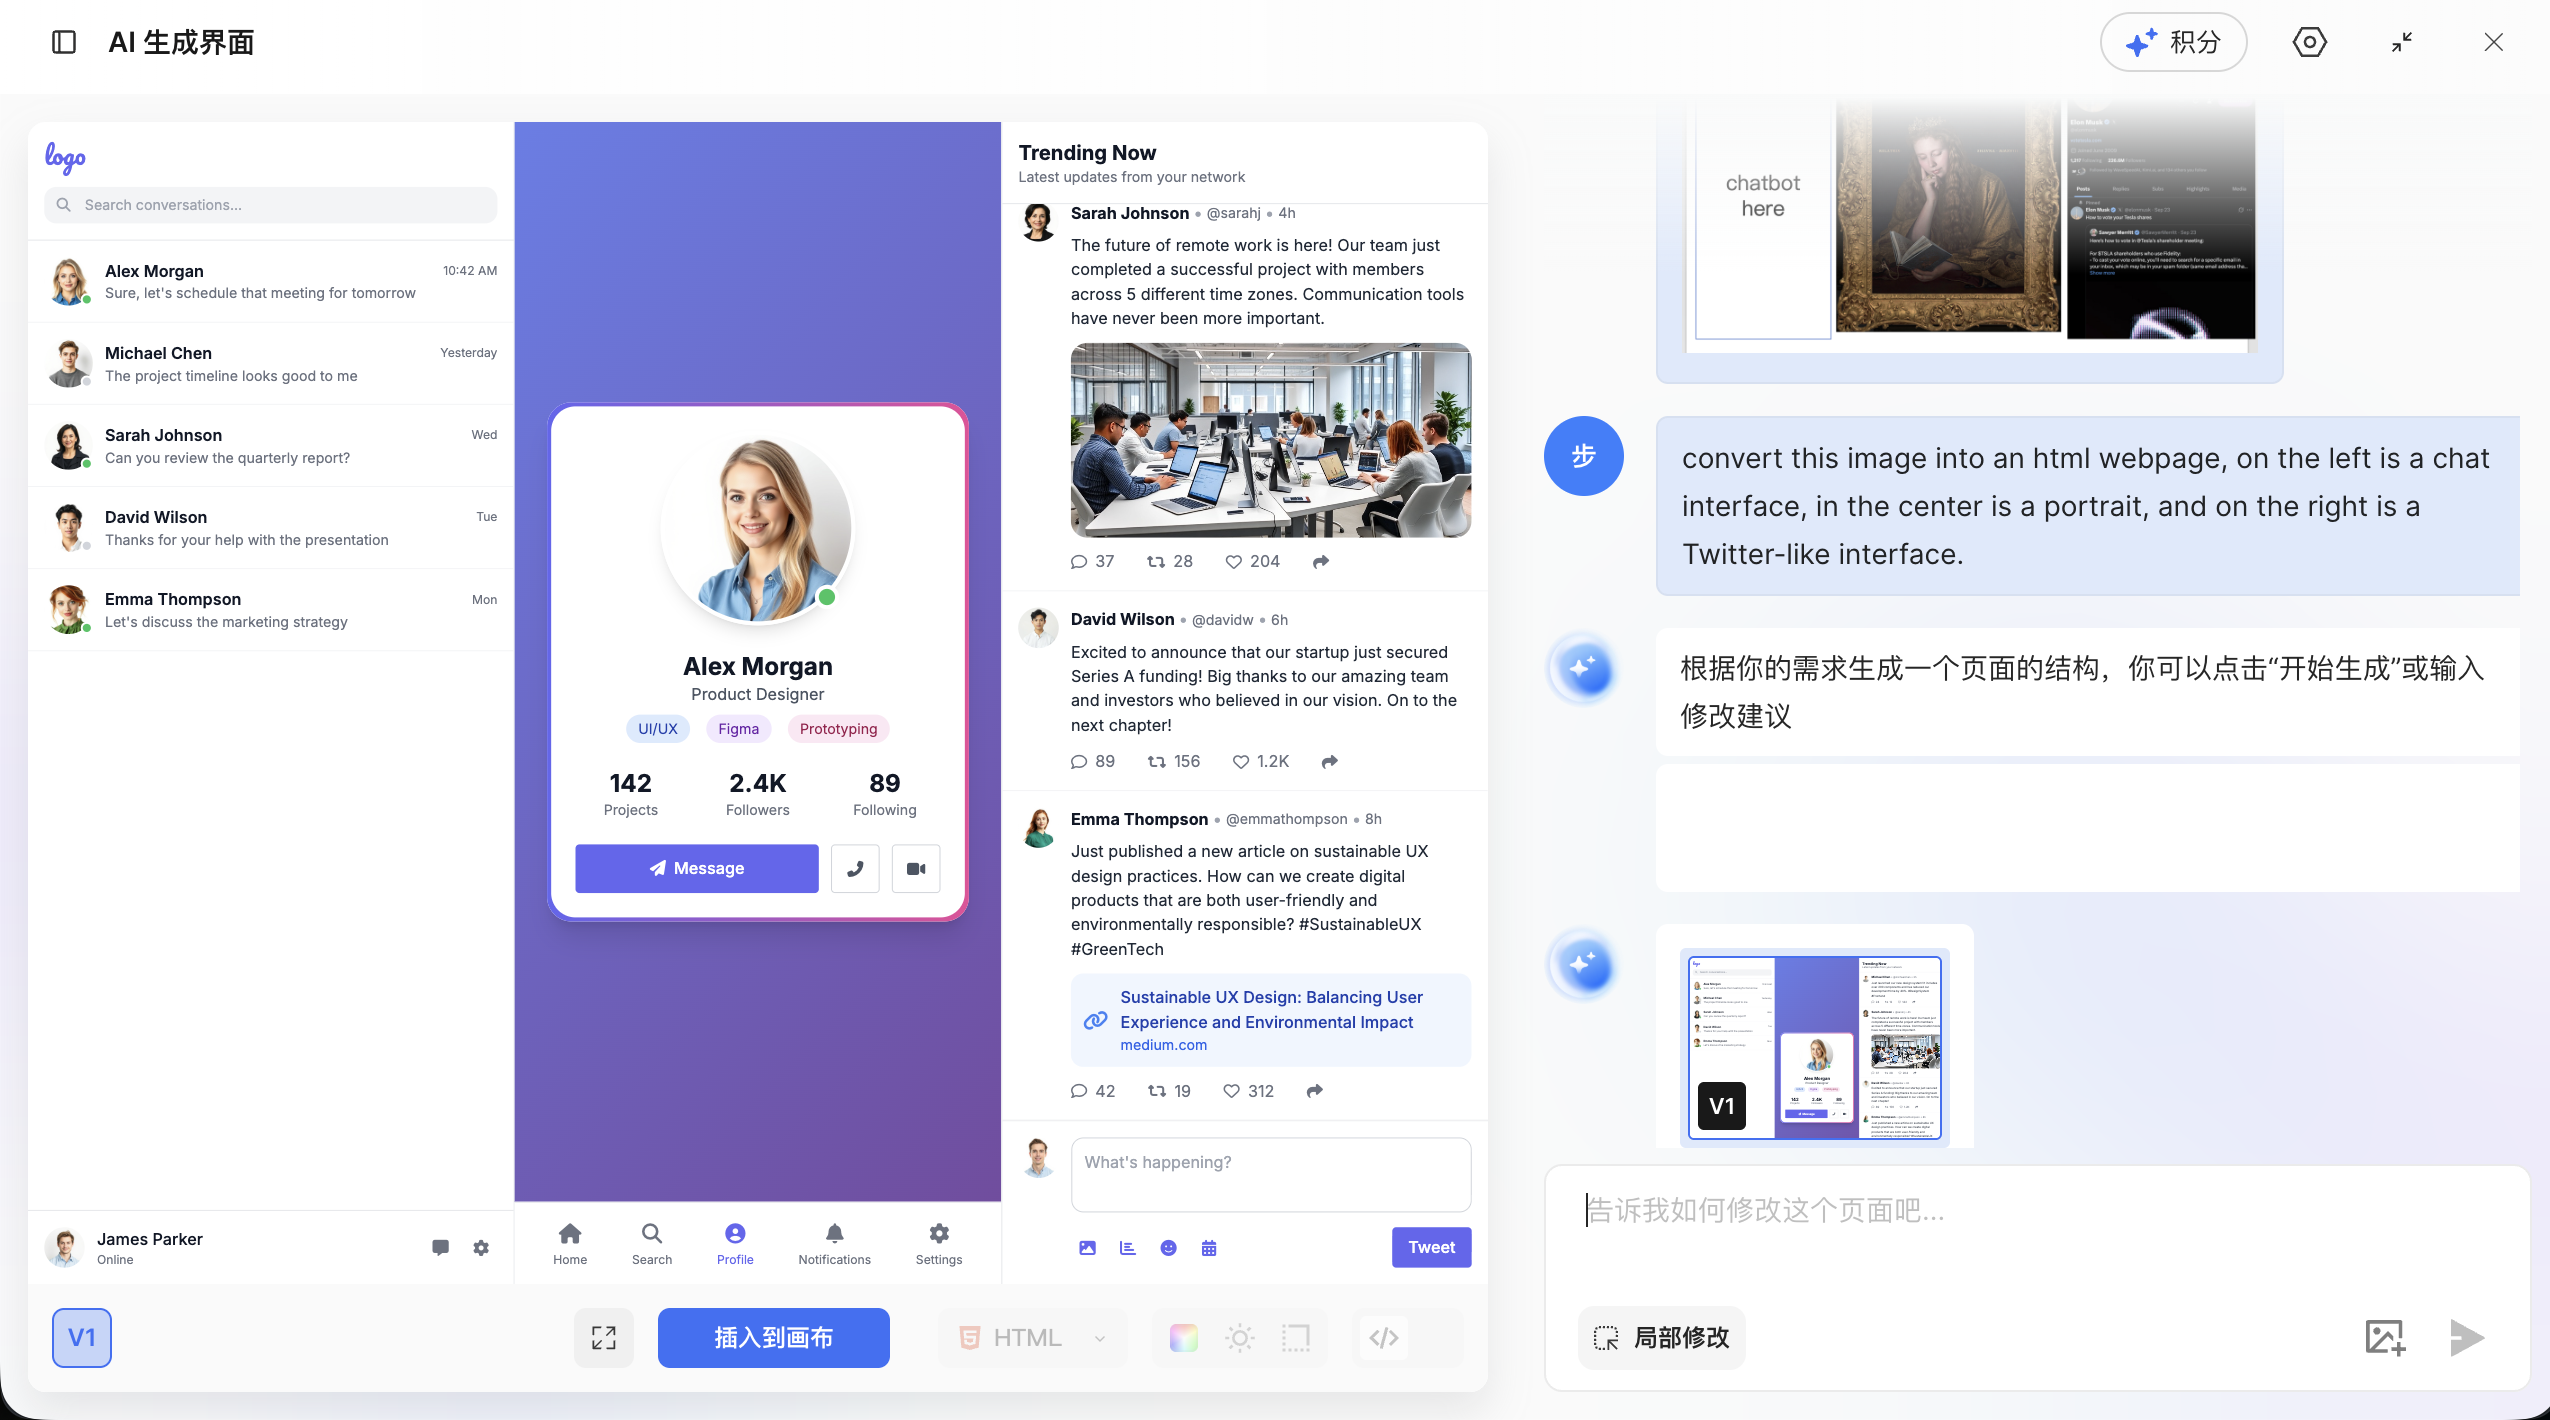
- Get the code
- Click the blue
Insert to canvasbutton if you want to edit the result visually - Or click the
Codebutton on the right to copy the implementation locally
- Click the blue
3. Path 2: export code through the design platform or plugins
3.1 Generate code with Figma Make
Figma Make is Figma's official AI design feature. It can recreate webpage UI prototypes with much higher fidelity from either prompts or reference images.
Key features
- High-fidelity recreation: usually better than generic screenshot-to-code generation
- Editable results: you can convert the result back into an editable Figma design file
- GitHub integration: the generated code can be synced directly to GitHub
Permissions
To use the full Figma Make experience, you usually need Figma Pro. Students can often get Pro access through education verification.
Steps
Open Figma Make
- Click the
Makebutton on the Figma homepage - Or visit Figma Make
- Click the
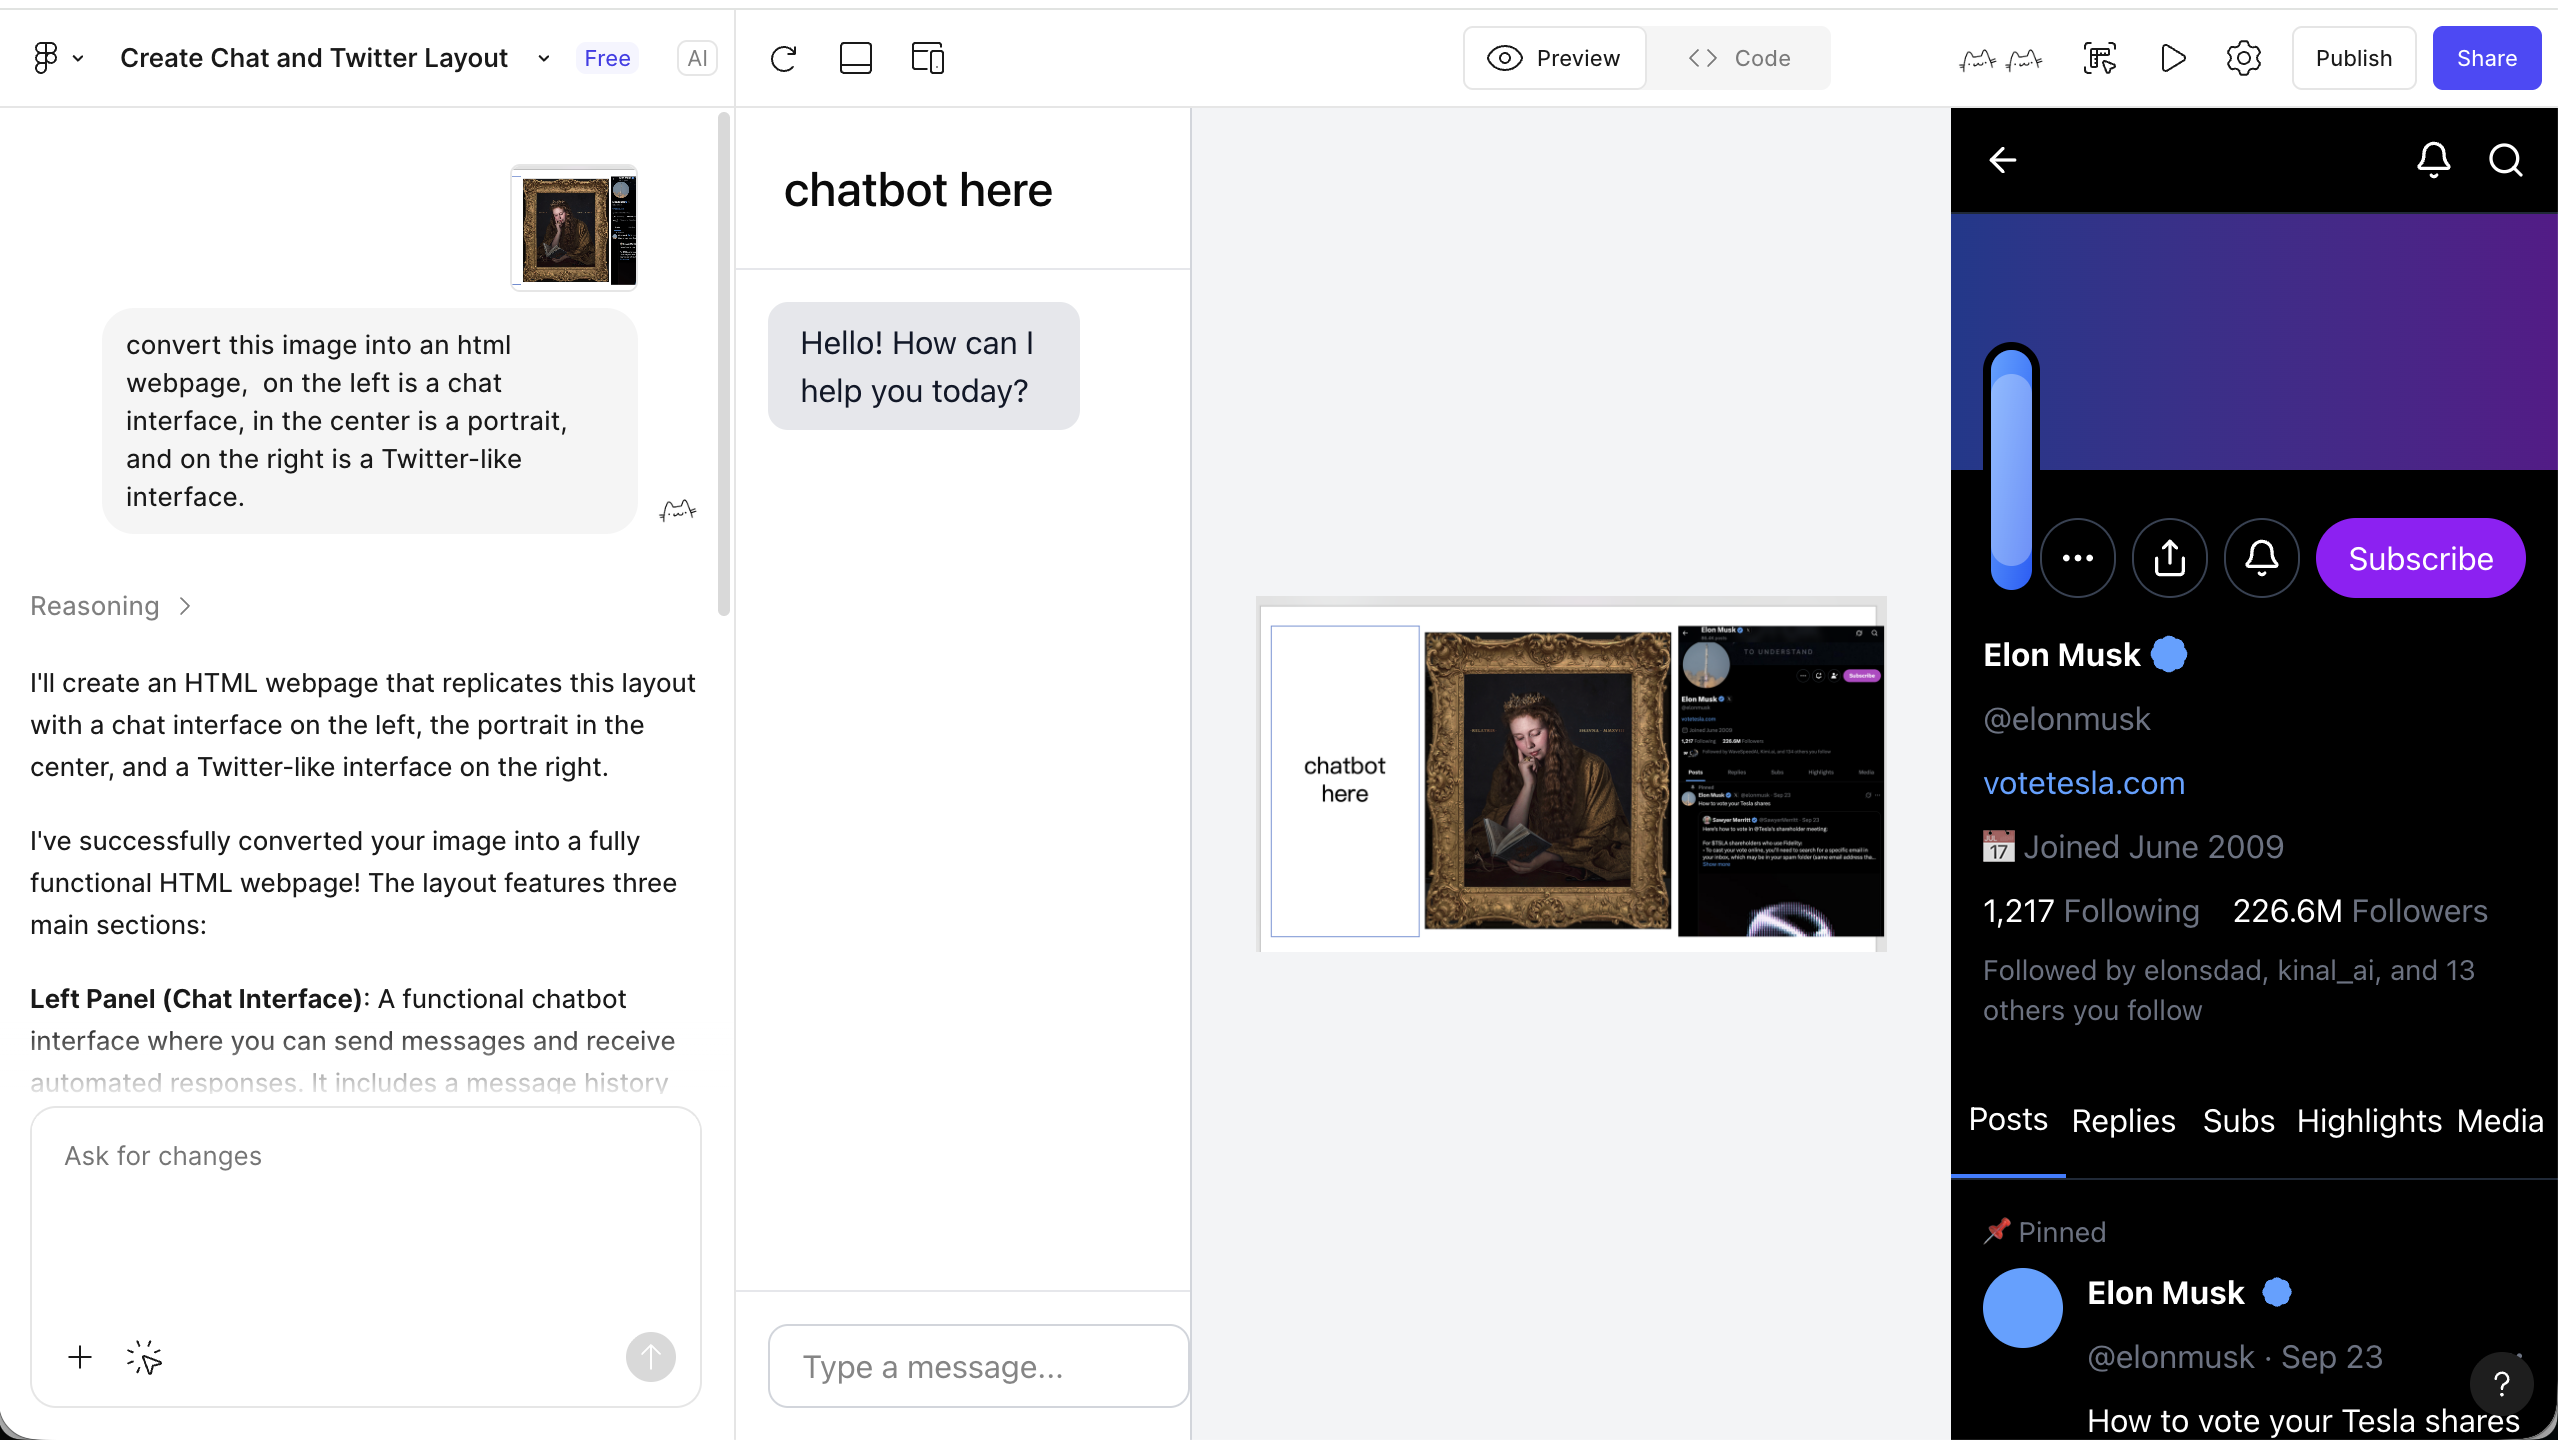
Upload your reference
- Upload the design you want to recreate
- Add a prompt describing what you want
- Check the result
- After a short wait, you will see the rendered result
- Click the play button in the upper right to preview it fullscreen
- Fine-tune the details
- Click the editor icon in the upper right
- Go back into the familiar Figma editor and make detailed adjustments
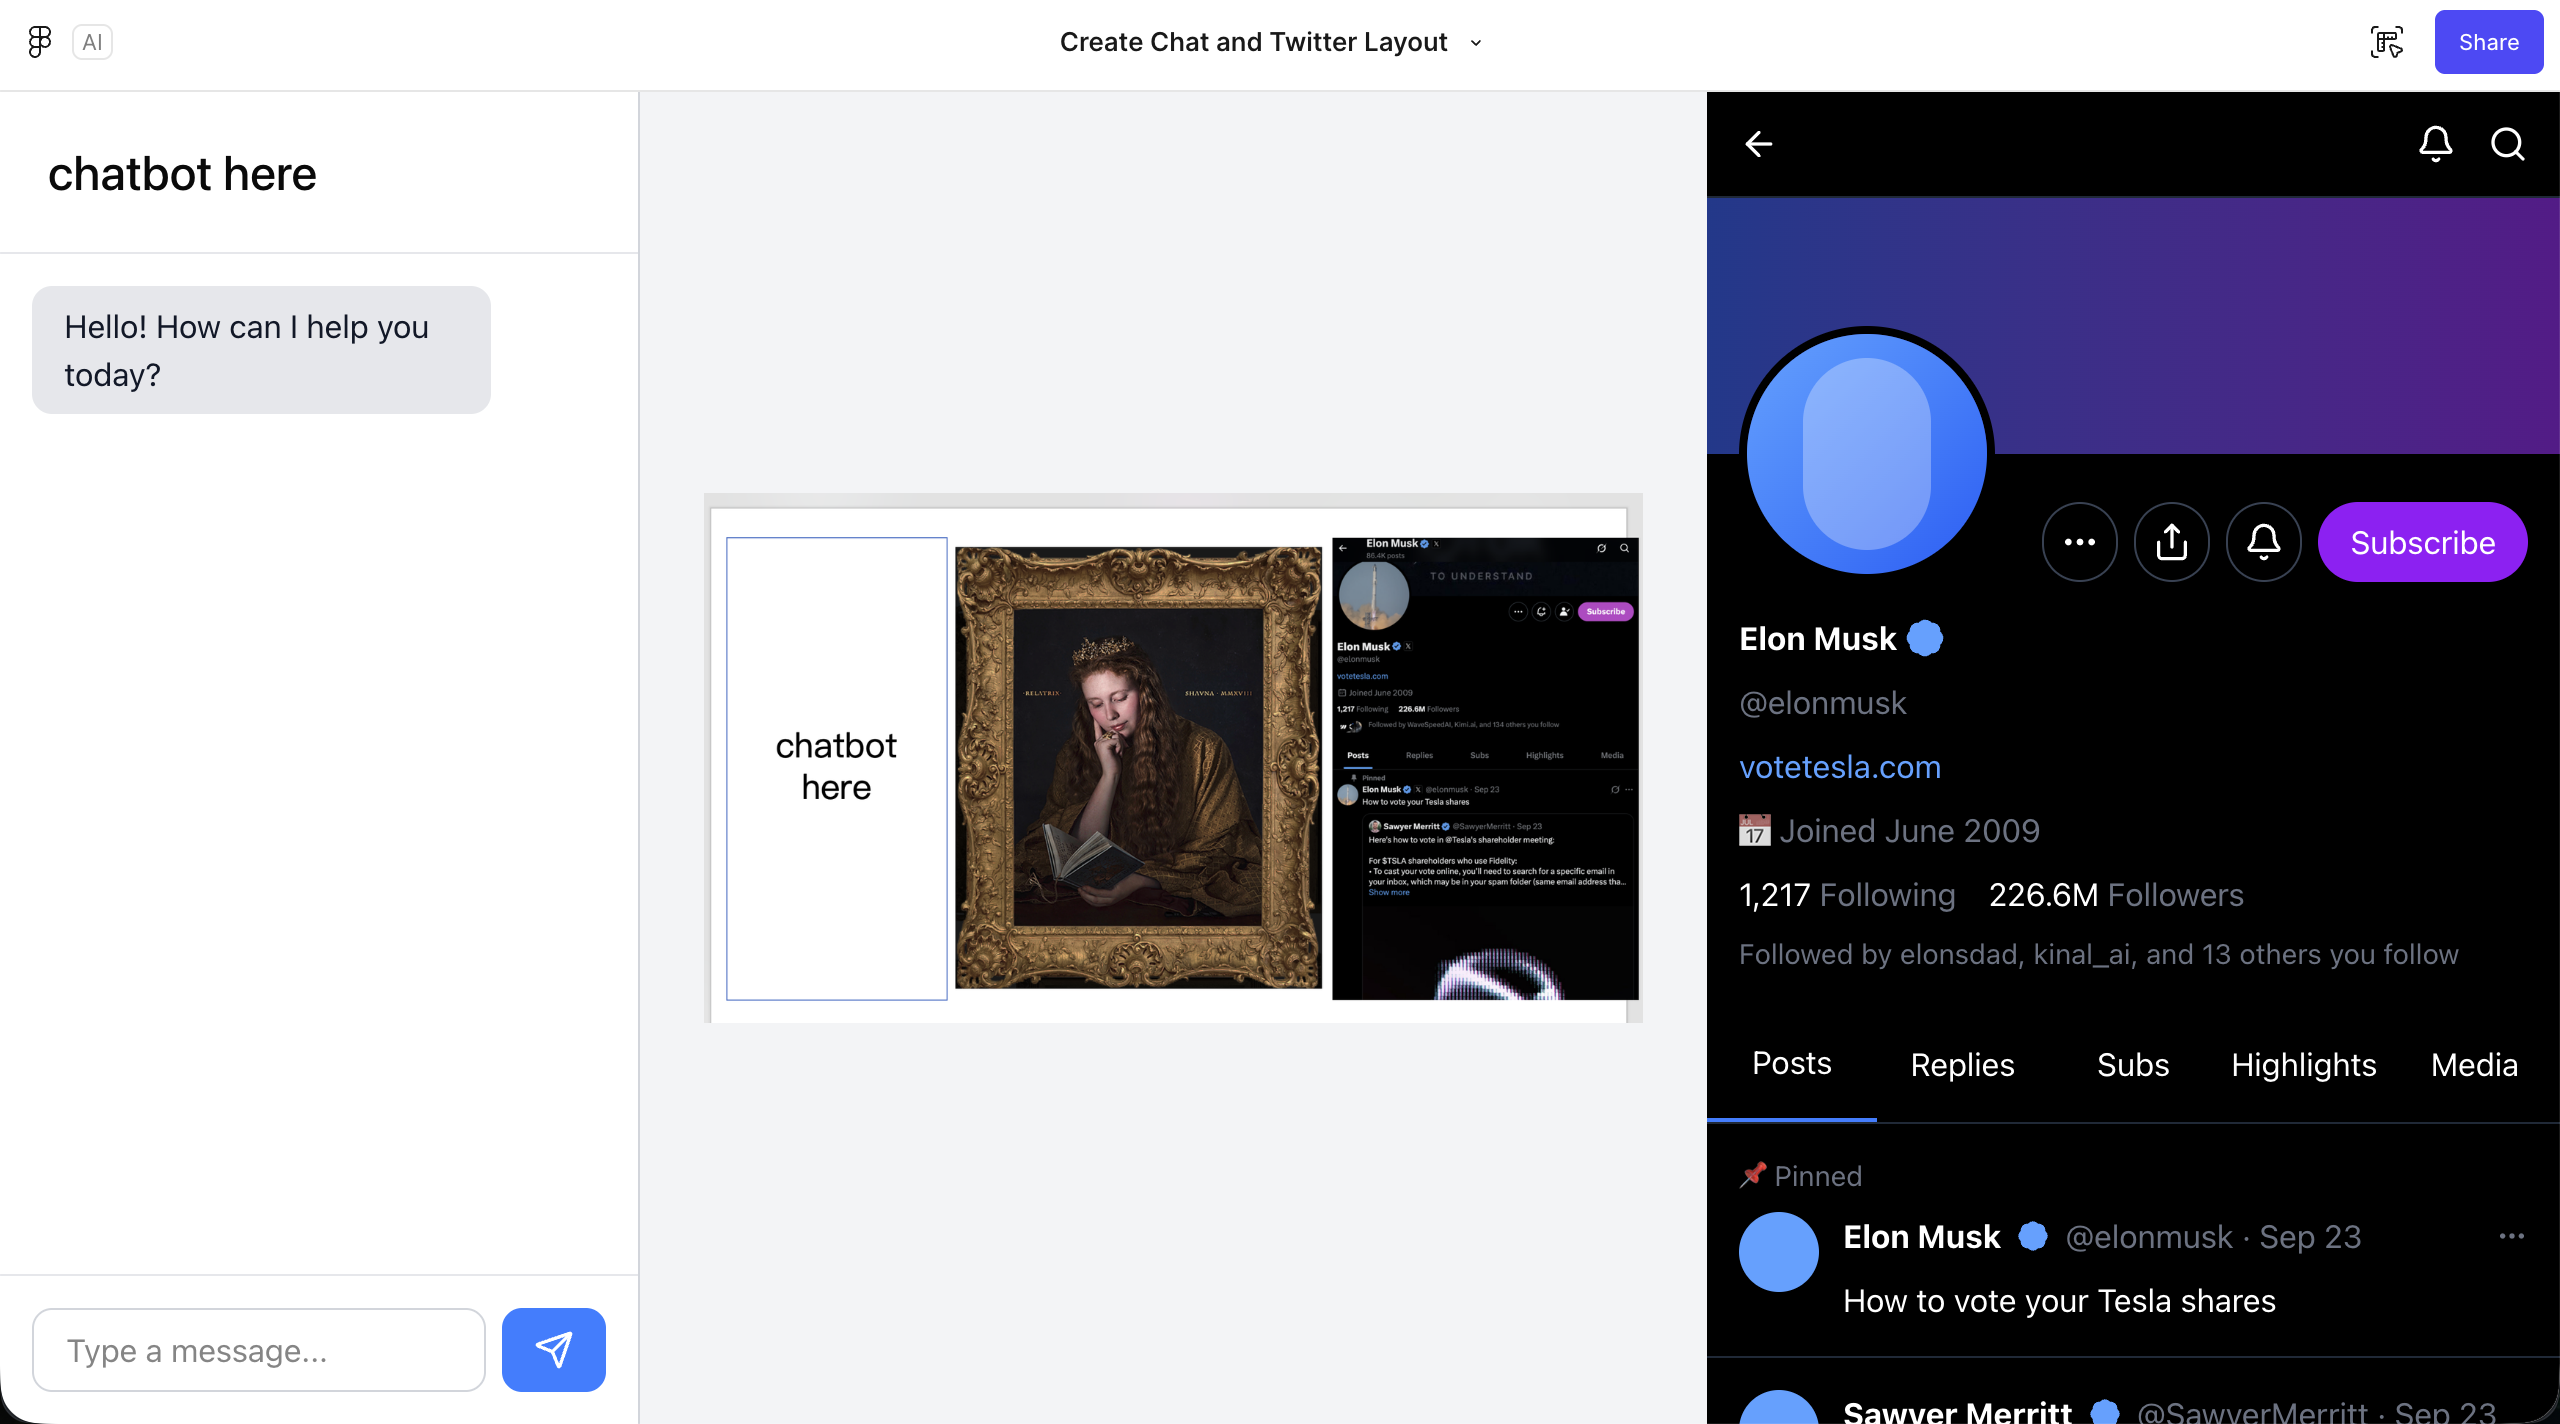
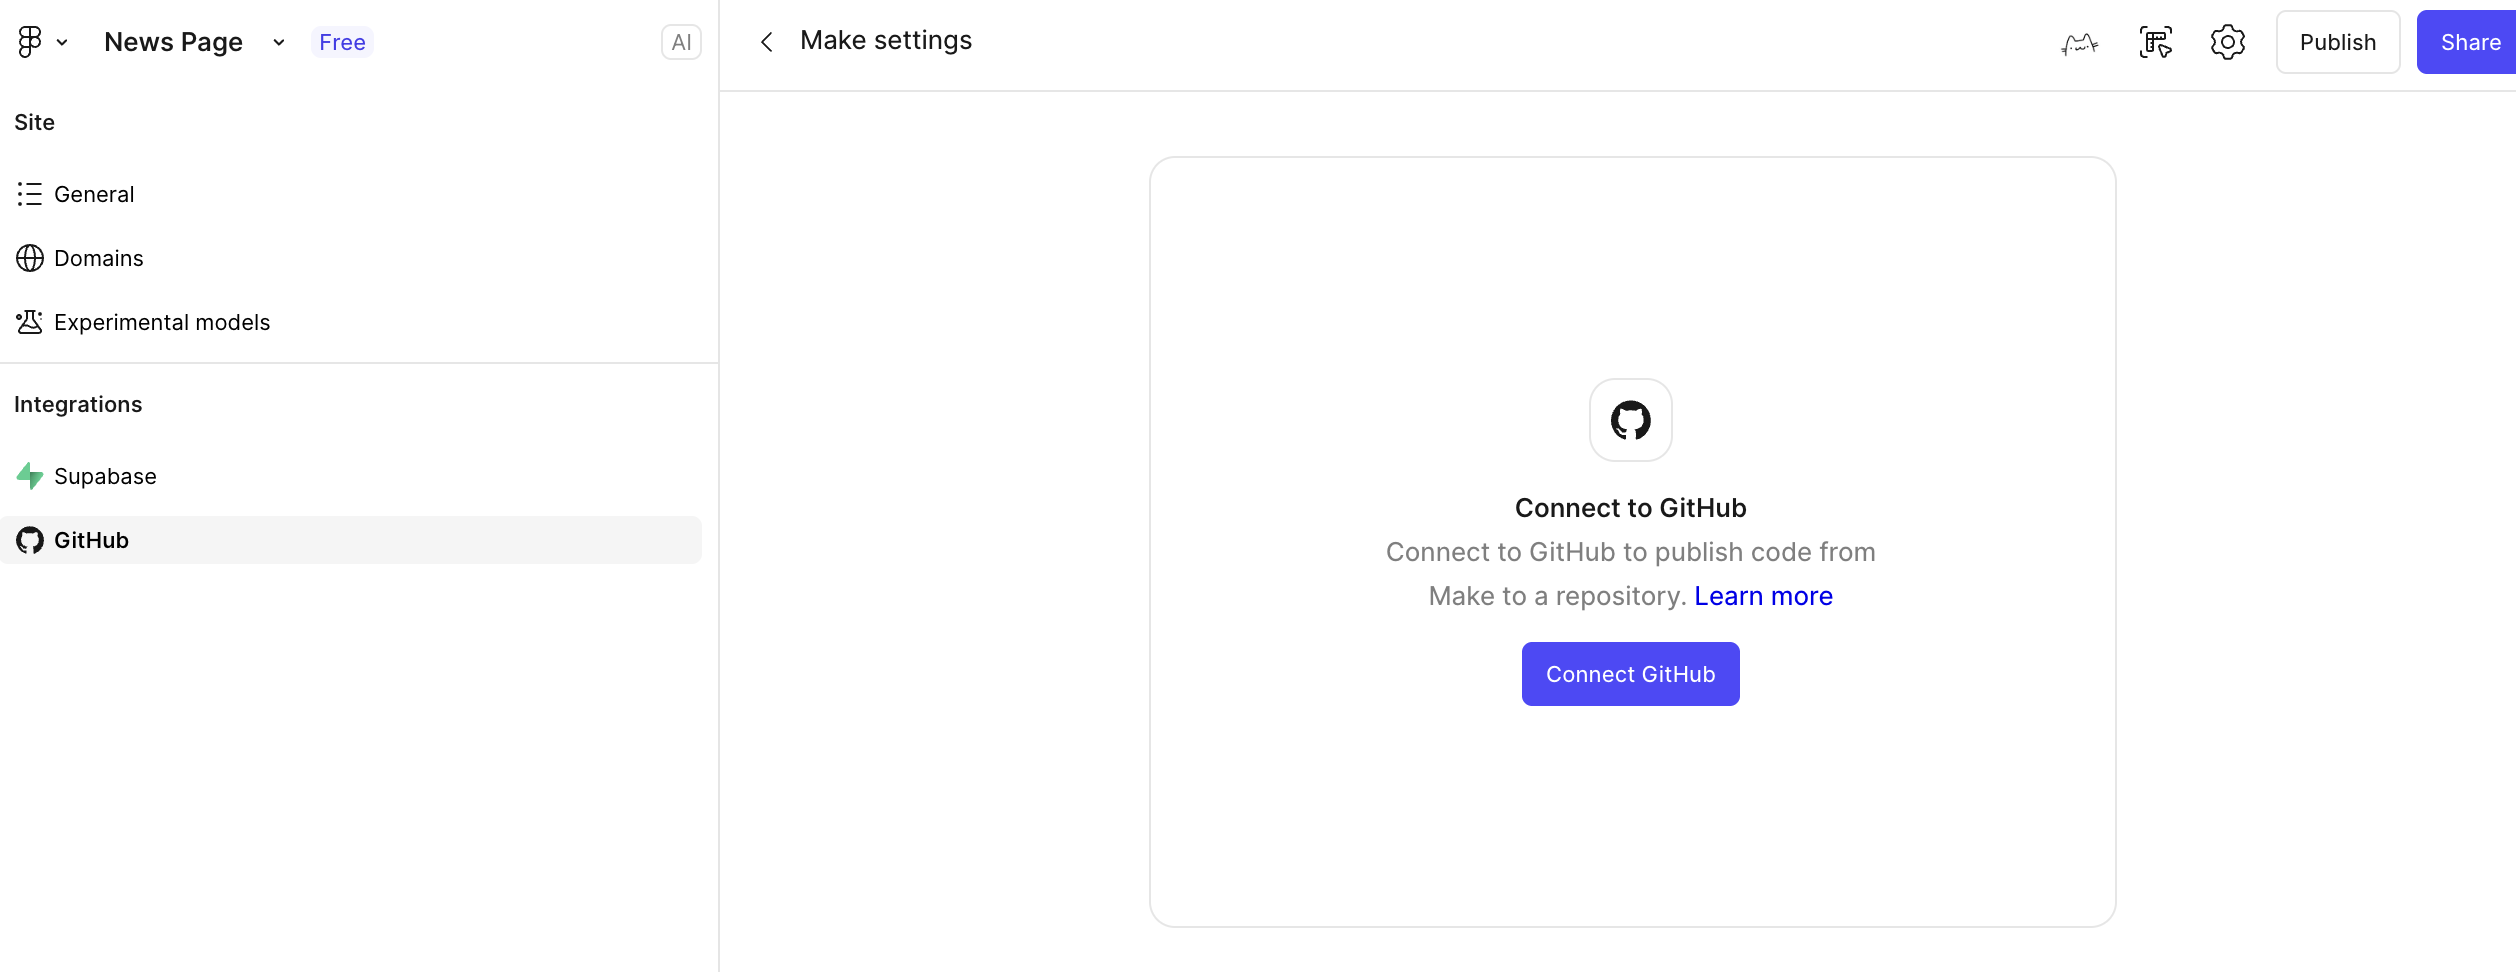
- Export the code
- Once the result looks good, export the code
- You can even connect it directly to GitHub
3.2 Export code with plugins
Besides the native AI features, both Figma and MasterGo support plugins that export code.
Common Figma plugins
- Figma to Code: converts designs into React, Vue, HTML, and more
- Anima: high-fidelity export with interaction support
- Locofy: AI-assisted design-to-code workflow
Typical workflow
- Open the Plugins panel in Figma
- Search for and install the export plugin you want
- Select the design elements you want to export
- Run the plugin and choose the target framework and output format
- Copy or download the generated code
4. Path 3: export code through MCP-enabled design tools
4.1 What is MCP?
MCP, or Model Context Protocol, is an open standard that lets AI models access external tools and data sources in a safe and controllable way. In the context of frontend design, MCP allows a model to read the structure, styles, and component metadata of a design file directly instead of guessing from screenshots.
4.2 How MCP works
┌─────────────┐     ┌─────────────┐     ┌─────────────┐
│  AI model   │ ←→  │ MCP server  │ ←→  │ Design tool │
│ (Claude etc.)│    │(protocol adapter)│ │(Figma/MasterGo)│
└─────────────┘     └─────────────┘     └─────────────┘
Typical flow
- The AI model sends a request through the MCP protocol
- The design tool returns structured design data such as layers, styles, and components
- The model understands the structure and generates matching code
- The result can then be exported or written into the development environment
4.3 Figma + MCP in practice
Environment setup
Install an MCP server
bashnpx figma-mcp-serverConfigure Claude Desktop or another MCP-capable AI tool
json{ "mcpServers": { "figma": { "command": "npx", "args": ["figma-mcp-server"], "env": { "FIGMA_ACCESS_TOKEN": "your-figma-token" } } } }Create a Figma access token
- Go to Figma → Settings → Personal Access Tokens
- Generate and save a new token
Workflow
Enable MCP in your AI tool
- Open Claude Code or another MCP-aware IDE
- Confirm that the MCP server is connected
Provide the design file link
textUser: Please convert this Figma design into React code Link: https://www.figma.com/file/xxxxx AI: I have connected to Figma through MCP and I am reading the design structure...Let the AI analyze and generate
- The MCP server retrieves the layer tree
- The AI understands component structure and style properties
- It generates React or Vue components with more accurate names and structure
Iterate
textUser: Please extract the button into a reusable component AI: I identified the Button component from the design system via MCP and I am generating a reusable React component with props...
4.4 Why MCP is powerful
| Feature | Traditional approach | MCP approach |
|---|---|---|
| Data accuracy | Based on screenshots, may lose detail | Reads the original design data directly |
| Component recognition | The model has to guess boundaries | Exact component definitions are available |
| Style fidelity | Estimated from pixels | Reads exact design tokens |
| Iteration speed | Re-screenshot after every change | Design changes can be synced directly |
| Automation | Copy and paste manually | Can write directly into project files |
4.5 MCP tools available today
Design-side MCP tools
- Figma MCP Server: official MCP support for Figma
- MasterGo MCP: community-built MasterGo adapter
Development-side MCP tools
- Claude Code: native MCP support
- Cline: VS Code extension with MCP support
- Trae: can enable MCP through configuration
Looking ahead
The MCP ecosystem is evolving quickly. Over time, design tools and development environments will become much more tightly integrated, and one-click design-to-code workflows will likely become far more common.
5. What to do after exporting code
5.1 Test locally
Once you have the code, open it in your local IDE and test it:
Create or open a project
bash# For plain HTML, open it directly in the browser open index.html # For React/Vue projects npm install npm run devCollaborate with your AI IDE
- Import the generated code into Trae or another AI IDE
- Ask AI to help fix layout issues or add interactions
5.2 Common issues
| Stage | Problem | Solution |
|---|---|---|
| Layout | Elements are misaligned | Check display, position, and container structure |
| Styles | Colors do not match | Use browser devtools to inspect the actual applied values |
| Responsive behavior | Mobile layout breaks | Add or refine media-query breakpoints |
| Interaction | Buttons do nothing | Check JavaScript event bindings |
6. How to choose between the three paths
6.1 Comparison
| Dimension | Path 1: Multimodal AI | Path 2: Platform features | Path 3: MCP |
|---|---|---|---|
| Ease of getting started | ⭐ Easy | ⭐⭐ Moderate | ⭐⭐⭐ More complex |
| Fidelity | ⭐⭐⭐ Medium | ⭐⭐⭐⭐ High | ⭐⭐⭐⭐⭐ Highest |
| Flexibility | ⭐⭐⭐⭐⭐ High | ⭐⭐⭐ Medium | ⭐⭐⭐⭐ Fairly high |
| Automation | ⭐⭐ Low | ⭐⭐⭐ Medium | ⭐⭐⭐⭐⭐ High |
| Cost | Low | Medium | Low |
6.2 Recommendations
Choose Path 1 if
- You need to validate an idea quickly
- Your design tools change often
- Perfect fidelity is not critical
- Your budget is limited
Choose Path 2 if
- Your team mainly uses Figma or MasterGo
- You need high-fidelity output
- Designers and developers collaborate frequently
- You are willing to pay for Pro tooling when needed
Choose Path 3 if
- You want the highest degree of automation
- You have the technical ability to configure MCP
- The project iterates from design to code frequently
- You want a standardized design-development workflow
7. Summary
In this chapter, you learned the three core paths from design prototype to code:
- Direct multimodal AI conversion: flexible and fast, ideal for early validation
- Platform-native capabilities: higher fidelity and a better fit for professional design workflows
- MCP protocol integration: the most automated path, and likely the direction of future workflows
Best Practices
- If you are new: start with Path 1 for speed
- For team collaboration: use Path 2 to preserve design consistency
- For maximum efficiency: experiment with Path 3 and build an automated workflow
- Use them together: switch between paths depending on the project stage