Chapter 2: OpenClaw Quick Installation
By the end of this chapter, you will have a real AI assistant running on your computer — you can chat with it in the terminal and manage it through a browser dashboard. The whole process takes about 10 minutes.
Want to skip this? Chapter 1 introduces AutoClaw — download → double-click → sign up and go, with built-in models and free credits, no terminal required.
0. Supported Platforms
OpenClaw runs on all major operating systems, and companion apps provide additional capabilities such as voice and camera support.
| Platform | Gateway Support | Companion App |
|---|---|---|
| macOS | Native | Menu bar app + Voice Wake |
| Windows | Supported (WSL2 strongly recommended) | Planned |
| Linux | Native | Planned |
| iOS | — | Companion App: Canvas, camera, Voice Wake |
| Android | — | Companion App: Canvas, camera, screen sharing |
Note for mobile users: Even without the companion app, you can chat with OpenClaw directly through messaging apps like WhatsApp or Telegram — no additional installation needed.
Gateway service installation methods
The Gateway runs as a background service and can be installed in several ways:
| Method | Command | Description |
|---|---|---|
| Wizard install (recommended) | openclaw onboard --install-daemon | One-stop configuration and service installation |
| Direct install | openclaw gateway install | Install the service only, without running the configuration wizard |
| Configuration flow | openclaw configure | Choose to install the Gateway service during the configuration flow |
| Repair / migrate | openclaw doctor | Auto-detect and fix service issues |
Service registration varies by operating system:
- macOS: LaunchAgent (
ai.openclaw.gateway) - Linux / WSL2: systemd user service (
openclaw-gateway.service)
VPS and cloud server deployment
If you want to deploy OpenClaw on a remote server, the following hosting platforms are supported:
| Platform | Notes |
|---|---|
| VPS (general) | Any VPS works; a clean Ubuntu LTS base image is recommended |
| Fly.io | Containerized deployment |
| Hetzner | Docker deployment |
| GCP | Compute Engine VM |
| exe.dev | VM + HTTPS proxy |
Note: Avoid third-party "one-click images". It is recommended to install using the installation script on a clean base image. Remote dashboard access can be achieved with tools like Tailscale.
For more cloud deployment options, see Appendix C: Claw-like Solution Comparison and Selection.
1. Installation
The officially recommended method is to use the one-click installation script — it automatically detects Node.js, installs the CLI, and launches the configuration wizard, all in one step.
What is a terminal?
A terminal is a text interface where you type commands and your computer executes them. How to open it:
- Windows: Press
Win + X, select "Terminal" or "PowerShell" - macOS: Press
Cmd + Space, search for "Terminal" - Linux: Press
Ctrl + Alt + T

macOS / Linux / WSL2
curl -fsSL https://openclaw.ai/install.sh | bashThe script automatically handles Node.js detection and installation, global OpenClaw CLI installation, and launching the configuration wizard (onboard).
Install without configuring? Add
--no-onboardto skip the wizard:curl -fsSL https://openclaw.ai/install.sh | bash -s -- --no-onboard
Windows (PowerShell)
Open PowerShell (administrator mode) and run:
Set-ExecutionPolicy -ExecutionPolicy RemoteSigned -Scope CurrentUser
iwr -useb https://openclaw.ai/install.ps1 | iex
This script automatically installs Node.js and OpenClaw, and immediately launches the configuration wizard (onboard). The wizard will prompt you to configure your model provider API Key, chat platform channels (QQ / Feishu / Telegram, etc.), and various auxiliary APIs (such as a search engine API). It is recommended to prepare at least one model API Key in advance (see Step 2 for how to obtain one); other settings can be skipped for now and will be covered in later chapters.
Verify the installation:
openclaw --versionView verification screenshot

What is Node.js?
OpenClaw requires a Node.js 22.14+ runtime (Node 24 recommended). Node.js allows OpenClaw, which is written in JavaScript, to run on your computer. You do not need to learn JavaScript — the installation script handles everything automatically. If you already have Node.js 22.14+ installed, the script will skip this step. openclaw update performs a preflight check of the target version's Node requirements and shows a clear upgrade message if your runtime is too old.
Windows users: What is WSL2 and how do I install it?
WSL2 (Windows Subsystem for Linux 2) lets you run a full Linux environment on Windows. If you don't want the extra setup, just use PowerShell directly and skip this step.
- Open PowerShell as administrator
- Run:
wsl --install - Restart your computer and follow the prompts to set a username and password
Afterwards, search for "Ubuntu" in the Start menu to open the WSL2 terminal and use the macOS / Linux installation script above.
OpenClaw's official recommendation: On Windows, using WSL2 is strongly recommended to run OpenClaw for better compatibility and stability.
Build from source (developers / contributors)
# 1. Clone and build
git clone https://github.com/openclaw/openclaw.git
cd openclaw
pnpm install
pnpm ui:build
pnpm build

# 2. Link CLI globally
pnpm link --global
# Or skip linking and use pnpm openclaw ... inside the repository

# 3. Run the configuration wizard
openclaw onboard --install-daemon
Building from source requires pnpm. VPS / cloud server users are recommended to install using the installation script on a clean Ubuntu LTS base image.
2. Configure an AI Model
OpenClaw does not include an AI brain of its own — it needs to connect to a "model provider" to gain intelligence. If the installation script already launched the configuration wizard, fill it in following the instructions below; if you skipped the wizard, run it manually:
openclaw onboard --install-daemon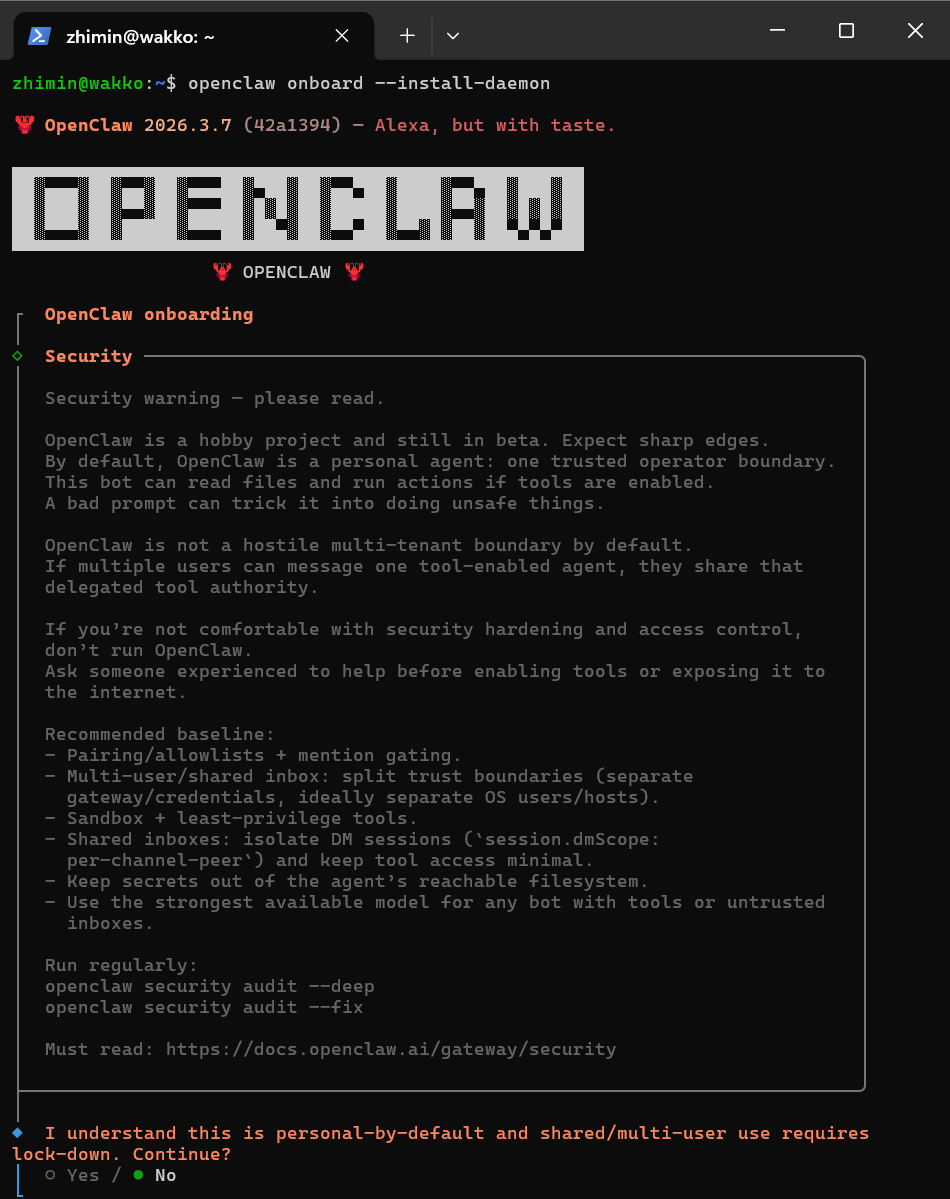
The wizard will guide you through all configuration steps. Key steps:
Security confirmation → Select YesConfiguration mode → Select QuickStartModel provider → Select Custom Provider
Then enter the following information (using a free OpenRouter model as an example):
◇  API Base URL
│  https://openrouter.ai/api/v1

◇  API Key
│  sk-or-v1-your-key

◇  Endpoint compatibility
│  OpenAI-compatible

◇  Model ID
│  qwen/qwen3.6-plus:free
OpenRouter is recommended — sign up and use free models (such as Step 3.5 Flash) immediately, no top-up required, zero cost to complete all tutorial exercises.
The wizard will subsequently ask about channels, skills, and other settings — it is recommended to skip all of these for now — later chapters will cover them in detail.
Don't have an API Key yet? Expand the guide below to obtain one.
Getting an API Key: Sign up for OpenRouter (free models, zero-cost onboarding)
Step 1: Create an account
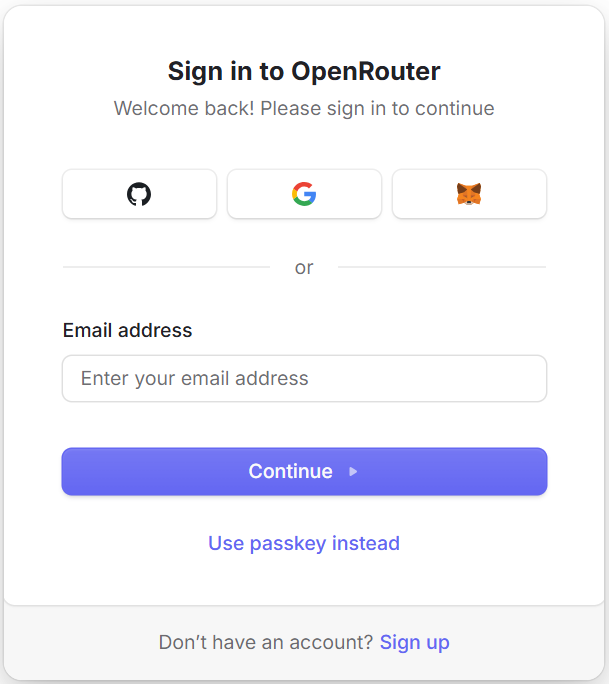
- Visit the OpenRouter website
- Click Sign In in the top right; supports Google, GitHub, email, and other registration methods
Step 2: Create an API key
- After signing in, click your avatar in the top right → select Settings
- Select API Keys in the left menu
- Click Create to generate a new API Key
- Copy the generated key (starts with
sk-or-v1-)
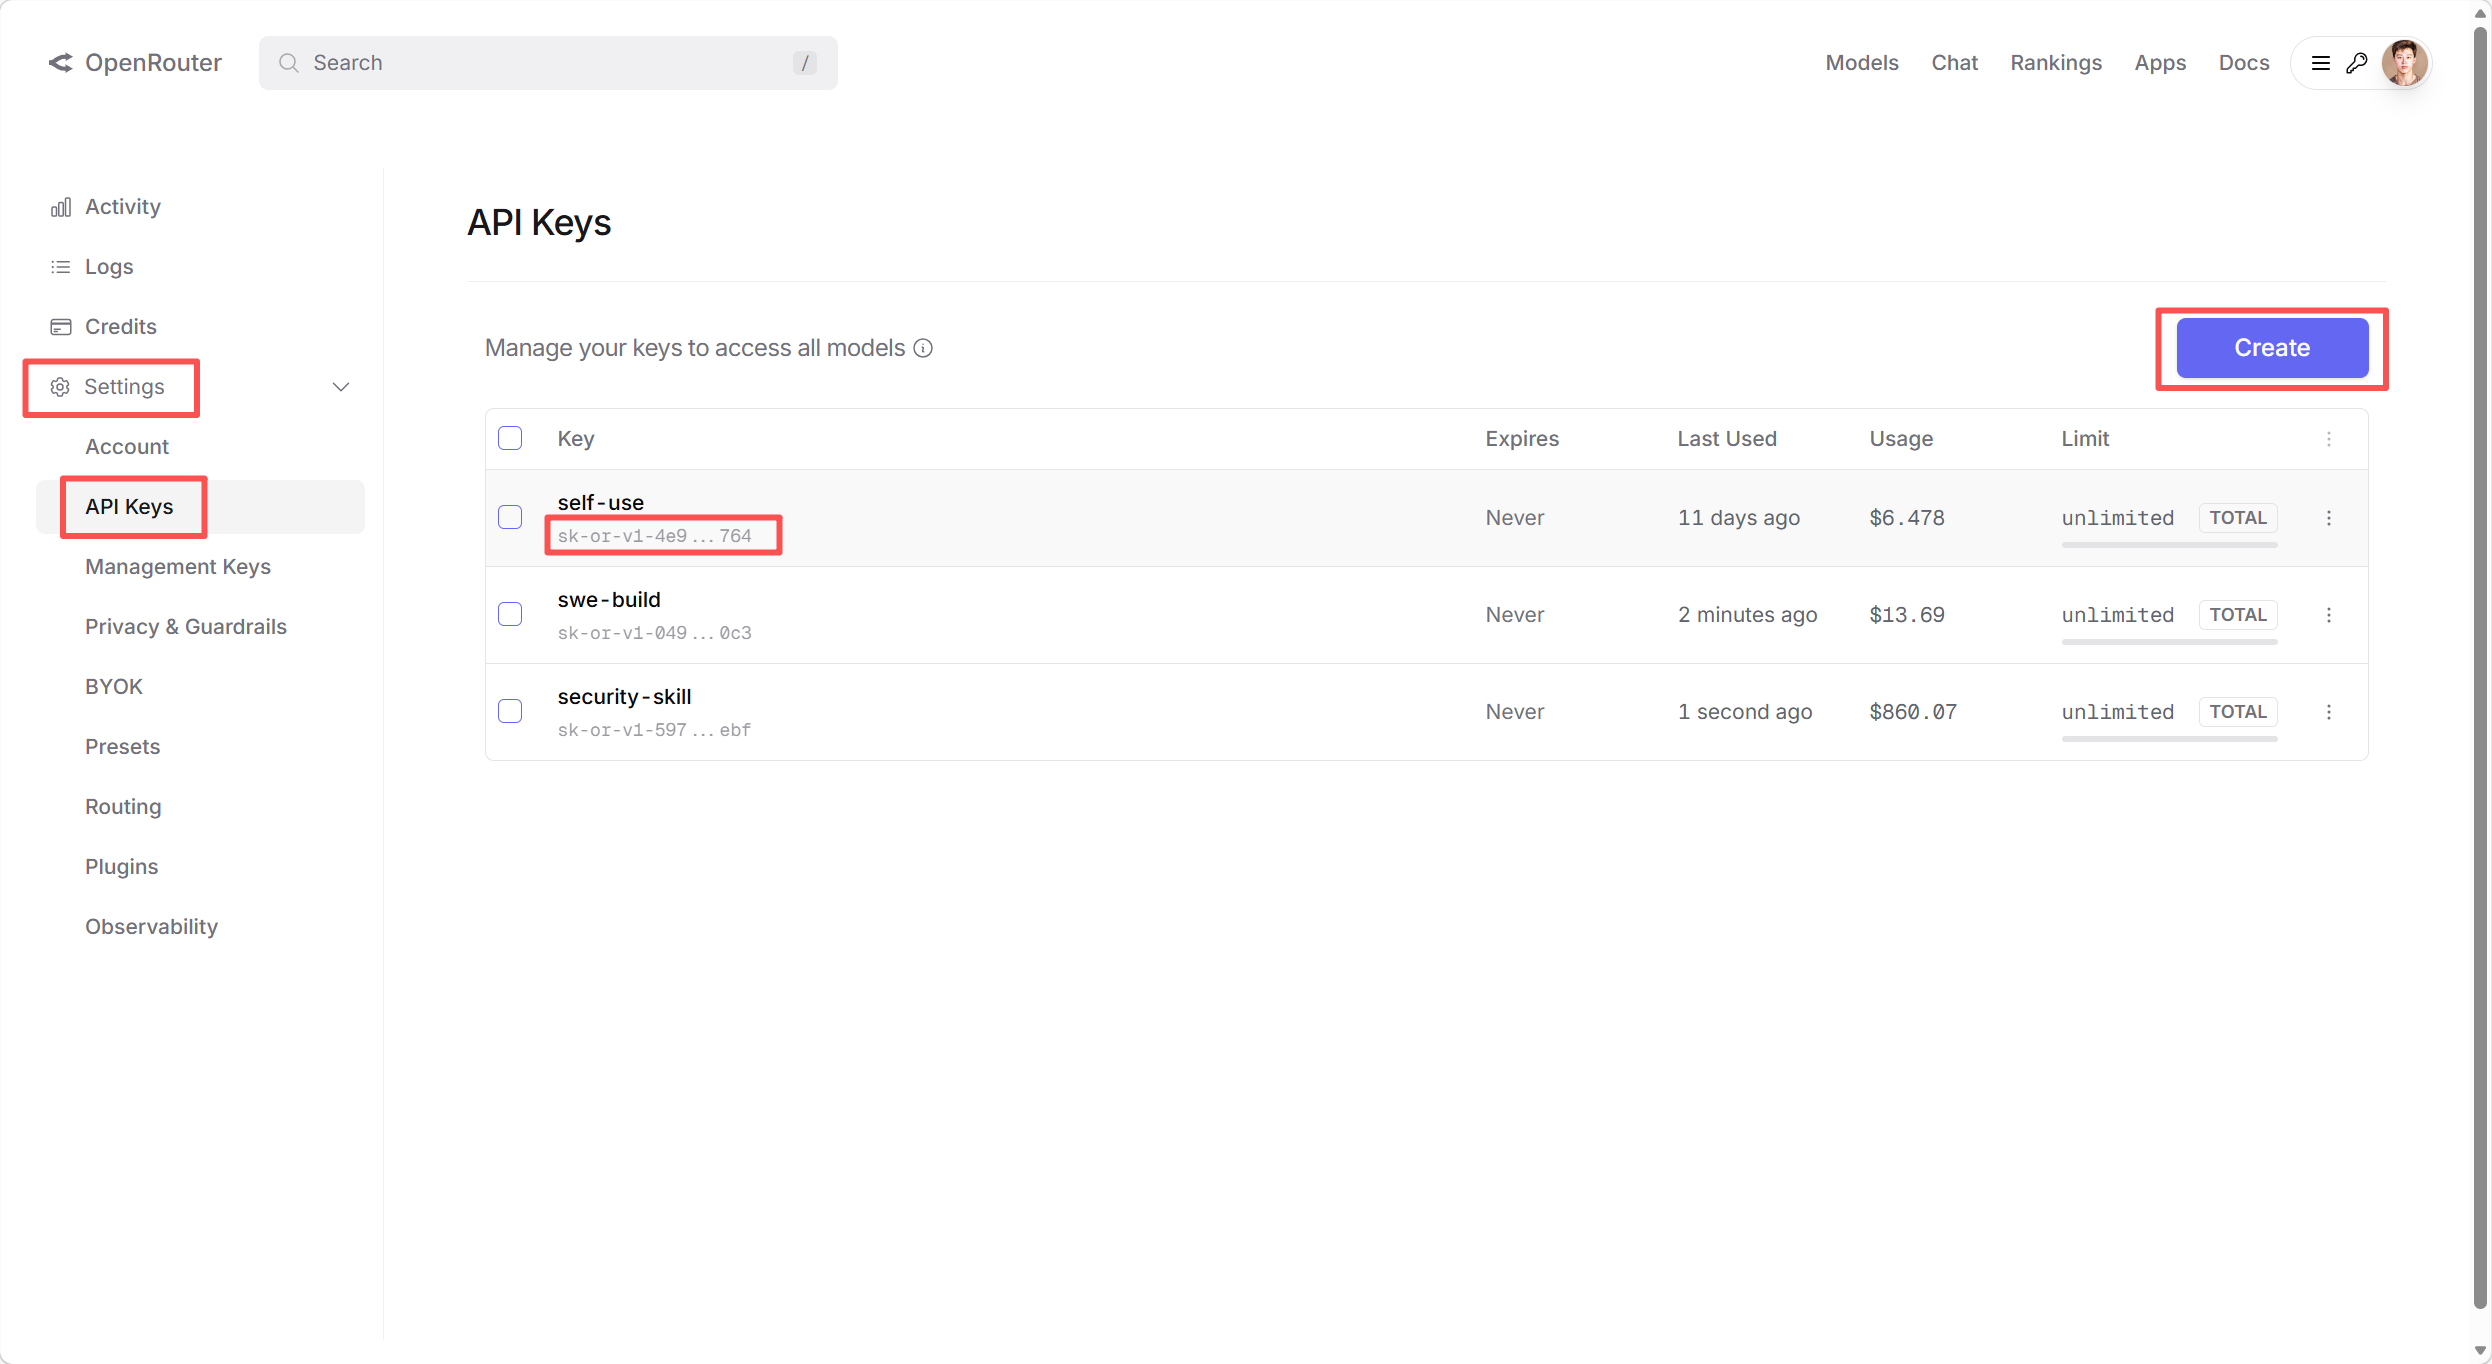
Important: The API key is only shown once — copy and save it immediately. If lost, you will need to create a new one.
Step 3: Add credits (optional)
Models with a :free suffix on OpenRouter are completely free, such as qwen/qwen3.6-plus:free, which is sufficient for everyday learning. If you want to use more powerful paid models:
- Click Credits in the left menu to go to the top-up page
- Click Add Credits to add funds
- OpenRouter supports UnionPay, VISA, and other common card types, and even supports cryptocurrency payments
- The recommended minimum first top-up is $5 USD, which is more than enough for practice
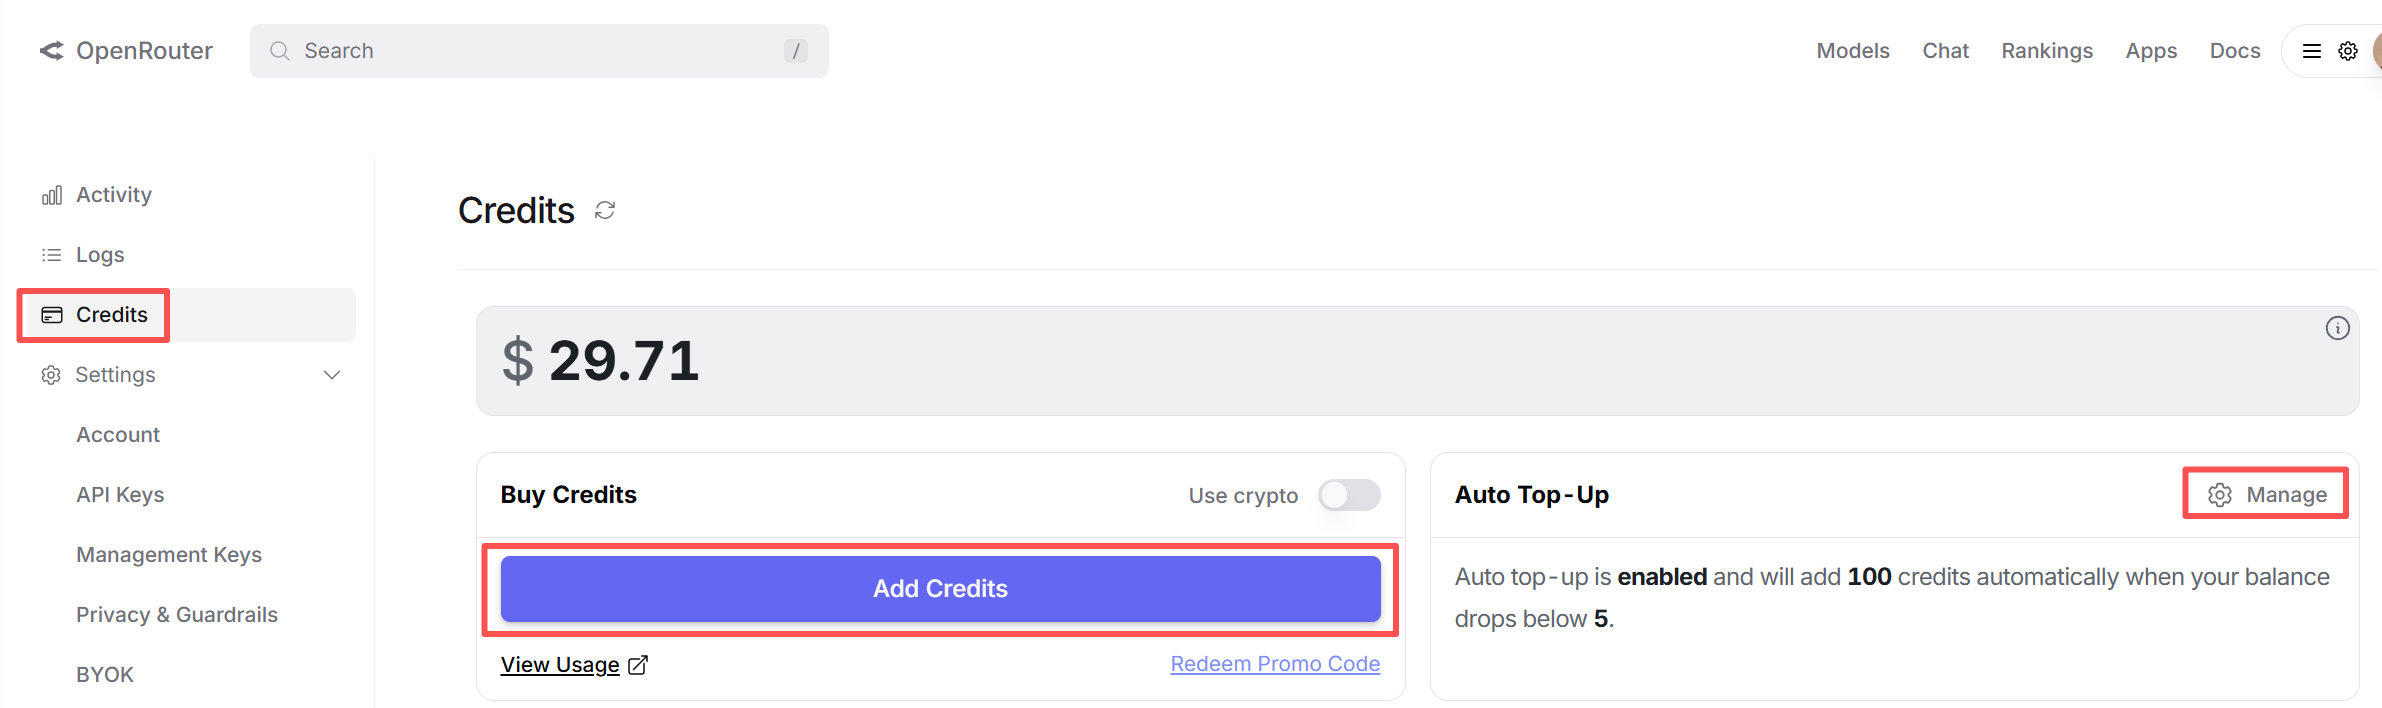
Convenience tip: If your usage grows later, you can enable Auto Top Up on the credits page to automatically replenish your balance when it runs low, avoiding service interruptions.
Alternative: Use SiliconFlow (domestic provider)
If you prefer to use a domestic provider, SiliconFlow is recommended — new registrations receive 16 CNY in free compute credits, with Alipay / WeChat Pay top-up support.
Sign up and get an API Key:
- Visit the SiliconFlow website and register with your phone number
- After logging in, go to the console and create an API key (starts with
sk-)

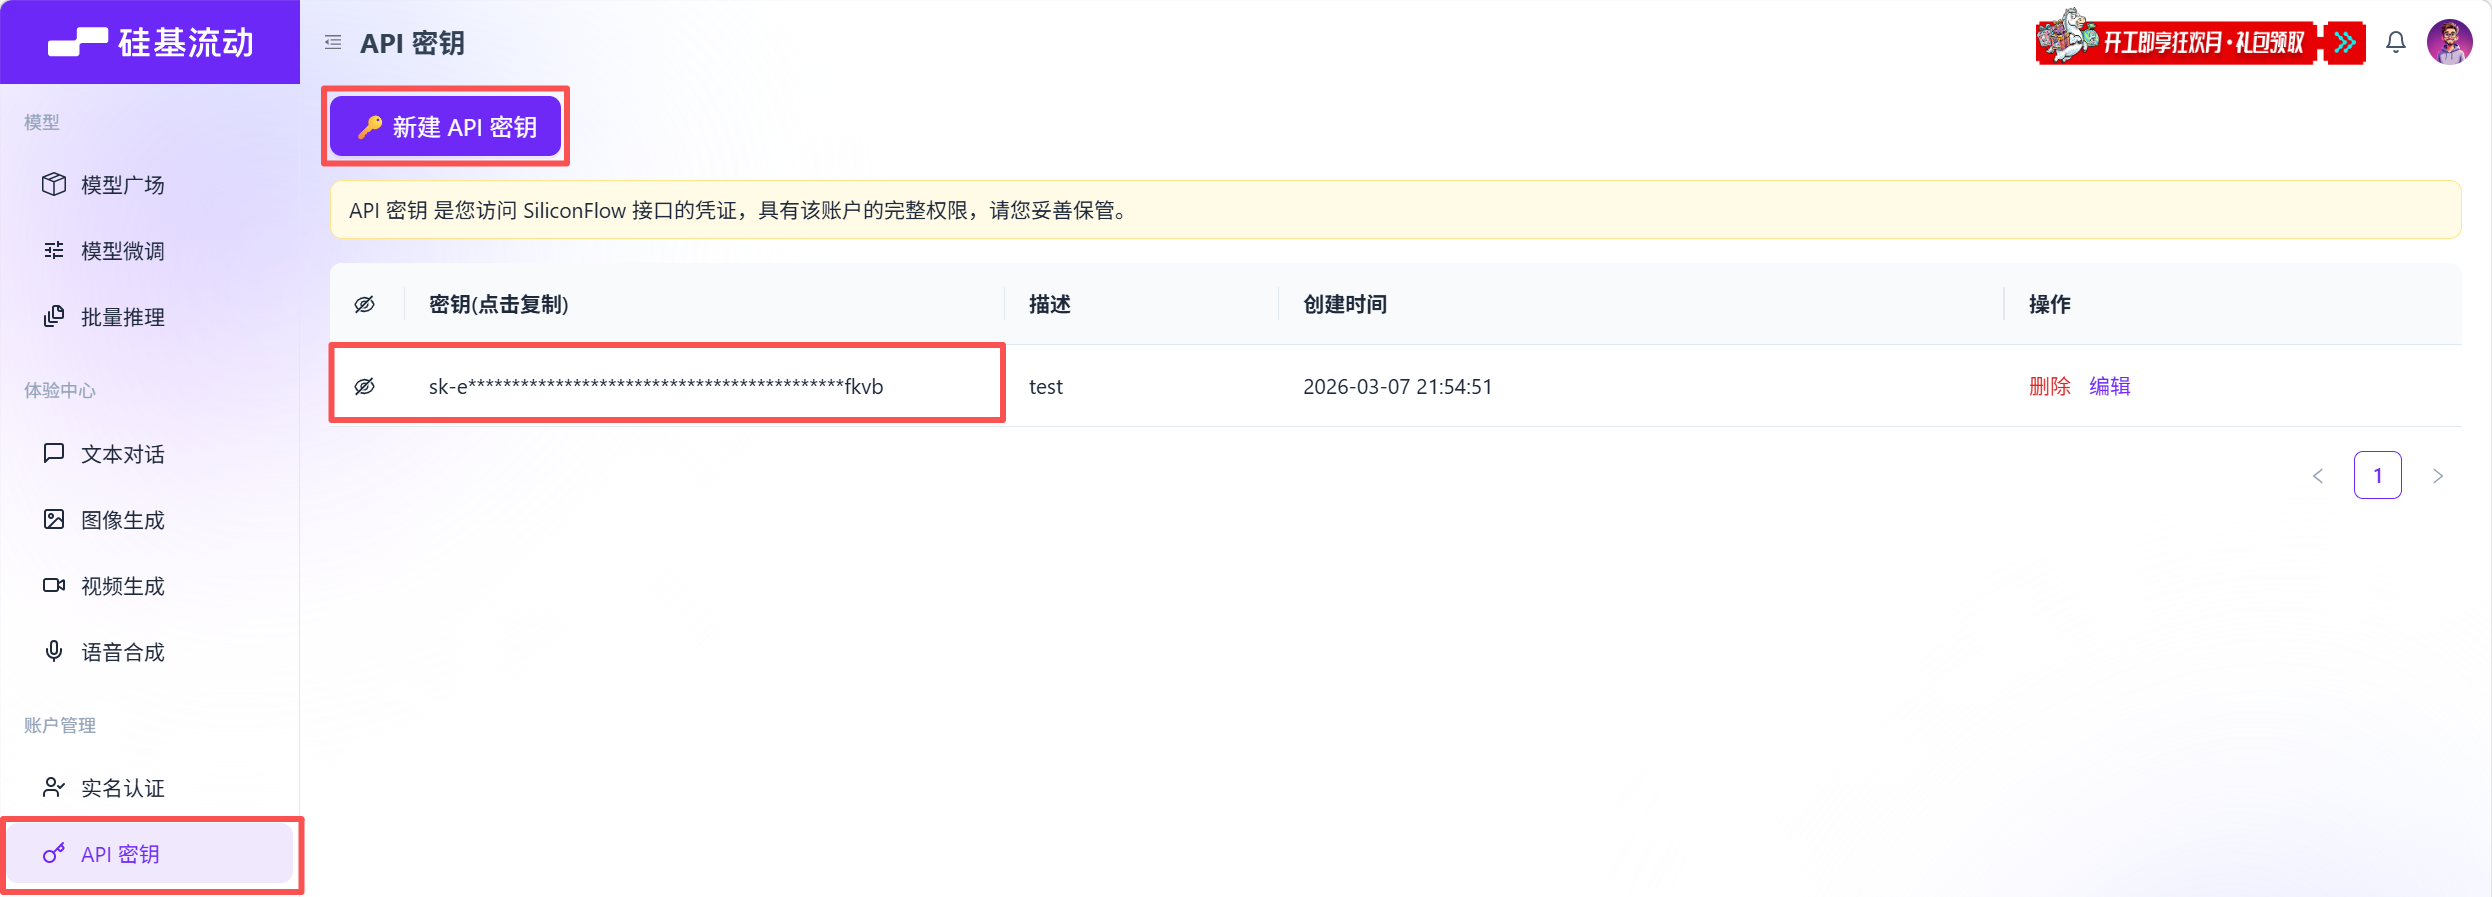
Fill in the QuickStart wizard:
◇  API Base URL
│  https://api.siliconflow.cn/v1

◇  API Key
│  sk-your-key

◇  Model ID
│  deepseek-ai/DeepSeek-V3
Cost reference: With the DeepSeek V3 model, 16 CNY supports approximately 800–1500 conversations.
More providers: OpenClaw supports 15+ model providers (DeepSeek, Qwen, Kimi, GLM, OpenAI, Claude, etc.). For the full list and where to obtain them, see Appendix E: Model Provider Selection Guide.
Want to understand the configuration file structure? The wizard generates the configuration file automatically — manual editing is rarely needed. For an explanation of each field, see Appendix G: Configuration File Reference.
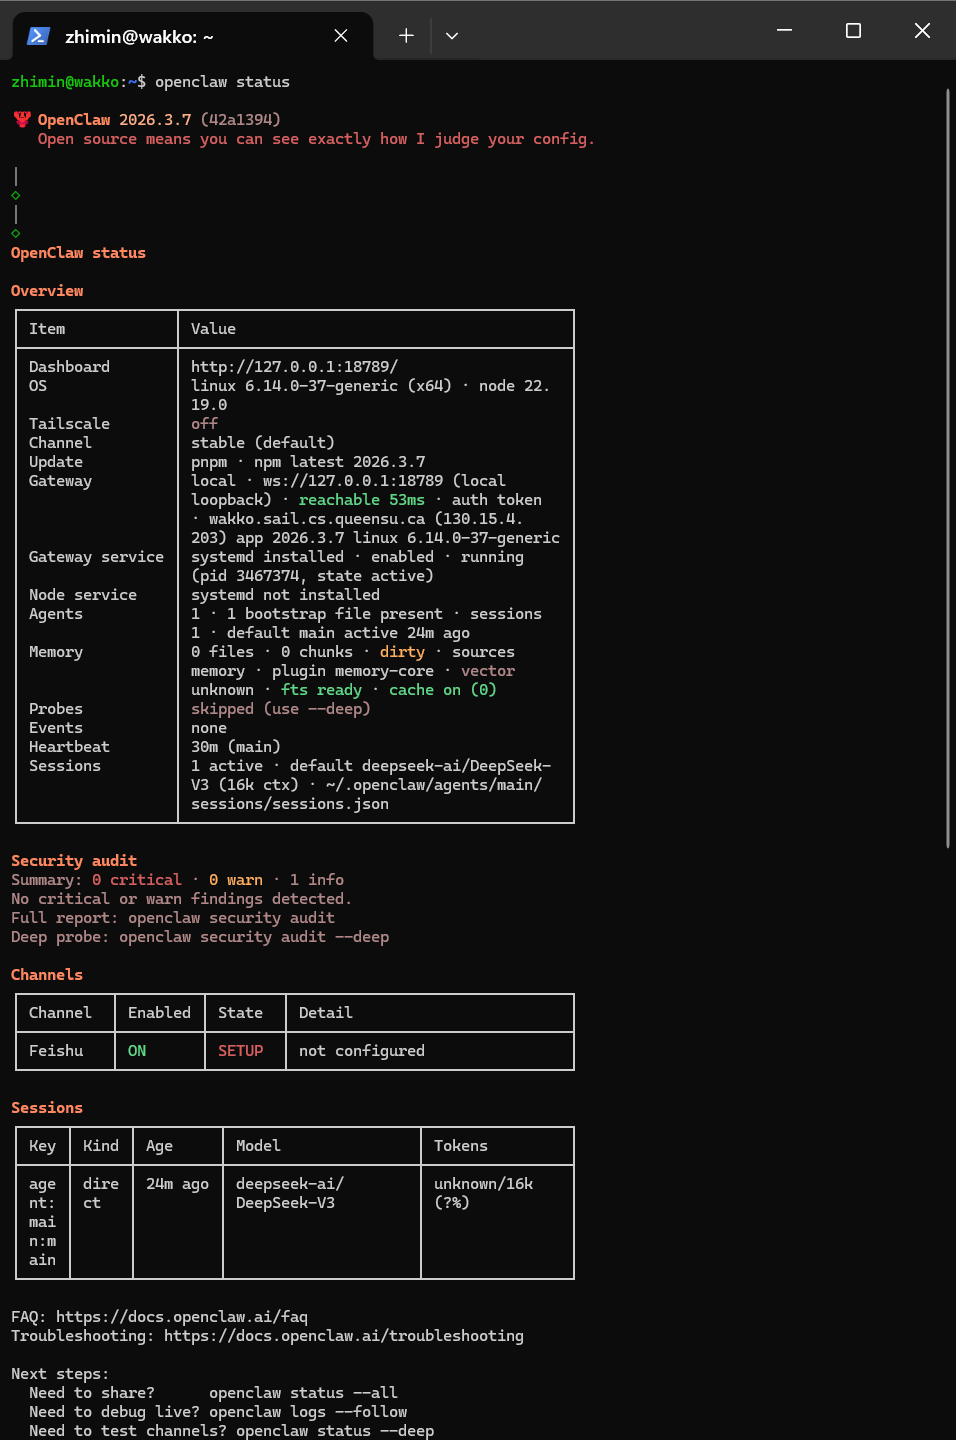
3. Verify and Start Your First Conversation
After installation and configuration, verify that everything is running:
openclaw statusView status output screenshot
Once everything looks good, start your first conversation:
openclaw tuiTry typing: Hello, please introduce yourself — if the lobster replies, congratulations, the installation was successful!
Open the web dashboard to visually manage your lobster:
openclaw dashboardThe browser will automatically open the dashboard at http://localhost:18789:
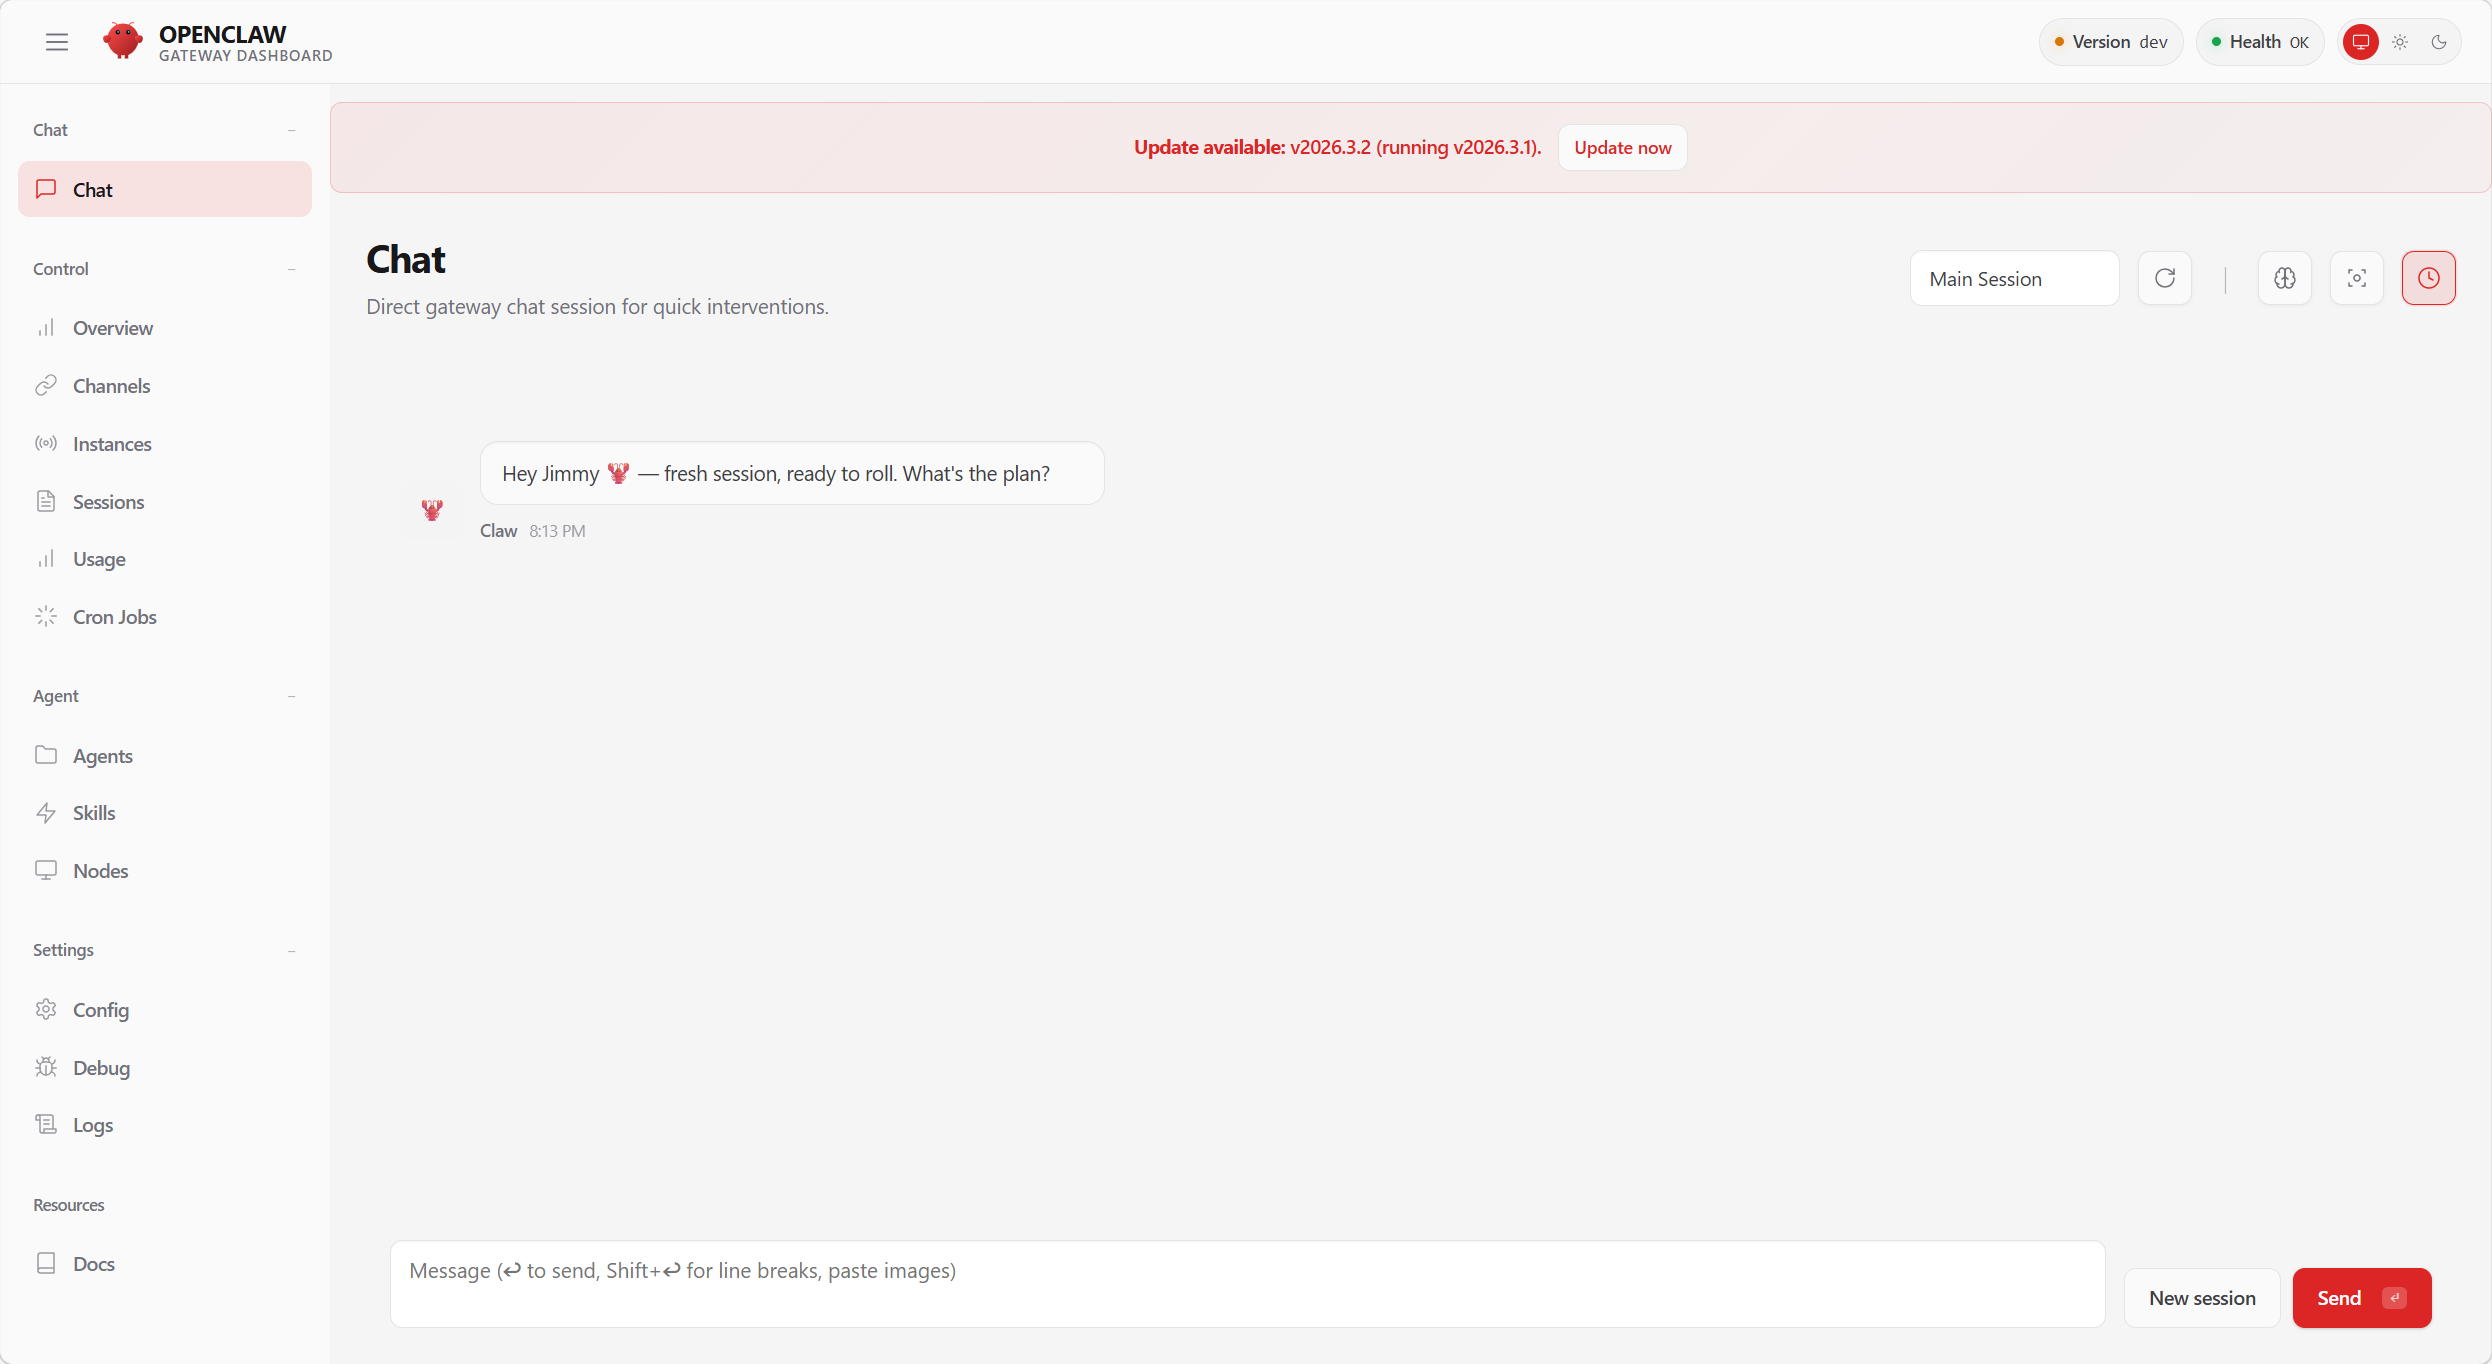
What is localhost?
localhostmeans "this machine" — this page can only be opened by you.
For more commands, see Appendix F: Command Quick Reference.
4. Frequently Asked Questions
Q: Running openclaw on Windows gives "command not found"?
A: PowerShell blocks script execution by default. Run as administrator:
Set-ExecutionPolicy -ExecutionPolicy RemoteSigned -Scope CurrentUserThen reopen the terminal. If it still does not work, try reinstalling using the one-click installation script.
Q: What do I do if I get "API key not found"?
A: Re-run the configuration wizard: openclaw onboard, and re-enter your API Key when prompted. You can also check that your environment variables are set correctly (e.g. OPENROUTER_API_KEY). Refer to the configuration example in Step 2.
Q: The bot replies slowly or times out?
A: The model may be responding slowly. Try switching to a faster model (such as deepseek-ai/DeepSeek-V3), or check your network connection.
Q: The installation script downloads slowly or times out?
A: This is likely a network issue. Try using a proxy, or retry a few times. If the download consistently fails, you can manually visit https://openclaw.ai/install.sh (or .ps1), save it locally, and then run it.
5. Upgrading and Maintenance
Upgrading requires just one command — simply re-run the installation script:
curl -fsSL https://openclaw.ai/install.sh | bashThe script automatically detects the existing installation and upgrades it in place. After upgrading, run:
openclaw doctor           # Migrate config + health check
openclaw gateway restart  # Restart the gateway
If you encounter issues after upgrading: run
openclaw doctoragain — it will usually tell you directly how to fix the problem. Community help: Discord
Want to know more about upgrade options? (npm/pnpm manual upgrade, channel switching, rollback)
Before Upgrading
Before upgrading, it is recommended to back up your customizations: configuration files, credentials at ~/.openclaw/credentials/, and workspace at ~/.openclaw/workspace/.
Global Install (npm/pnpm)
npm i -g openclaw@latest
# or
pnpm add -g openclaw@latest
Switch update channel:
openclaw update --channel beta    # Preview channel
openclaw update --channel dev     # Development channel
openclaw update --channel stable  # Stable channel (default)
After updating, you must run:
openclaw doctor
openclaw gateway restart
Source Install
openclaw updateOr manually:
git pull
pnpm install
pnpm build
pnpm ui:build
openclaw doctor
Controlling UI Updates
The Dashboard provides an "Update and Restart" function, equivalent to openclaw update (source installs only).
Rolling Back to a Specific Version
# Install a specific version
npm i -g openclaw@<version>
openclaw doctor
openclaw gateway restart
Roll back by date for source installs:
git fetch origin
git checkout "$(git rev-list -n 1 --before=\"2026-01-01\" origin/main)"
pnpm install && pnpm build
openclaw gateway restart
Start / Stop / Restart Gateway
openclaw gateway status    # Check status
openclaw gateway stop      # Stop
openclaw gateway restart   # Restart (apply configuration changes)
openclaw logs --follow     # View logs in real time
Direct system service control on macOS/Linux:
# macOS launchd
launchctl kickstart -k gui/$UID/bot.molt.gateway

# Linux systemd
systemctl --user restart openclaw-gateway.service
What does openclaw doctor do?
- Migrates deprecated configuration keys and legacy configuration file locations
- Audits direct message policies and warns about risky settings
- Checks Gateway health and offers a restart option
- Migrates legacy Gateway services (launchd/systemd) to the current version
6. Uninstalling
Before uninstalling, it is recommended to back up ~/.openclaw/workspace (which contains conversation history and memory files).
openclaw uninstallNeed to uninstall manually, or the CLI has been deleted but the service is still running?
Full manual uninstall:
openclaw gateway stop
openclaw gateway uninstall
rm -rf "${OPENCLAW_STATE_DIR:-$HOME/.openclaw}"
npm rm -g openclaw
# or pnpm remove -g openclaw

# macOS app (if present)
rm -rf /Applications/OpenClaw.app
If you used
--profile, repeat the deletion steps for each~/.openclaw-<profile>.
Manually cleaning up service leftovers:
macOS:
launchctl bootout gui/$UID/bot.molt.gateway
rm -f ~/Library/LaunchAgents/bot.molt.gateway.plist
Linux:
systemctl --user disable --now openclaw-gateway.service
rm -f ~/.config/systemd/user/openclaw-gateway.service
systemctl --user daemon-reload
Windows:
schtasks /Delete /F /TN "OpenClaw Gateway"
Remove-Item -Force "$env:USERPROFILE\.openclaw\gateway.cmd"
7. Migrating to a New Machine
Switching computers? Here's how to move your lobster over completely.
The core approach is: copy the state directory + workspace → install → doctor → restart. No need to redo the onboarding wizard.
What to migrate:
| Item | Default path | Contents |
|---|---|---|
| State directory | ~/.openclaw/ | Config, credentials, API keys, OAuth tokens, session history, channel state |
| Workspace | ~/.openclaw/workspace/ | MEMORY.md, USER.md, Skills notes, and other agent files |
Copying both = full migration. Copying only the workspace = no sessions or credentials are preserved.
Step 0 — Back up on the old machine:
openclaw gateway stop
cd ~
tar -czf openclaw-state.tgz .openclaw
Step 1 — Install on the new machine:
Install the CLI following Step 1, then copy openclaw-state.tgz to the new machine using scp or an external drive, extract it, and overwrite the newly generated ~/.openclaw/.
Step 2 — Run doctor + restart:
openclaw doctor
openclaw gateway restart
openclaw status
Verification checklist:
- [ ]
openclaw statusshows Gateway is running - [ ] Channels are still connected (WhatsApp does not need to be re-paired)
- [ ] Dashboard shows existing sessions
- [ ] Workspace files are present
Common pitfalls:
- Only copied the config file: Not enough — you must migrate the entire
~/.openclaw/folder (credentials are stored in thecredentials/subdirectory) - Permission issues: Make sure the state directory is owned by the user running the Gateway; do not copy as root
- Backup security:
~/.openclaw/contains sensitive information such as API keys — store it encrypted and do not transfer it over insecure channels