How to Build an iOS App - Native SwiftUI Development
Chapter 1: What an iOS App and iOS App Development Are
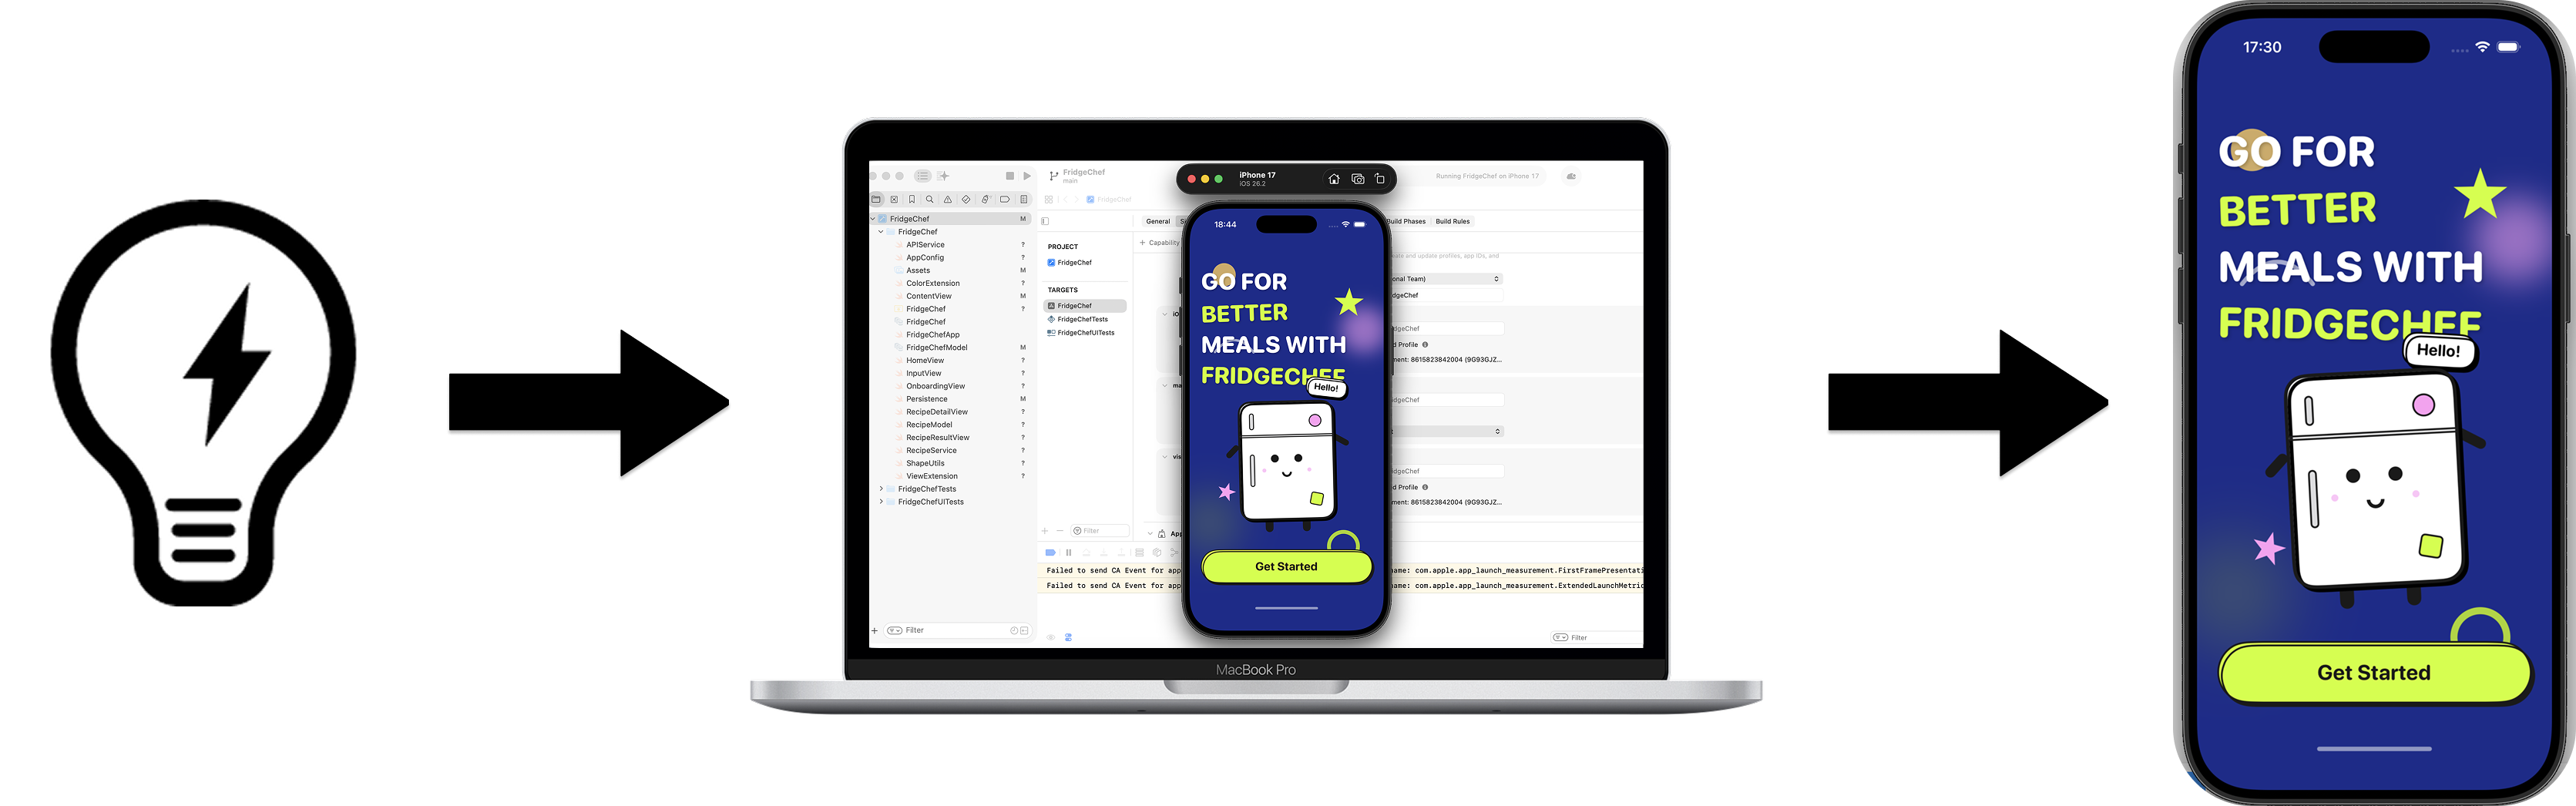
In this tutorial, we will complete a full closed loop: from an idea in your mind to a real iOS app that can be successfully installed and run on an iPhone.
For this tutorial, you should at least have:
- A Mac running a relatively recent macOS
- An iPhone running a relatively recent iOS version, with developer mode enabled
- Xcode successfully installed
- Trae installed and opened
- A usable Apple ID
1.1 iOS App
An iOS App is a native application running on the iPhone operating system. It launches quickly, feels smooth, and can deeply use system features such as notifications, camera, and local storage.
1.2 iOS App Development
At its core, building an iOS App only involves a few things:
- Clarify the problem your app is solving
- Design the interface users can see and operate
- Define how the app behaves under different actions
- Build the app correctly and install it on an iPhone
1.3 Common Ways to Build iOS Apps
In real development, there is more than one way to build an iOS App. We will not go deep here, but only provide an overall understanding.
The first way is Apple's official native approach: create a project in Xcode and use Swift and SwiftUI to build the interface and logic.
The second way is to use cross-platform frameworks, such as React Native and Flutter, and adapt one codebase to multiple platforms.

Based on the approaches above, this tutorial chooses: native SwiftUI development as the foundation, with AI tools doing the majority of the coding work.

1.4 iOS App Development Steps Covered in This Tutorial (High-Level Preview)
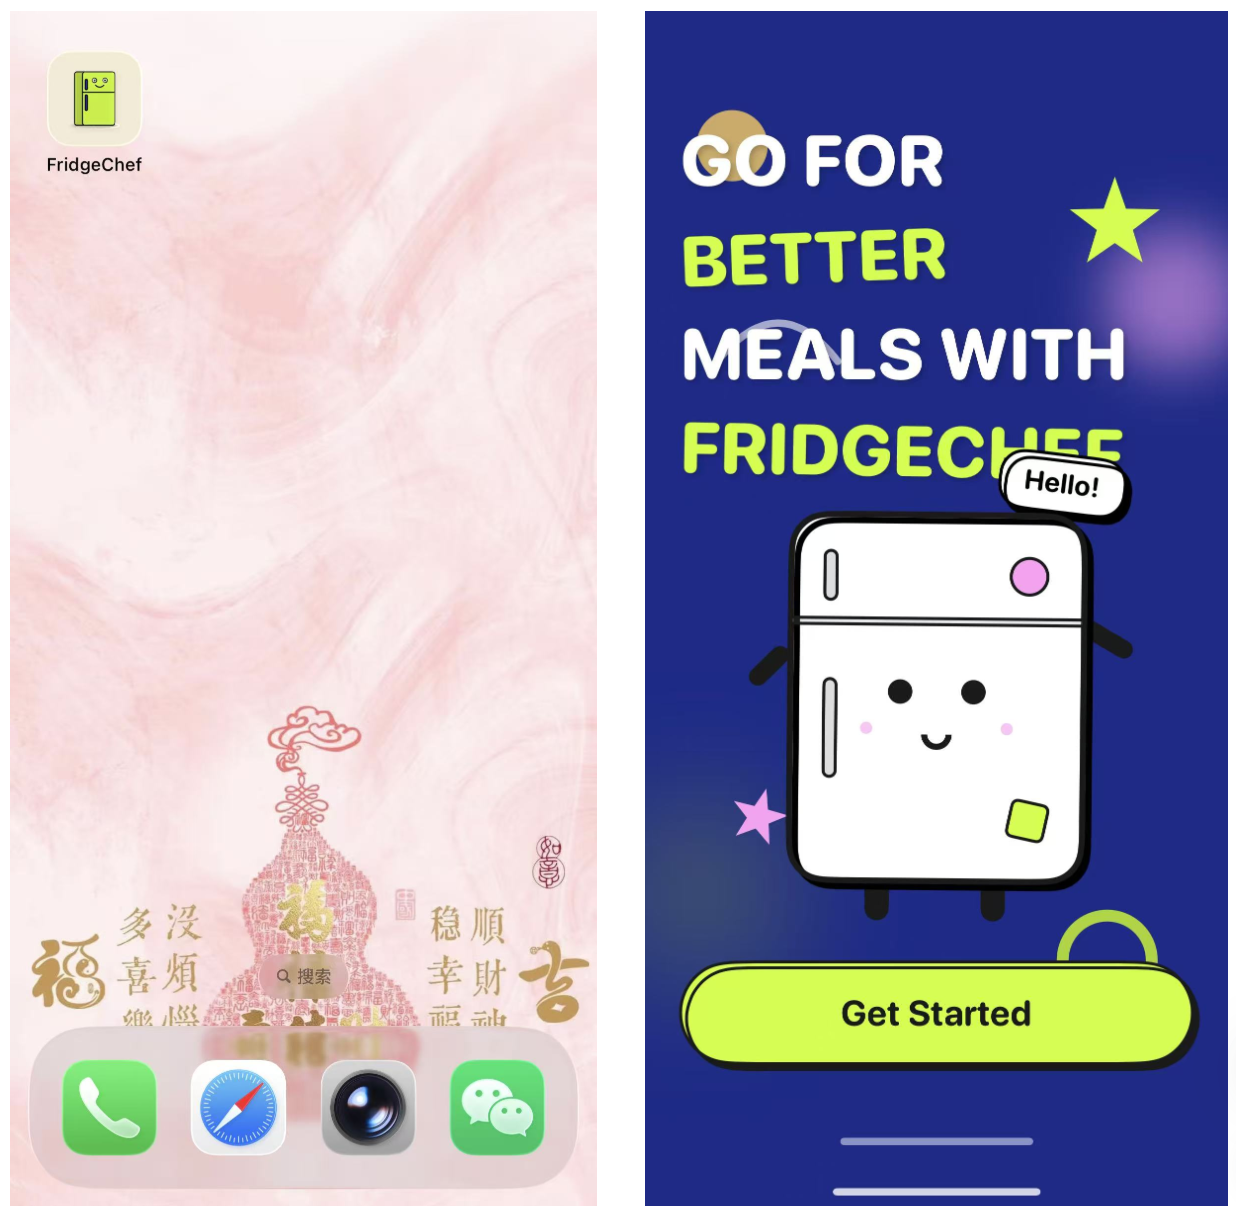
The sample app used in this tutorial is FridgeChef.
The user enters the ingredients currently available in the fridge, and the app uses a real AI API to generate a feasible recipe, then saves the result locally for later review. This example fully covers the core parts of a real iOS application, including UI input and display, network requests, data parsing, local storage, and final installation and running on a real device.
- The overall idea from prototype to native app
In implementation, this tutorial adopts a staged approach. We will first use AI to quickly generate an interface prototype with HTML and CSS, confirm the layout structure and information hierarchy in the browser, and then migrate it into SwiftUI.
- Overall development flow preview
Overall, the following chapters will go through these stages in order:
- Build basic understanding
Understand the shape of an iOS app, common development methods, and what problem this sample app solves. - Complete environment setup
Prepare a Mac and an iPhone, update the systems, install Xcode and Trae, and create a basic iOS project that can run successfully in the simulator. - Enter formal development
Open the project in Trae and gradually generate the UI and basic interaction through conversation with AI, turning the app from an empty shell into something usable. - Debug and organize
When compilation errors appear or behavior does not match expectations, let AI help troubleshoot; when the structure becomes messy, use AI to refactor and simplify it. - Run on a real device
Configure signing, install the app on a real iPhone, and complete one full verification from code to hardware.
Chapter 2: Development Environment Preparation
2.1 Required Devices and Systems
In this practice, two pieces of hardware are irreplaceable: a Mac and an iPhone.
At the same time, both devices should be running a relatively recent official system version.
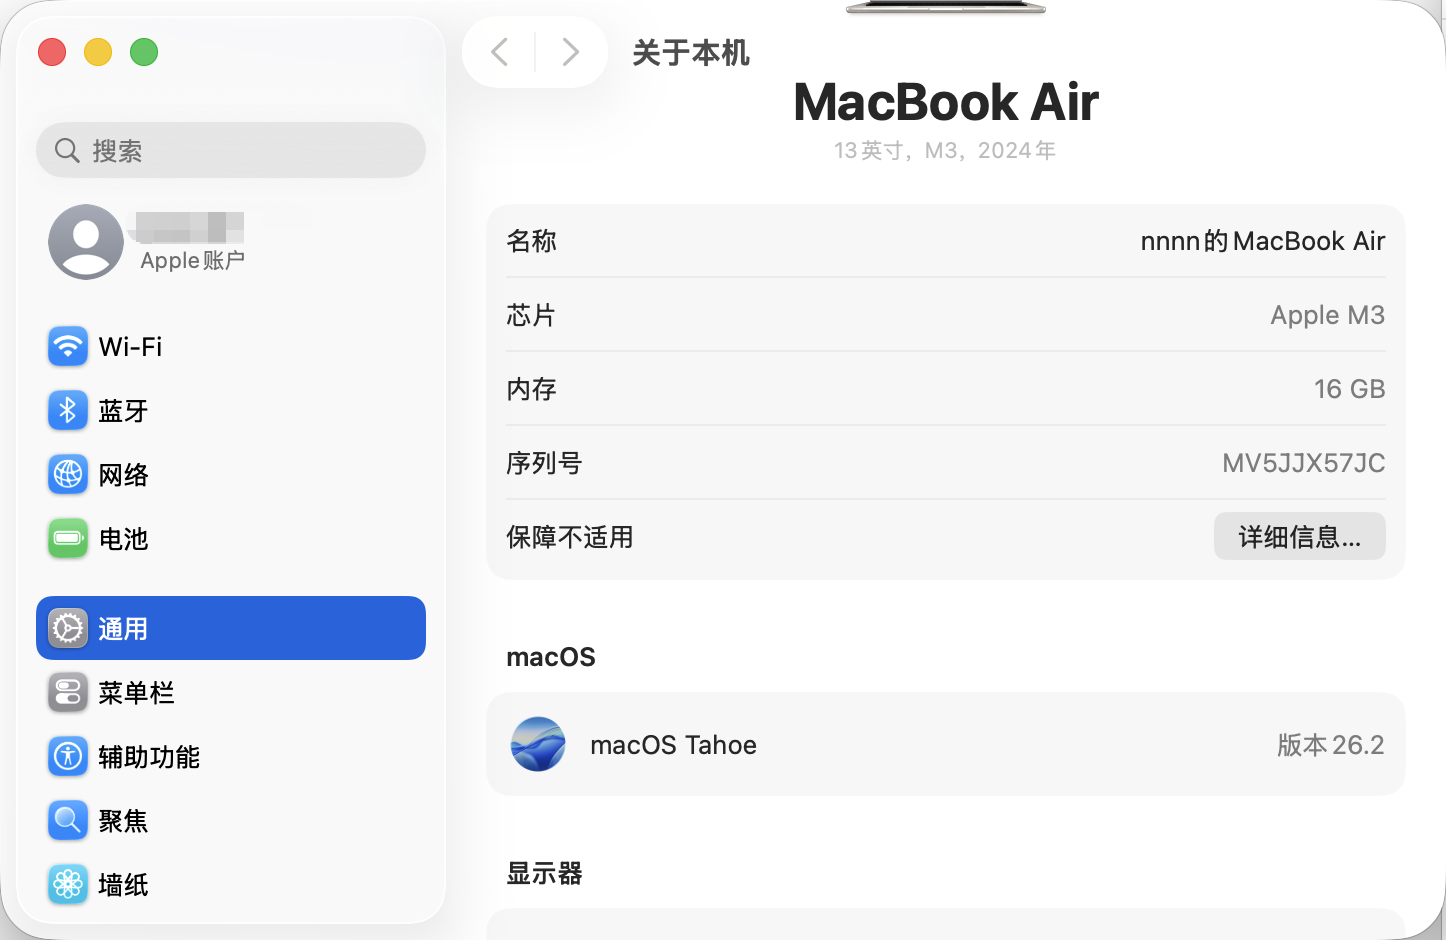
2.1.1 Mac
iOS apps can only be developed and compiled on macOS. This is a hard requirement of Apple's platform.
To ensure Xcode can be installed and used normally, it is recommended that you update macOS to a relatively recent official version first. You can check and update from System Settings -> General -> Software Update.
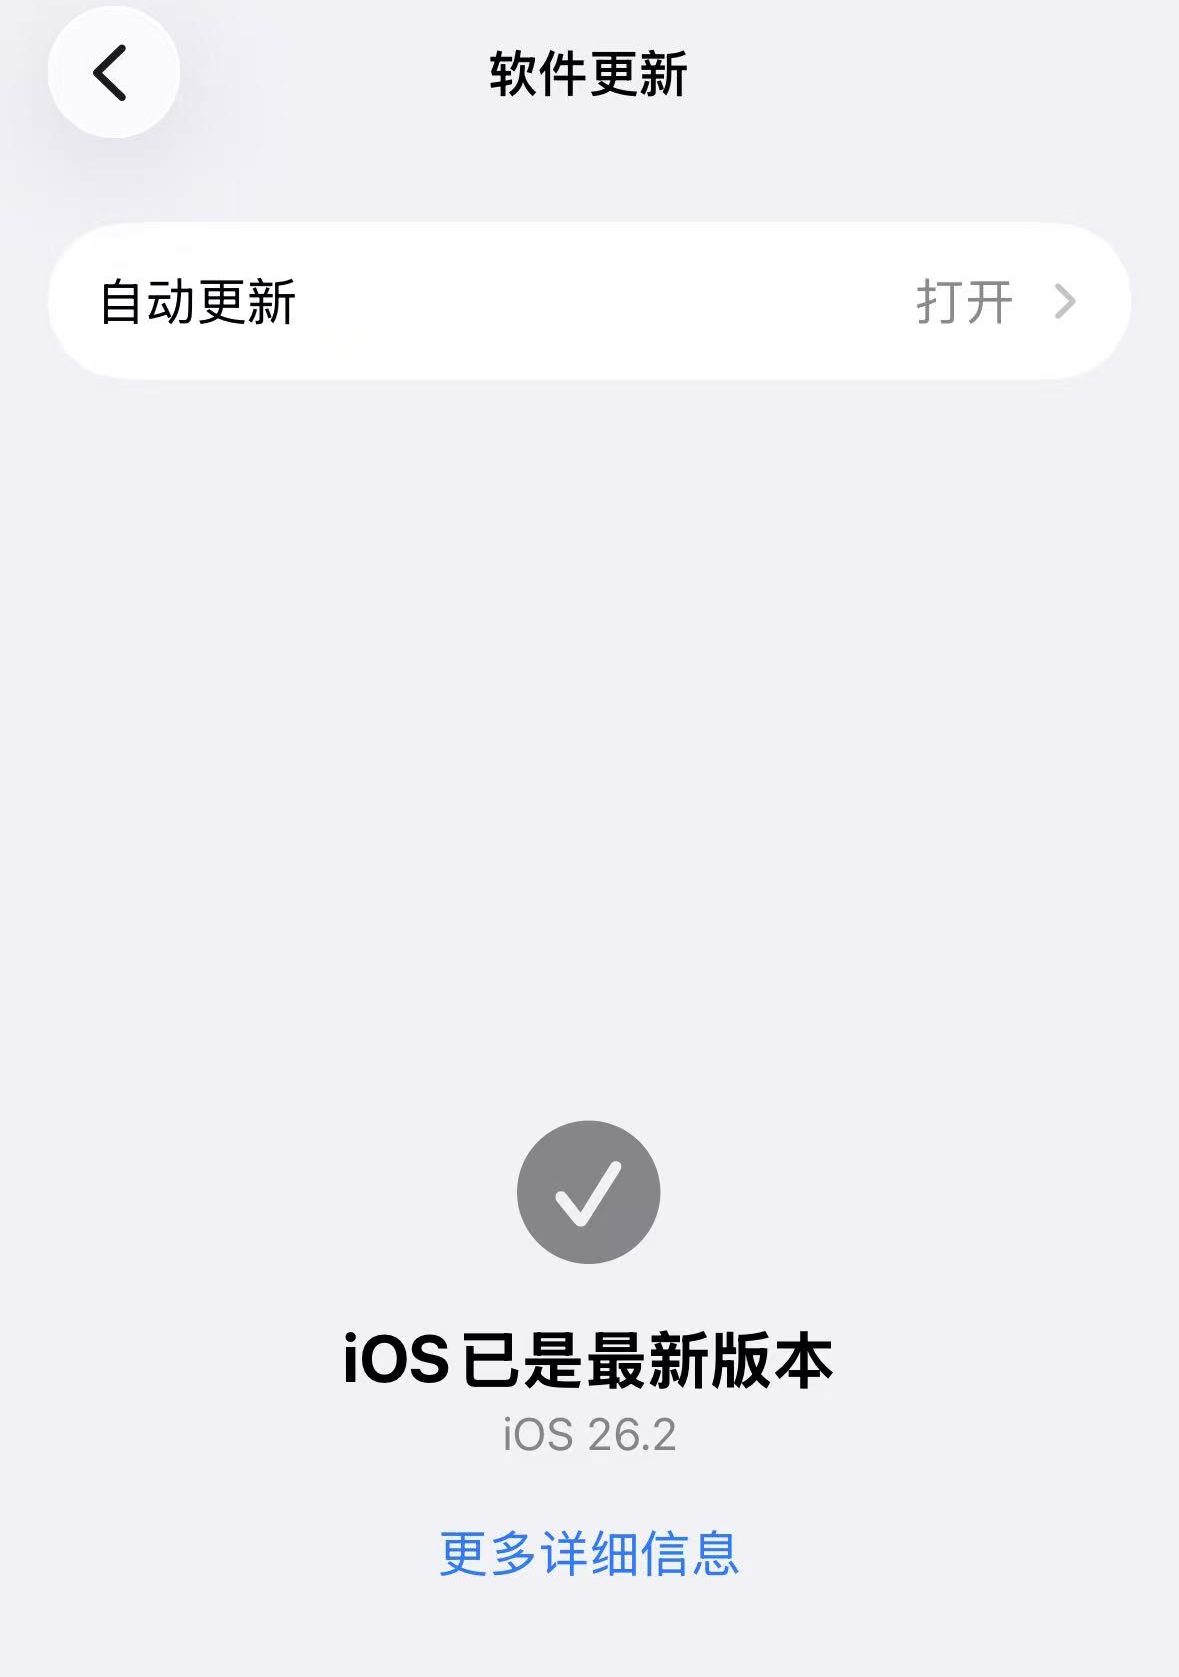
2.1.2 Real iPhone Device
In addition to the Mac, this tutorial also requires a real iPhone for verifying whether the app can be installed and launched correctly.
To keep the debugging process smooth, the iPhone should also run a relatively recent iOS version. You can check and update from Settings -> General -> Software Update.
Later in development, this iPhone will be connected to the Mac by cable for real-device debugging.
2.1.3 Enable Developer Mode on iPhone
To install and run debug apps from Xcode on a real device, you need to enable developer mode on the iPhone.
Steps:
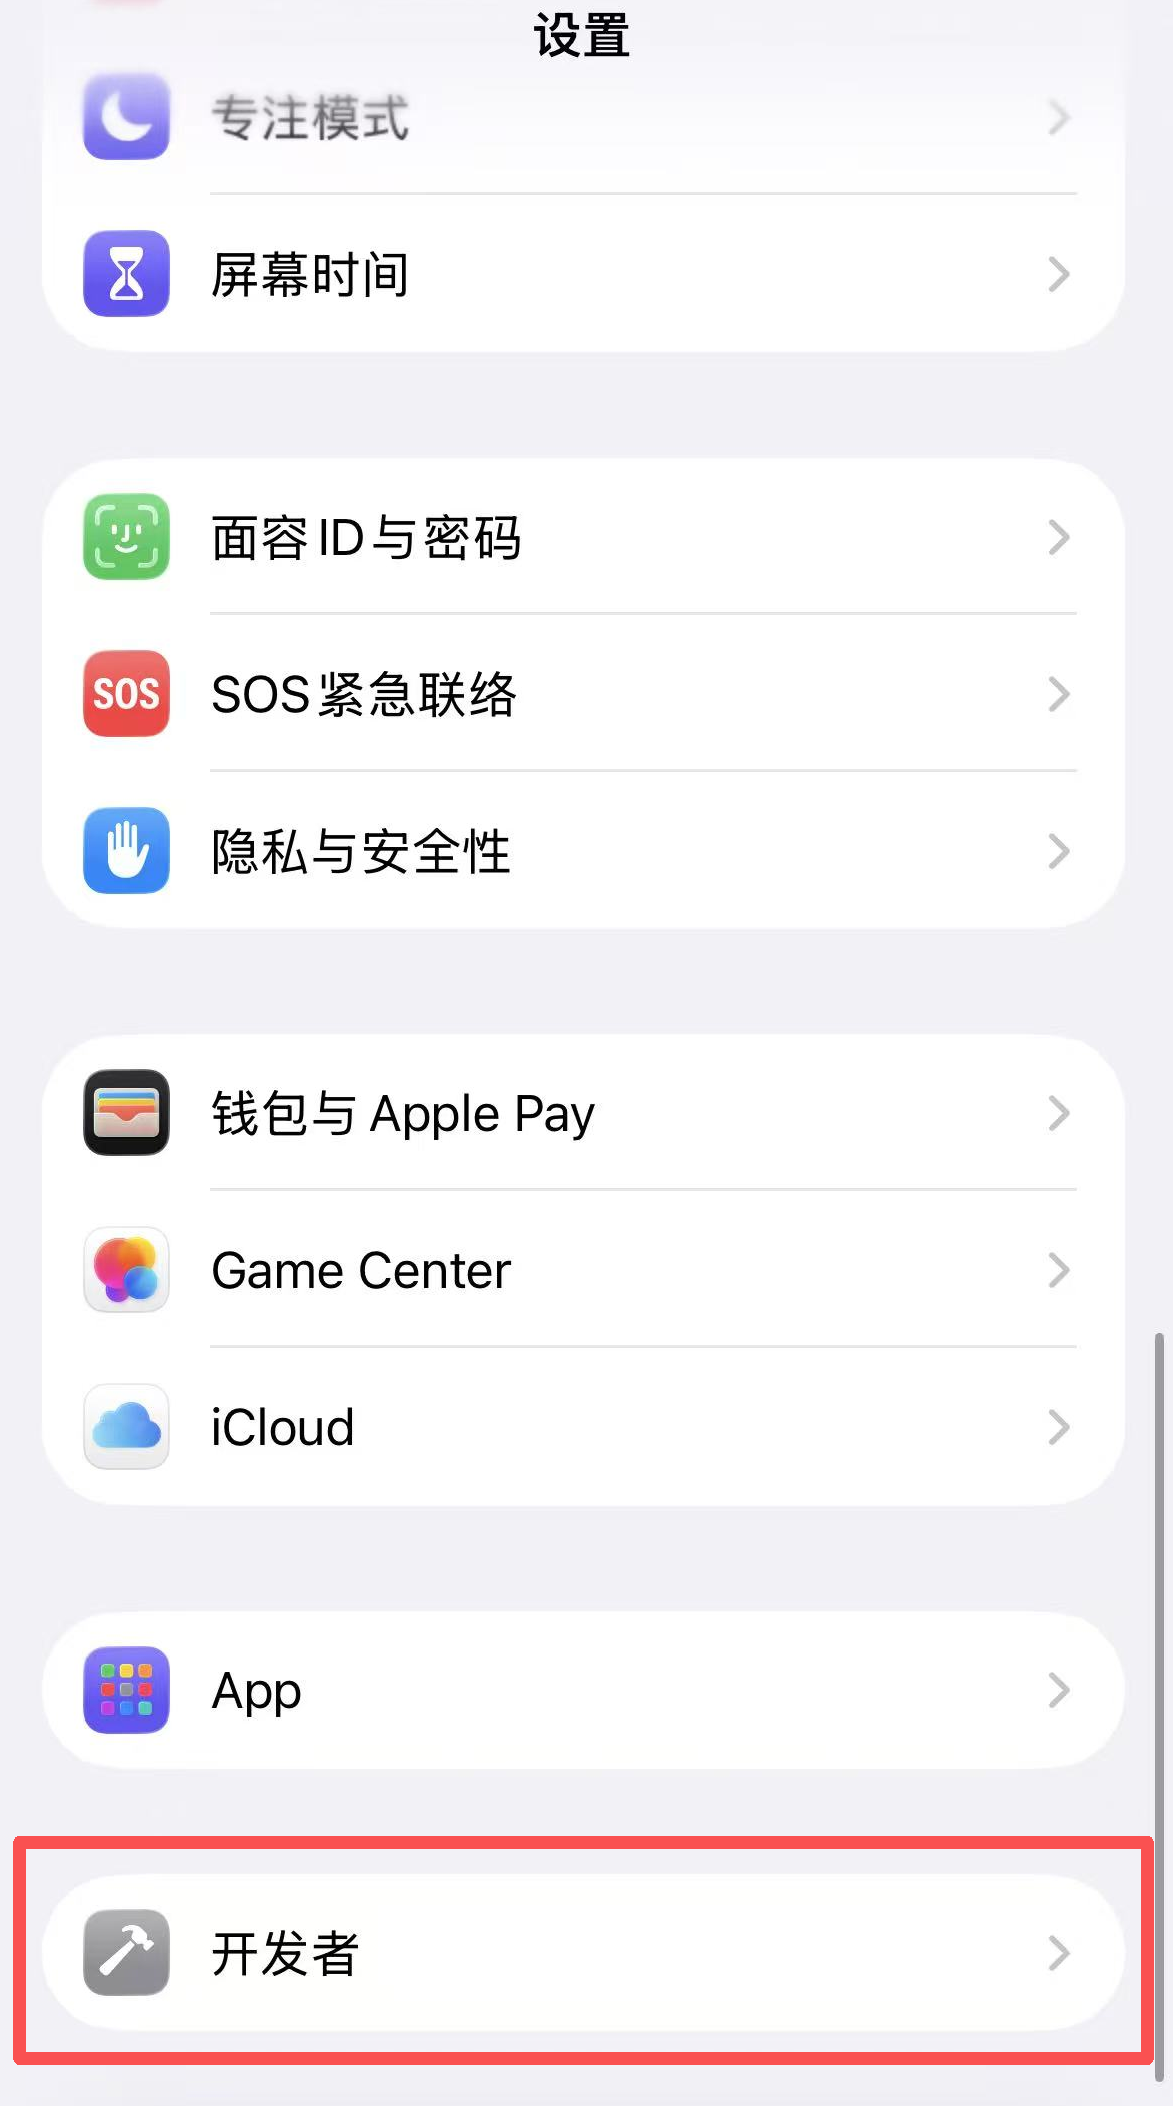
- Open Settings
- Enter Privacy & Security
- Scroll to the bottom and find Developer Mode
- Turn it on, then restart the device as prompted
- After restart, unlock the device and confirm enabling developer mode
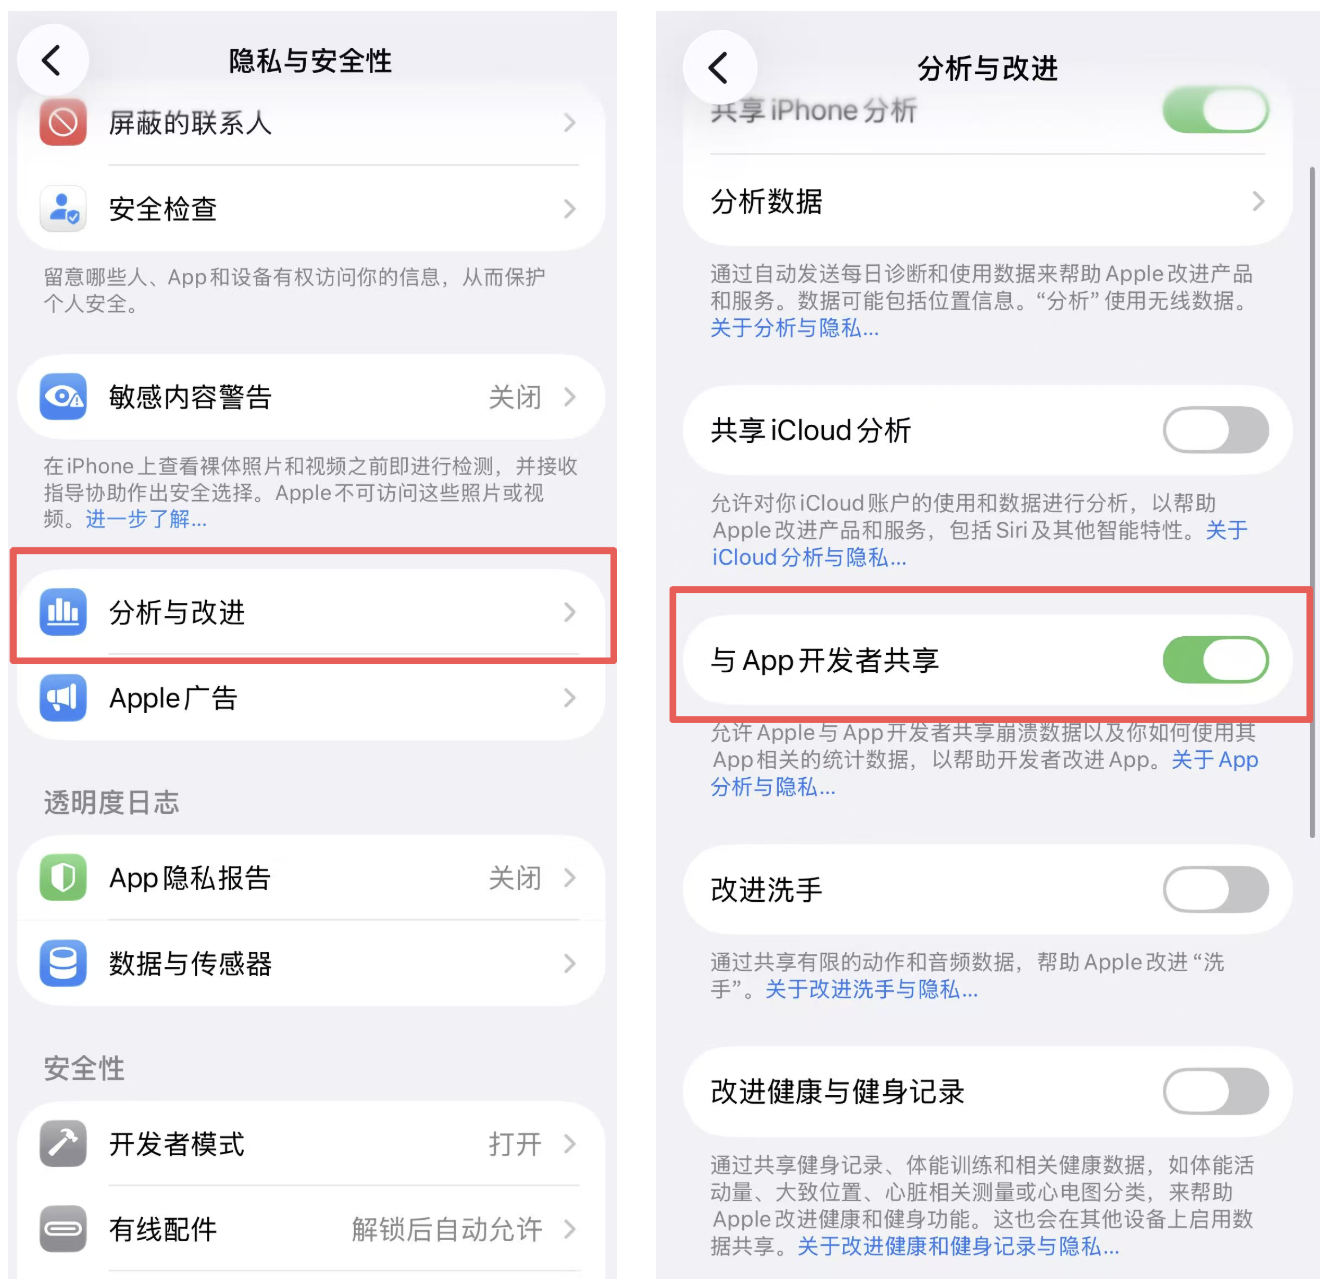
If your iPhone has never been connected to Xcode or other development tools before, you may find that Developer Mode does not appear under Privacy & Security. This is not a system issue - it simply means developer mode has not yet been triggered.
In that case, you can make it appear by following these steps:
- Open Settings -> Privacy & Security -> Analytics & Improvements
- Turn on Share With App Developers
- Go back one level, enter Privacy & Security again, and scroll to the bottom
- You should now see Developer Mode, then enable it and restart the device
After completing the above steps, developer mode only needs to be enabled once. Future real-device debugging with Xcode will not require repeating this configuration.
2.2 Required Software
After devices and systems are ready, you still need to install the software used for development. This tutorial only uses two categories of tools: the official iOS development tool and the AI-assisted development tool.
2.2.1 Xcode
Xcode is Apple's official development tool for iOS. In this tutorial, it is mainly used to create iOS projects, compile Swift / SwiftUI code, and run the app on the simulator or a real device.
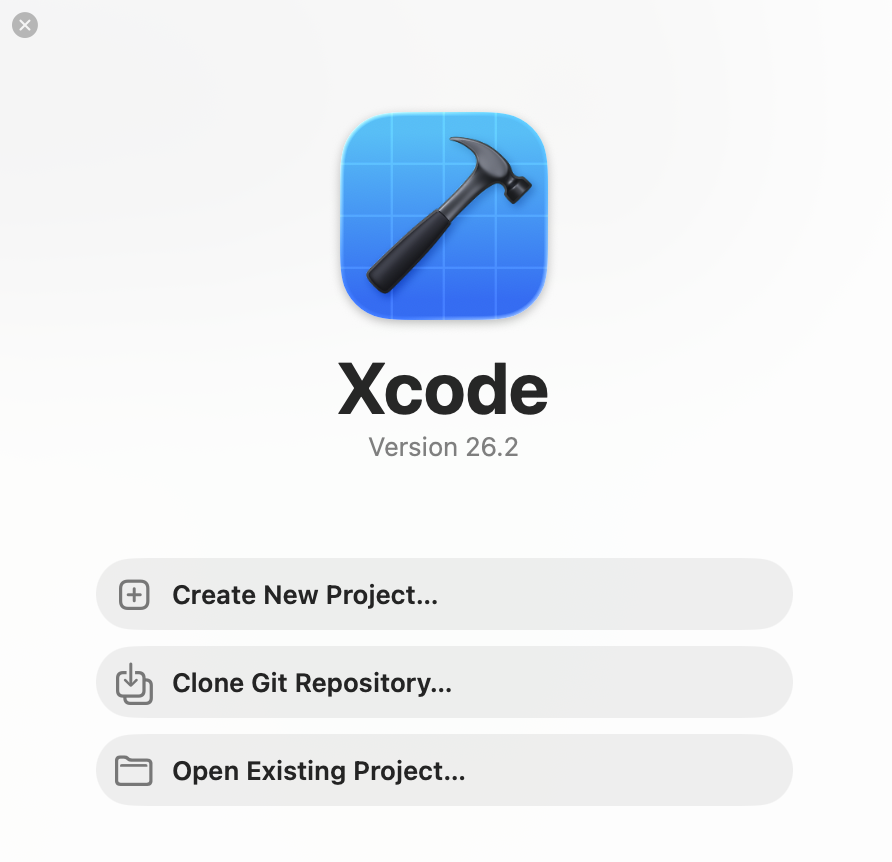
Xcode can be found and installed directly from the App Store. After installation, when you open it for the first time, you will see the welcome screen. Later project creation starts from there.
2.2.2 Trae
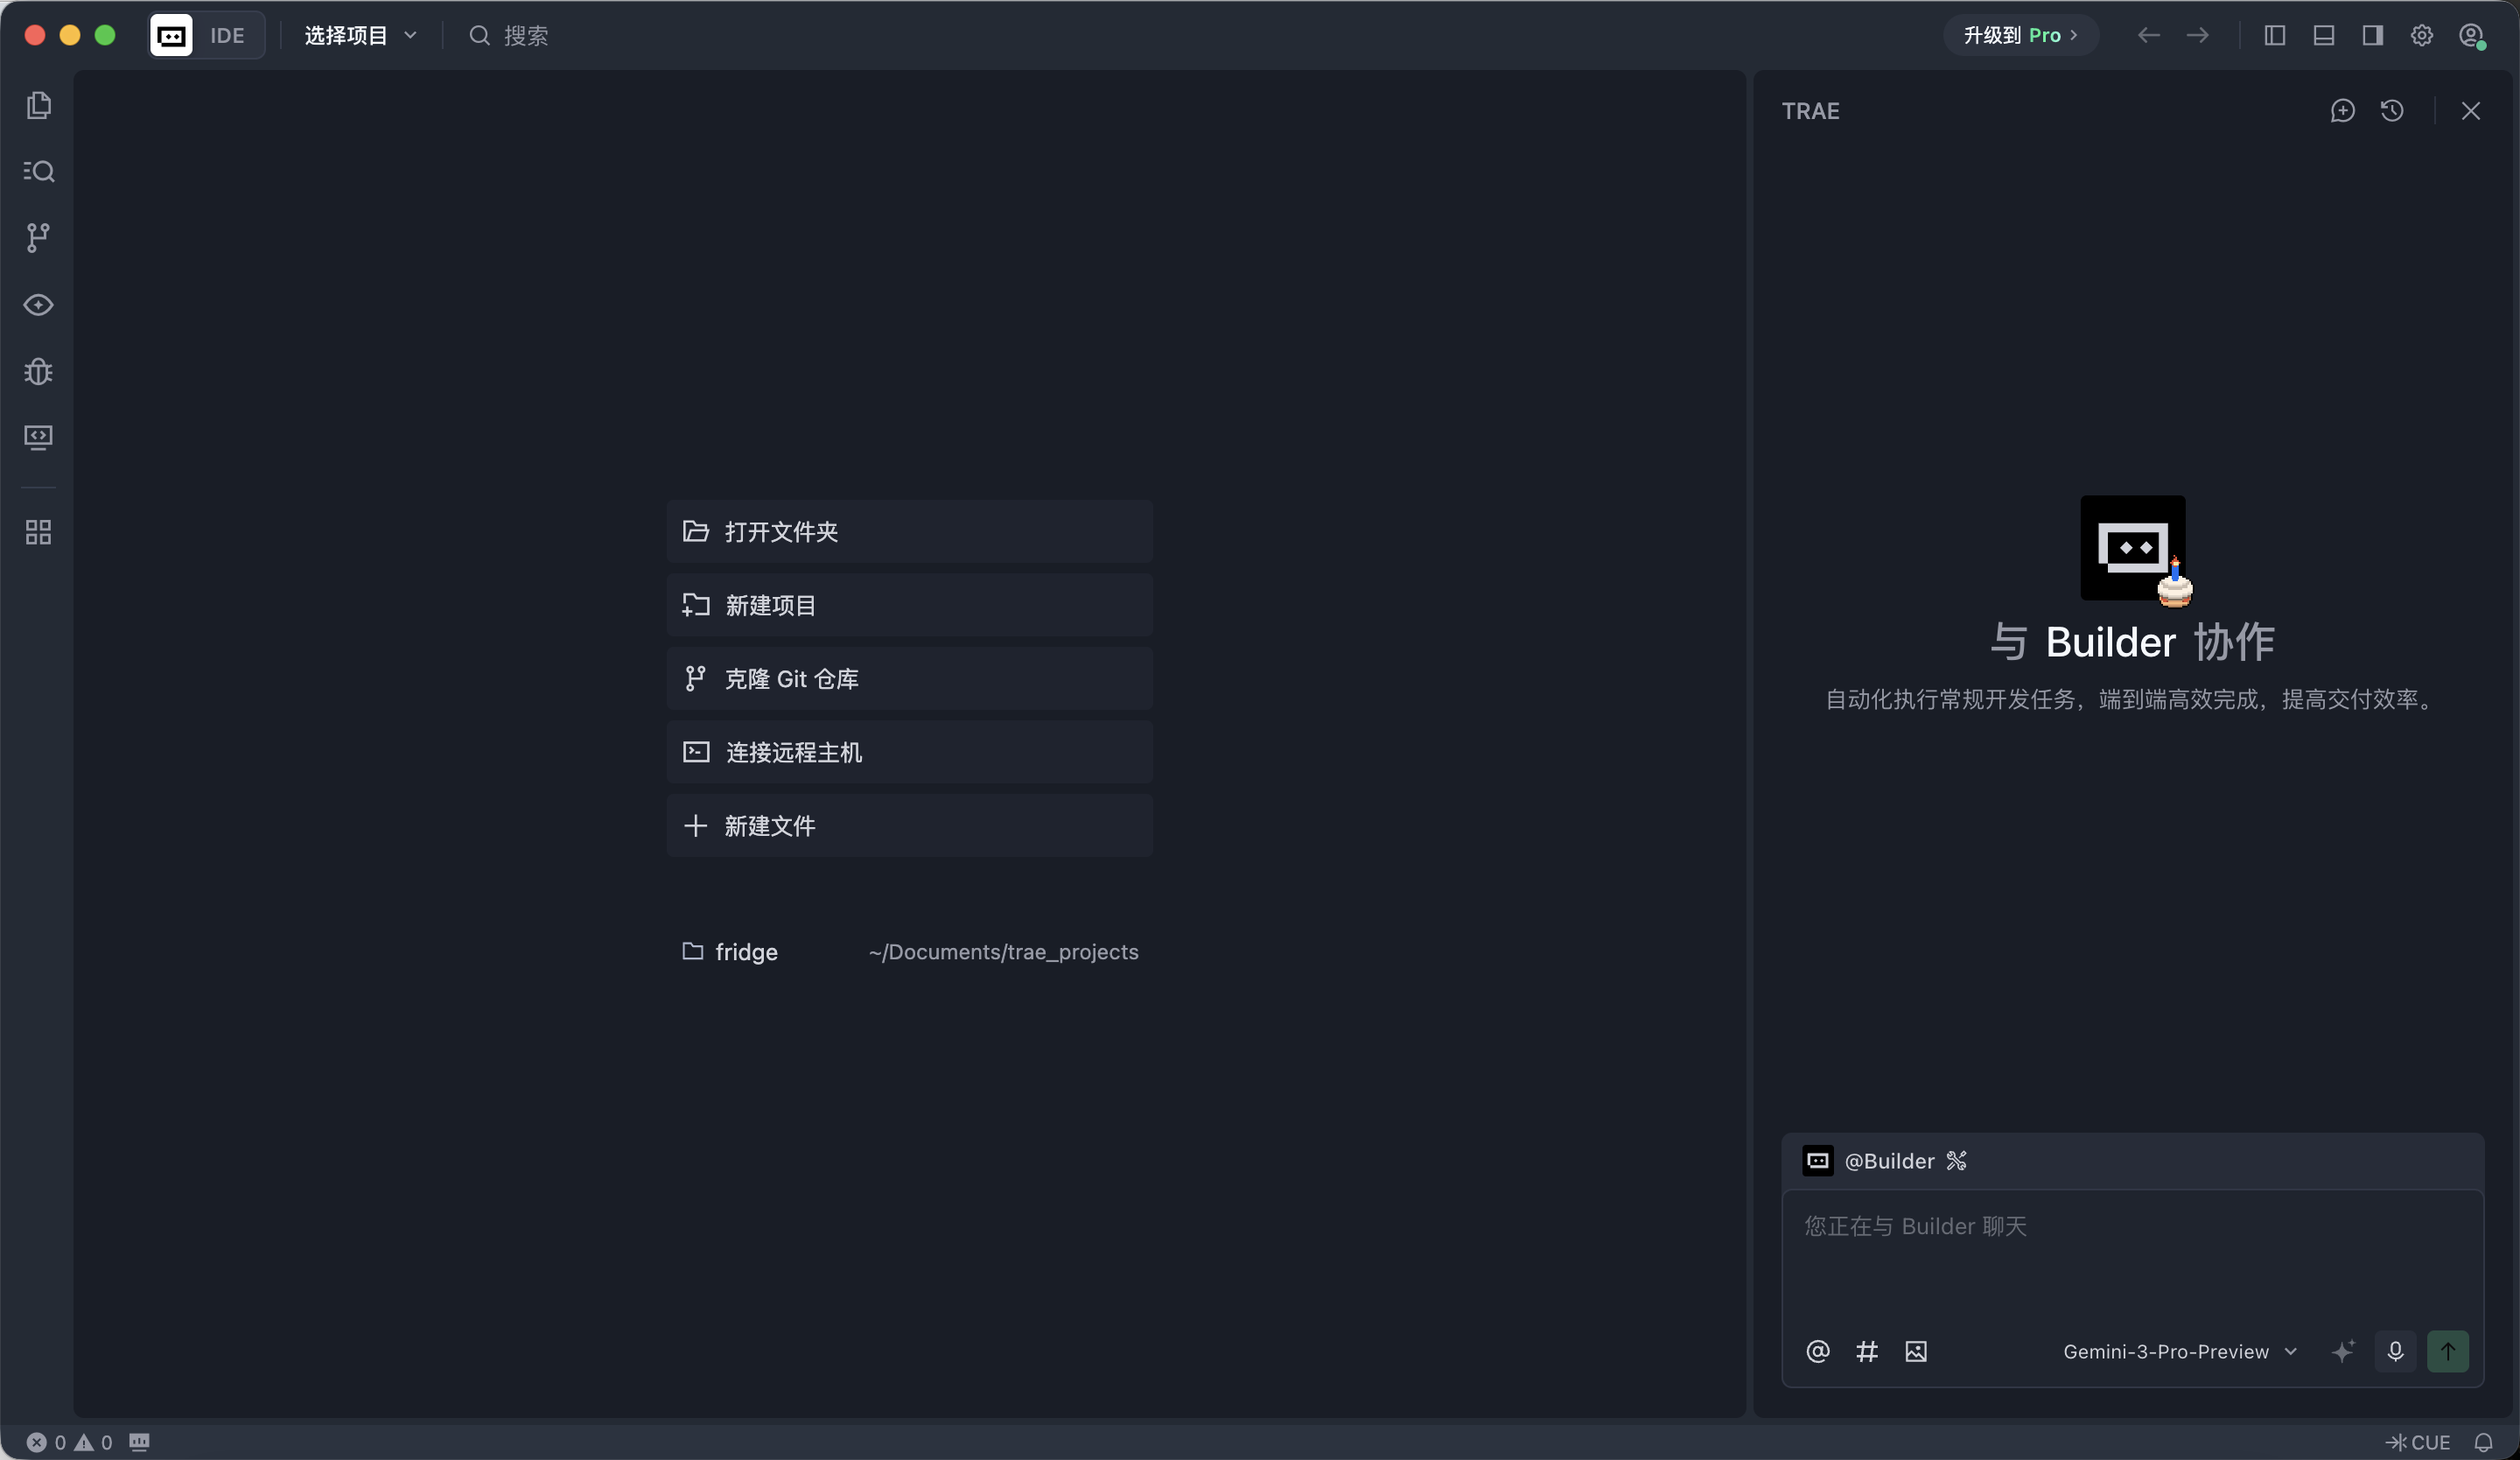
Trae is the main environment where development work is performed in this tutorial. You will place the whole iOS project into Trae and collaborate with AI through dialog to complete development.
2.3 Apple ID and Development Debugging Notes
On the iOS platform, in order for an app to be installed on a real device, it must go through developer signing. This tutorial does not require you to pay for Apple Developer Program membership. A personal Apple ID is enough.
2.4 Checklist Before Moving On
Before entering the next chapter, you can compare your current state with the checklist below.
You should now already have:
- A Mac running a relatively recent macOS
- An iPhone running a relatively recent iOS version with developer mode enabled
- Xcode successfully installed
- Trae installed and opened
- A usable Apple ID
If all of these are ready, you can continue and create your first iOS app.
Chapter 3: Create the First iOS Project
3.1 Use Xcode to Create a New Project
Open Xcode. On the welcome screen, choose to create a new project.
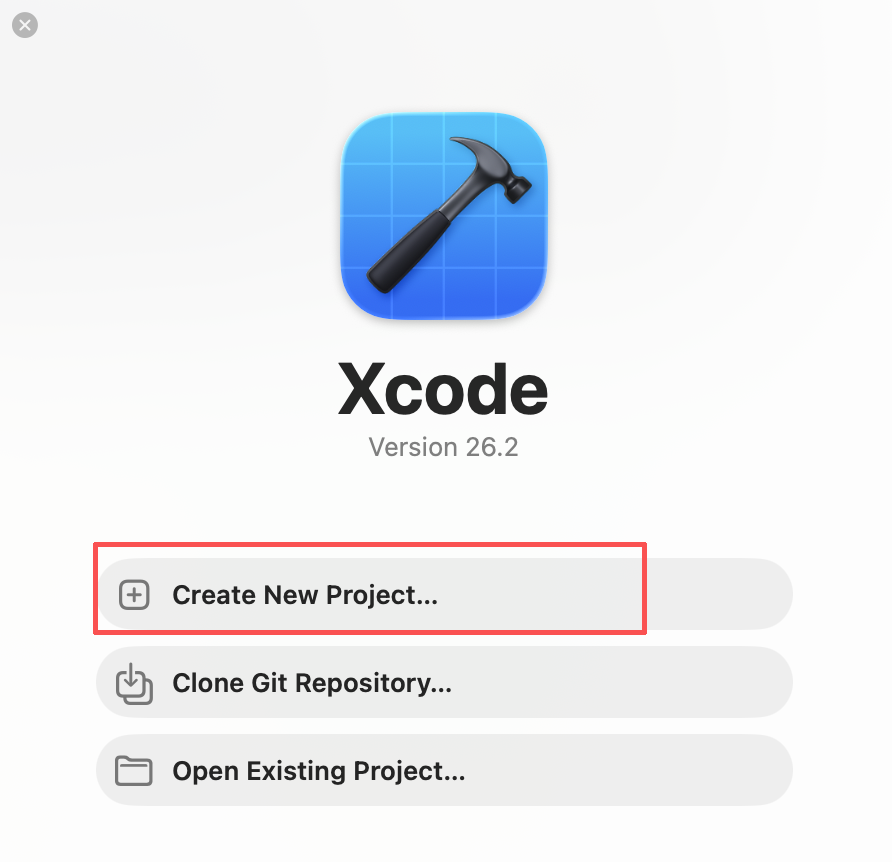
Click Create new project to enter the project template selection screen.
3.2 Choose App Template and Tech Stack
On the template selection screen, use the following configuration:
- Platform: iOS
- Application type: App
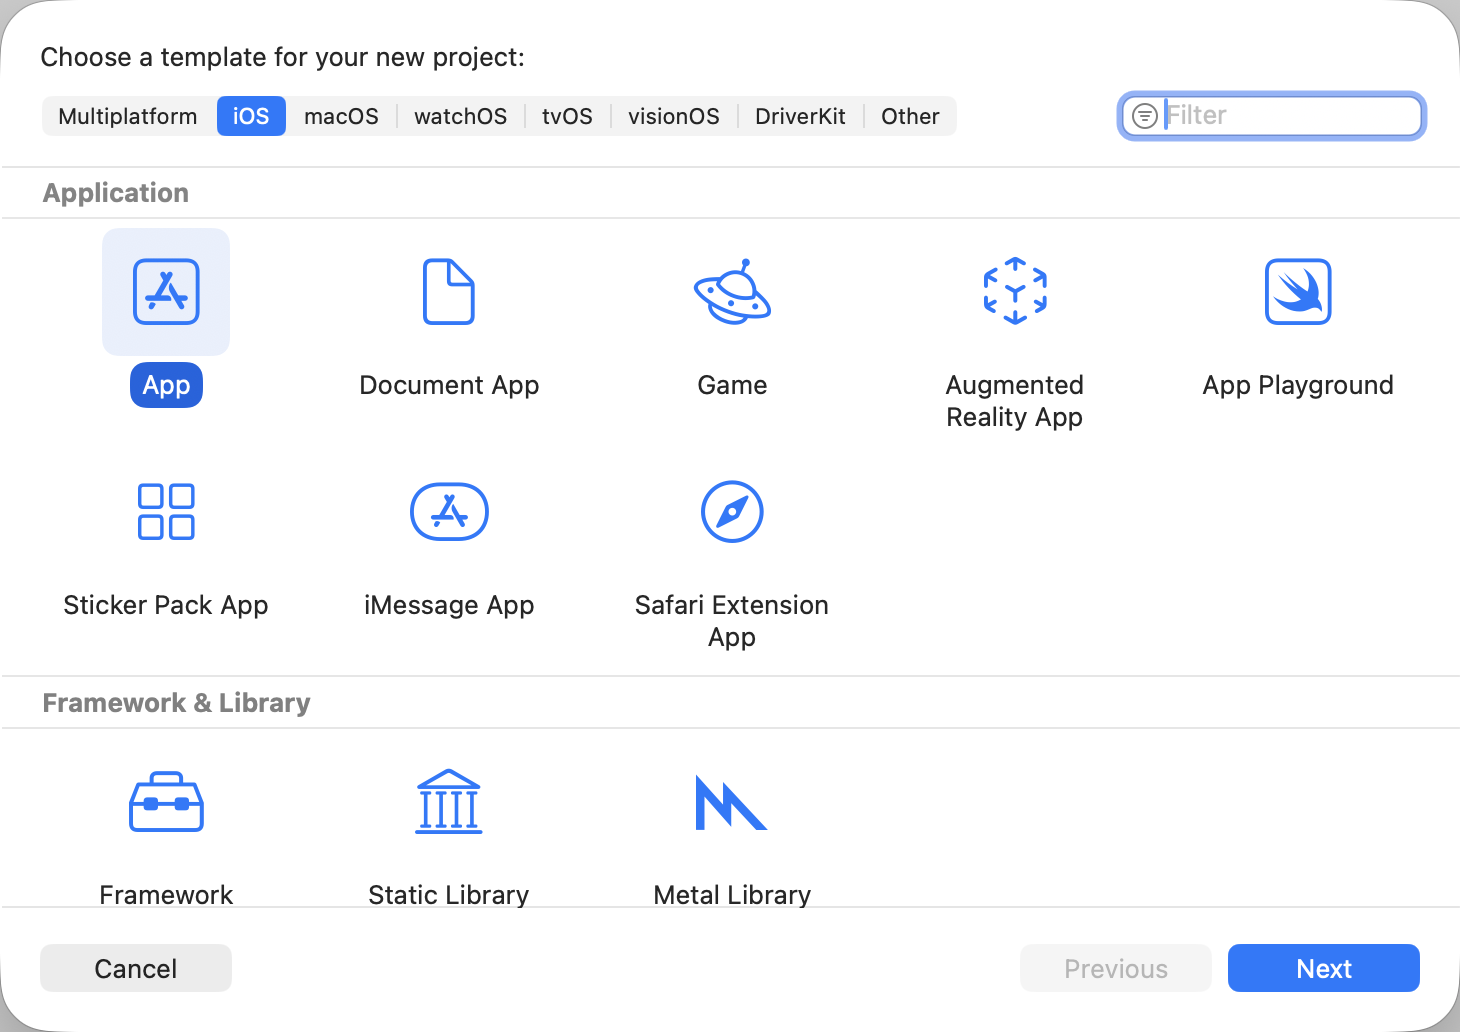
Click Next to enter the project information configuration screen.
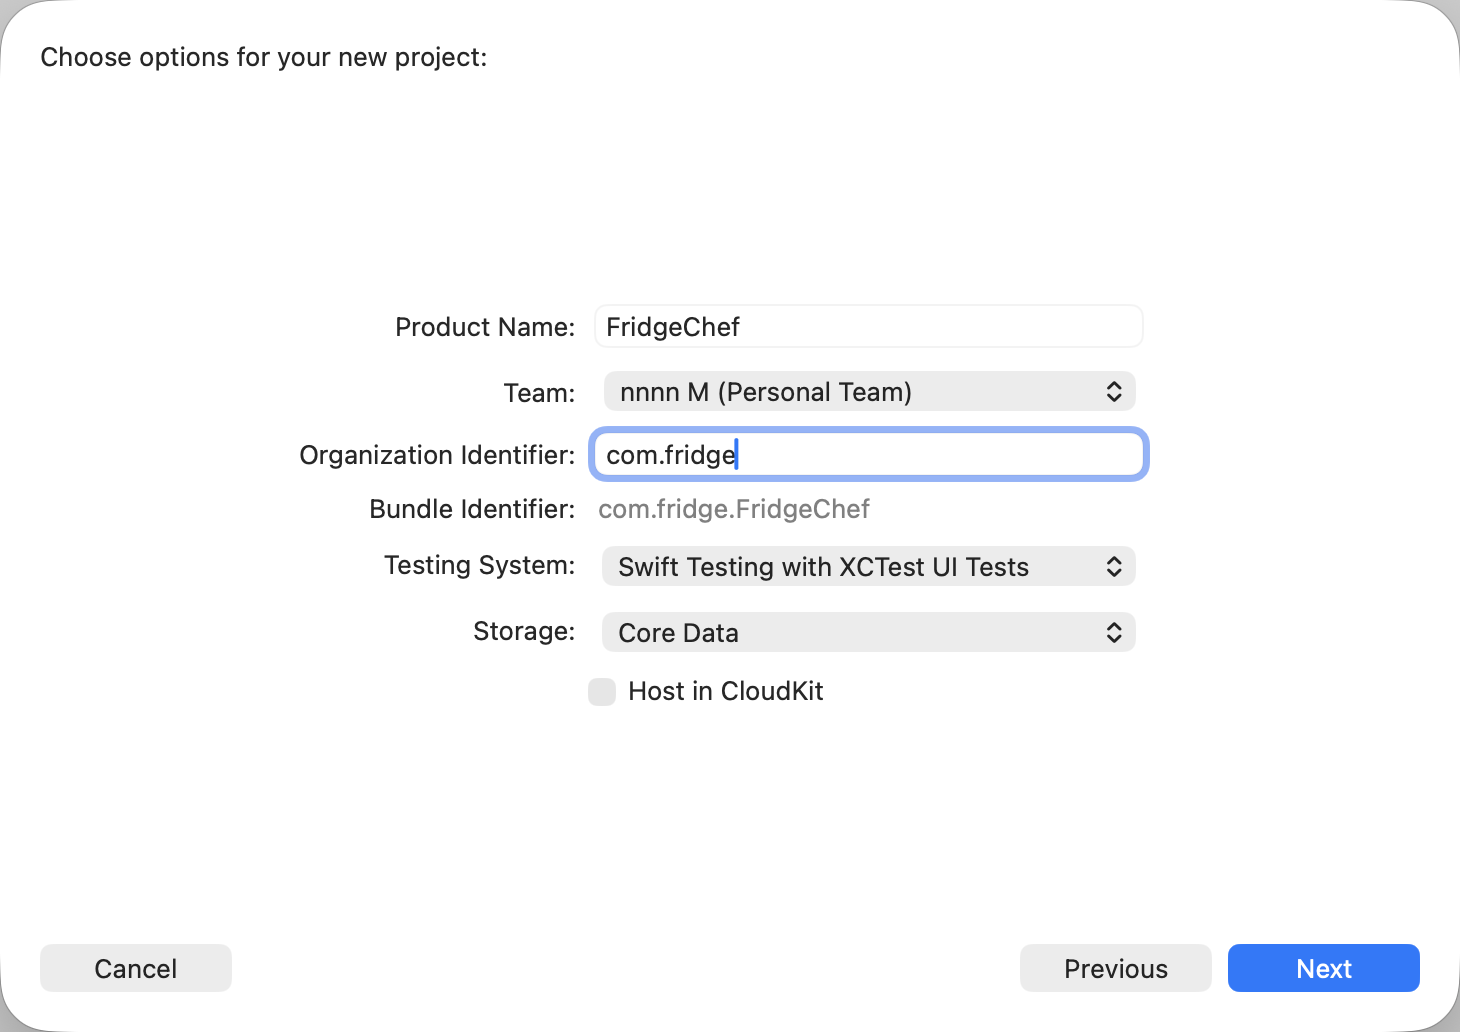
3.3 Configure Project Information
On the project information screen, just fill in the basic settings:
- Product Name: app name (for example
FridgeChef) - Team: choose your personal Apple ID
- Organization Identifier: reverse-domain format (for example
com.example) - Bundle Identifier: generated automatically, keep default
- Testing System: Swift Testing with XCTest UI Tests
- Storage: choose Core Data (for later saving recipe history)
- Leave the other options at default
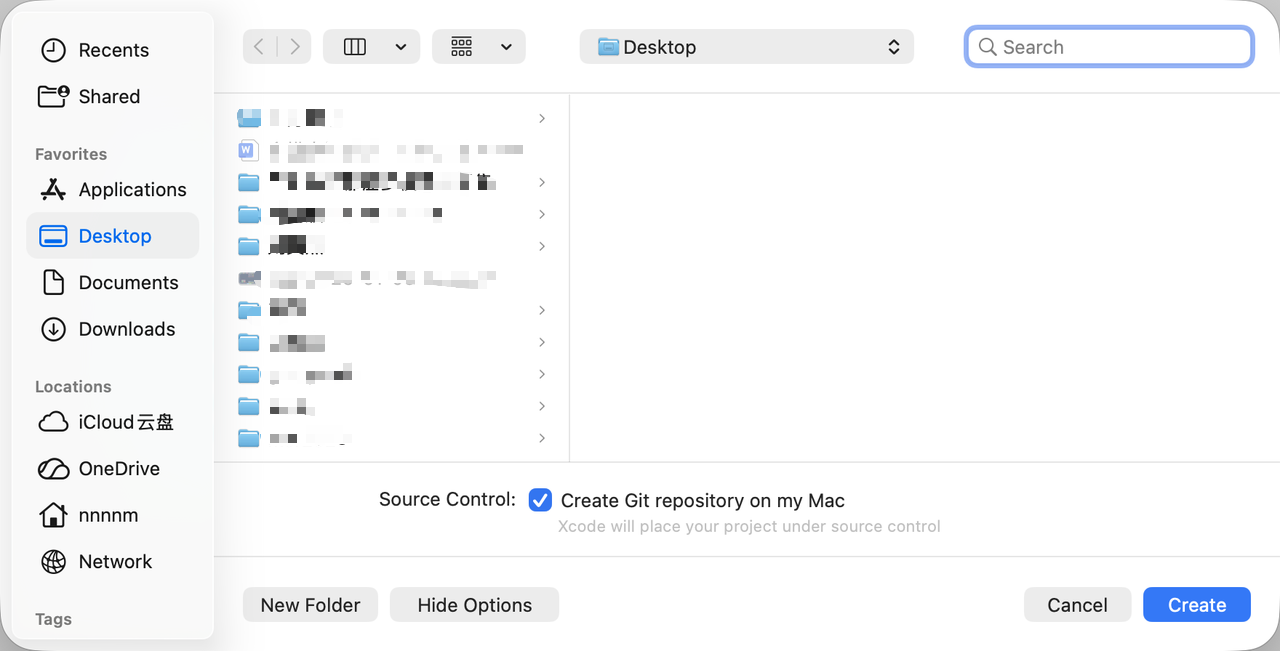
Click Next and choose the project storage location.
3.4 Recognize the Project Structure After Creation
After the project is created, Xcode will automatically open the workspace. At this point, you do not need to understand every file. You only need to recognize a few key parts.
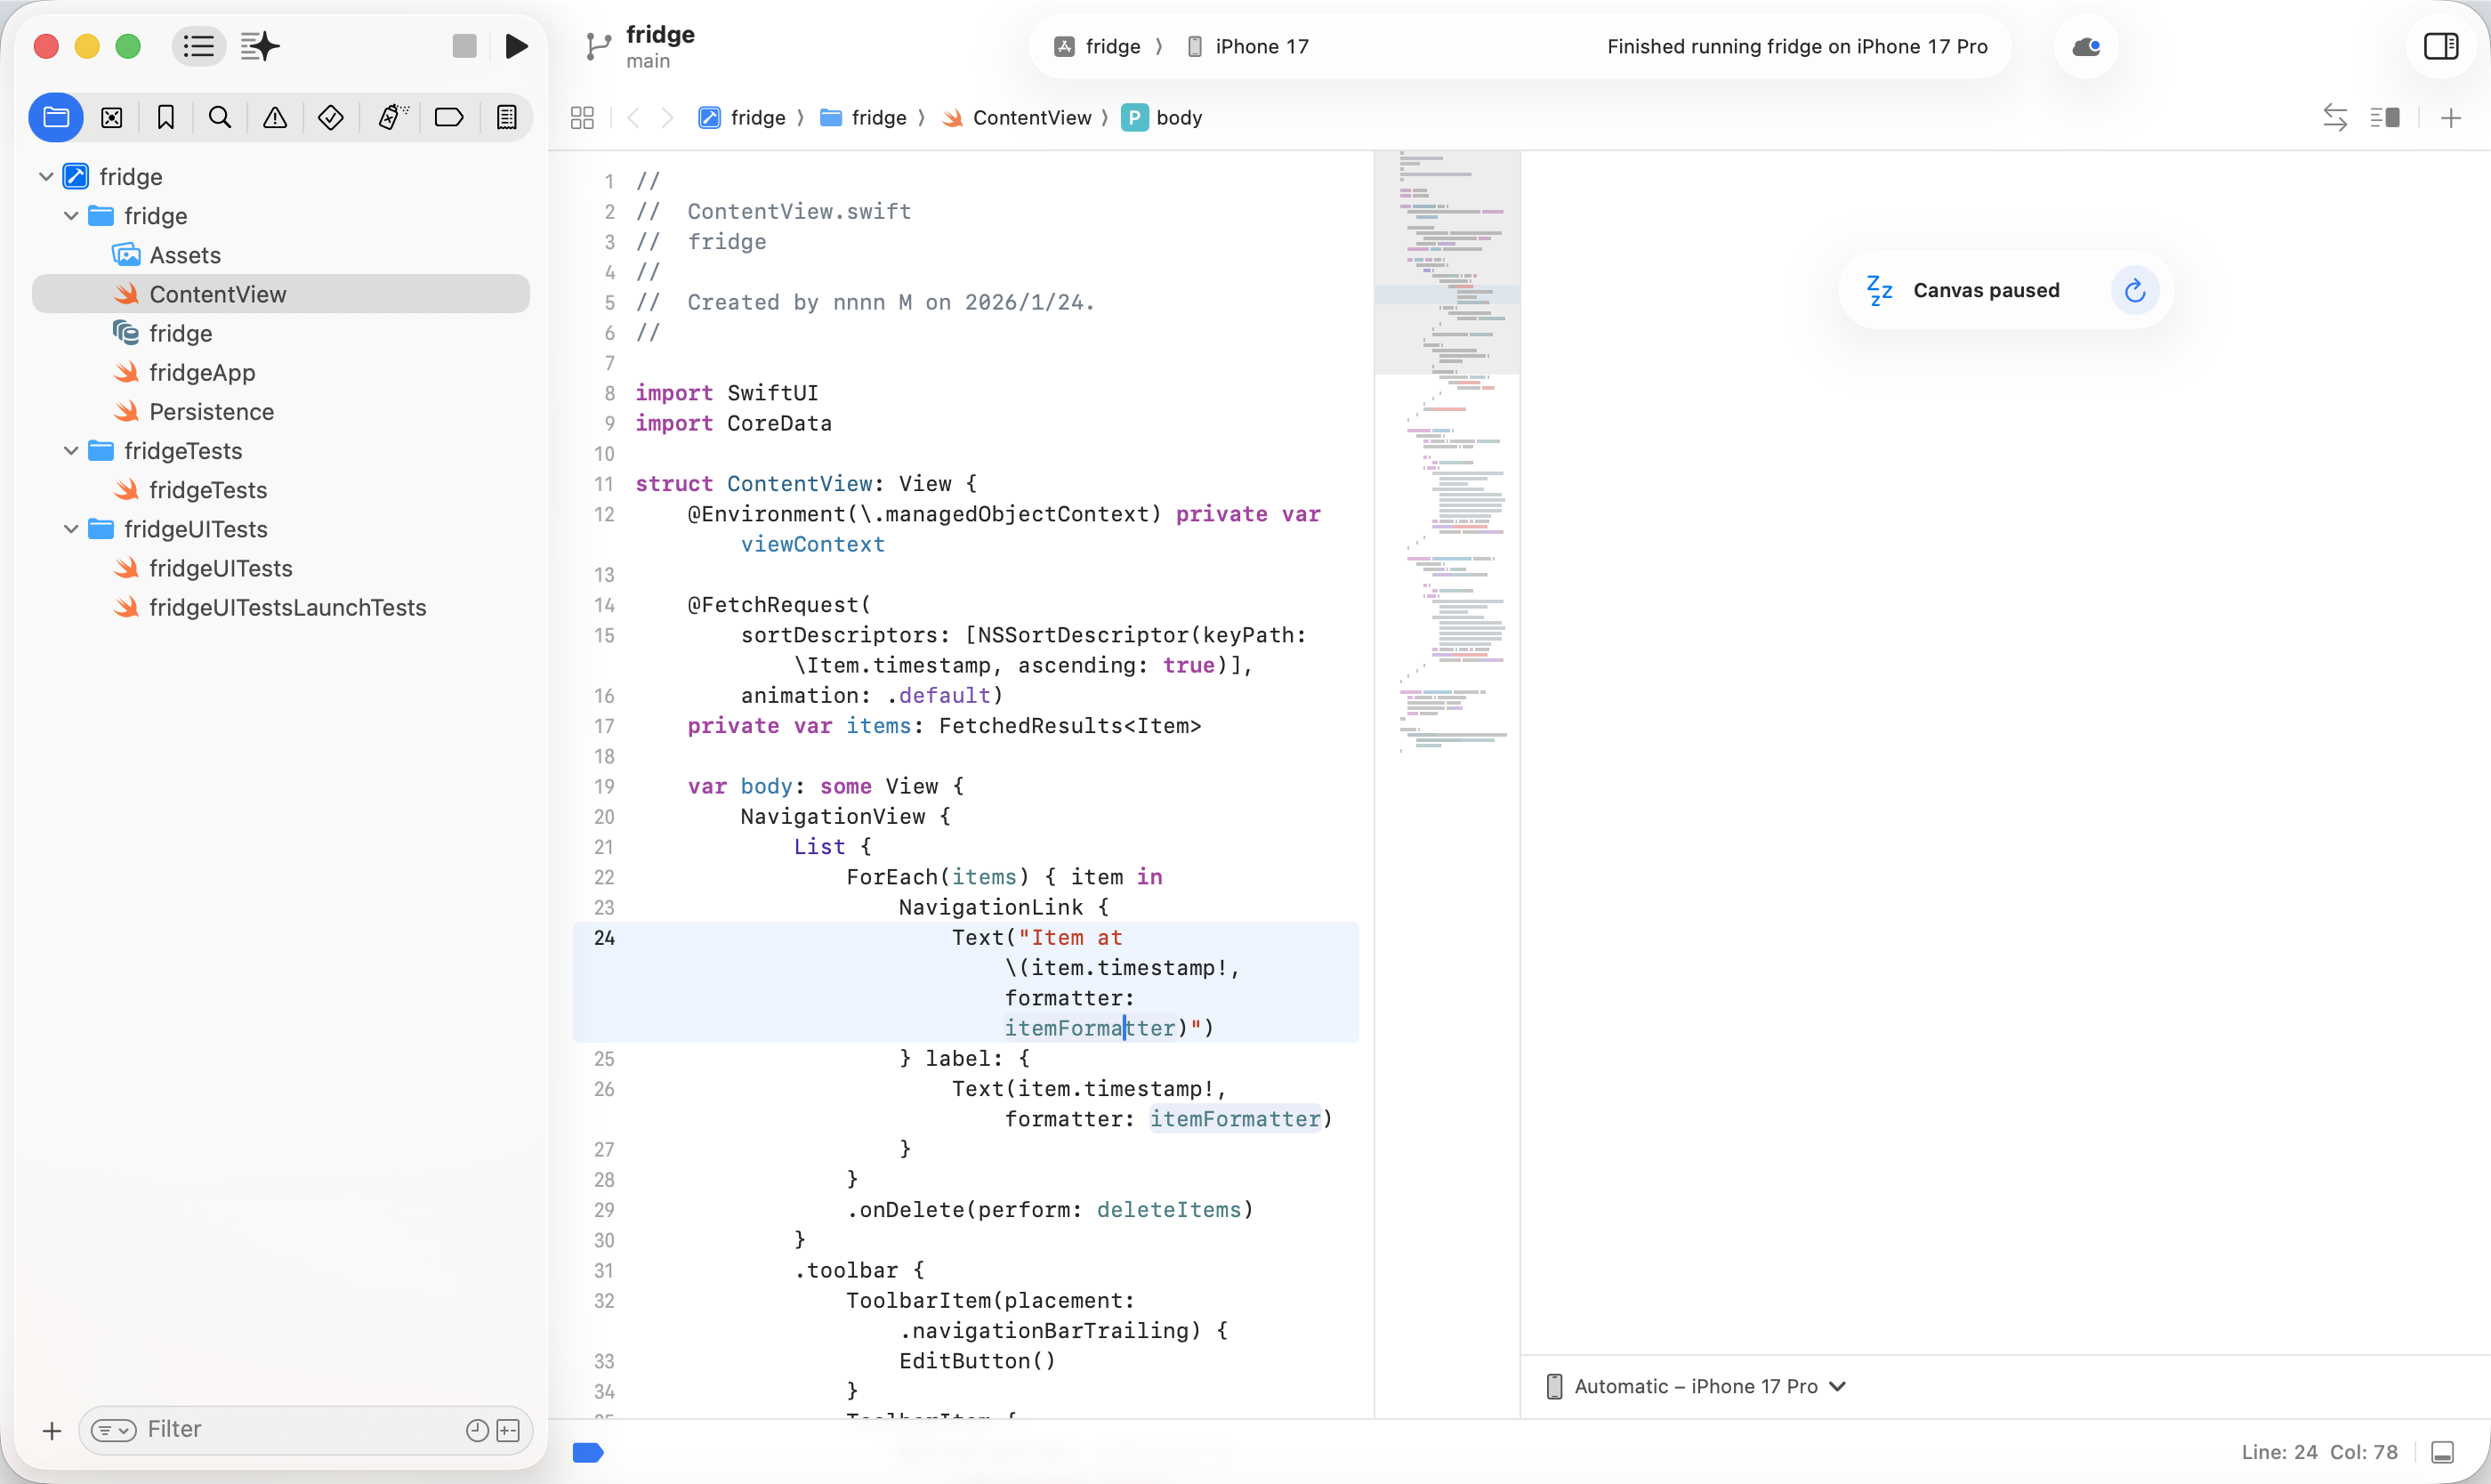
In the default project, you will see:
- A folder named after the project
- A Swift file ending with
App(the application entry) - A
ContentView.swiftfile (the default page)
This is already the smallest runnable iOS App.
3.5 Run the First iOS App
Before changing any code, run the original project directly.
In the top toolbar of Xcode, keep the default iPhone simulator selected, then click the Run button on the top left.
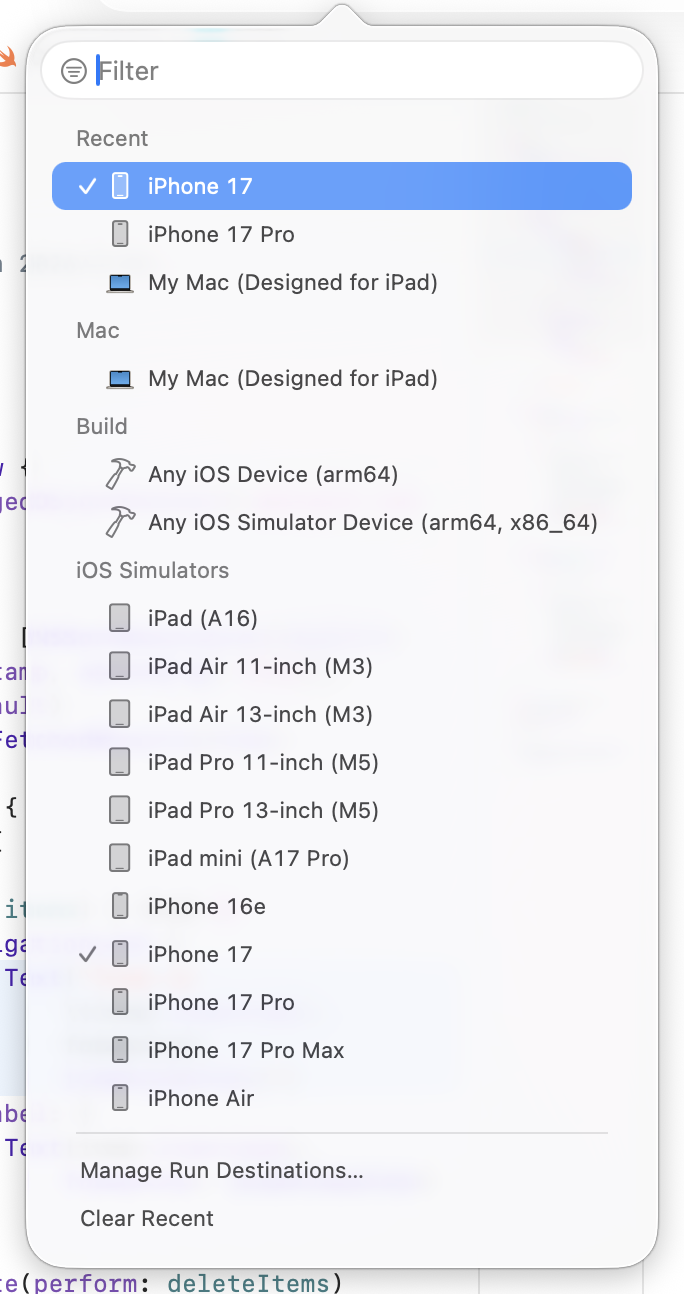
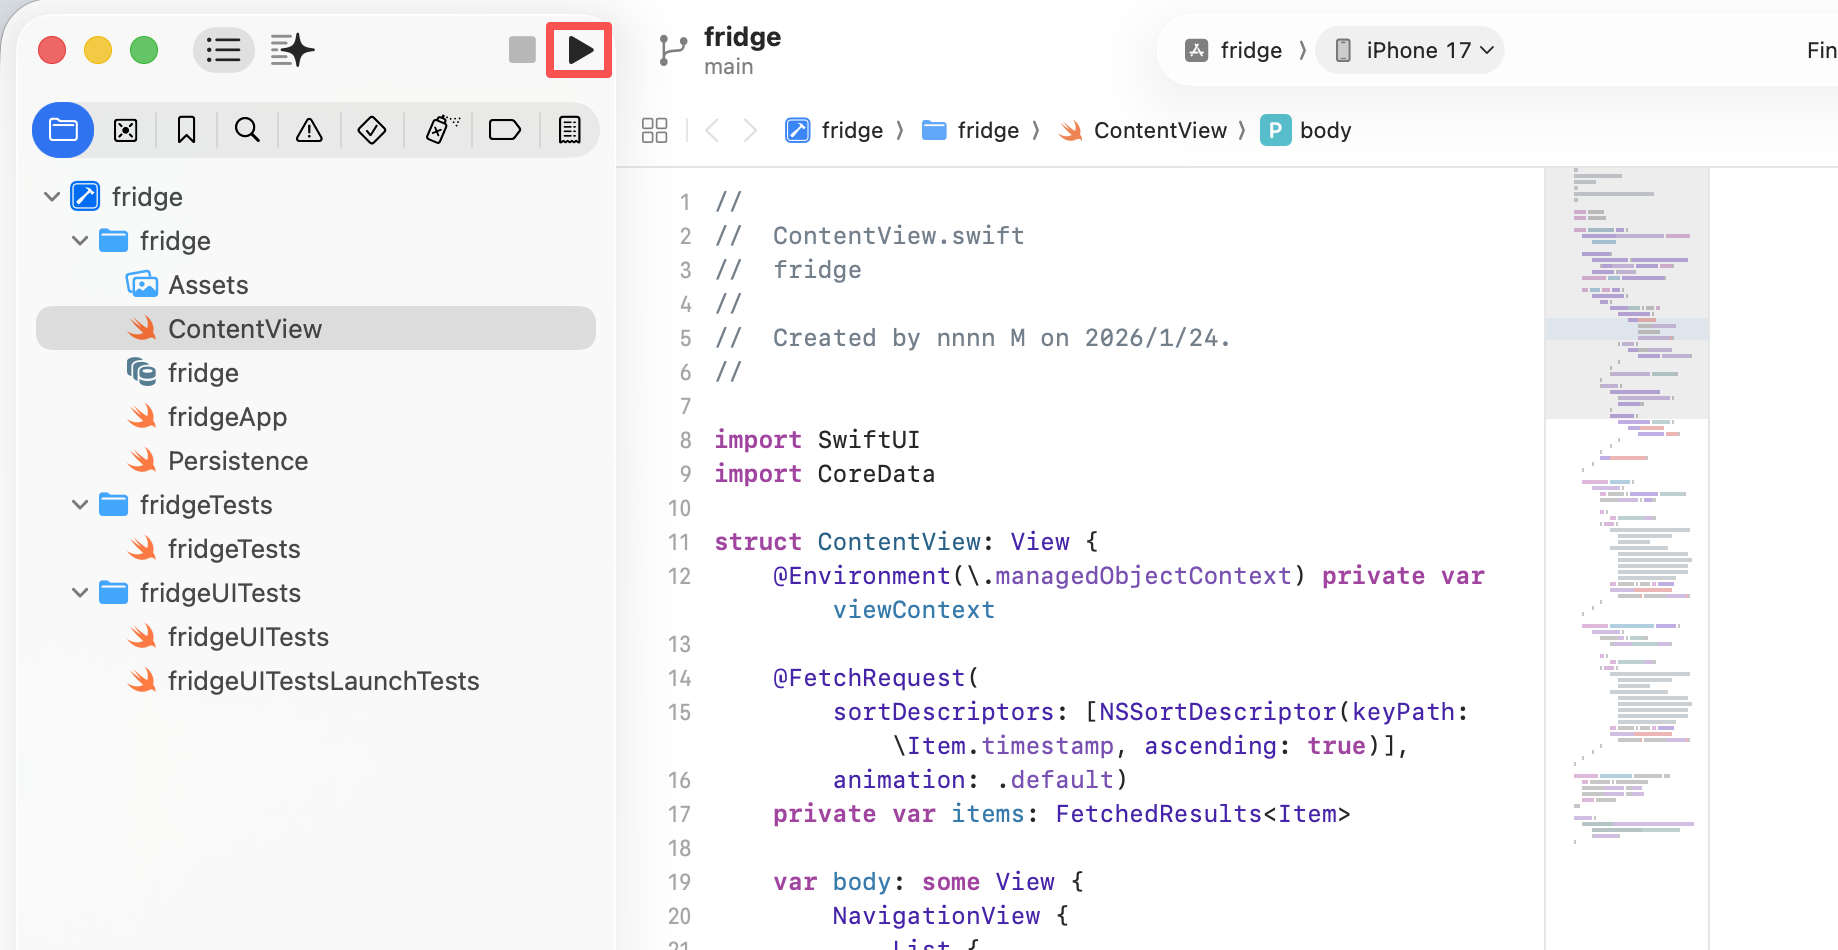
If everything is normal, the simulator will show a blank app that can start successfully. The first compilation may take a relatively long time. In later chapters, we reduce waiting time by using HTML prototypes first.
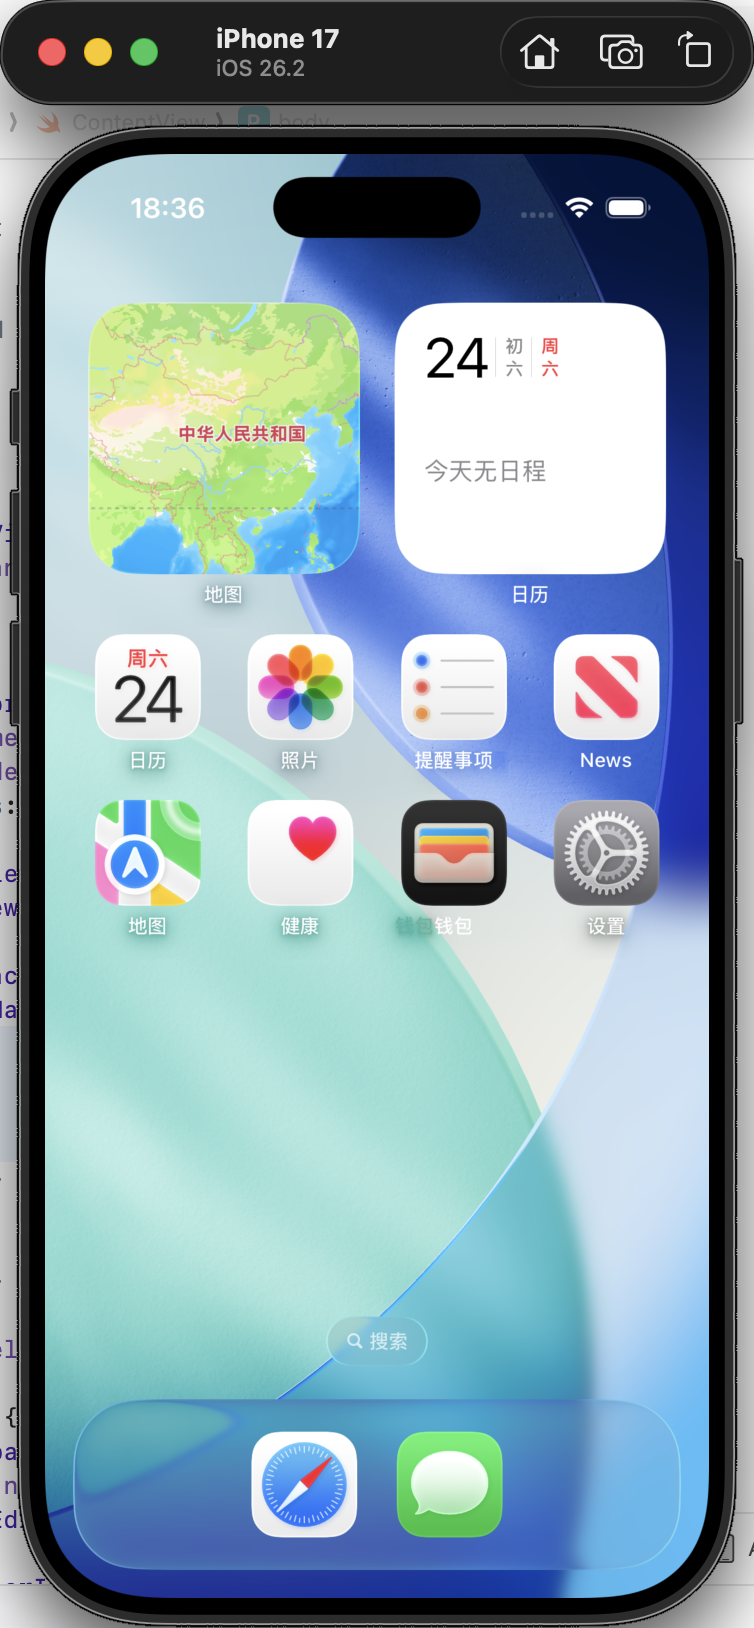
To stop the app, click Stop next to the Run button.
3.6 What You Have Actually Achieved at This Stage
Even though the interface is still simple, you have already completed several key confirmations:
- The project can compile successfully
- The simulator can run the app correctly
- The development process has already been proven to work end-to-end
This means that future problems will mainly focus on the code and logic themselves, rather than environment issues.
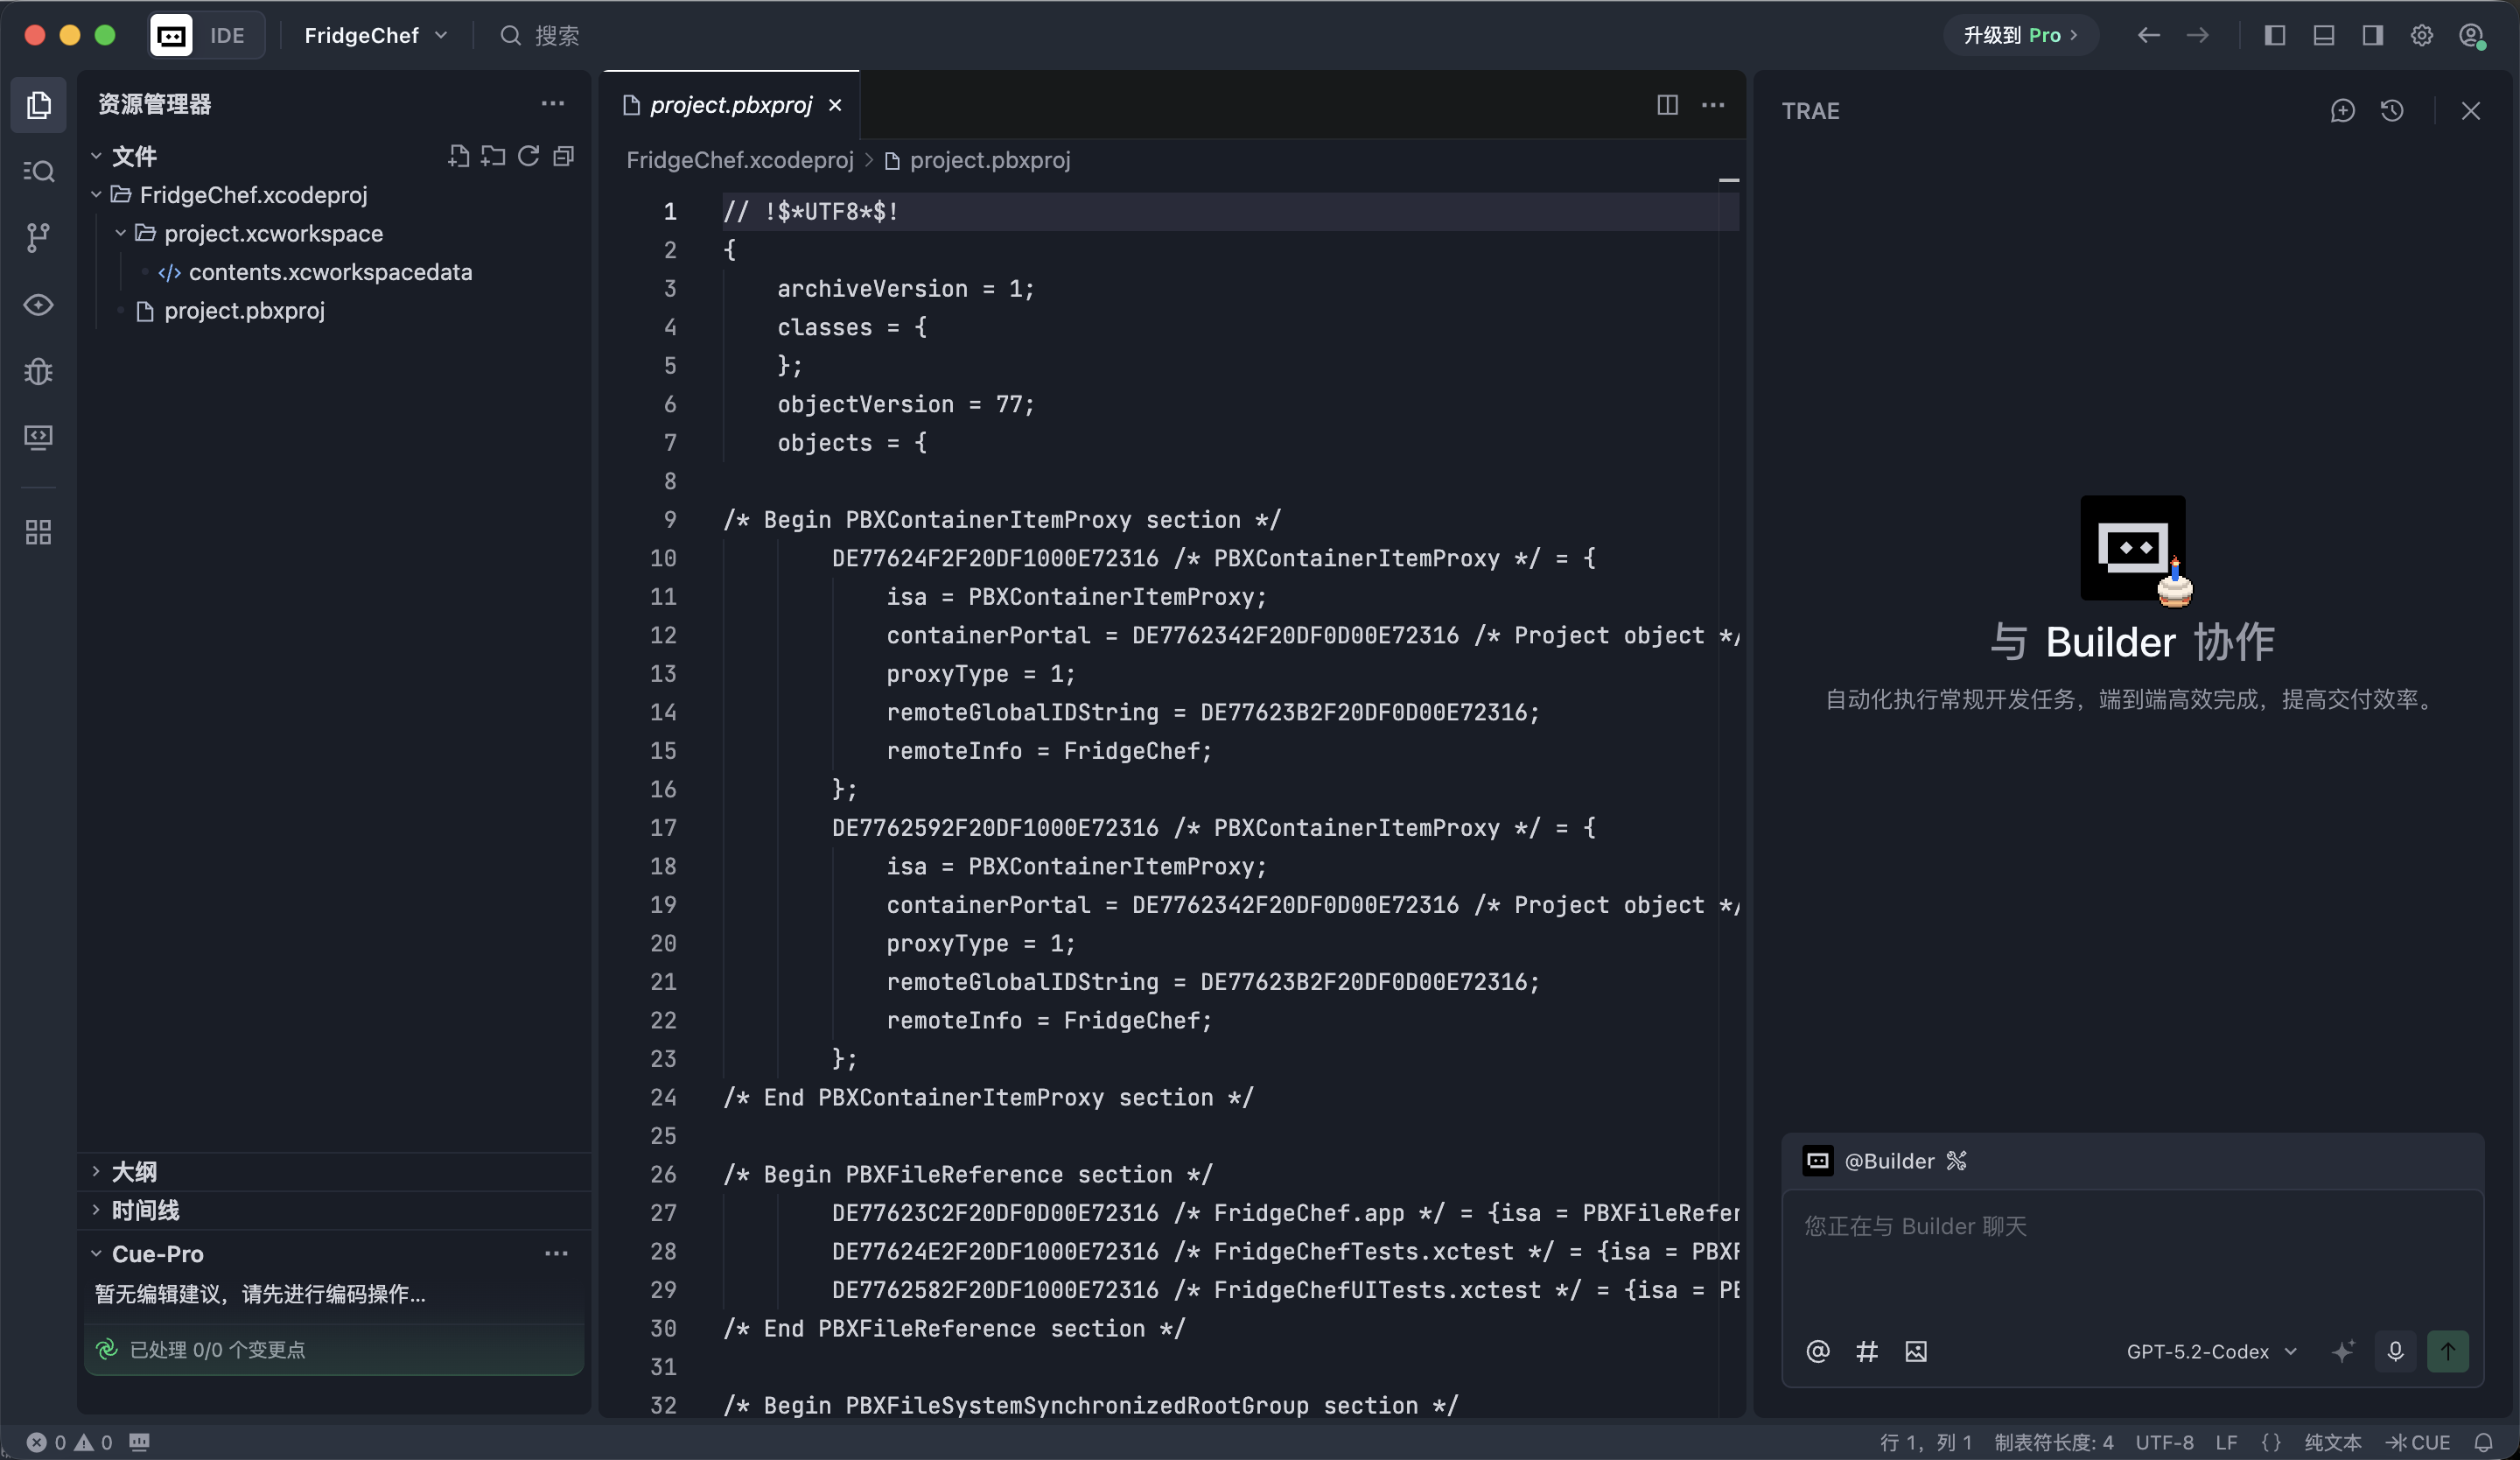
3.7 Hand the Project Over to Trae
Starting from the next section, the main development work will gradually move into Trae.
What you need to do is simple: open the iOS project folder you just created in Trae.
Chapter 4: AI-Assisted Development Practice - Build FridgeChef from Scratch
This chapter is the core part of the entire tutorial.
This tutorial does not use the traditional route of "write SwiftUI first, repeatedly compile, and keep tweaking previews." Instead, we use a more efficient flow:
first use **HTML** to quickly validate the interface structure, then migrate the confirmed result into SwiftUI, and finally gradually complete business logic, local data, and interaction details.
4.1 Stage One: Requirement Clarification
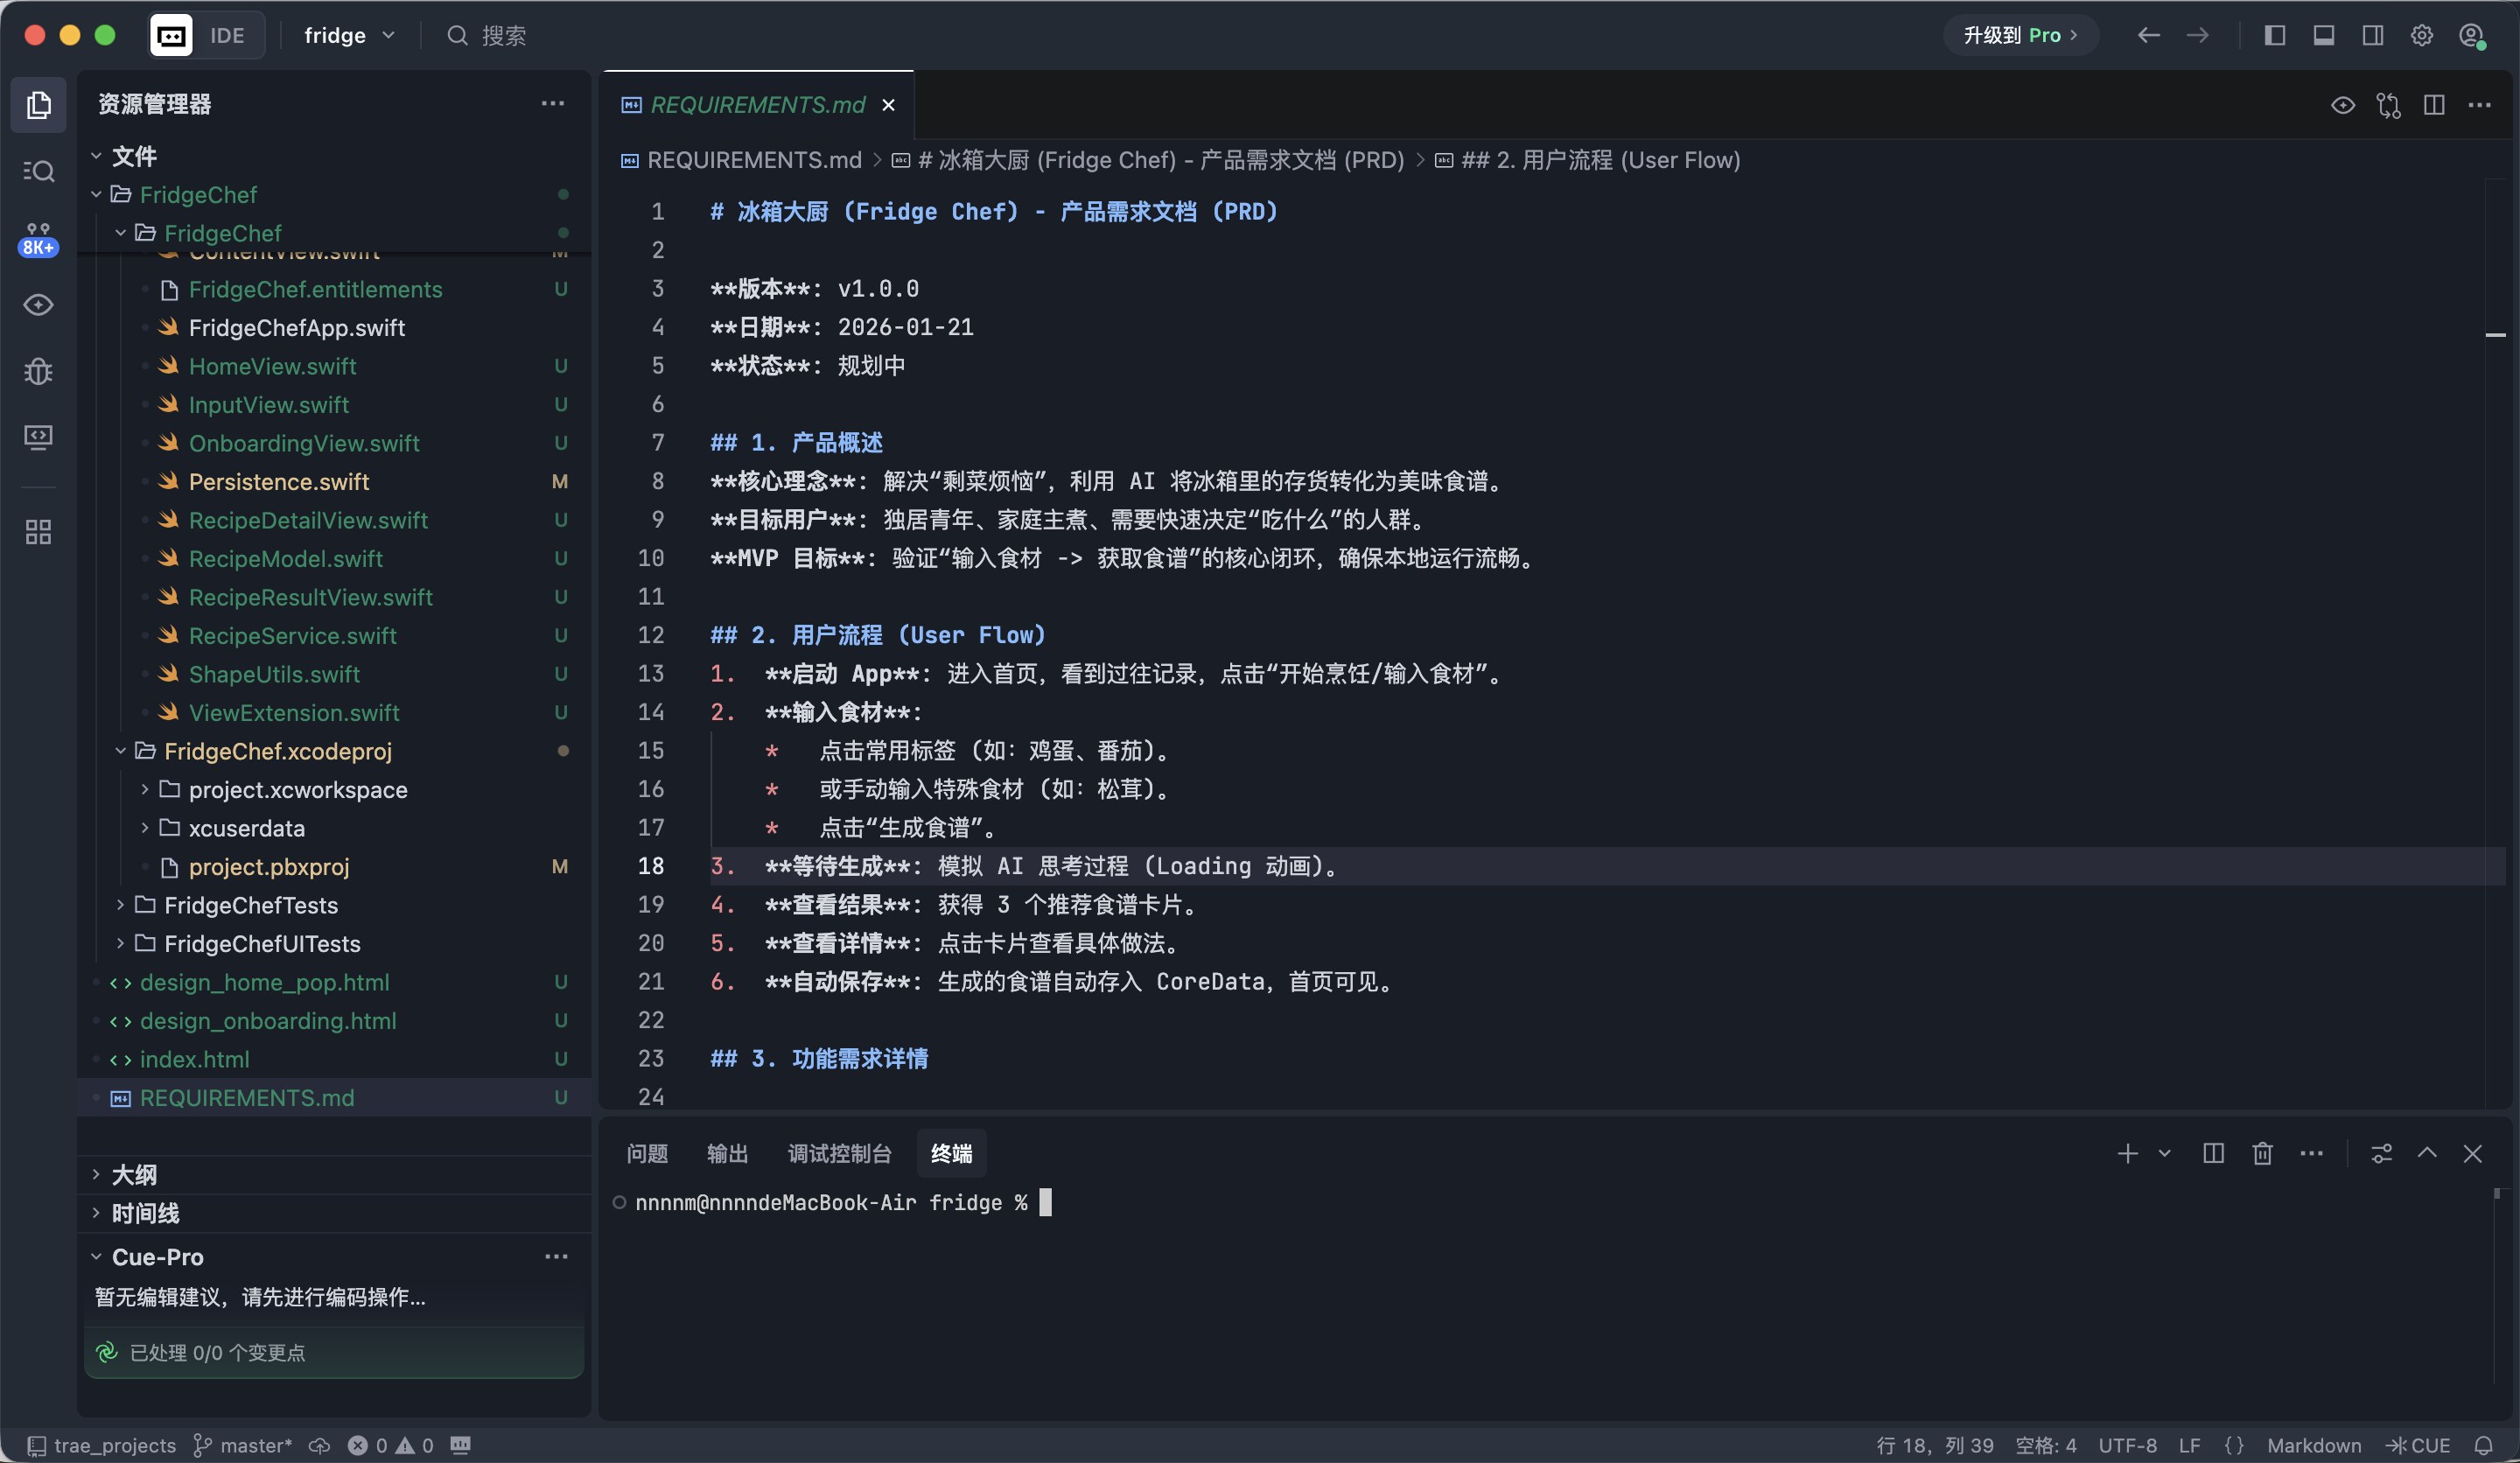
Before writing code, the first step is not building pages - it is clarifying what we are building. Let AI first act like a **product manager** and organize the requirements into a structured specification document.
In Trae's chat window, enter the following instruction. Trae will generate a REQUIREMENTS.md file in the project root, describing the functionality and structure of the whole app.
📋 Prompt to copy:
We are now going to develop an iOS App called "FridgeChef".
1. Core concept
This is an AI assistant that solves the problem of "I don't know what to cook with the leftover ingredients in my fridge."
Users input the ingredients they currently have, and the app calls a large model to generate a practical recipe.
2. Core functions
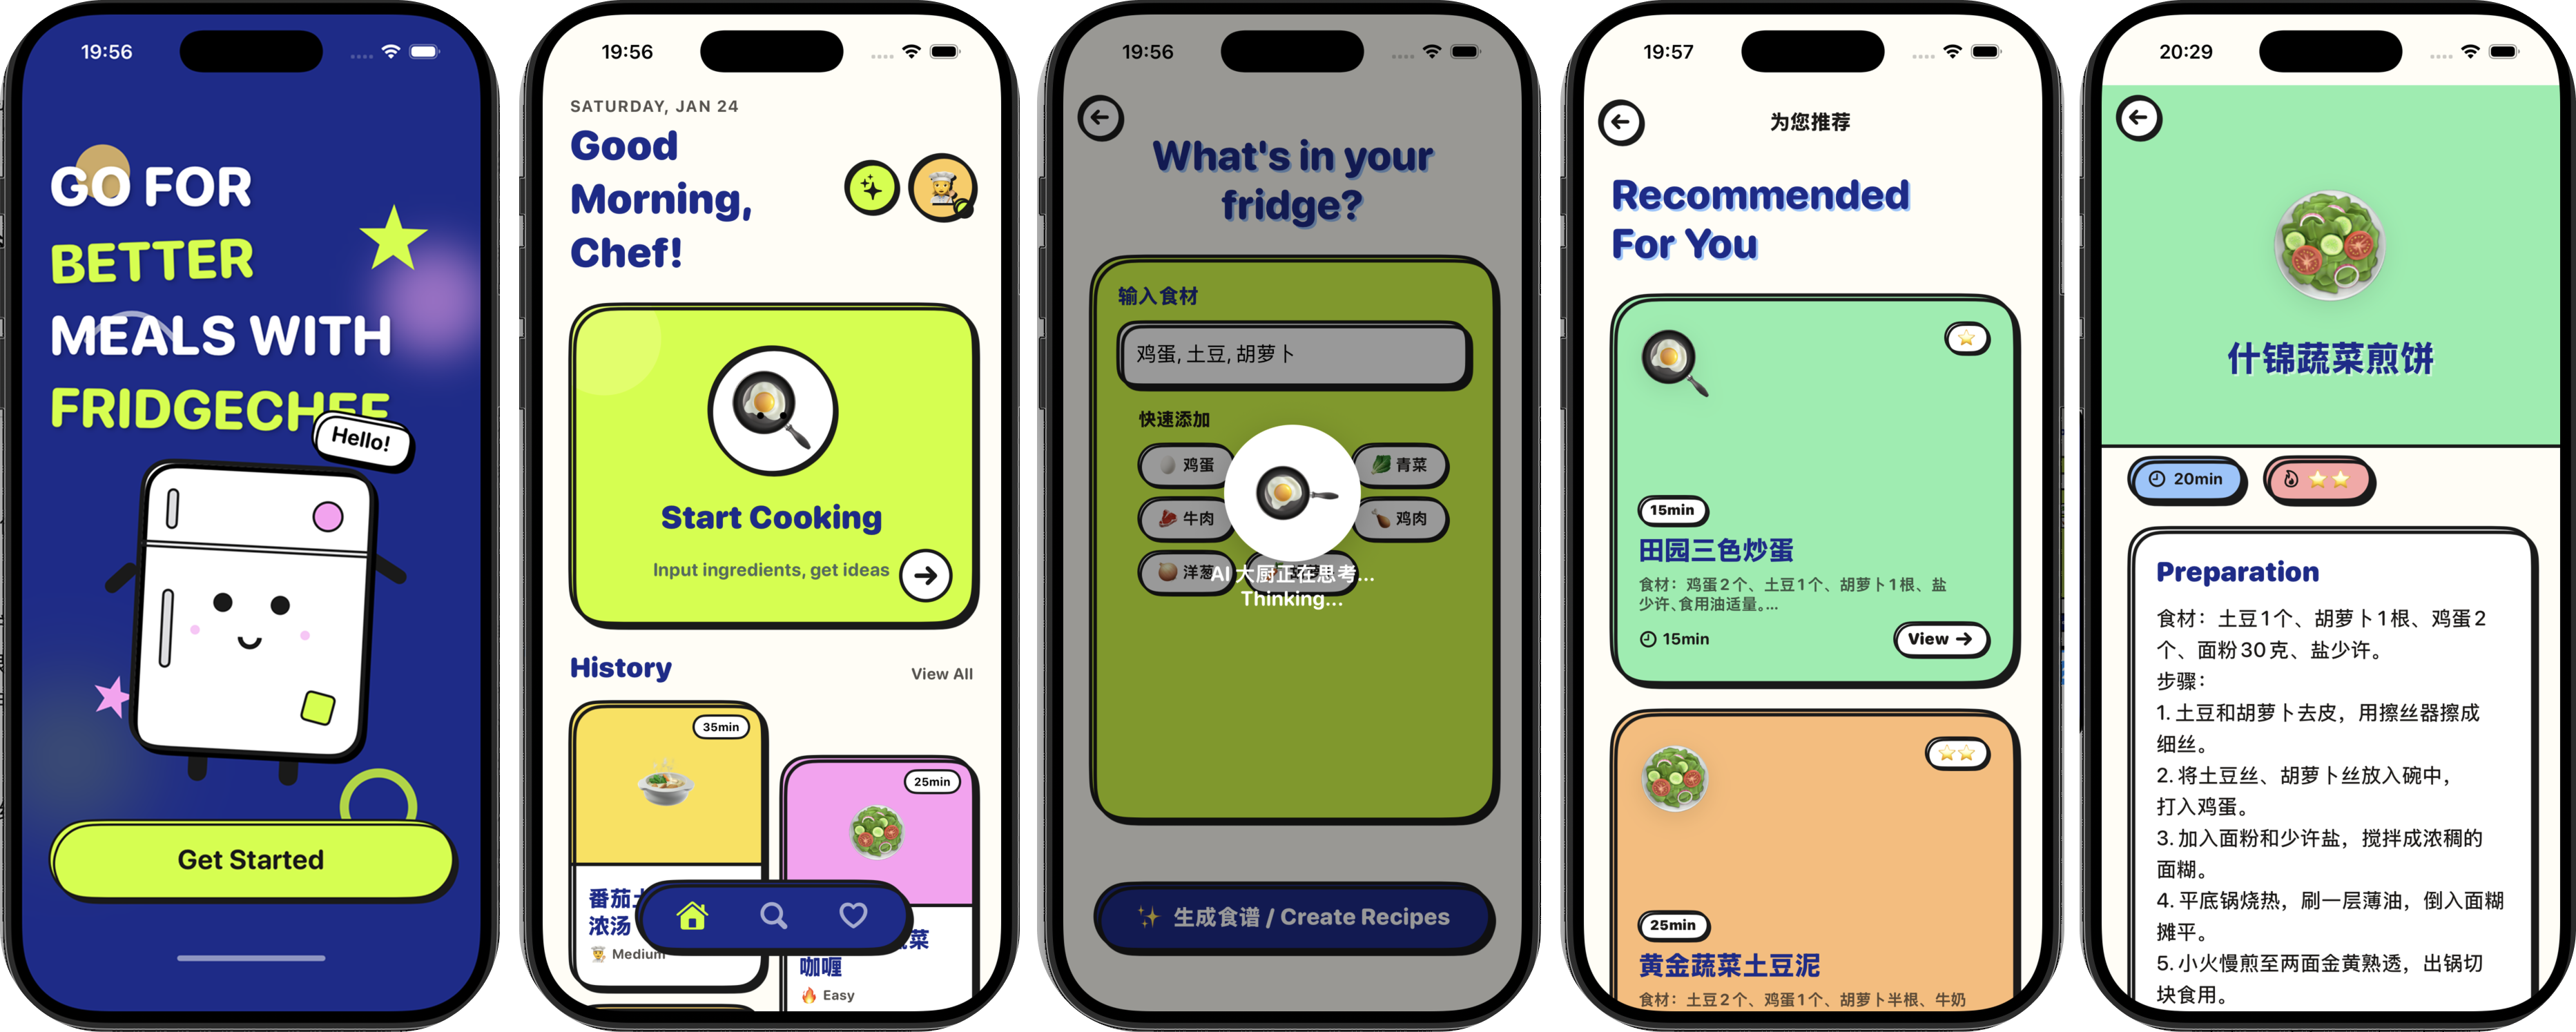
- Home page:
Show a prominent "Start Cooking" entry, and below it display historical recipe records in card or list form.
- Input page:
Users input ingredients, supporting text input or simple quick tags.
- Result page:
Display the AI-generated recipe, including dish name, ingredient list, and cooking steps.
3. Technical requirements
- Use SwiftUI
- Save data locally (Core Data)
- Support basic page navigation and state updates
Please help me organize this into a clear, structured REQUIREMENTS.md document from the perspective of a product manager, and save it in the project root.After generation, quickly read through the document and confirm whether the function points match your expectations.
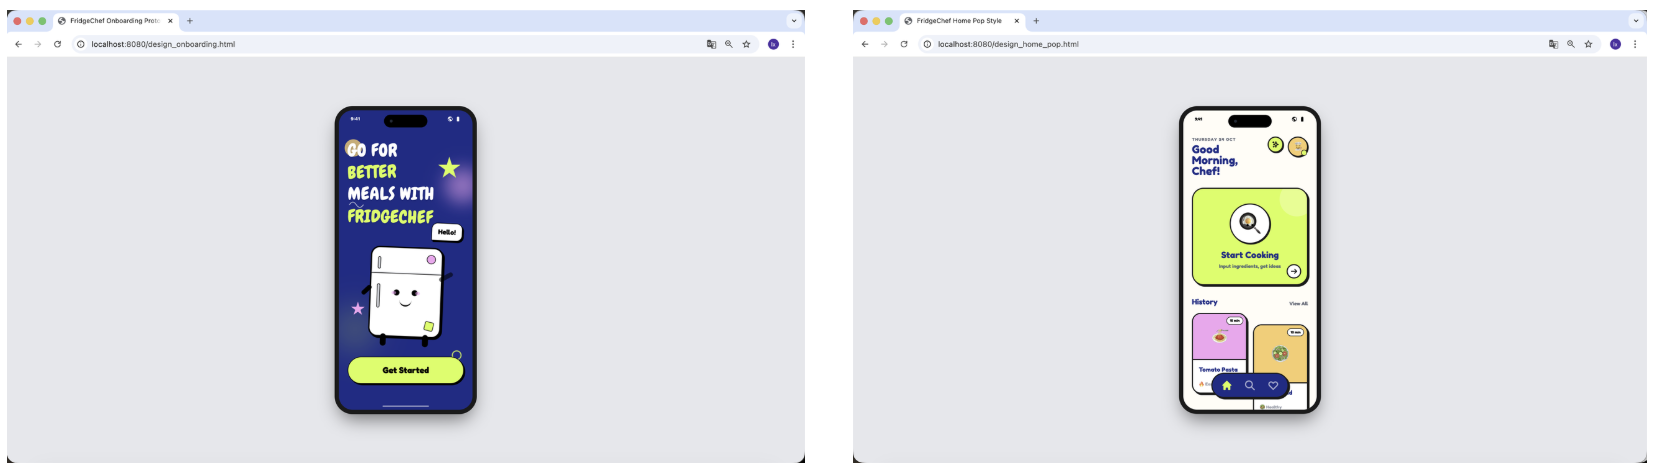
4.2 Stage Two: Visual Prototype
Let AI quickly draw a high-fidelity interface prototype using HTML** + **CSS, so we can confirm the overall layout and style first. Continue by entering this in Trae:
📋 Prompt to copy:
The requirements are confirmed.
Please use HTML + Tailwind CSS to generate a high-fidelity interface prototype for me.
Design style: Neo-Pop
Colors:
- Background: light cream #FFFDF5
- Accent colors: acid green #CCFF00, hot pink
Visual characteristics:
- 3px thick black borders
- Hard shadow without blur (offset 4px)
- Large rounded cards, overall sticker / comic feeling
Layout requirements:
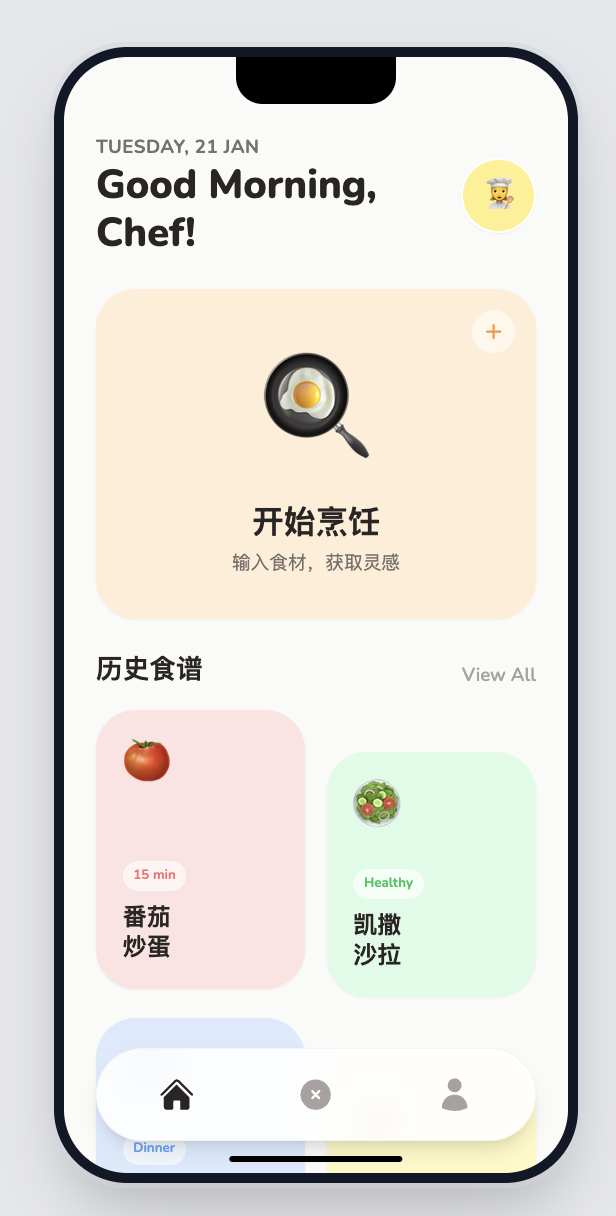
- Home page should use a Bento Grid-like layout
- Include two screens: home page and input page
Please generate a single-file index.html and simulate an iPhone screen ratio around the content.After generation, find index.html in the file list and open it directly in a browser.
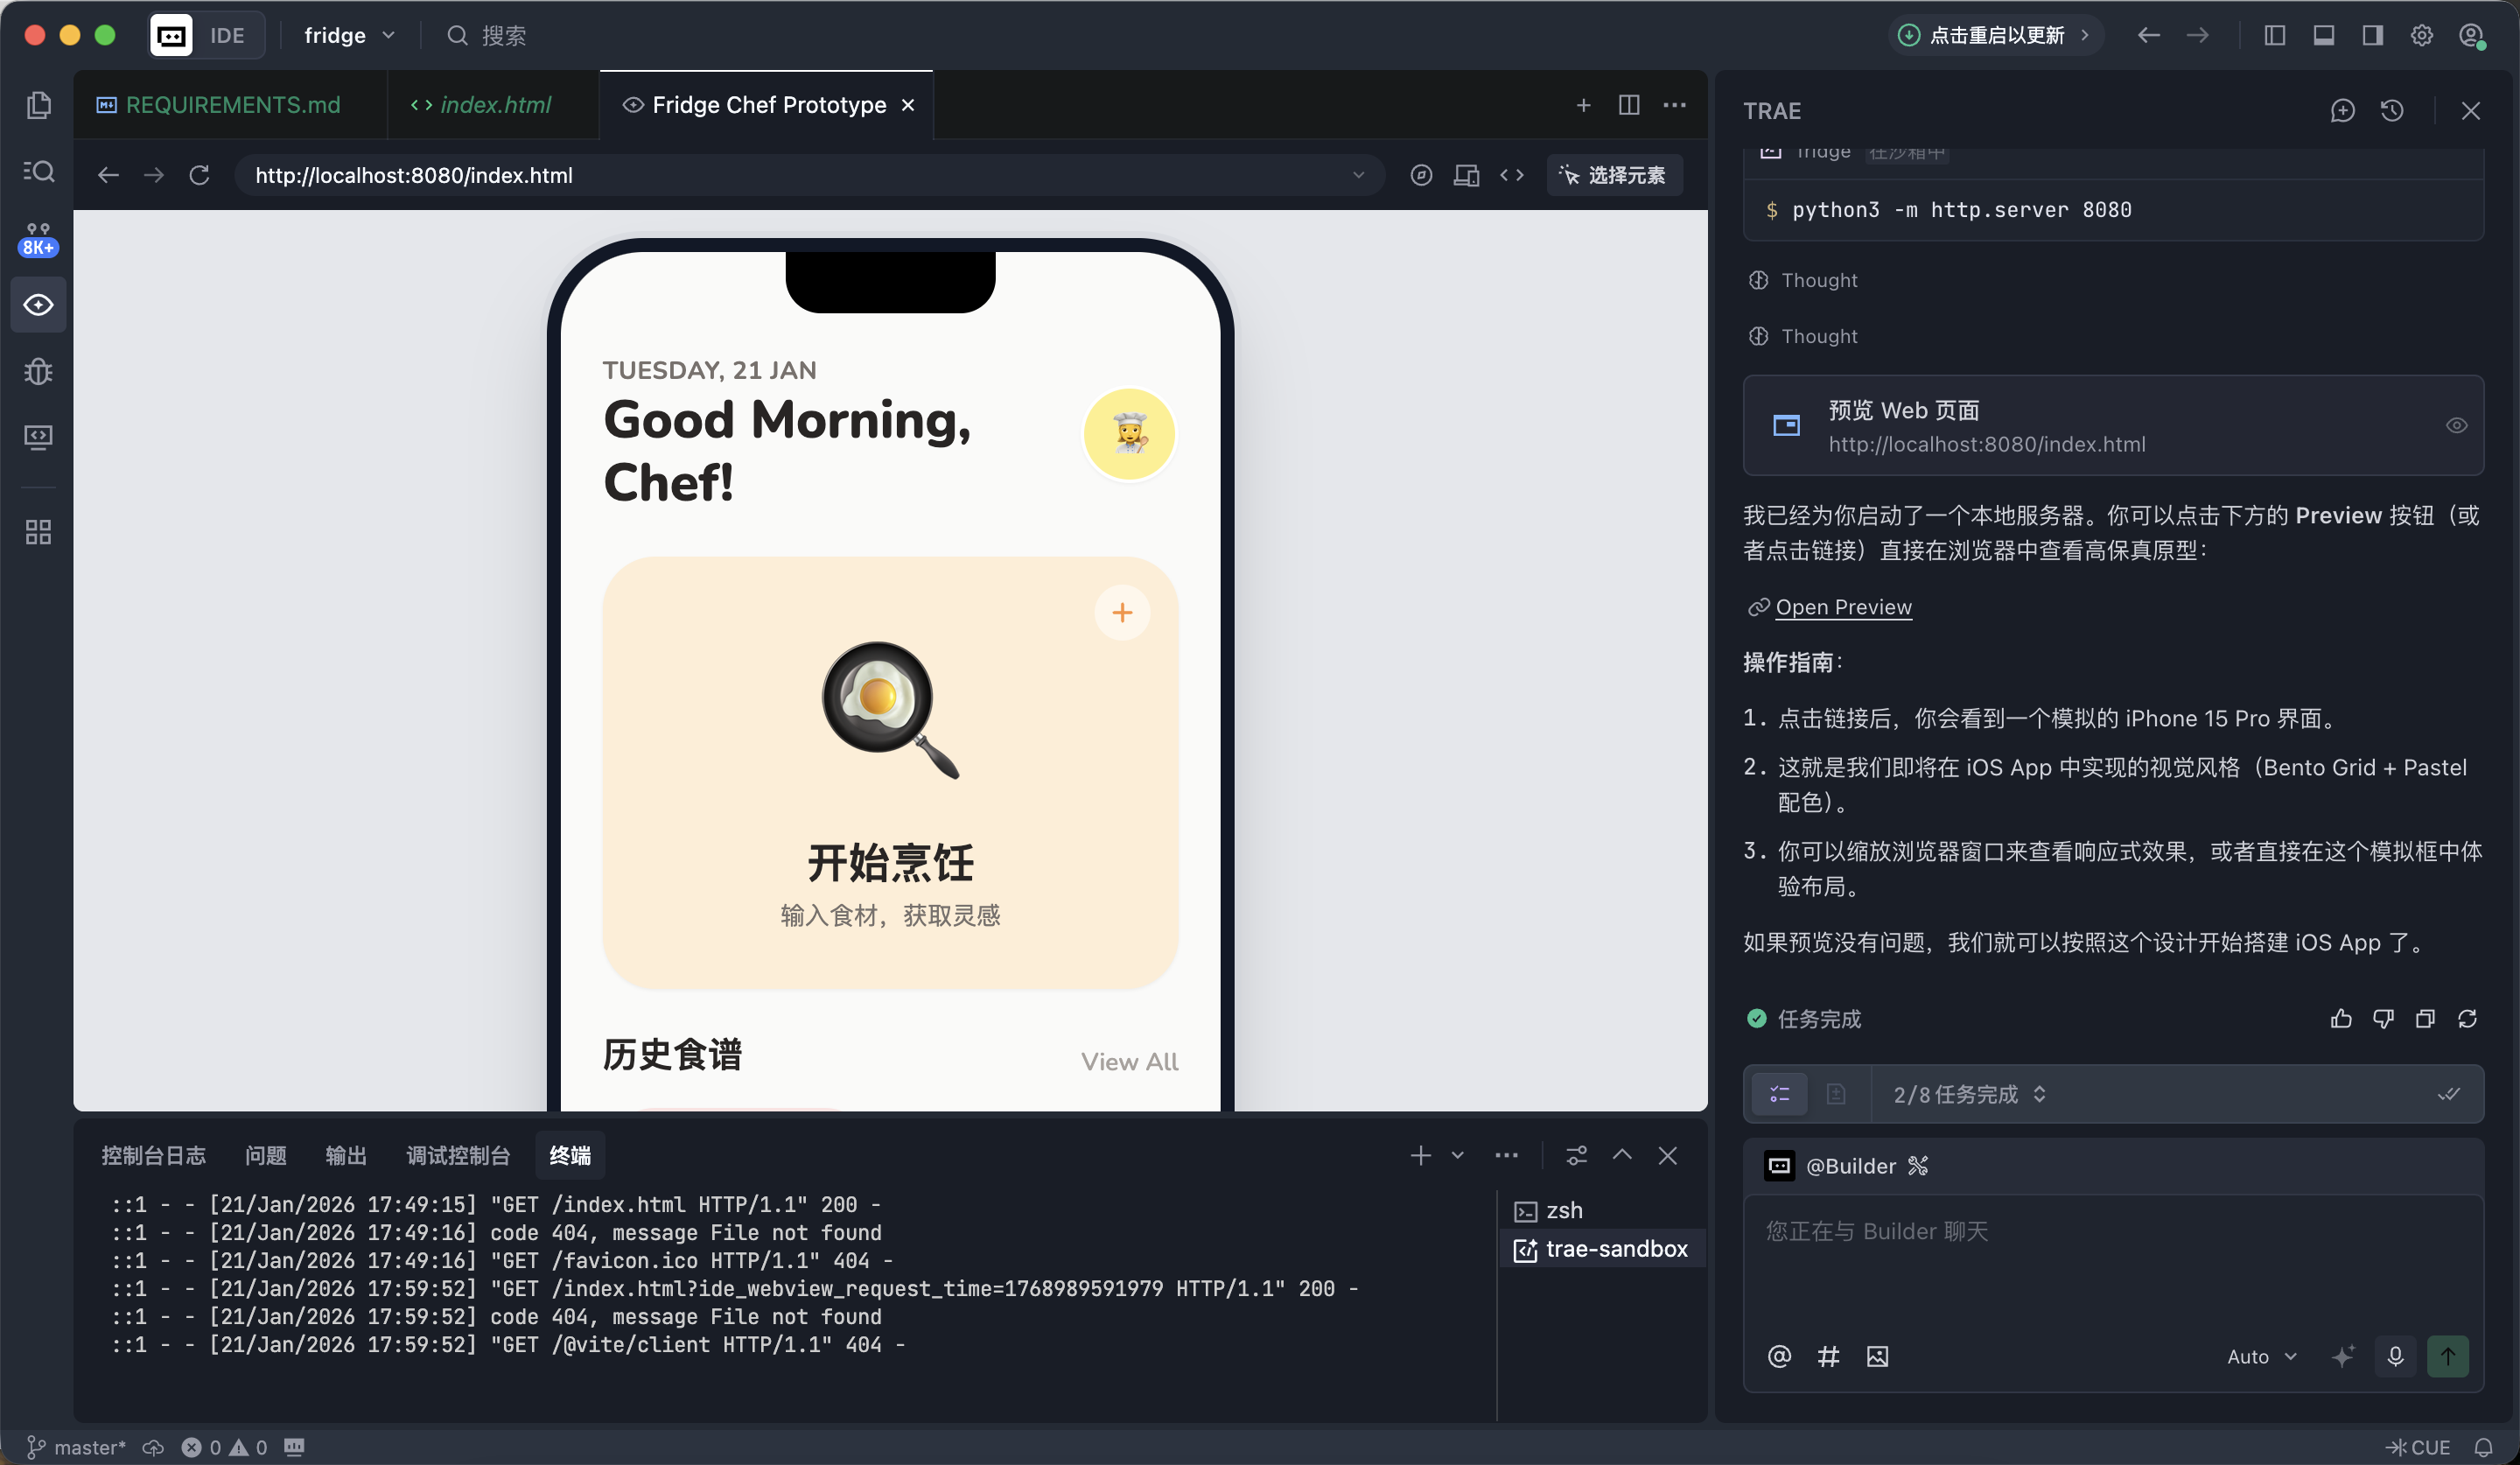
At this stage, the point is not whether every detail is perfect. The point is whether the page structure is reasonable, the main elements are complete, and the overall direction is correct.
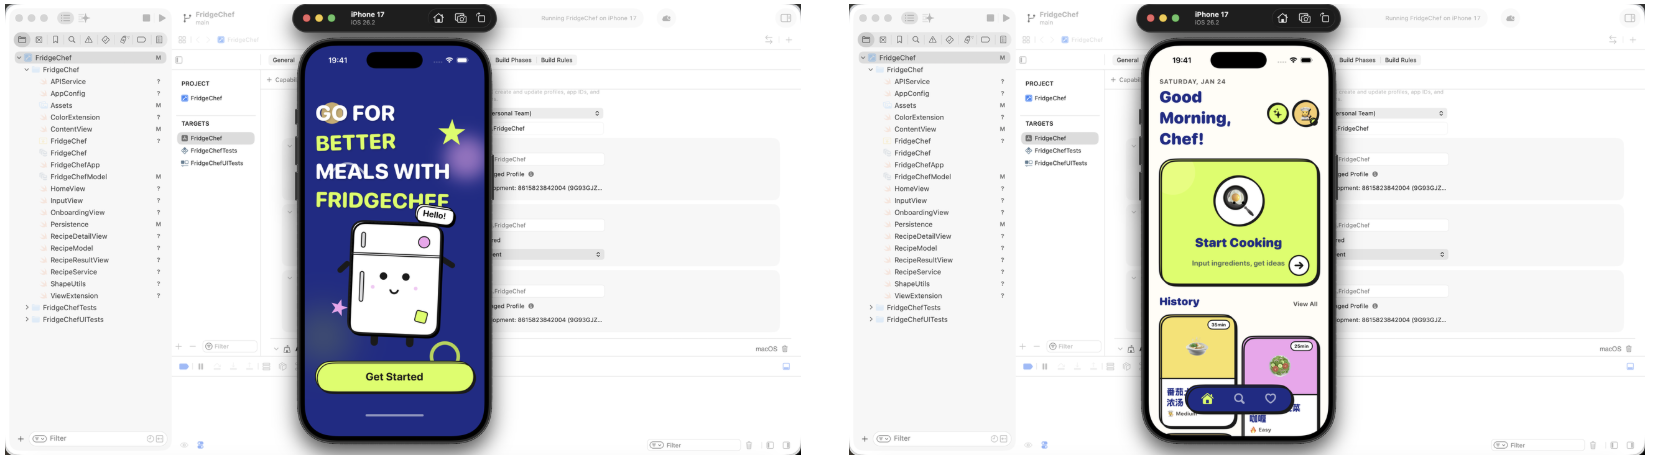
4.3 Stage Three: Native Recreation
Once the HTML prototype is finalized, translate the confirmed interface into SwiftUI.
Steps:
- Upload the
index.htmlfile (or a browser screenshot) into Trae - Tell AI to generate SwiftUI code based on it
📋 Prompt to copy:
[index.html uploaded]

Please read the layout and style of this HTML file.

Task: recreate this interface in the current project using SwiftUI.

Requirements:
1. Encapsulate a NeoPopStyle modifier including background color, thick border, and hard shadow
2. Create HomeView.swift for the home layout
3. Create InputView.swift for the input page
4. Use Mock Data for now, and make sure it can display correctly in Xcode Preview and simulator
After it finishes, open Xcode and run the simulator. You will see an iOS app that already has a complete visual structure.
4.4 Stage Four: Connect the AI API
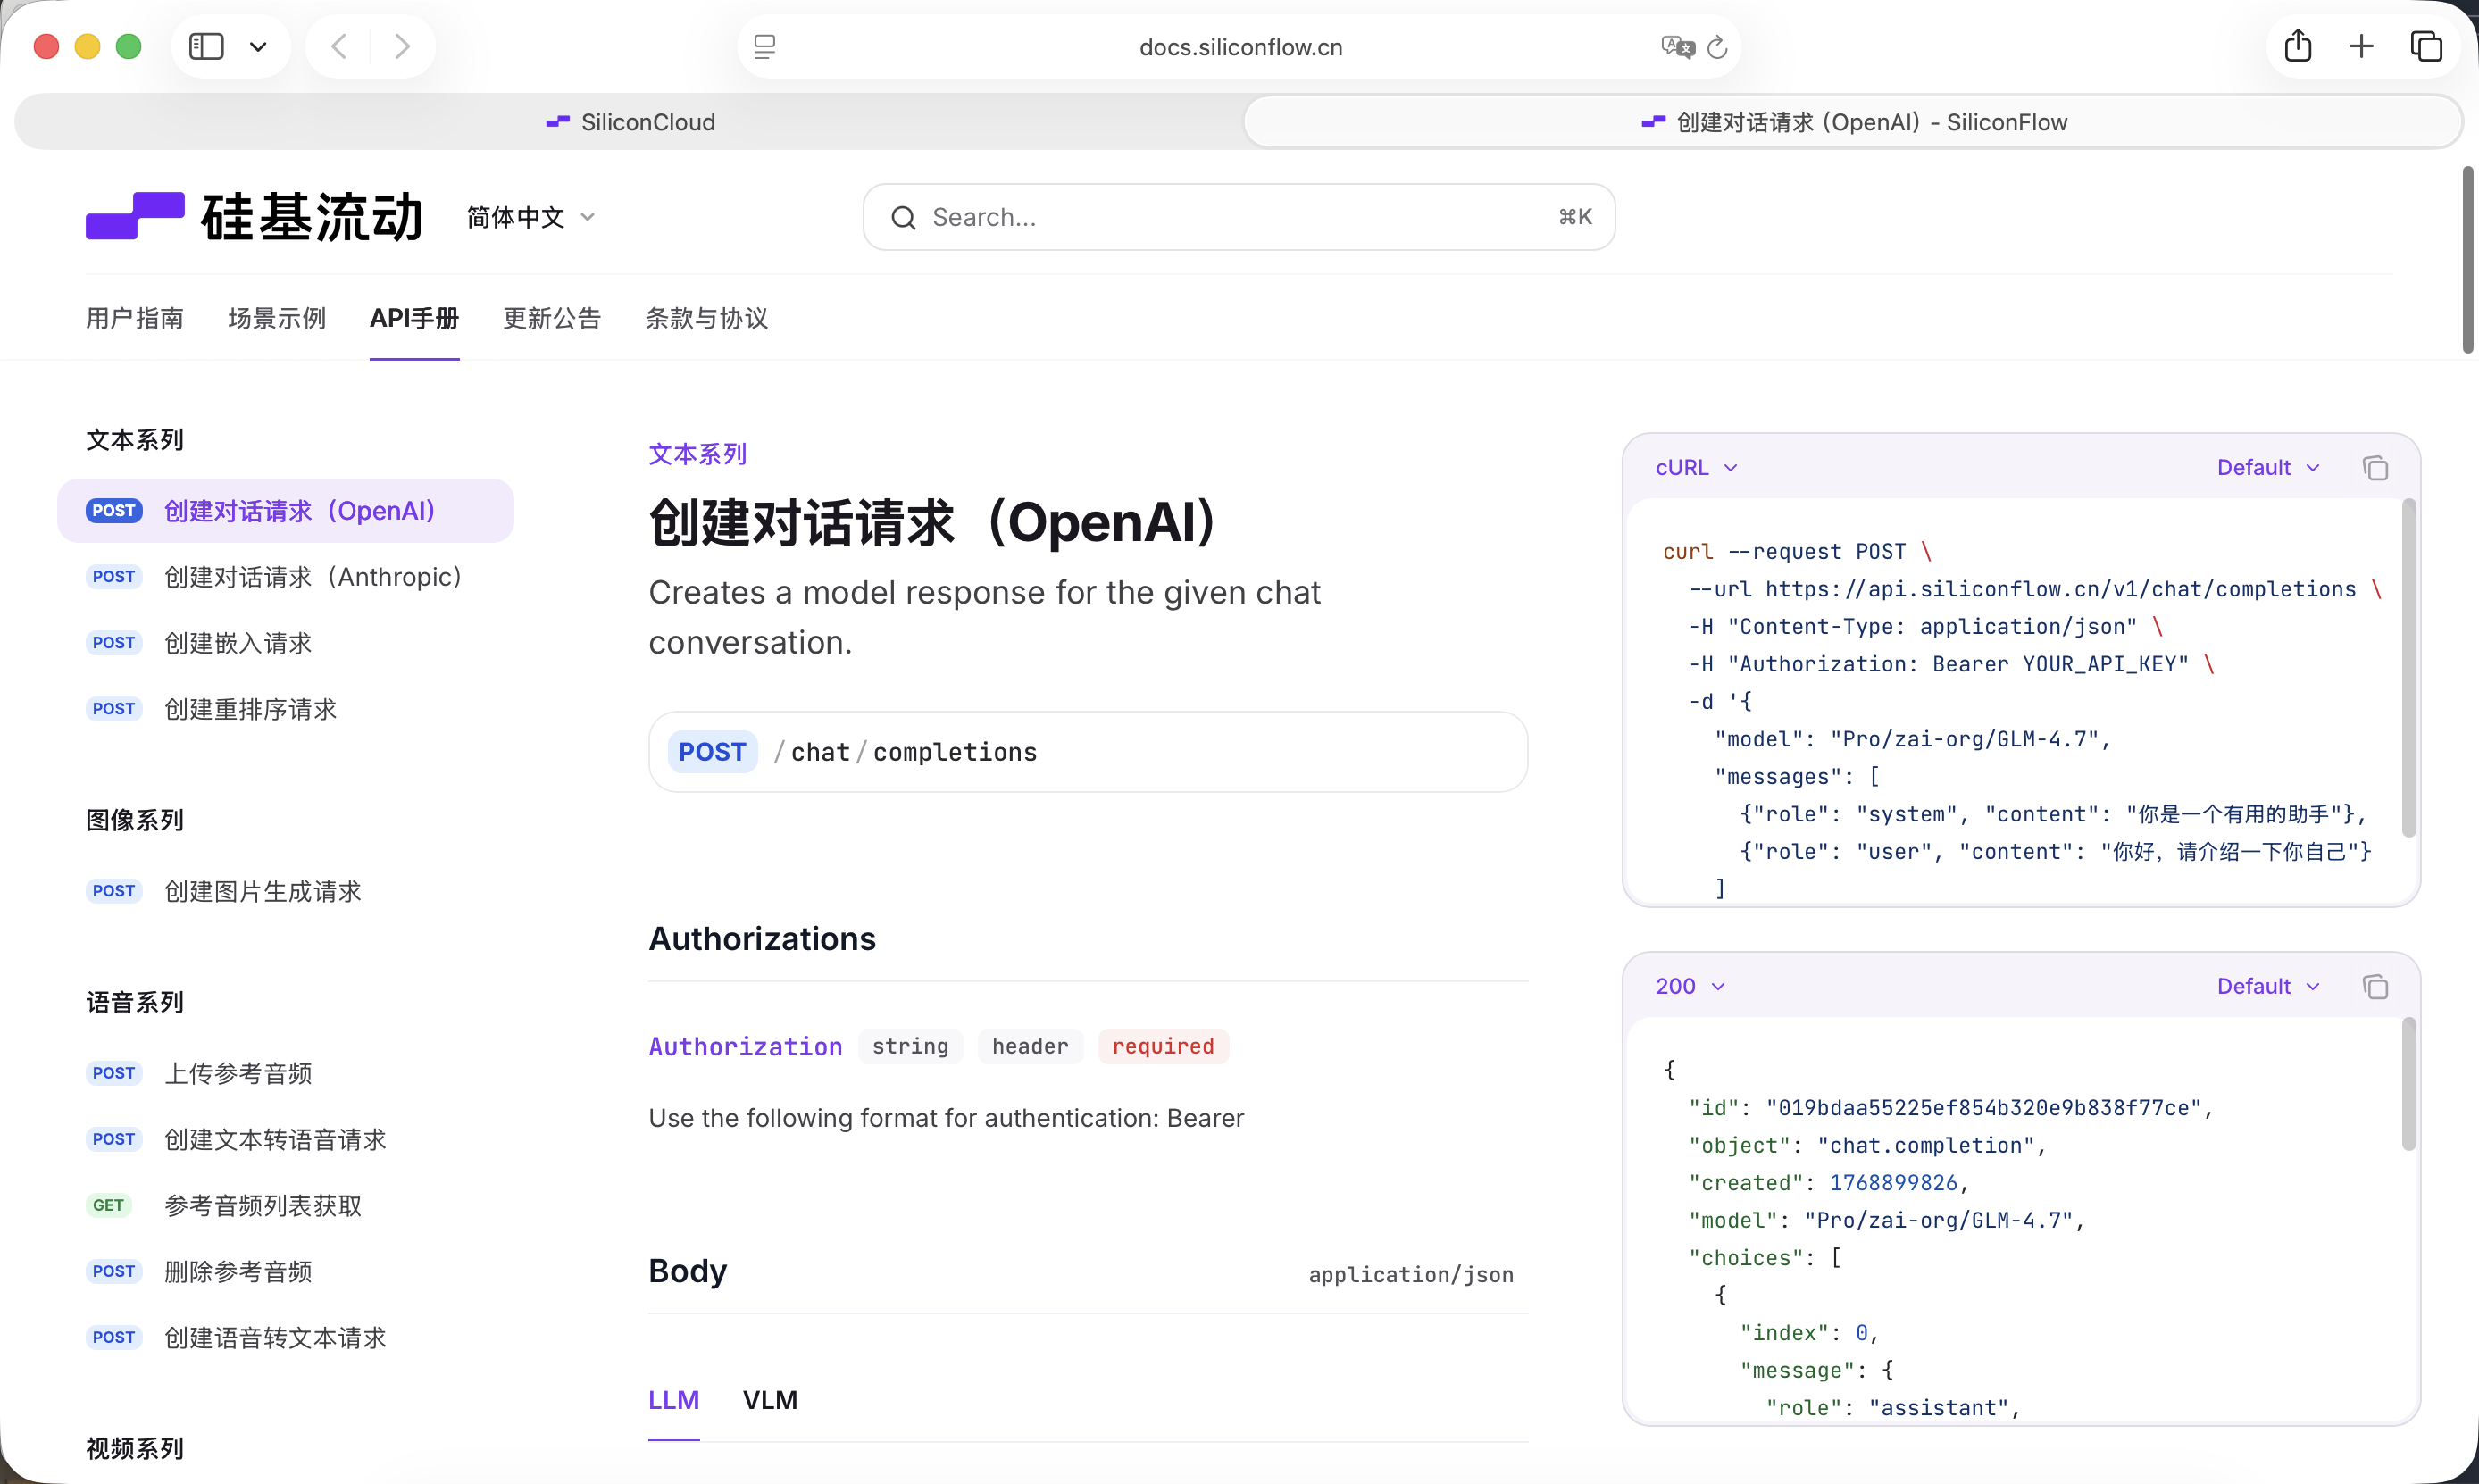
Once the interface is done, the app is still only a display layer. Next we need to connect real AI capability. In this tutorial we use the large-model service provided by SiliconFlow: https://cloud.siliconflow.cn
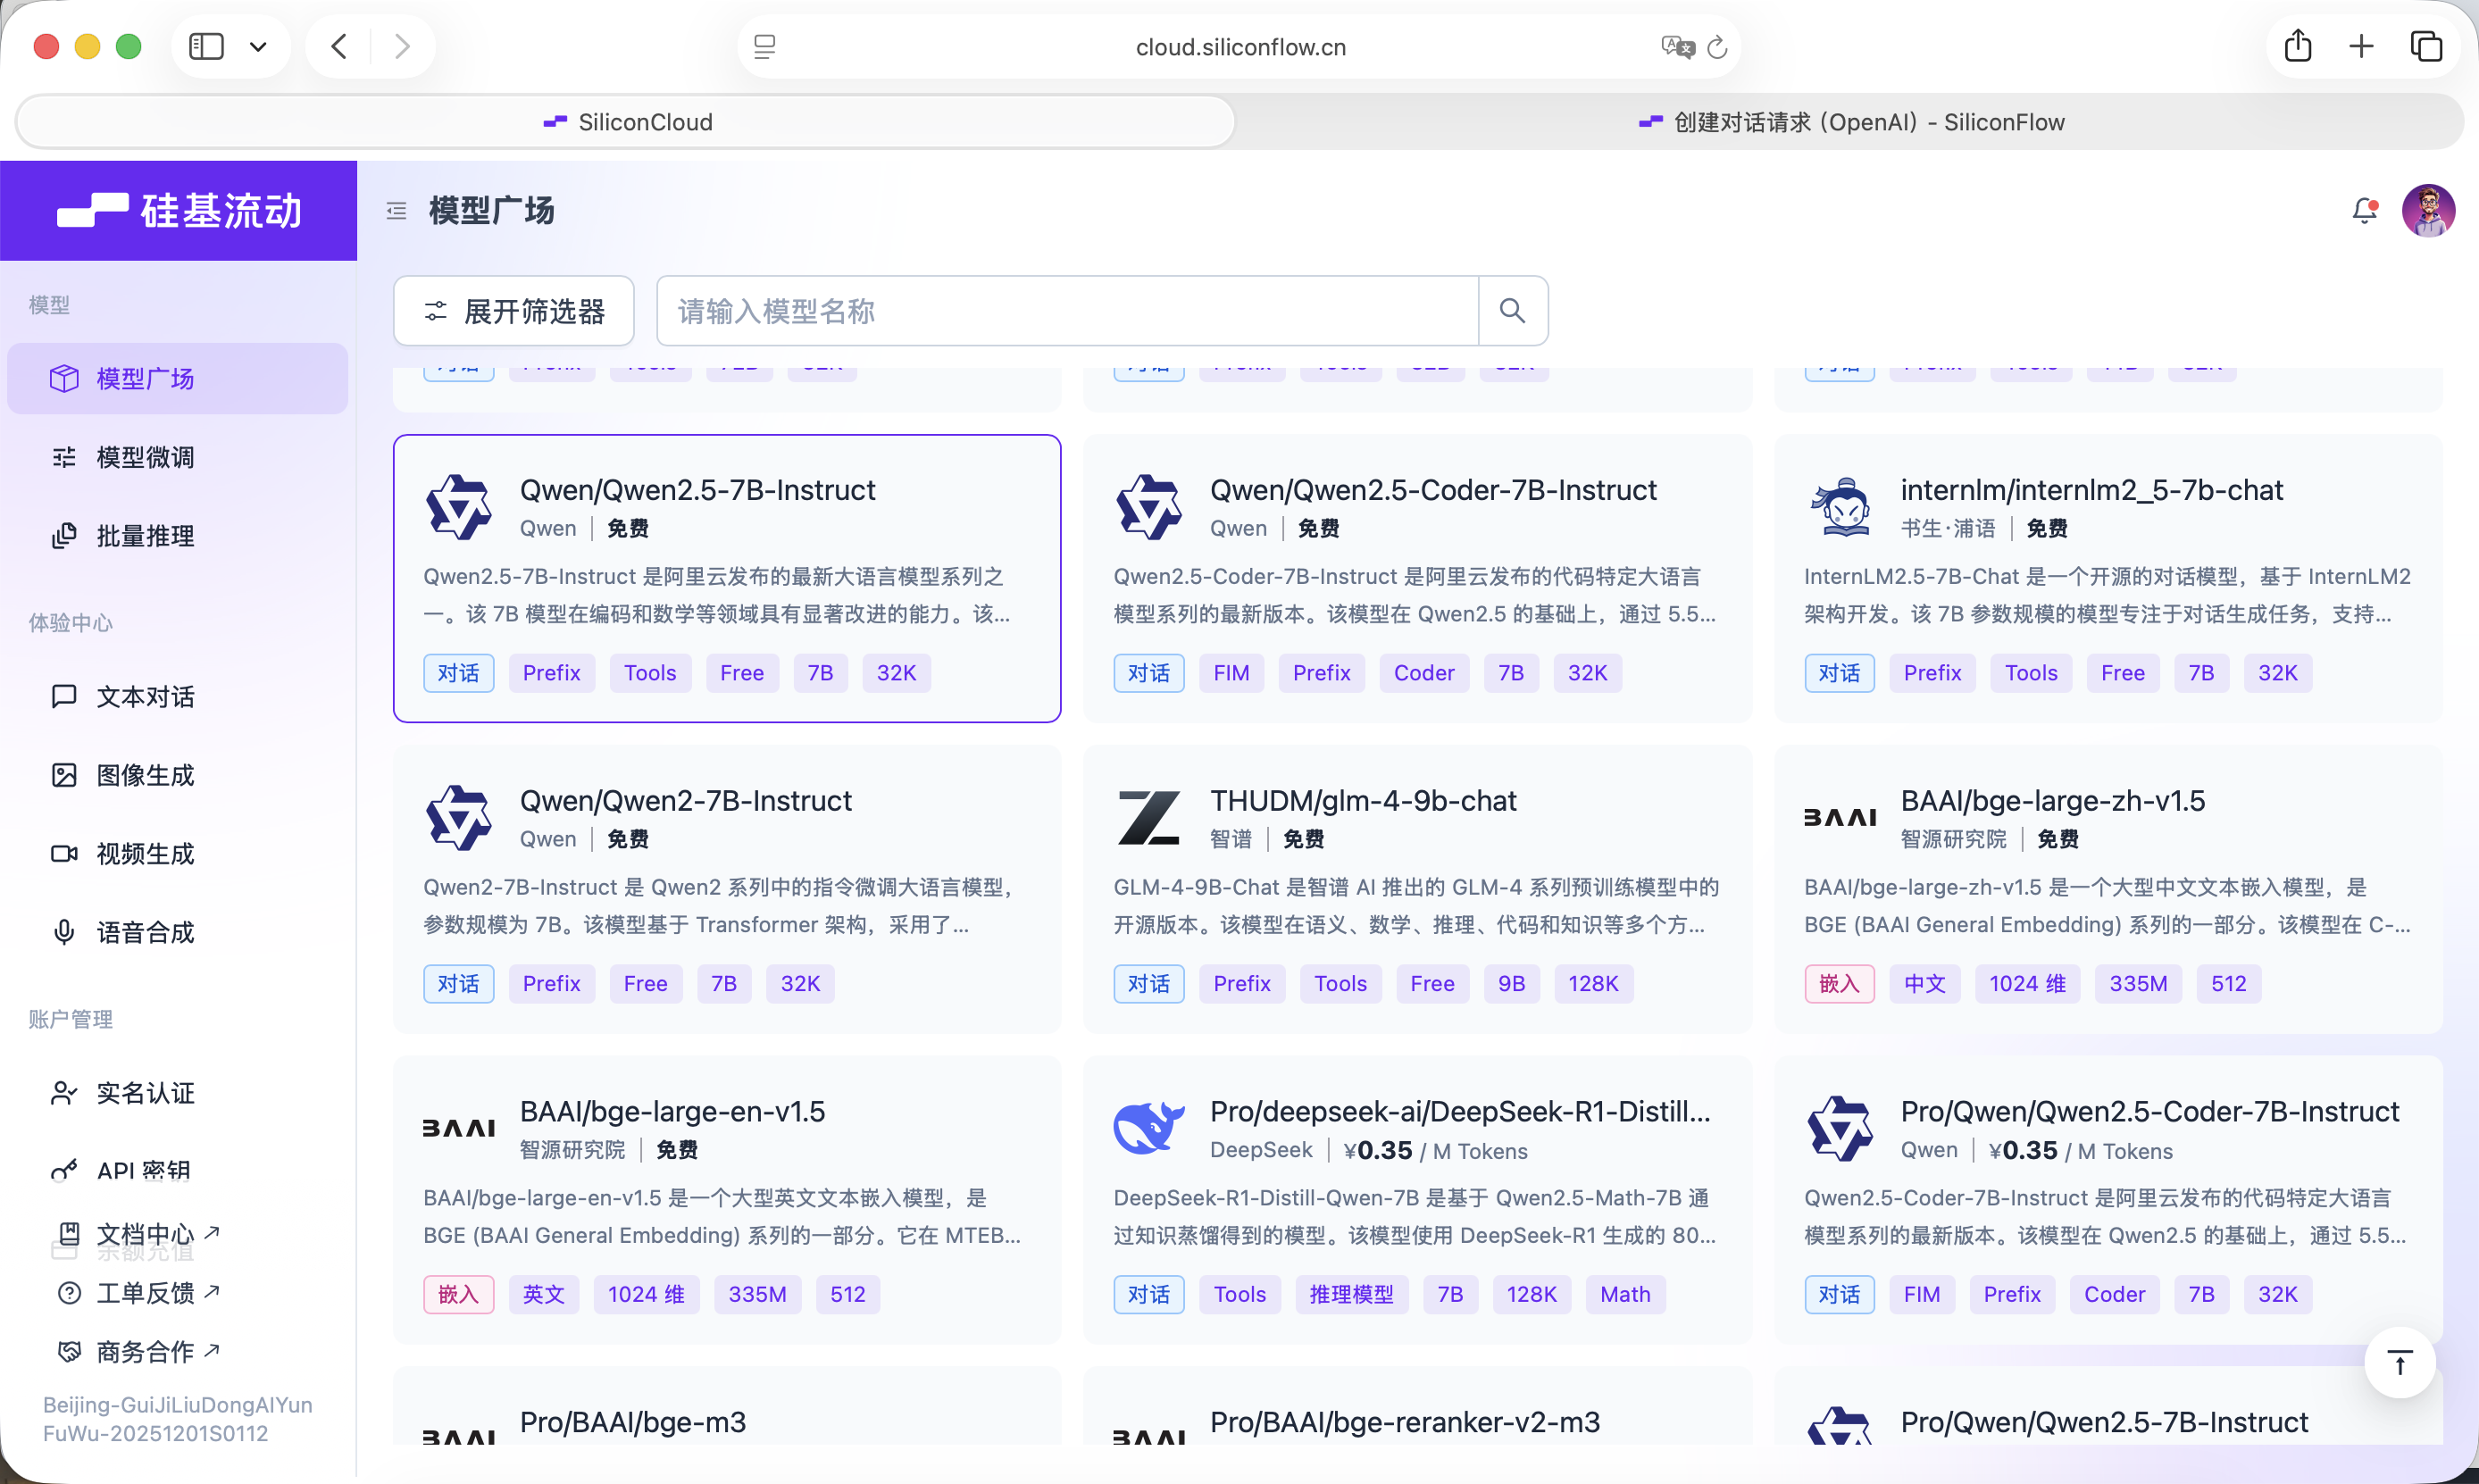
SiliconFlow provides an API compatible with the OpenAI API specification, so it is very convenient to call from an iOS project using standard network requests.
Before starting, you need to register an account on the site and create an API Key.
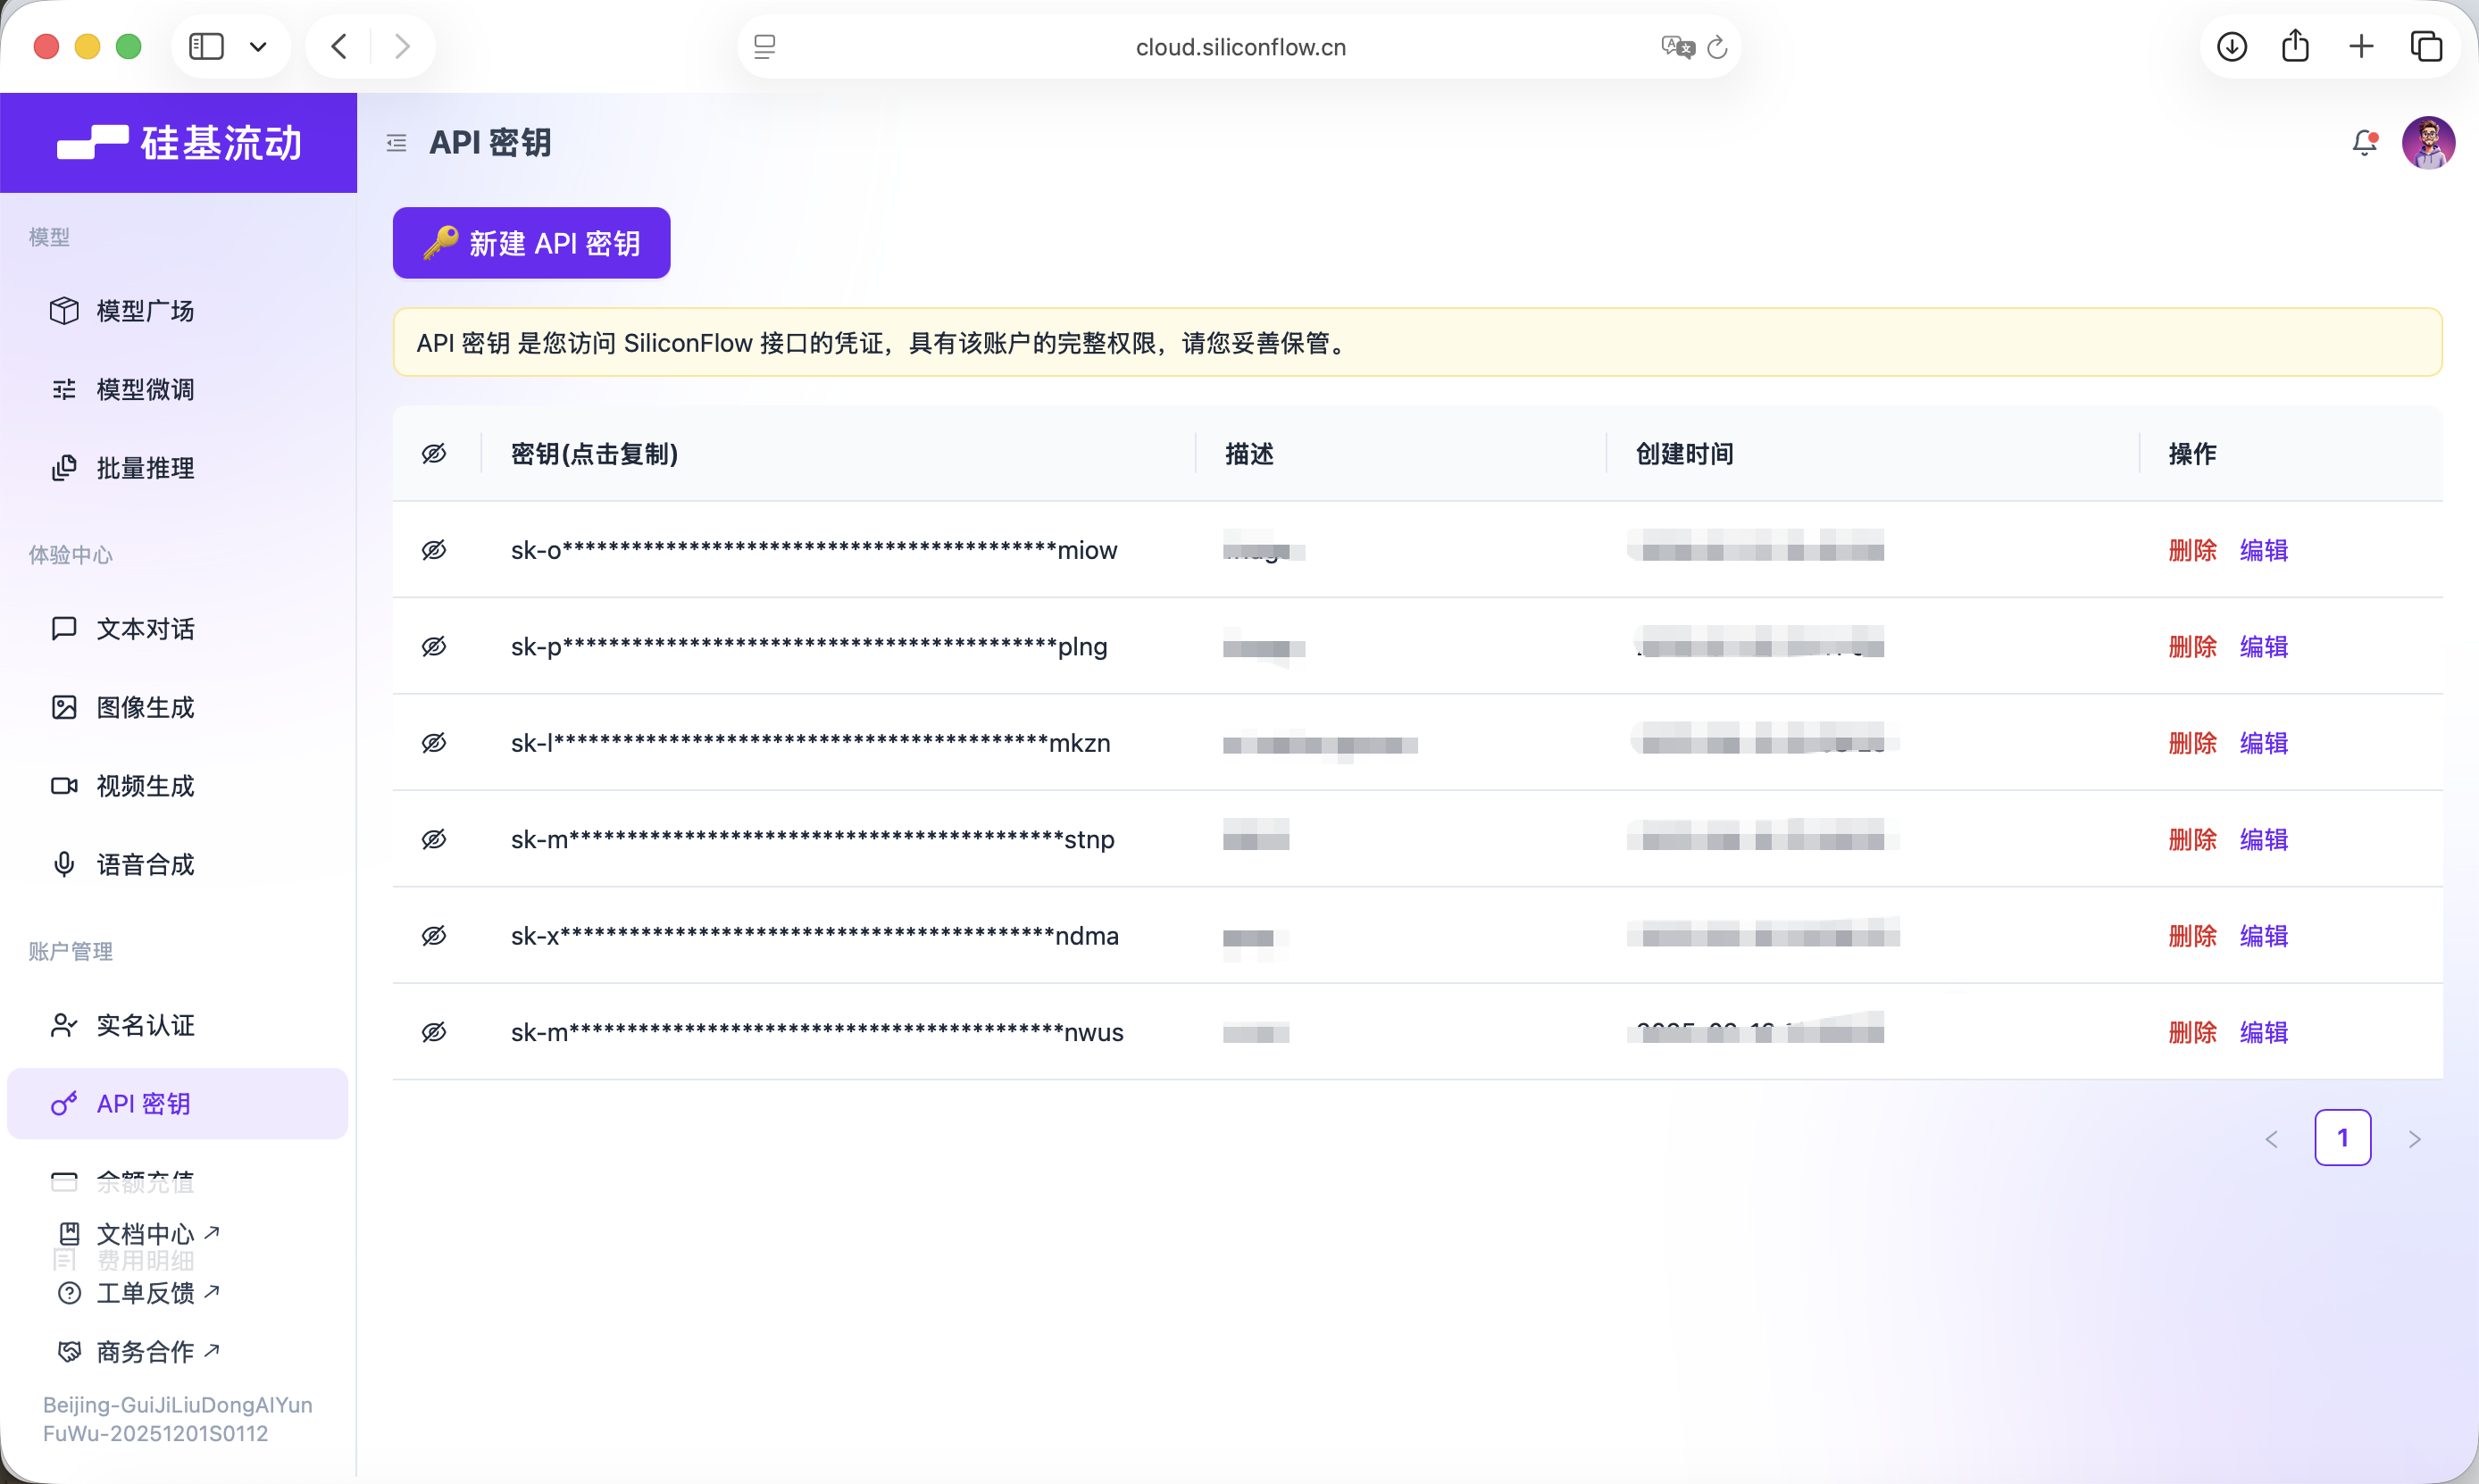
This Key will be used for later model calls.
📋 Prompt to copy:
Now we need to connect AI capability.

Please create APIService.swift.

Configuration:
- Base URL: https://api.siliconflow.cn/v1
- Model: Qwen/Qwen2.5-7B-Instruct
- API Key: define it as a variable for now, I will fill it later

Functions:
- Write a generateRecipe(ingredients: [String]) method
- The System Prompt must strictly require the model to return pure JSON only
- JSON fields should include: dishName, ingredients, steps

Also define a RecipeModel struct for parsing the returned data.
After the code is generated, fill in your own Key inside APIService.swift.
4.5 Stage Five: Core Data Local Storage
To let the app remember the recipes it has generated, we need to bring in local data storage. This stage is divided into two steps.
Step 1: manually configure Core Data in Xcode
- Open
FridgeChef.xcdatamodeld - Create a new Entity named
RecipeEntity
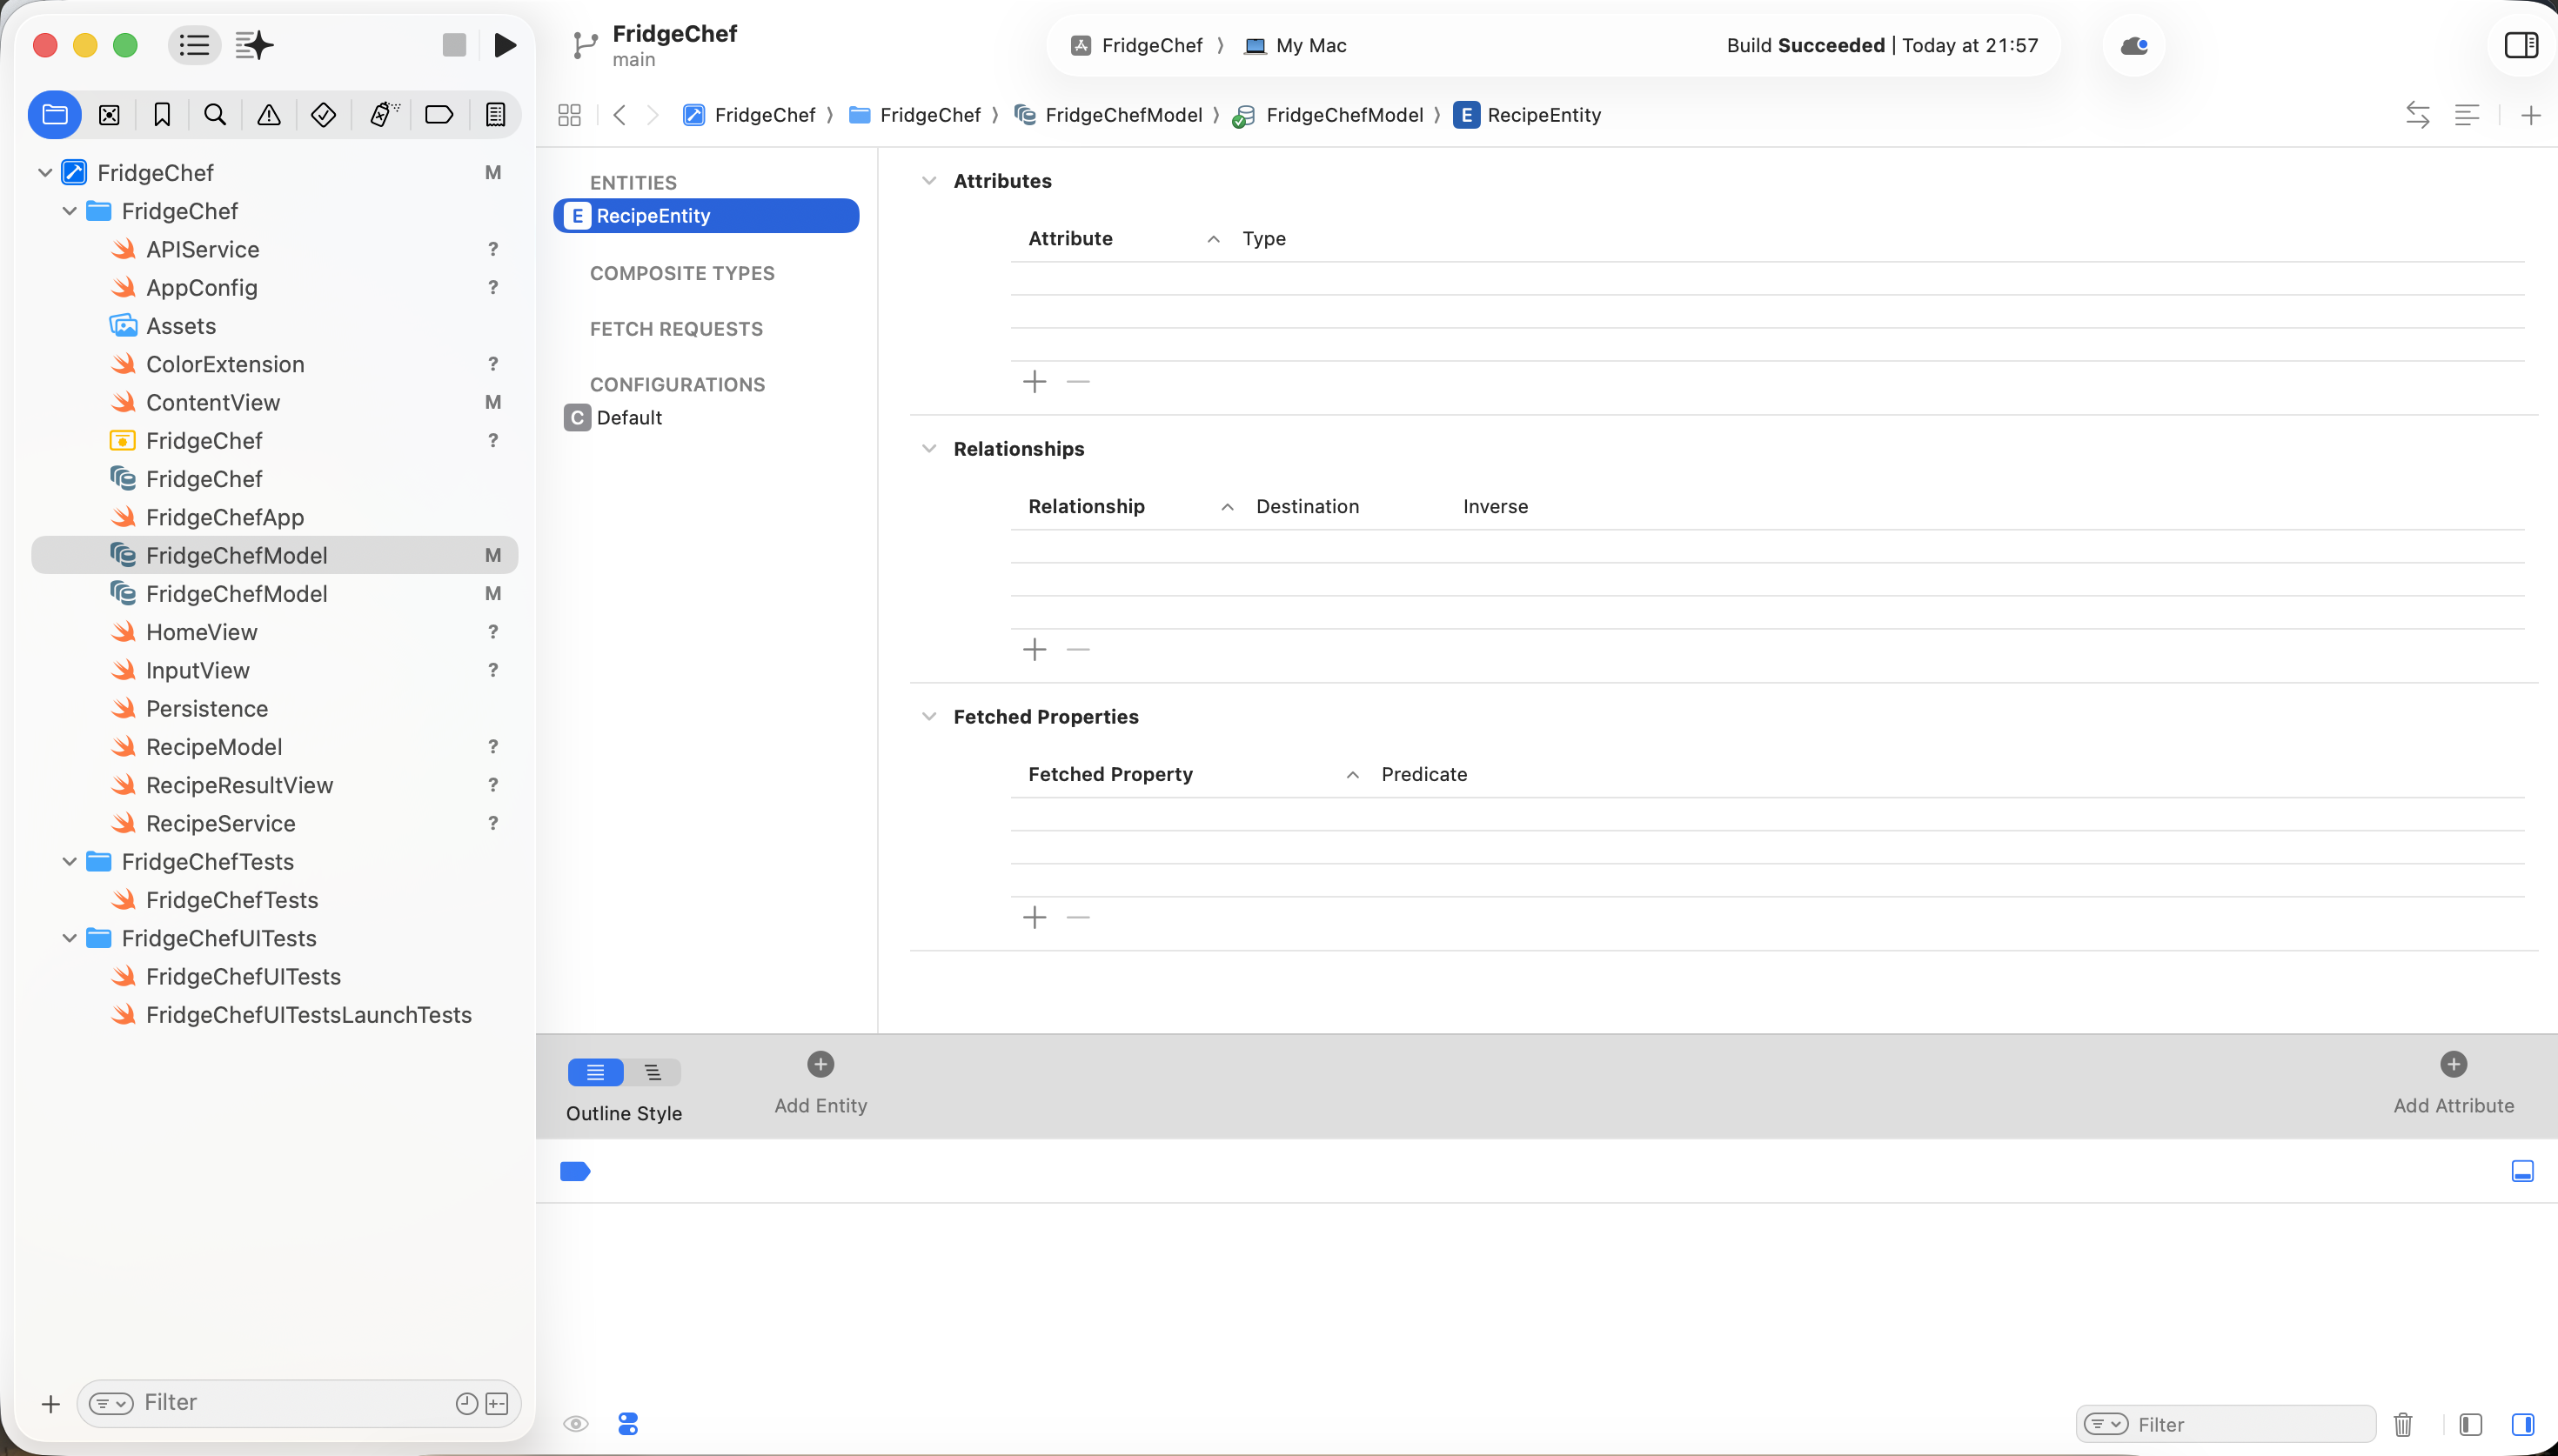
- Add the following attributes:
id: UUIDname: StringcookTime: Stringdifficulty: Stringdesc: Stringtimestamp: DatecolorIndex: Integer 16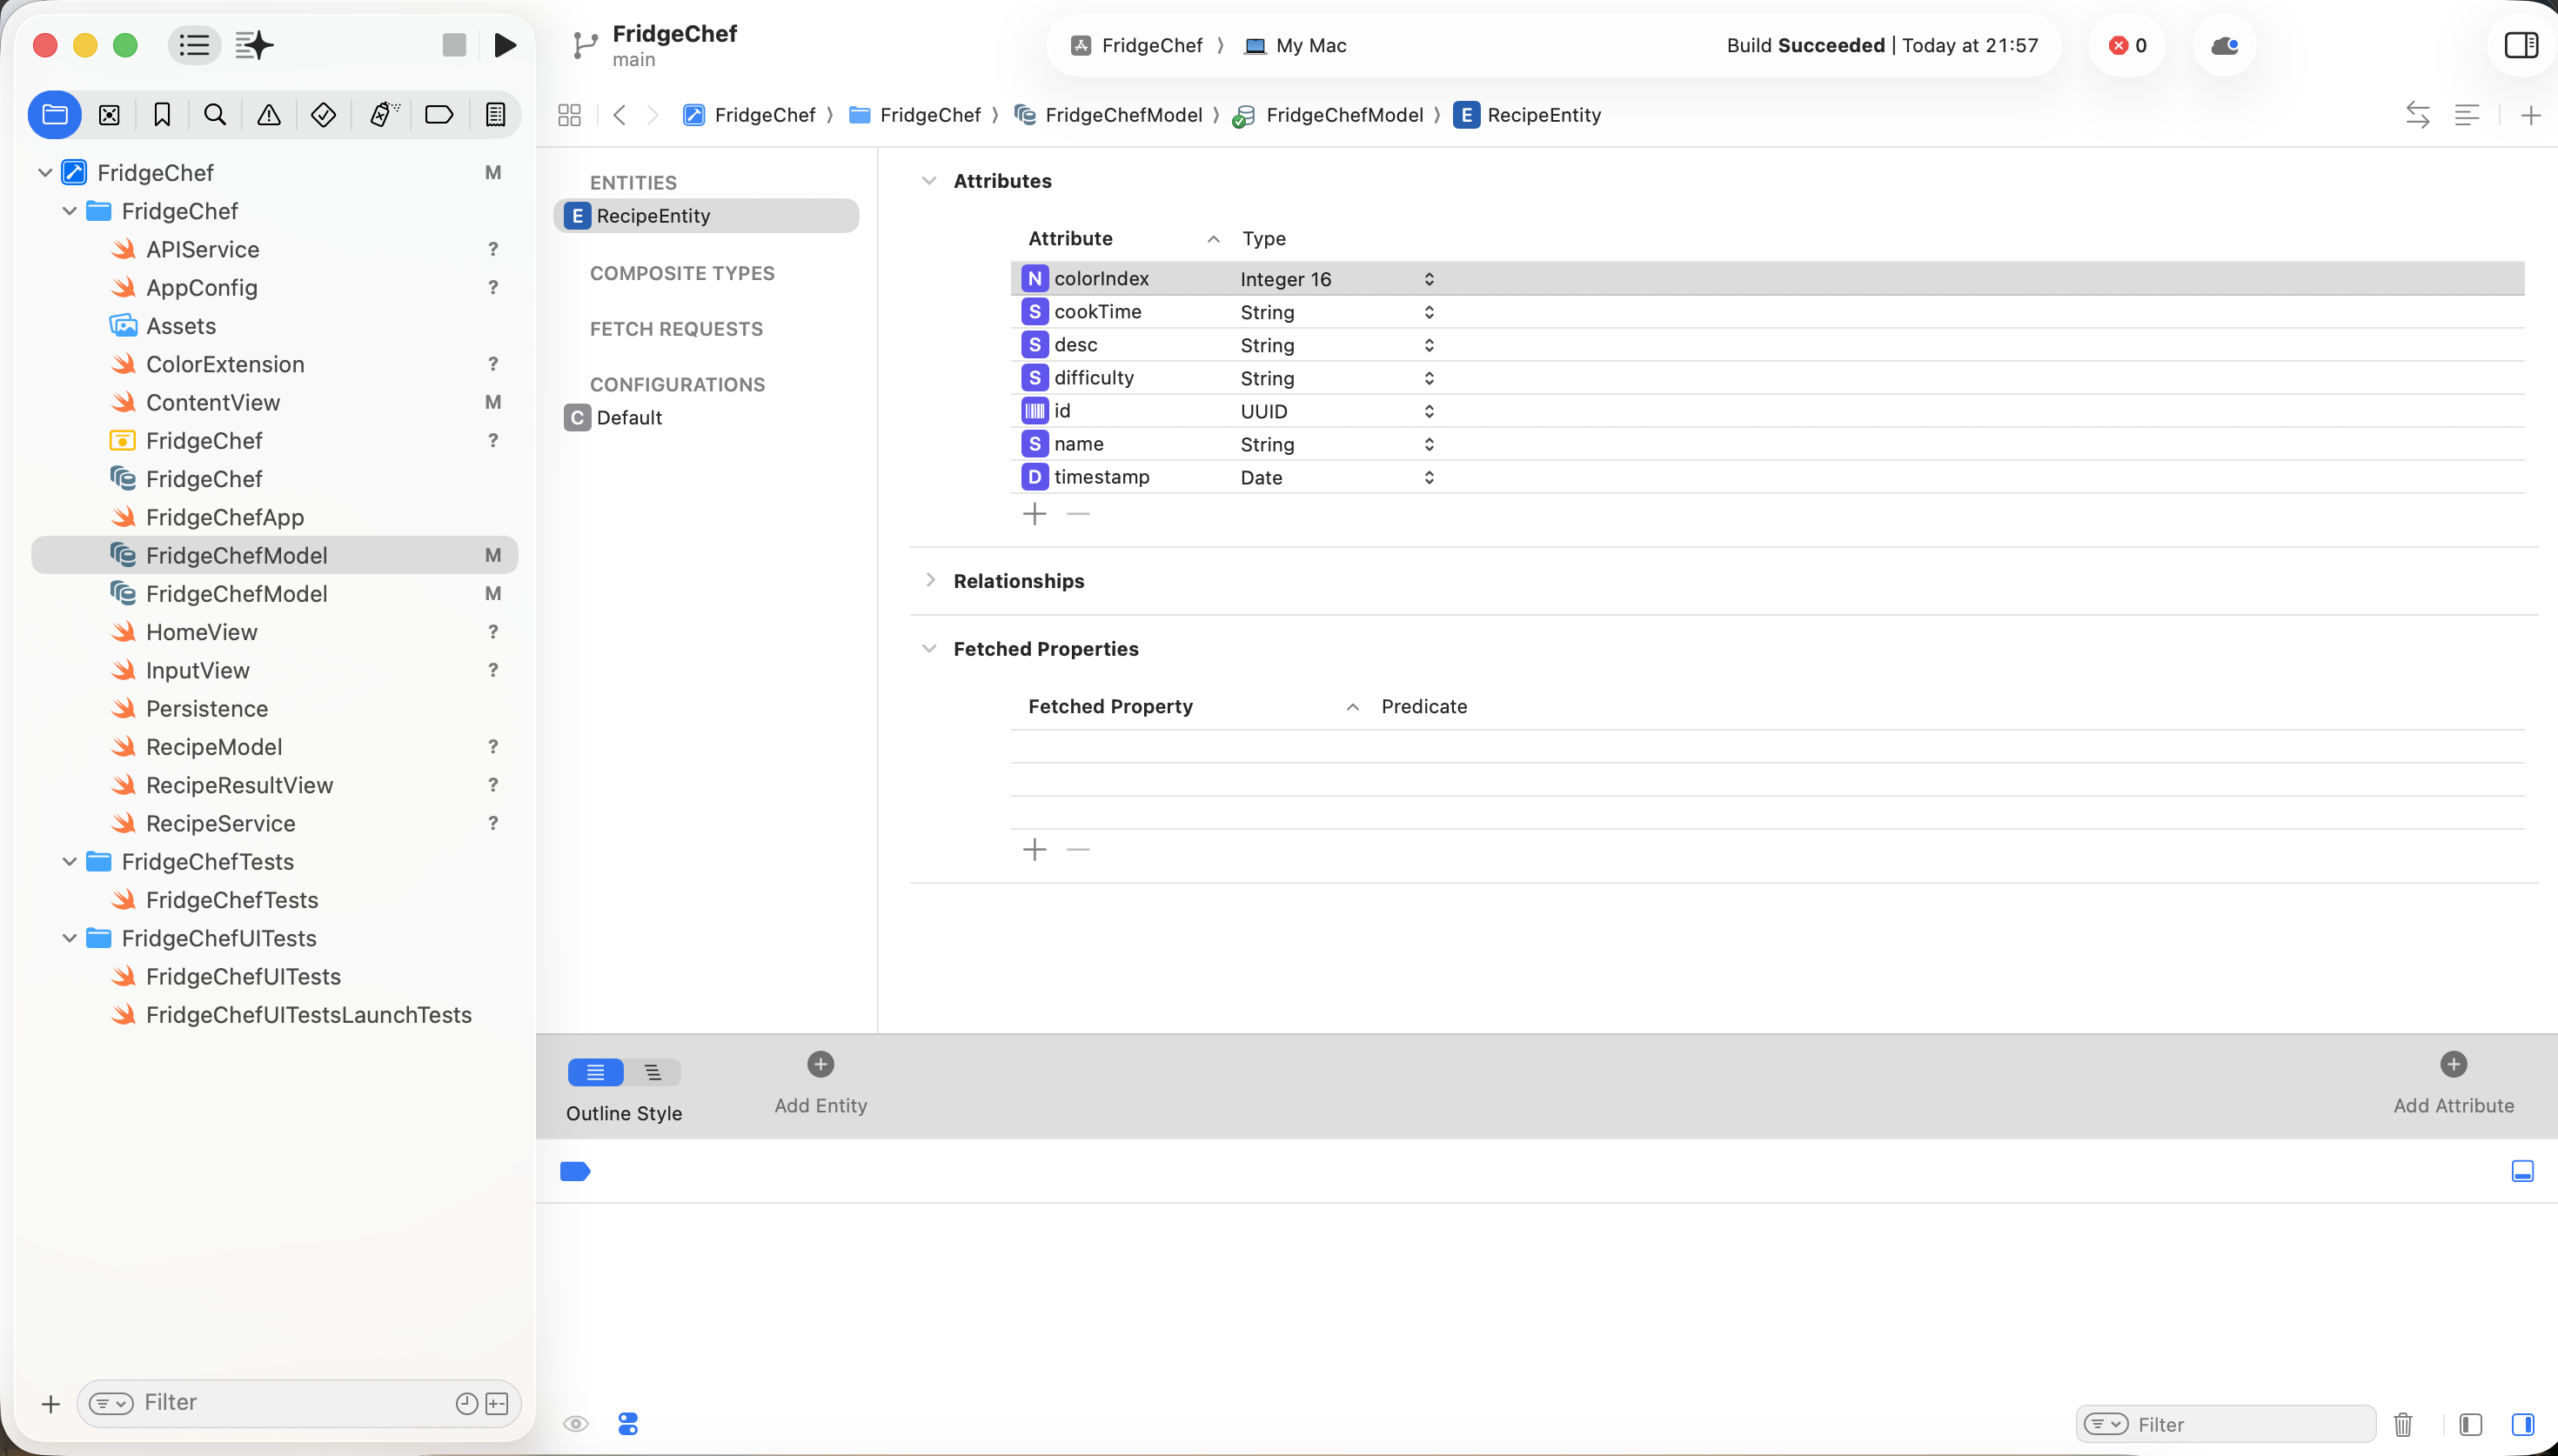
Step 2: let AI write the logic code
📋 Prompt to copy:
I have finished configuring the Core Data Entity.

Entity: RecipeEntity
Attributes: id, name, difficulty, timestamp, colorindex, cookTime, desc

Please complete the following tasks:
1. Save data into Core Data after recipe generation succeeds
2. Use FetchRequest on the home page to read historical records and display them in reverse chronological order
3. When the database is empty, show a friendly empty-state message
4.6 Stage Six: Generate an App Icon
The final step is to prepare a proper icon for the app. Here we use Lovart to generate the icon asset: https://www.lovart.ai/zh
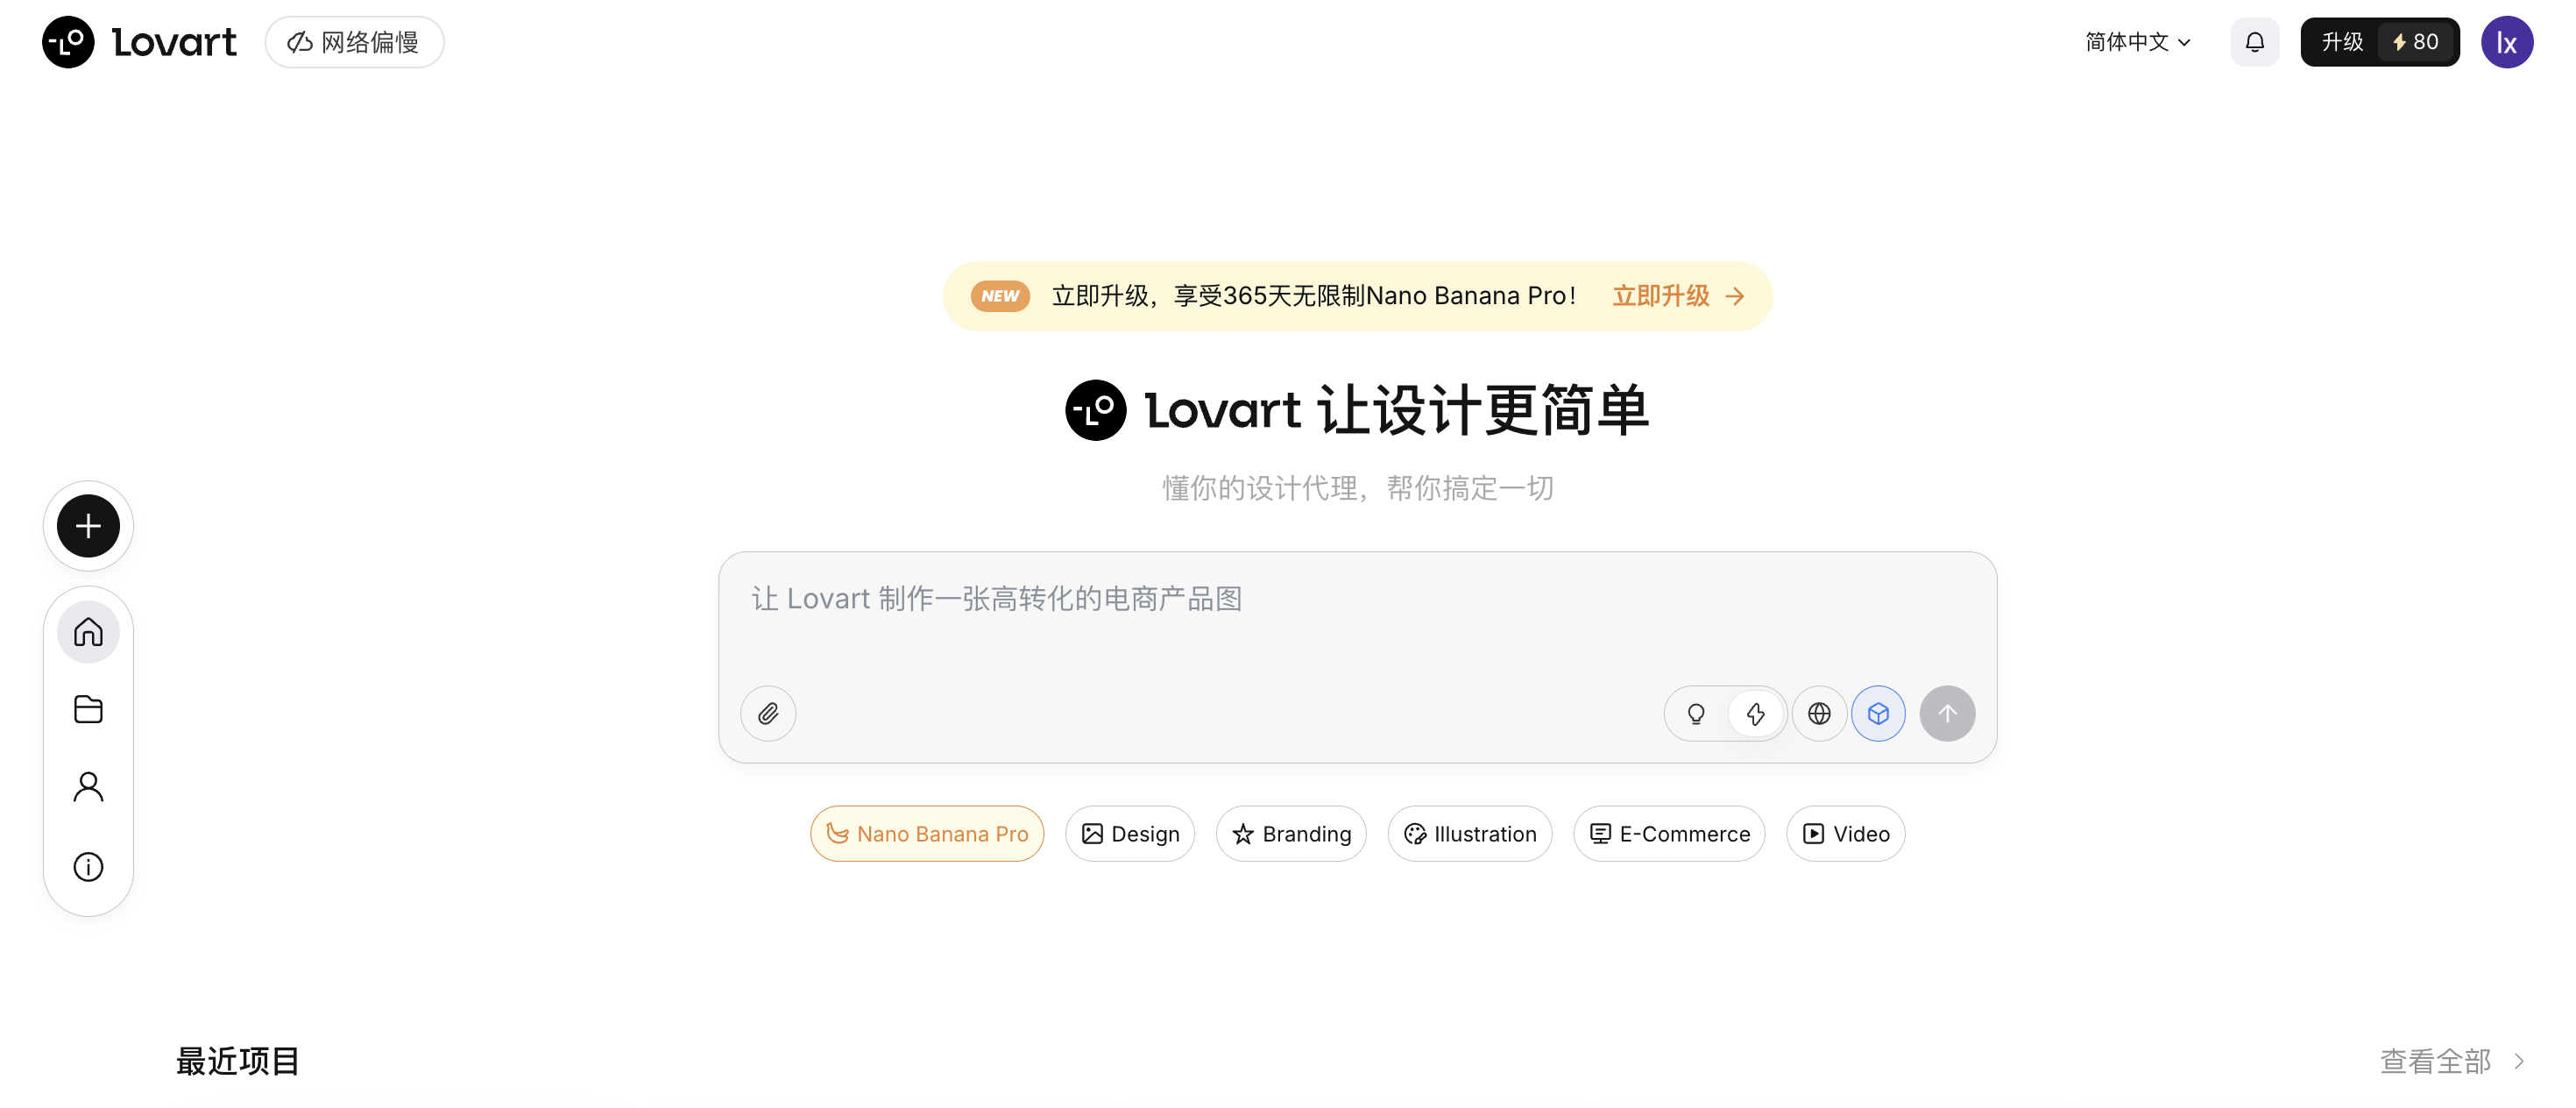
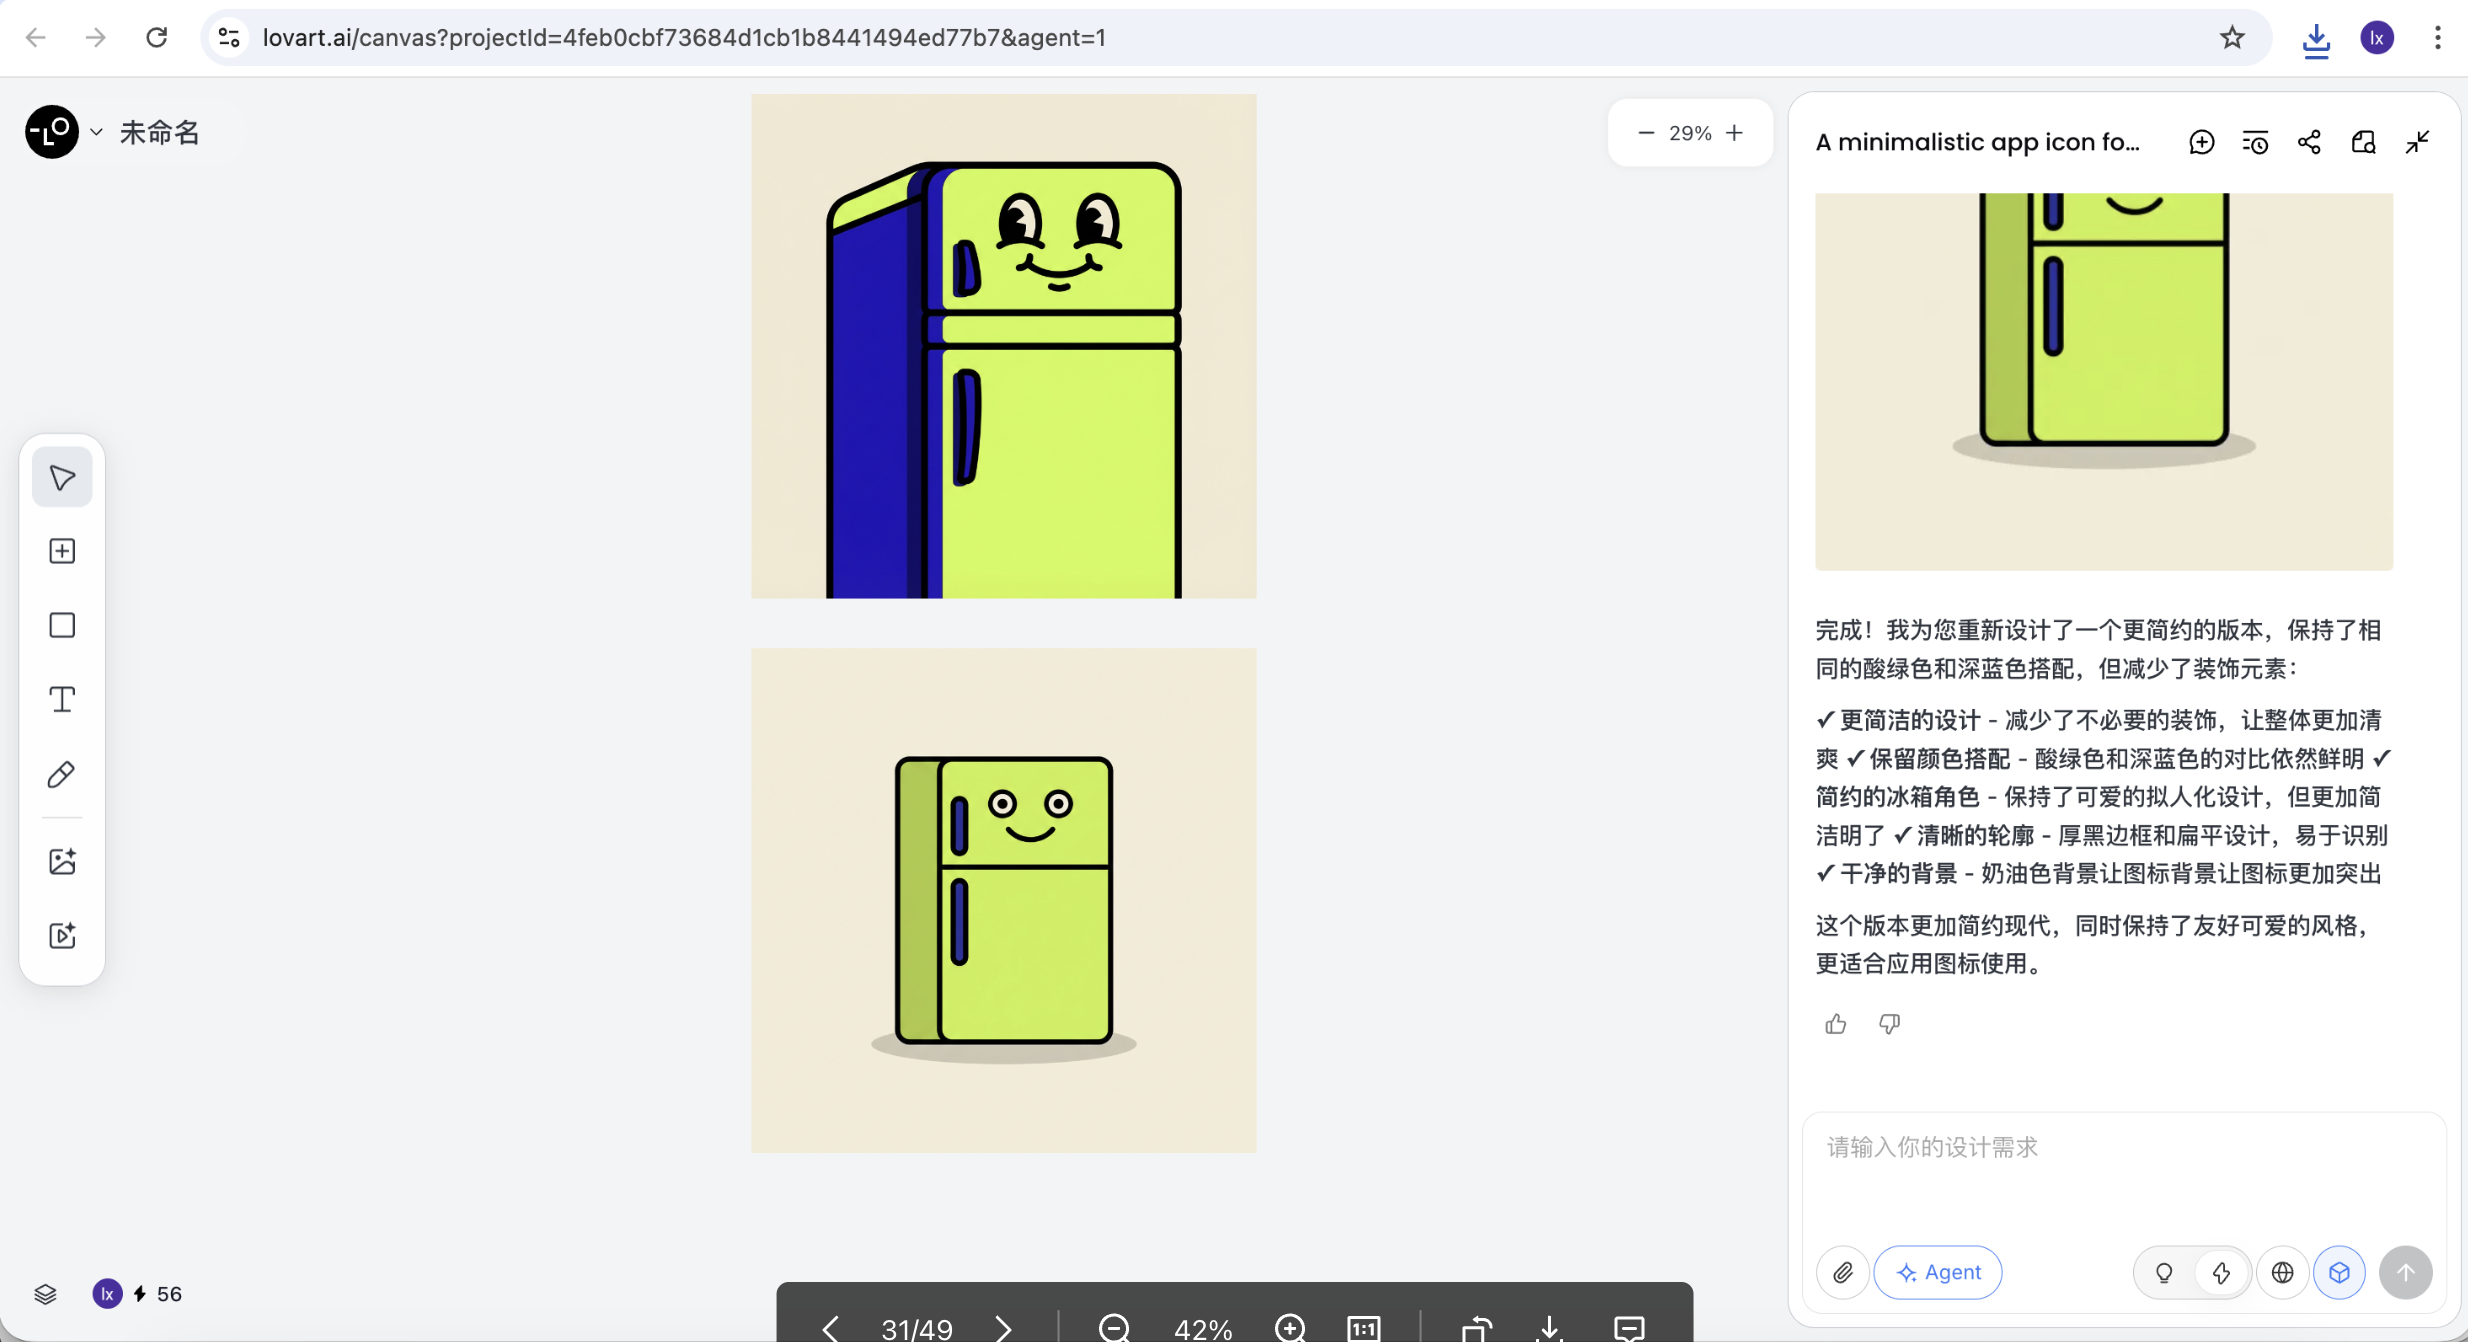
📋 Prompt to copy into Lovart:
Subject: A cute anthropomorphic fridge character with a happy face
Style: Minimalistic App Icon, Neo-pop style, thick black outlines, vector art
Colors: Acid green (#CCFF00) and deep blue
Background: Solid cream color
Negative Prompt: Text, realistic details, 3D render, complex background
After generation, crop the image to 1024x1024 and drag it into Assets.xcassets -> AppIcon in Xcode.

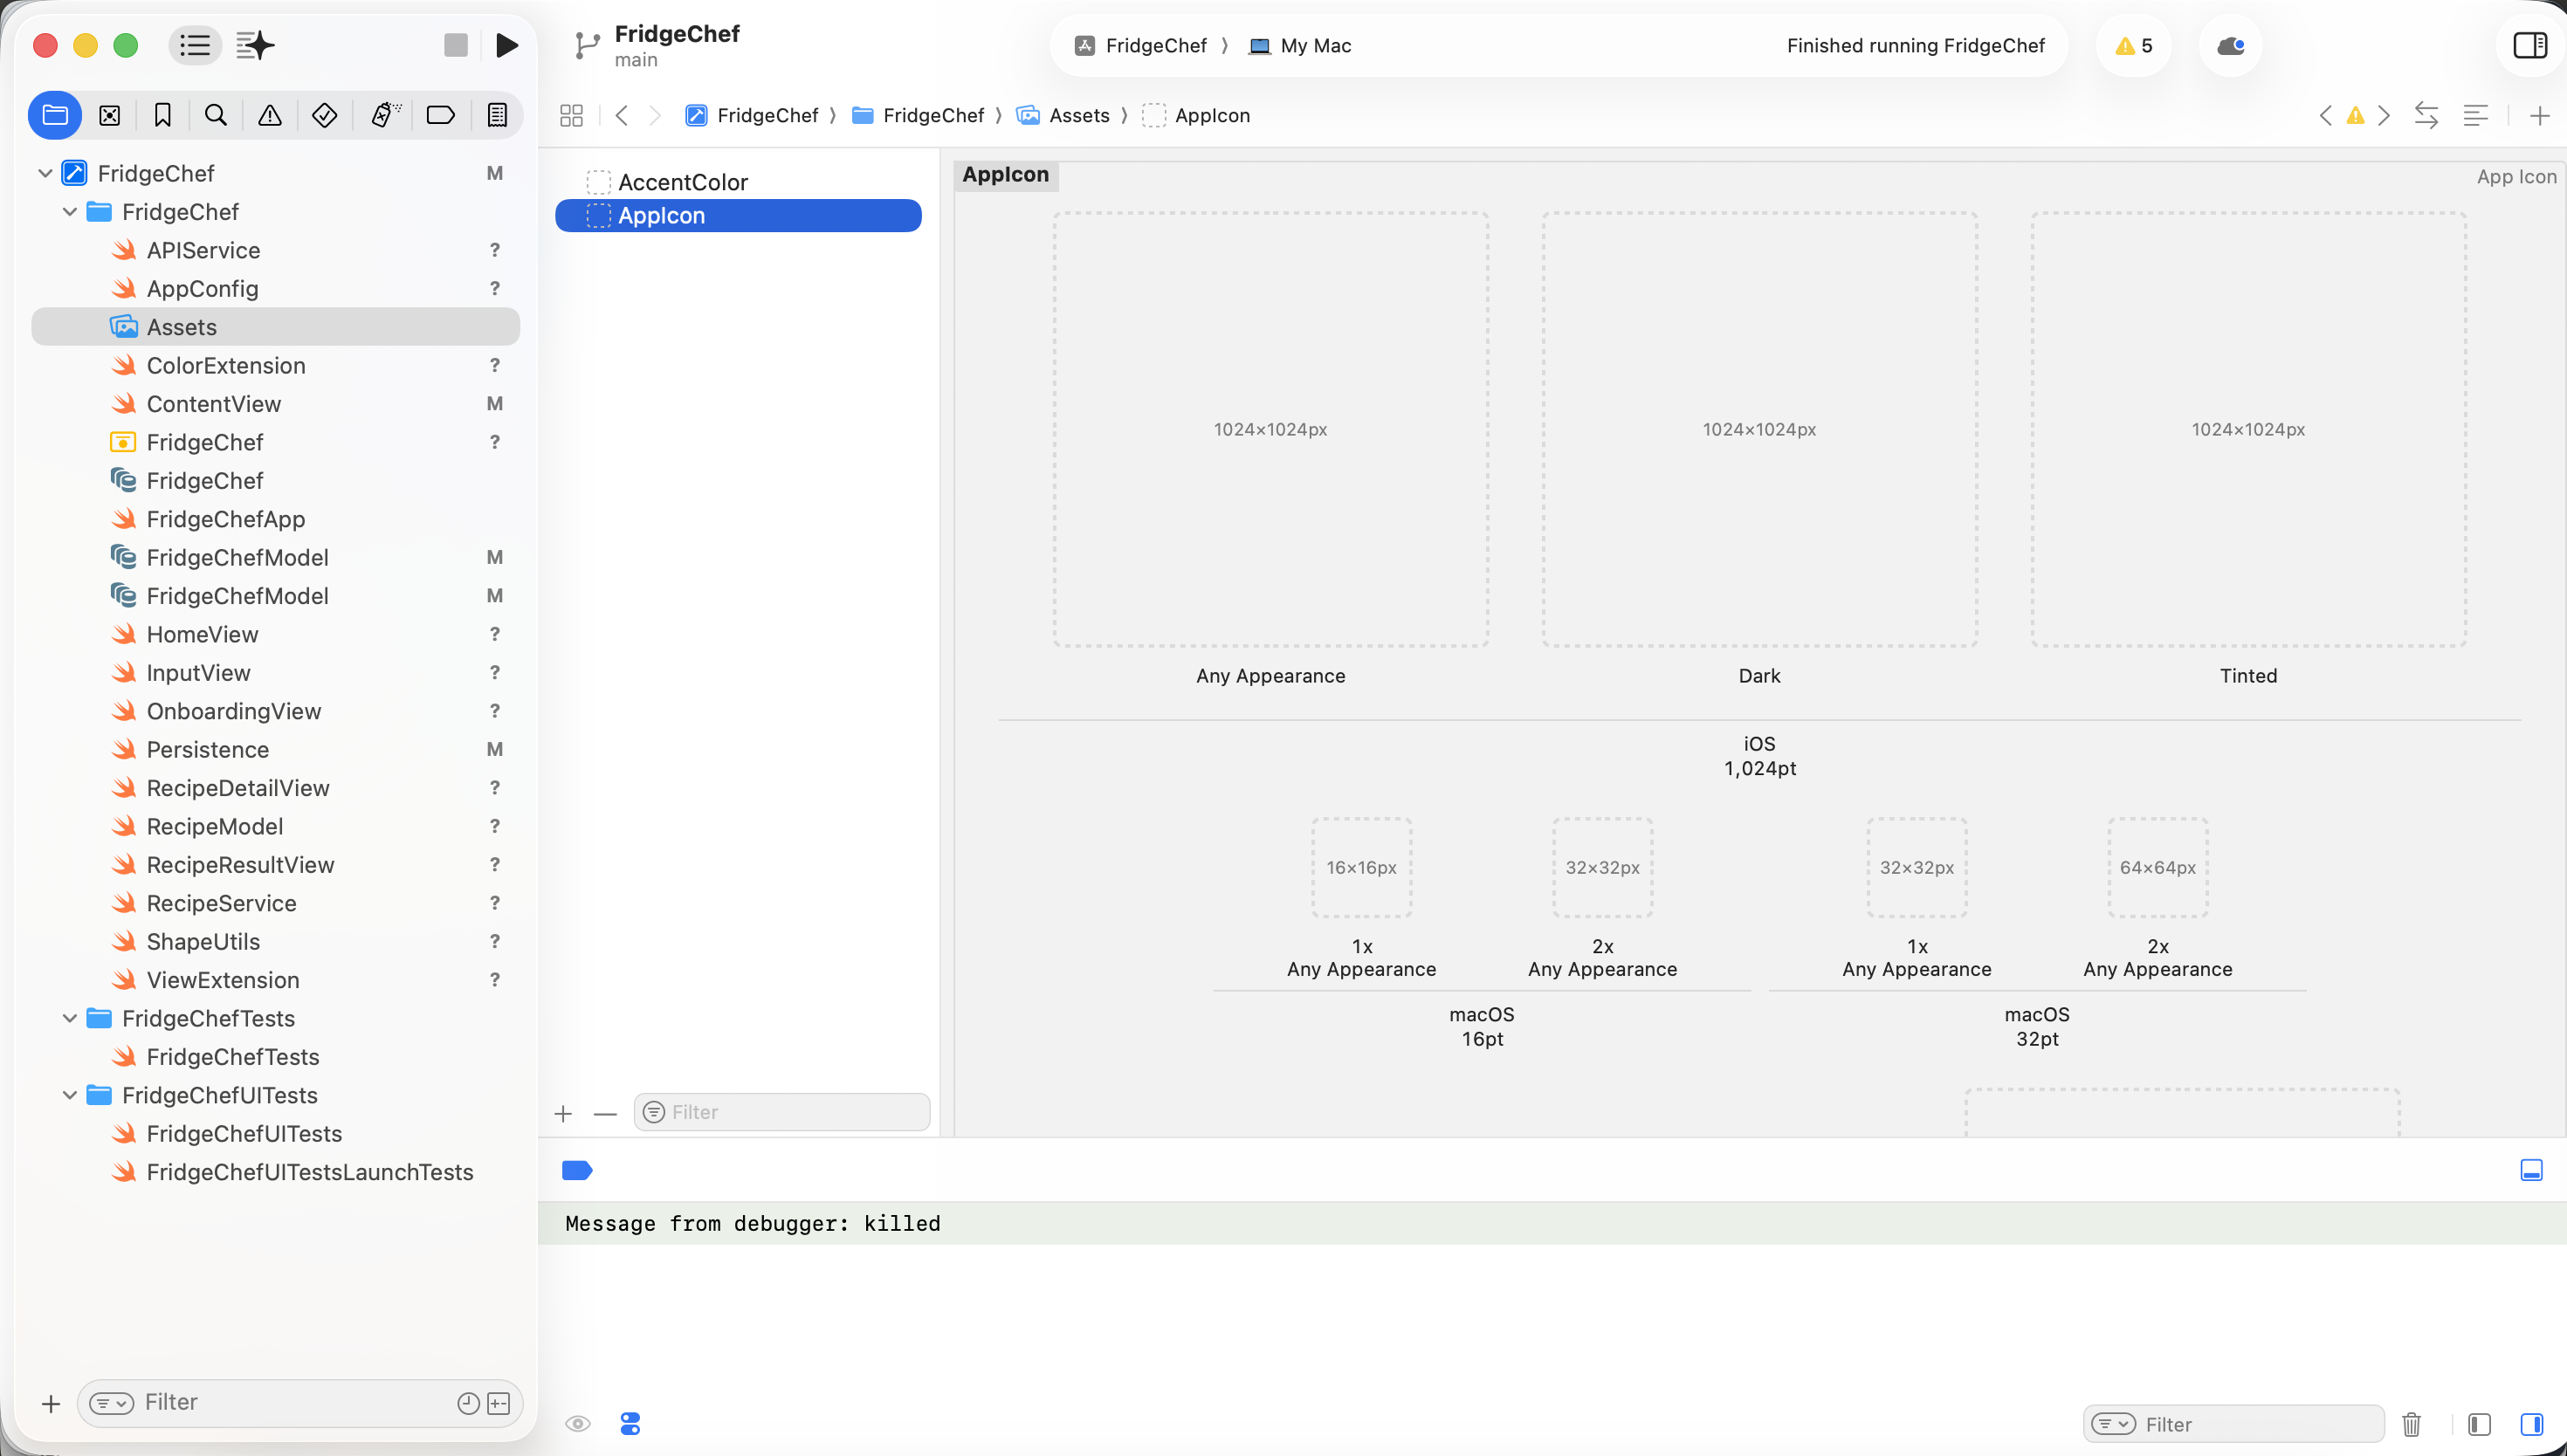
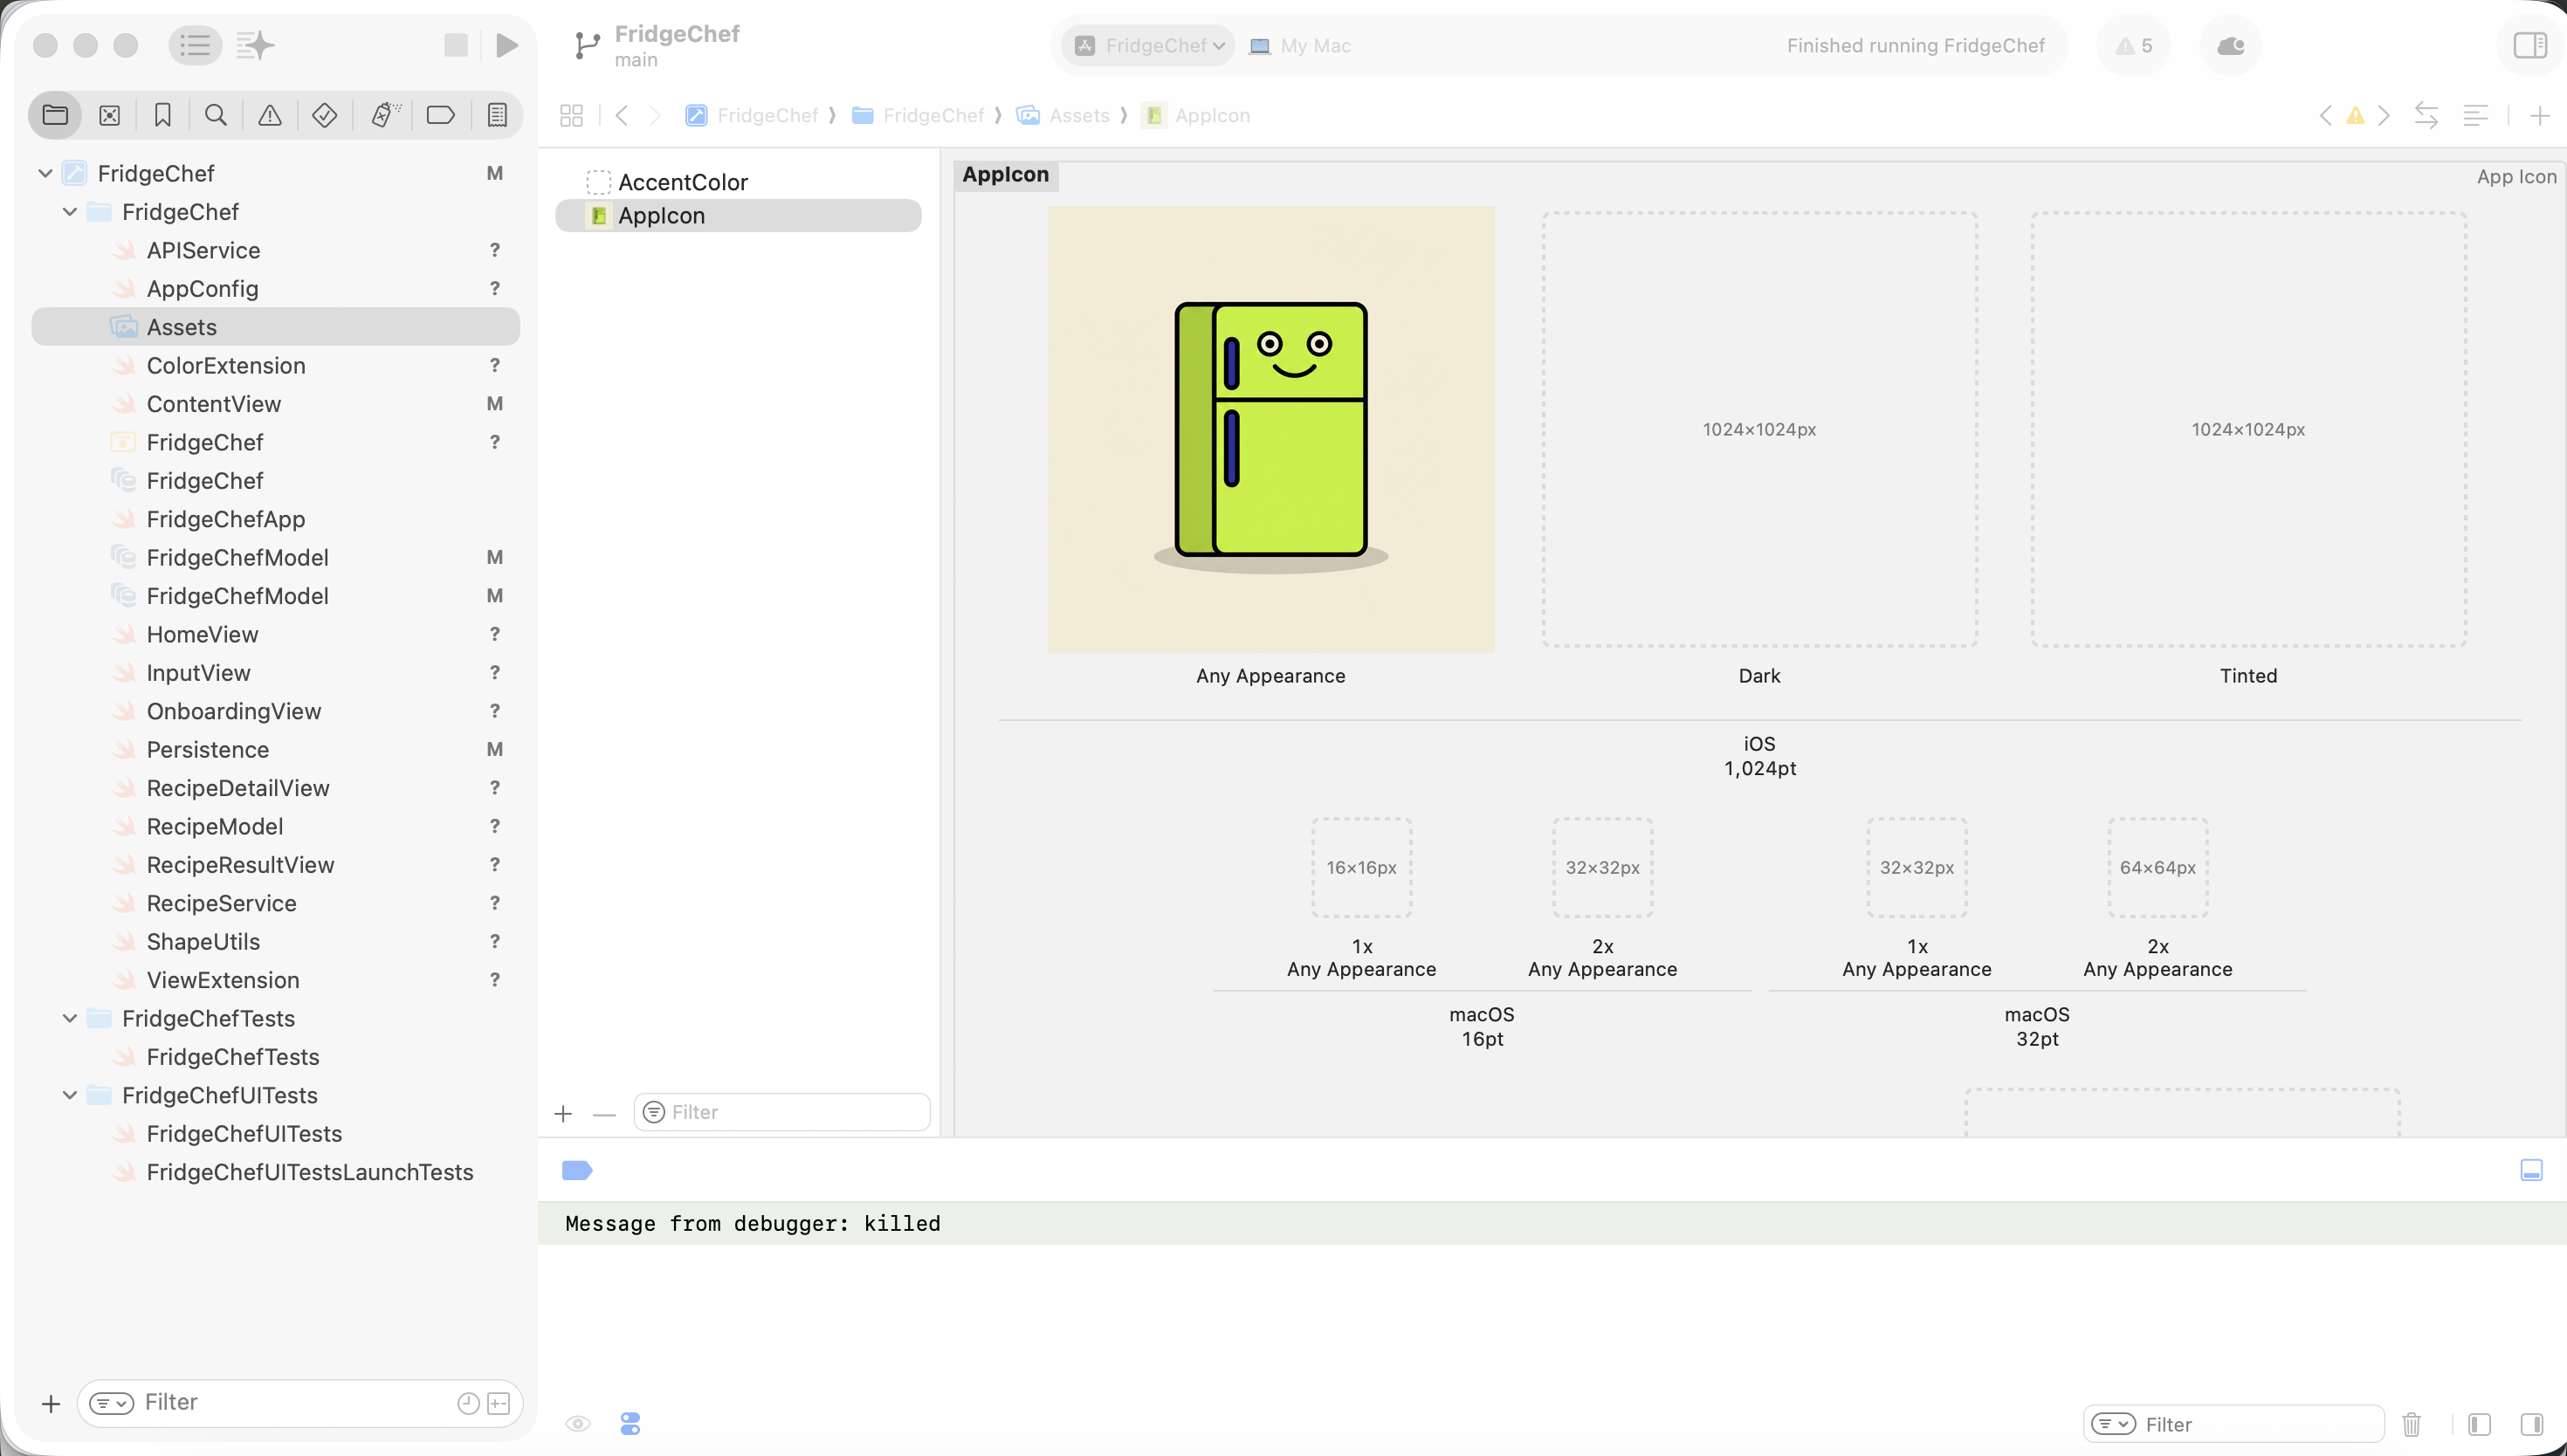
Run the app again, and you will now see a complete, recognizable, real iOS application.
4.7 Stage Seven: Advanced Experience Upgrade
Once the functionality is stable, if you want to further improve the visual style, you only need to describe the effect you want to AI, let it generate a new design proposal, and then migrate the confirmed result into SwiftUI.
📋 Reference Prompt:
The app's functionality is already complete, but I want to try a more visually impactful UI style.
Please first generate a new design draft in HTML + Tailwind CSS for me, with the file name design_v2.html.

Design style: Neo-Pop (dopamine style)
Color requirements:
Use Deep Royal Blue as the full-screen background
Use Acid Green (#CCFF00) as the accent color

Visual feel:
All cards should use a 3px thick black border
Use a hard shadow without transparency blur, shifted down-right

Layout requirements:
Keep the home page structure unchanged
Use pill-shaped buttons and input boxes

Please generate the full code so I can preview it in a browser.
After it is generated, open this HTML file in a browser.
Once the HTML version is finalized, you can begin modifying the iOS project.
📋 Reference Prompt:
[design_v2.html uploaded]
Please analyze the visual style of this HTML and migrate it into the current iOS project.

Task requirements:
Create a new NeoPopStyle.swift file
Encapsulate a neoPopBlue() style modifier

The modifier needs to include:
- rounded corners
- thick black border
- opaque hard shadow

Refactor HomeView:
- change the background to Deep Royal Blue
- use Acid Green for the primary button
- use white background for historical record cards
- make sure text remains clear and readable on the dark background

Please provide the full modified code.
Click Run in Xcode again. If everything works, you should see:
- the functionality is exactly the same as before
- the visual style has changed significantly
- the overall app quality feels noticeably upgraded
Chapter 5: Running, Debugging, and Error Handling
In the previous chapter, you completed the core functionality and successfully ran the app in the simulator.
But for an iOS app, true completion is not just "compiles successfully" - it is stable operation, and knowing how to handle problems when they appear.
5.1 Run the App in Xcode
First, make sure the project can run correctly in Xcode.
In the top-left of Xcode, select the run device and keep the default iPhone simulator. Click the Run button to compile and run. If everything is normal, the app will launch in the simulator and display the interface built in Chapter 4.
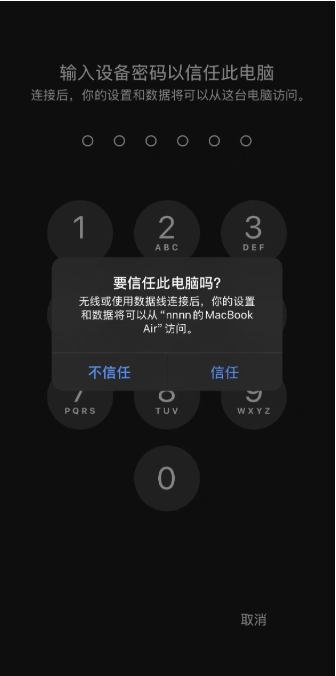
5.2 Run the App on a Real Device
Connect your iPhone to the Mac using a cable.
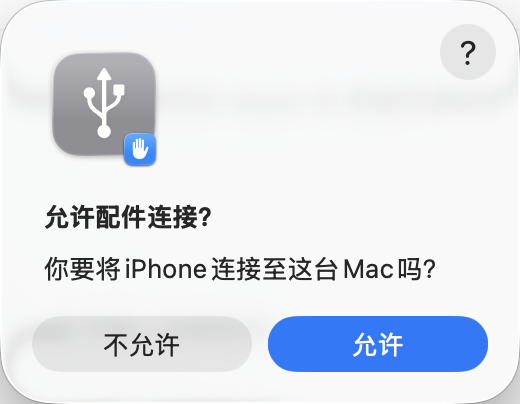
When connecting for the first time, the phone will show Trust This Computer? Tap trust and enter the unlock passcode.
In Xcode's device list, select your iPhone, then click Run again.
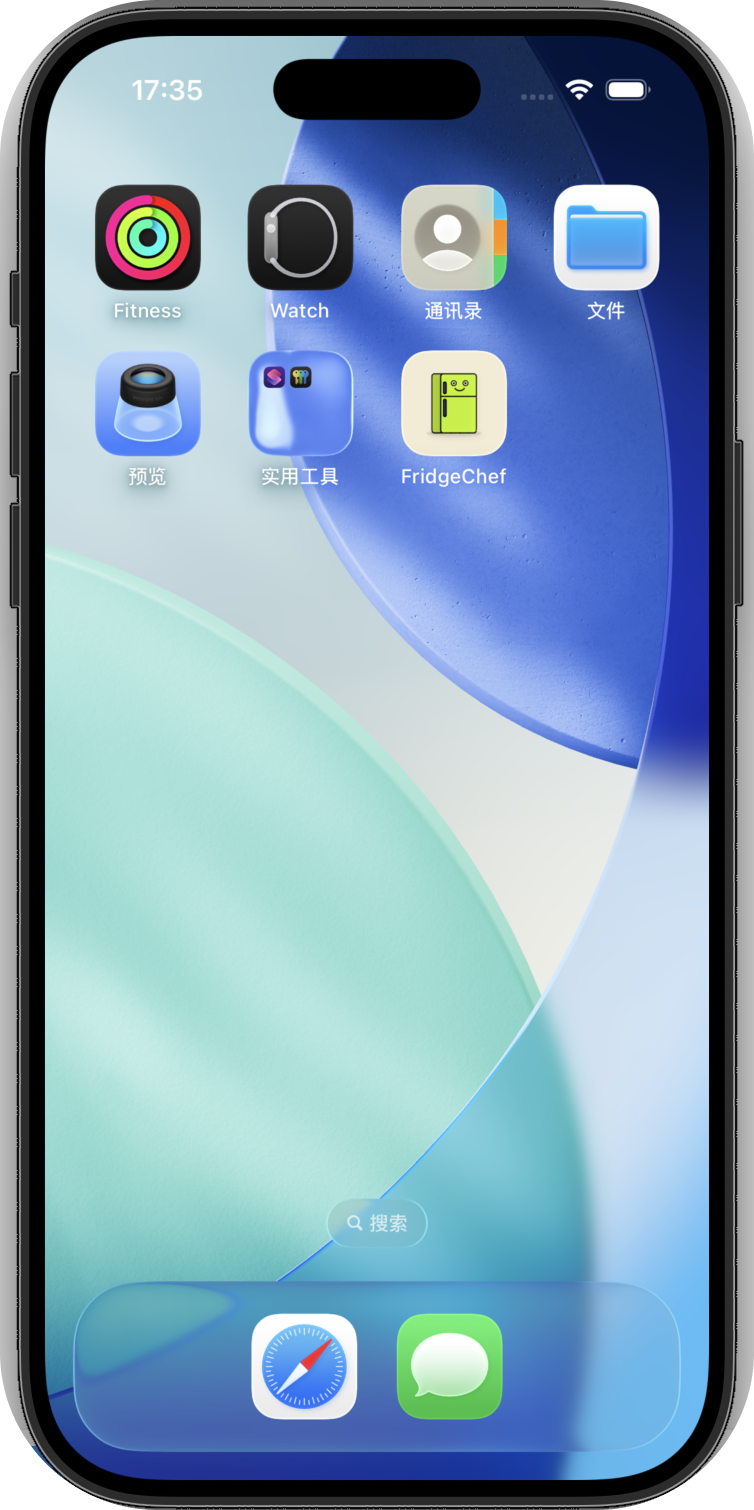
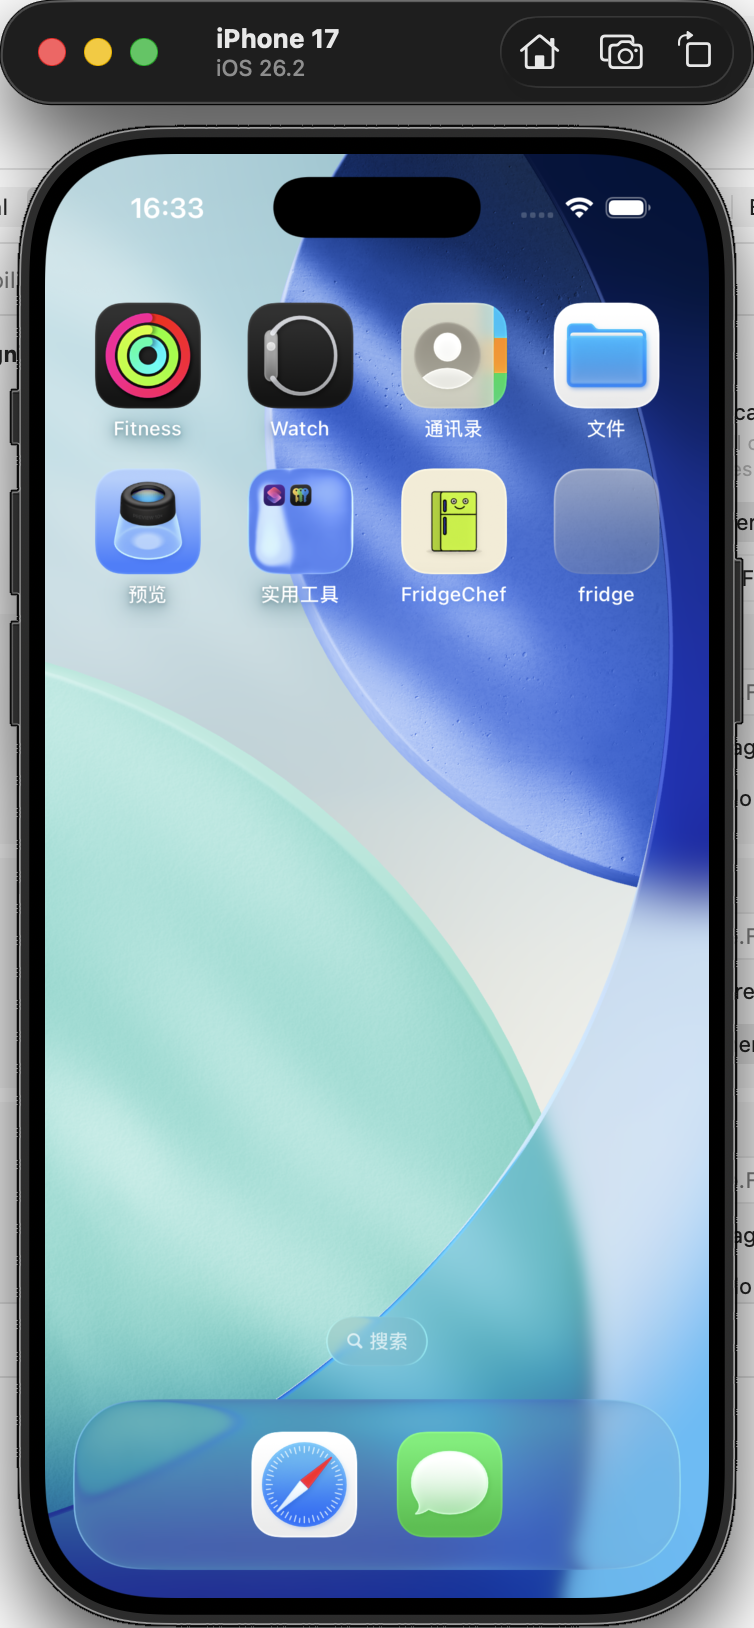
At this point, you should be able to see the FridgeChef icon on your phone's home screen, and open and use it normally.
This step marks the completion of one full iOS development closed loop.
5.3 Where iOS Development Errors Usually Come From
In real development, encountering errors is normal, not an exception.
Common issues usually come from these categories:
- Compilation errors
Swift syntax, type mismatches, missing parameters, etc. Xcode will directly highlight them in red. - Runtime errors
The app compiles, but crashes during execution - for example, array out of bounds or force-unwrapping a nil value. - Permission or configuration errors
Network requests blocked by the system, missing Info.plist configuration, signing issues, etc. - Logic errors
The app does not crash, but the behavior is wrong - for example, buttons not responding or data not refreshing.
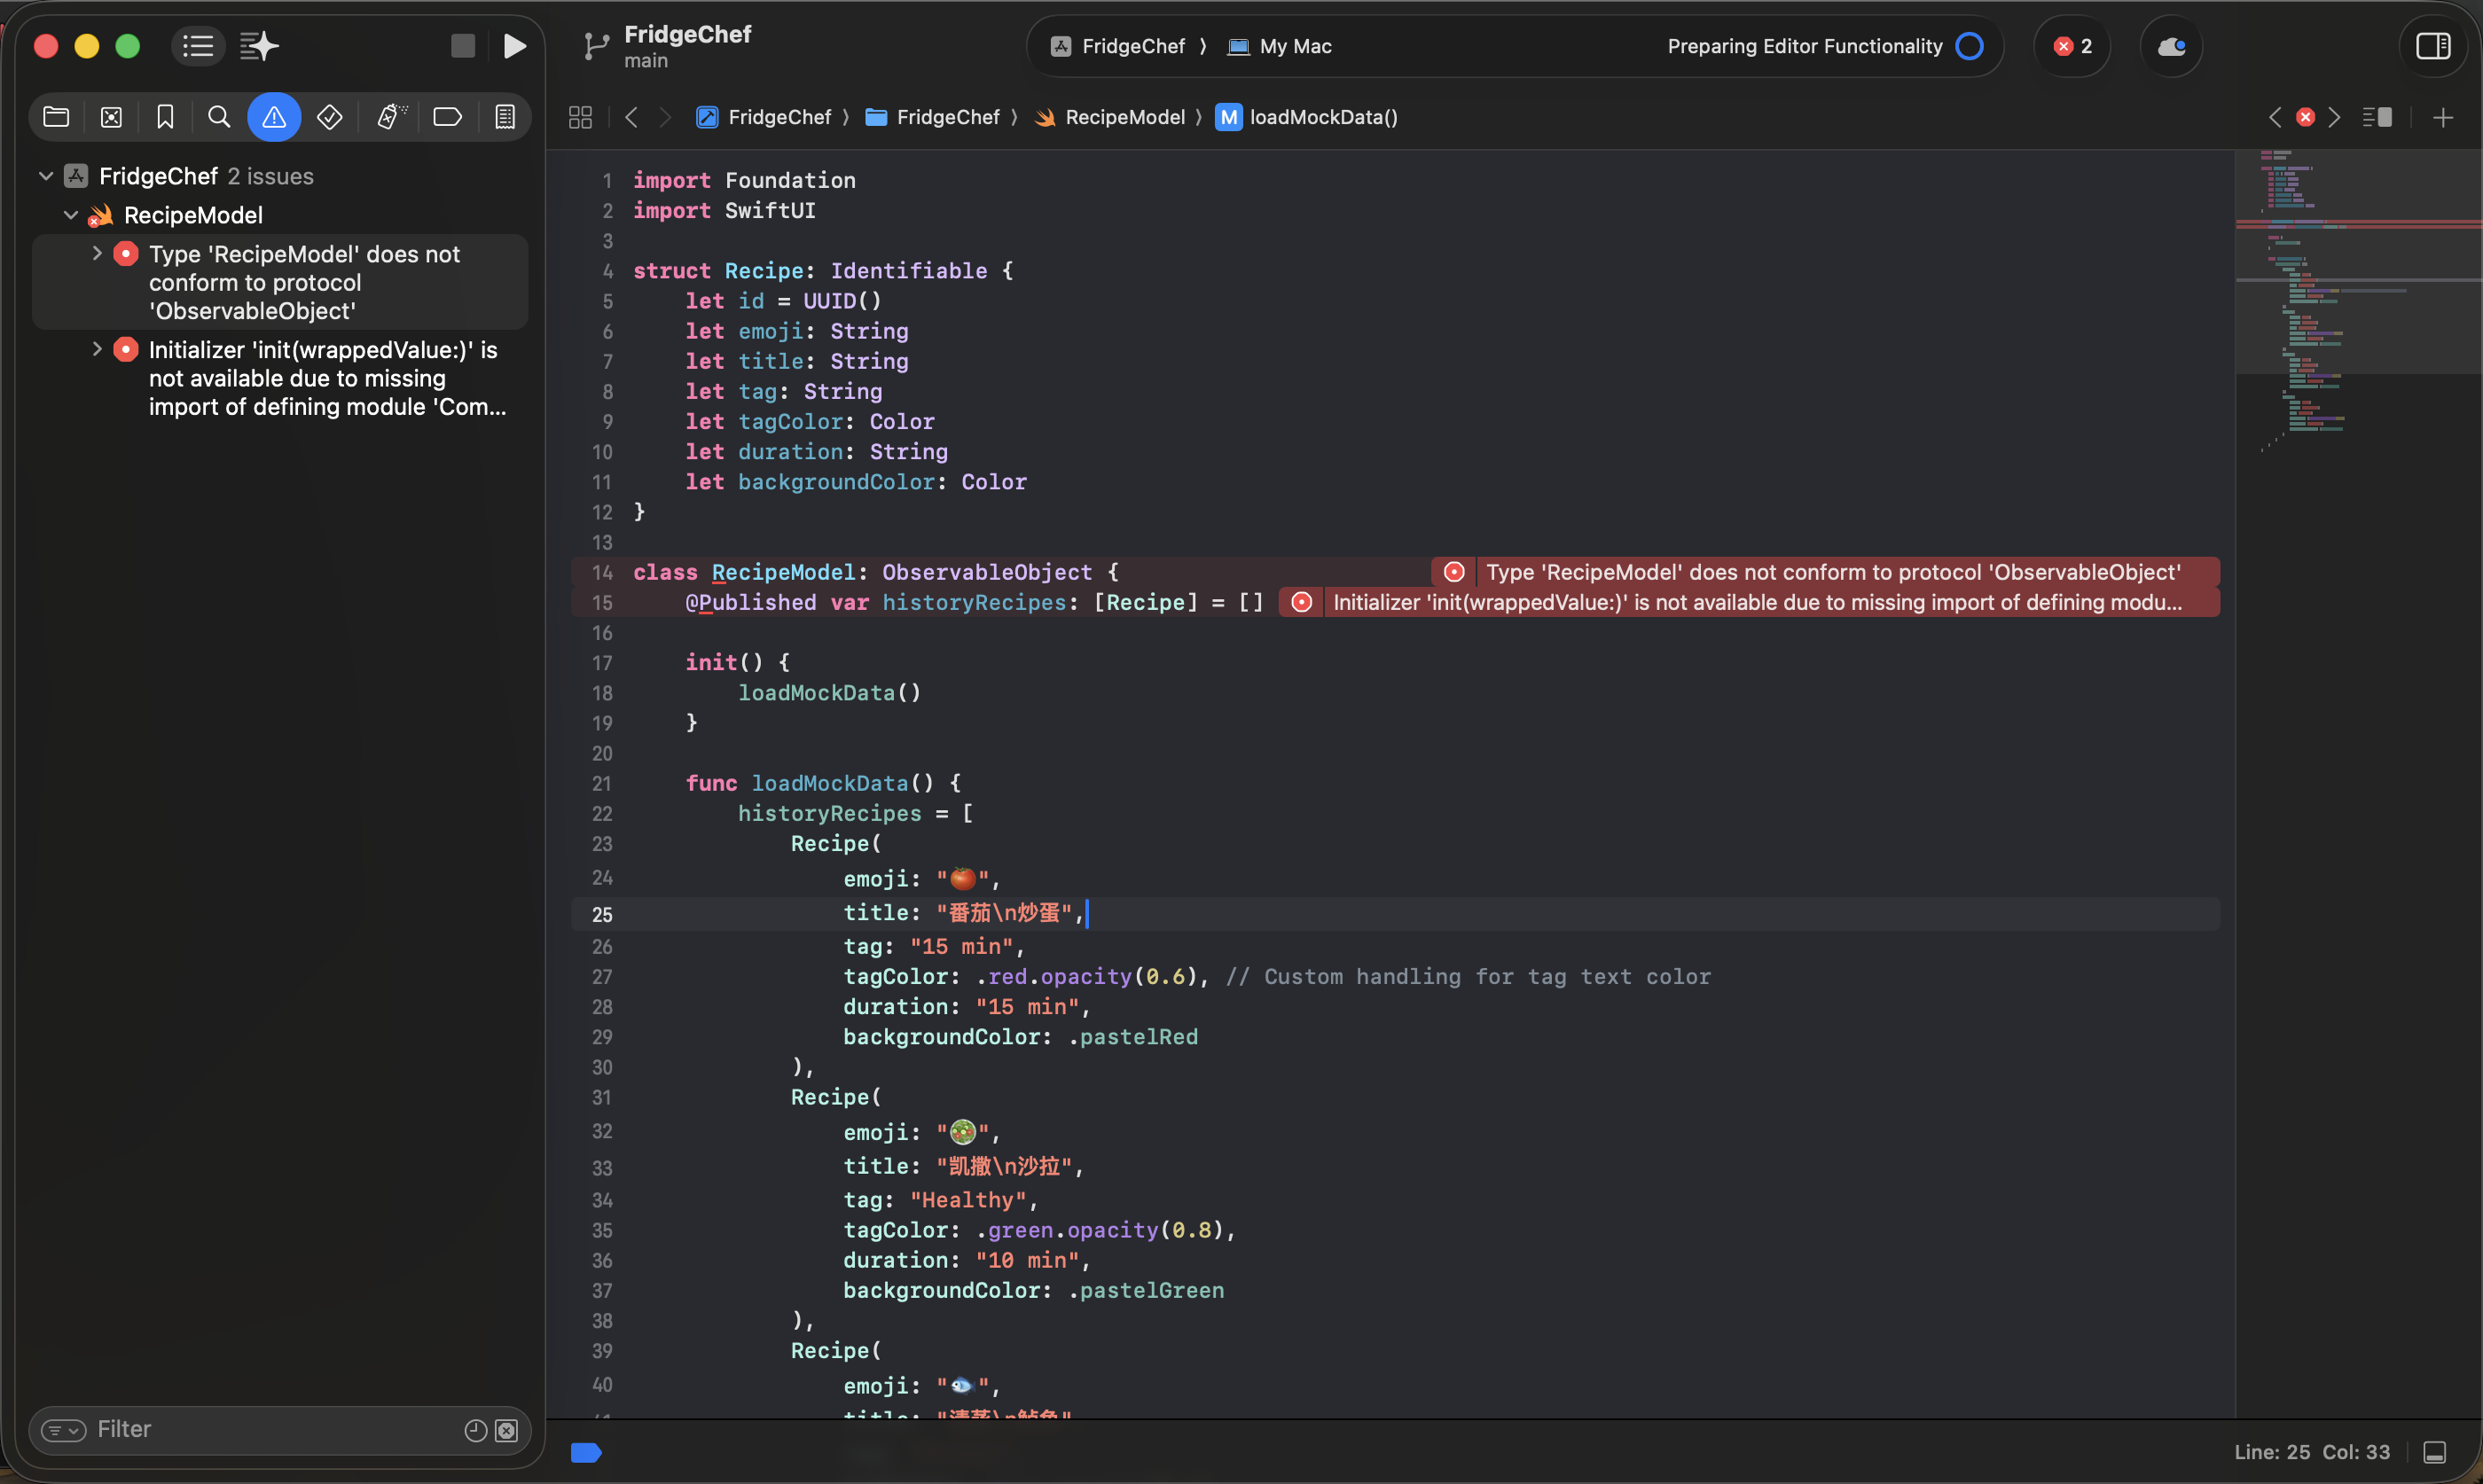
When any error appears, you only need to copy the full error message exactly as it is into Trae's chat box. With awareness of the project context, Trae can help you do the debugging.
5.4 Common Real-device Debugging Errors and Solutions
Errors during real-device debugging are very common. These problems are usually not caused by code itself, but by device trust, security rules, or signing configuration. If the app cannot run on your iPhone smoothly, you can check this section first.
1. Signing and registration problems
Common symptoms:
- Xcode shows red errors like
"Communication with Apple failed"
or"No profiles for 'com.xxx.xxx' were found" - Or it says
"Your team has no devices which are compatible"
Cause:
- The Bundle Identifier is not unique or valid
- The current iPhone has not yet been registered under your Apple ID for development
Solution:
- Modify the Bundle Identifier
In Xcode project settings, change the Bundle Identifier to something more unique, such as:com.yourname.FridgeChef - Let Xcode auto-register the device
In the error prompt, clickTry AgainorRegister Device, and let Xcode complete the device registration and certificate configuration automatically.
2. Device pairing and connection problems
Common symptoms:
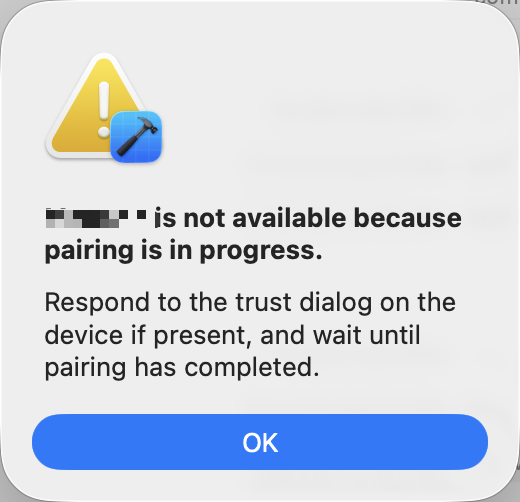
- Xcode shows
"Device is not available because pairing is in progress" - Or it says
"Device Locked" - Or you already tapped Trust, but Xcode still remains stuck
Cause:
- The iPhone is still locked
- The pairing process has not fully completed
- Xcode has not refreshed the connection state
Solution:
- Unlock the phone
Make sure the iPhone is unlocked and stays on the home screen. - Finish the trust process
When the phone pops up Trust This Computer?, tap Trust and enter the lock-screen passcode. - Refresh the connection state
If it is still stuck, unplug the cable, wait 2-3 seconds, and reconnect. If necessary, restart Xcode and try again.
3. The app installs but cannot open
Common symptom:
- The app icon already appears on the iPhone home screen
- The system shows
Untrusted Developer
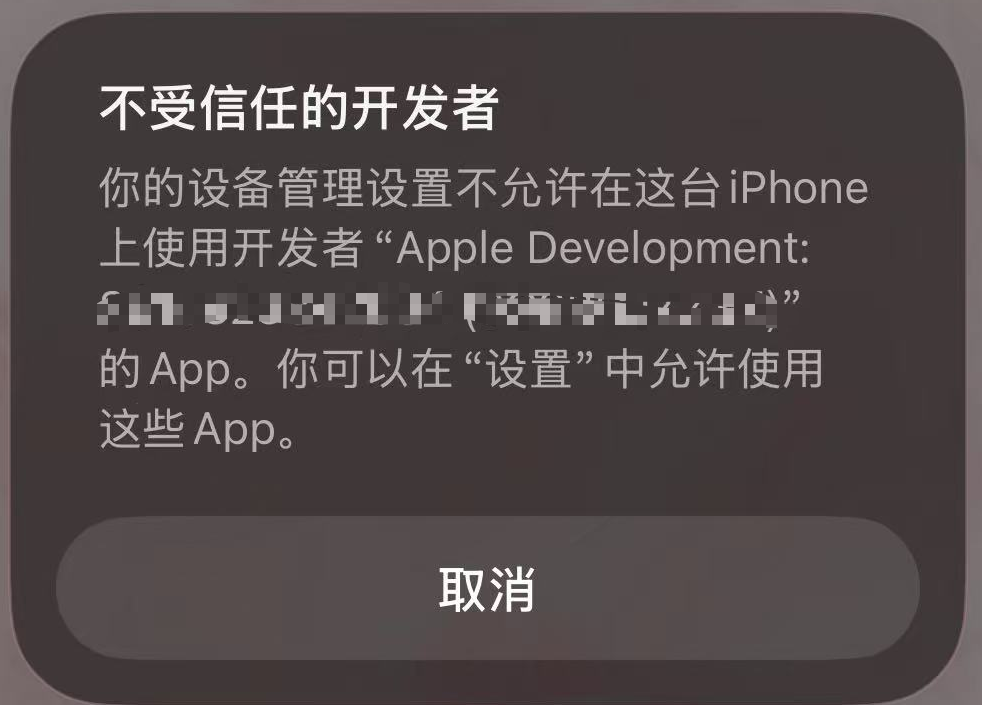
Cause:
This is an iOS security mechanism. Debug apps installed with a personal Apple ID require manual trust authorization.
Solution:
- Open Settings
- Enter General
- Tap VPN & Device Management
- Under Developer App, find your Apple ID
- Tap Trust, then confirm again
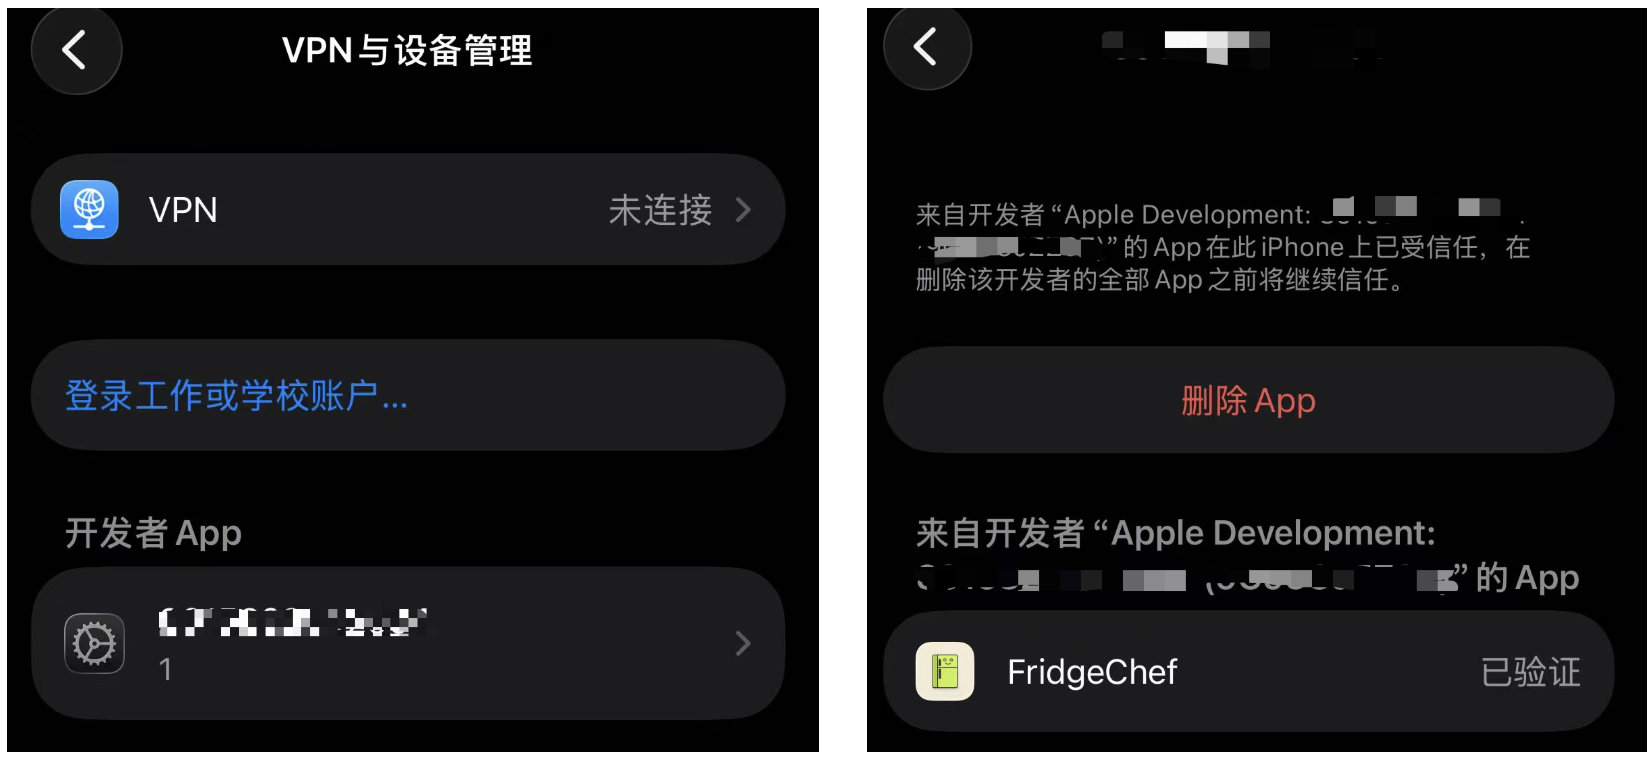
After that, return to the home screen and tap the app again. It should now run normally.
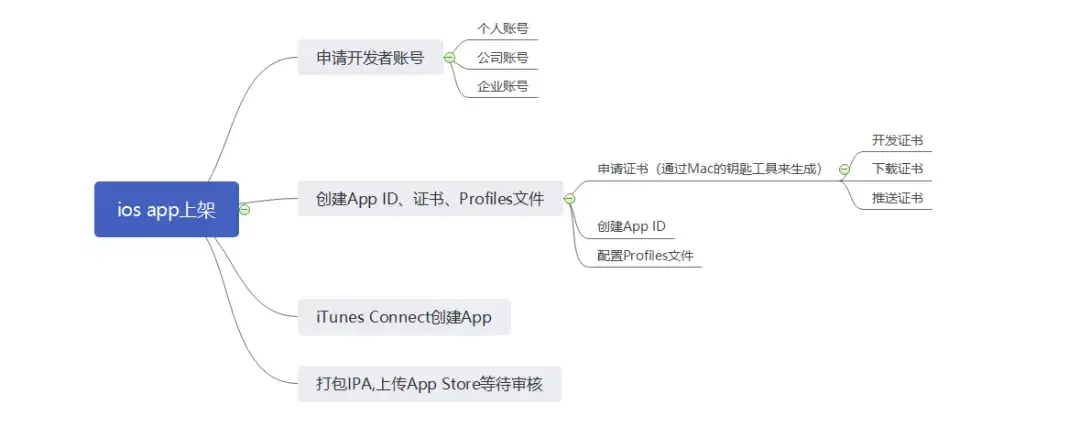
Chapter 6: If You Want to Publish the App to the App Store
In this tutorial, what we mainly completed is the full closed loop for a personal development and debugging version of an app: from creating the project, implementing functions, and debugging, all the way to successfully installing and using it on a real device.
If you want to go further and formally publish the app to the Apple App Store so that all users can download and use it, then you need to enter a more formal release process. Since that process involves a paid developer account, review rules, and compliance requirements, and is not the main practical focus of this tutorial, the following content is only provided as an overall reference and roadmap.
The following content references Apple's official review requirements and public experience discussions (including original Zhihu sharing). Links are listed below. If any link becomes unavailable, you can search by title or keyword to find the original source.
6.1 Apple Developer Program
To publish an app to the App Store, you must join Apple's paid developer program:
- Apple Developer Program (USD $99 per year)
- Official site: https://developer.apple.com/
After joining, you can use App Store Connect to create the app entry, manage versions, and publish formally.
6.2 App Store Connect: Create the App Entry
In App Store Connect, you need to create a complete app record, including but not limited to:
- App name and Bundle ID
- Description, keywords, and privacy policy link
- App icon, screenshots, and preview materials
- Pricing and distribution region settings
All this information must be completed before submission can proceed.
6.3 Build and Submit for Review
After the metadata is ready, you need to:
- Use the paid developer account in Xcode to sign a Release build
- Build and upload the formal version
- Submit it for review in App Store Connect
After submission, the app enters Apple's review queue. The review time is typically 1-3 days, depending on the case.
6.4 Review Rules and Common Reasons for Rejection
Apple mainly reviews apps from the following aspects:
- functionality and stability
- privacy and data compliance
- consistency between metadata and actual functionality
- whether there is infringement or misleading behavior
If the app does not meet requirements, the review will be rejected and Apple will provide a specific reason. The developer then needs to modify the app and resubmit.
6.5 What to Do After Rejection
If the app is rejected, you can:
- modify the code or description according to the feedback
- resubmit the version
- communicate with the review team through App Store Connect
This is a very common part of the publishing process and does not mean the project has failed.
Reference sources
The following content references Apple's official documentation and public experience sharing:
- App Store Review Guidelines (Apple official)
https://developer.apple.com/app-store/review/guidelines/ - Official guide to submitting for review
https://developer.apple.com/cn/help/app-store-connect/manage-submissions-to-app-review/submit-for-review - Full illustrated guide to iOS App Store publishing and review pitfalls (Zhihu)
https://zhuanlan.zhihu.com/p/146128612
Chapter 7: Summary

Congrats! At this point, you have personally walked through the complete iOS app development process from 0 to 1. From setting up the environment, running the project, and then gradually landing interface, functionality, data, and real-device testing, all the key stages have been completed smoothly. More importantly, you did not get here by memorizing Swift syntax - you handed most of the implementation to AI. No matter what your background is, every attempt like this makes you more fluent, and you will realize that iOS development is not as difficult as it once seemed. Even if you could not write a single line of code before, you can still build your own app.
Looking back, the whole process is not actually that complicated: decide what you want to build, use HTML to test the interface quickly, convert it into SwiftUI, connect the API and local data, and then run through debugging once. Based on this, in the future you can also casually build a personal alarm clock, a minimal todo list, or even a chatbot that speaks in the tone of your favorite celebrity.
This is exactly the most important thing that this tutorial - and easy-vibe - wants to teach you. I am looking forward to the newest creations from all of you future vibe coding masters, and to the day I get dazzled by your work.