Project 4: Let's Build Hogwarts Portraits
In previous chapters, we learned how to build more complex AI interactions through prompt engineering and API calls. We moved from simple chatbots to AI agents and workflows, and by adding richer branching logic and conditional behavior, we were able to create features with real practical value.
To make these more advanced AI capabilities work inside real products, we gradually moved from the simplest online environments to more modern local AI IDEs. That means bringing the programming environment from the browser onto your own computer. Naturally, that also means you now have to face environment setup and configuration issues more directly. But by working with AI agents such as Trae, those challenges also become manageable.
In this project, we go one step further on the product side. We are not only improving the AI capability itself, but also starting to polish the product's "outer shell." You will try to make your interface more attractive and more usable, and you will customize the layout and style of the product based on actual needs.
Before we begin, use these quick review questions to refresh the previous lesson:
- What is Dify? What does it do, and why do we need it?
- How do you call the Dify API?
- What is RAG? How do you use Dify to build a RAG agent or workflow? How do common Dify nodes work?
- What is an AI IDE? What is Trae? How is it different from
z.ai?
If any of these still feel unclear, go back to the previous lesson or ask in the community chat before continuing.
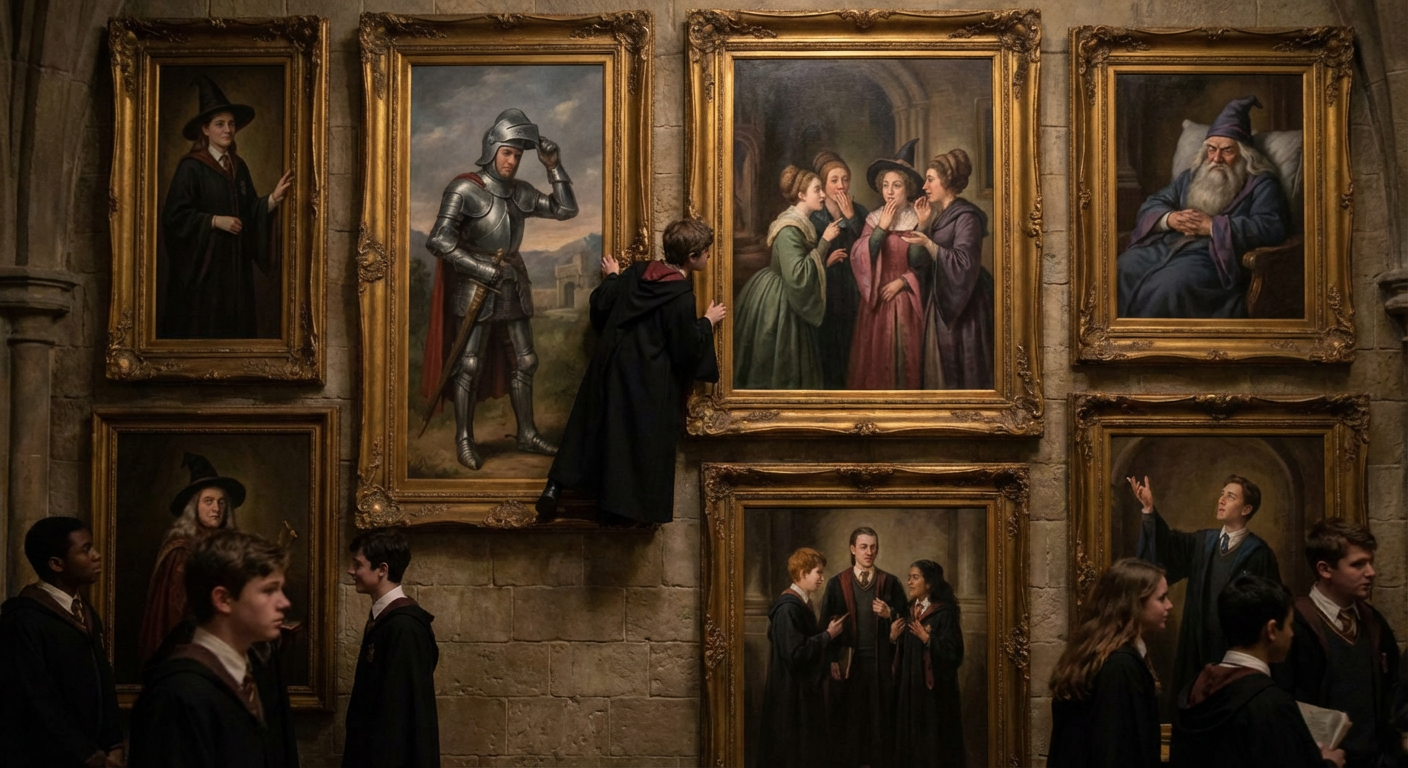
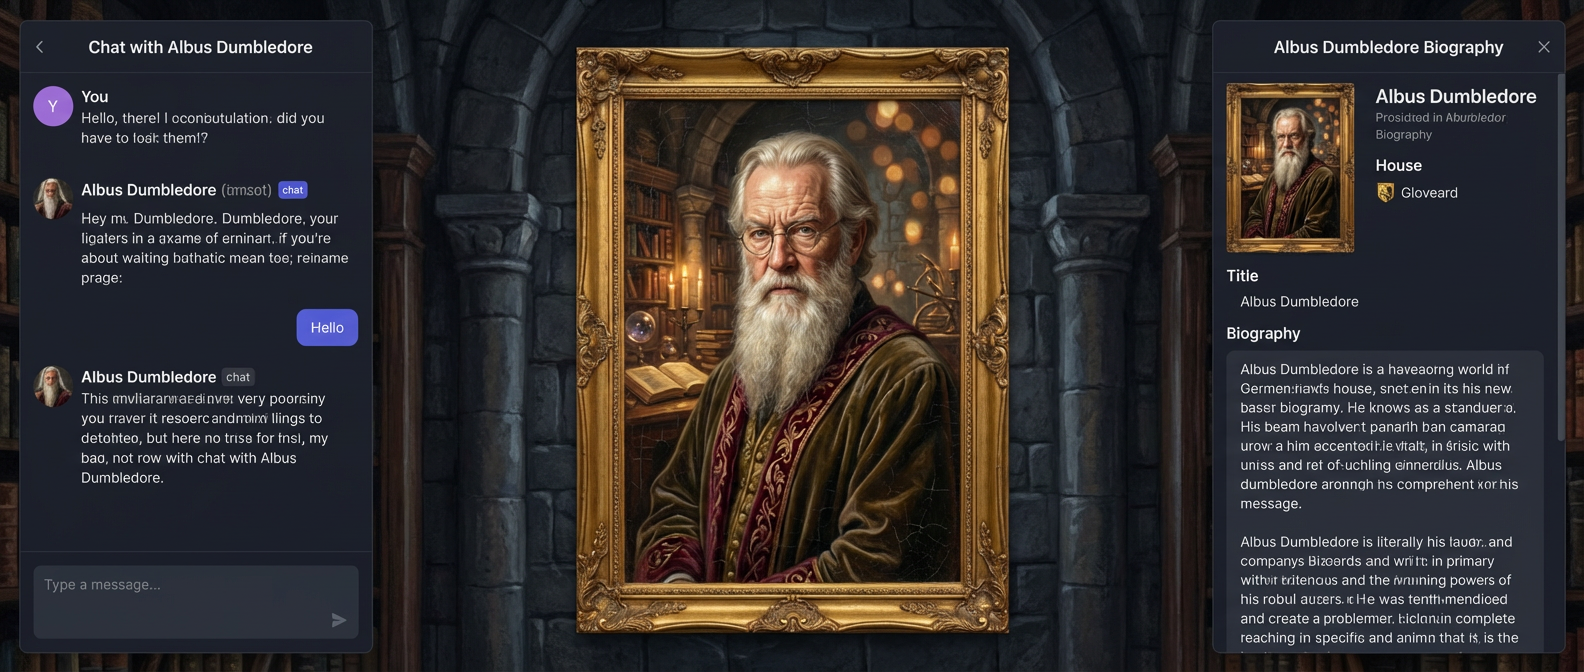
This chapter's project is Hogwarts Portraits. As the name suggests, it is inspired by the magical portraits in Hogwarts that seem to come alive. Our goal is to use AI to create an interactive magical portrait experience. Talking to the portrait should feel like talking to the character directly: it should preserve conversational memory and also know the character's background and history. Through this project, you will integrate the AI agent and workflow concepts you learned earlier into a real product interface.
To really build Hogwarts Portraits, we need to create a frontend interface that matches the feeling of a magical portrait. That means touching modern frontend design tools, learning how to combine design and code, and turning a sketch on a canvas into a real webpage.
You will also need to publish the page from your local environment to the internet so the special interface you built can be experienced not only on your own machine but also by users anywhere in the world.
Reference project: Project4-Hogwarts-Portraits
What you will learn
- What frontend design tools are, what problems they solve, and which ones are common today
- The basics of Figma and MasterGo, including code export plugins
- How to use Figma AI and MasterGo AI to generate web design concepts and export usable page code
- What GitHub is, how to configure SSH, create a code repository, and push code
- What deployment means, and how to use Zeabur to deploy code from GitHub or your local environment to the internet
By the end, you will have your own Hogwarts Portraits page for a celebrity, historical figure, or fictional character.
1. What is Hogwarts Portraits?
What kind of "magical portrait" are we actually trying to build?
Put simply, we want to recreate the feeling of the living portraits in the Harry Potter world. The portrait should no longer be a static image hanging on a wall. Instead, it should be a person-like character you can talk to, and it should change expression or "mood" depending on the conversation.
To make the portrait feel less like a generic chatbot and more like a "real person," we need to solve two things.
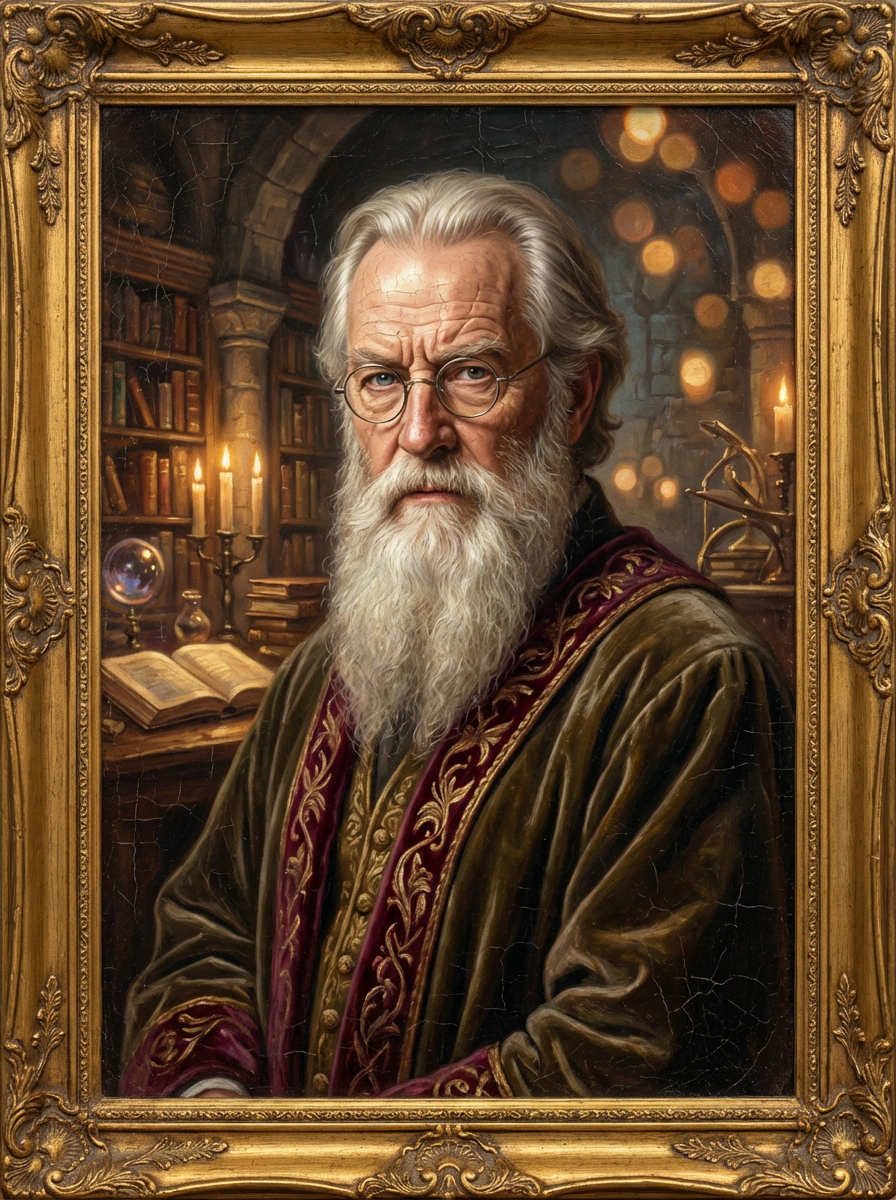
The first is memory and knowledge. The portrait needs to know a lot about the character: their background, story, world setting, and related material. This can be handled through a knowledge base. If you connect the text materials you collected for the character into Dify, the portrait can explain the character's background with much more confidence.
The second is speech style. Knowledge alone is not enough. We also want the portrait to speak more like the character: tone, wording, thought patterns, even bits of humor or temper. This is where prompt engineering matters. In the system prompt, we need to clearly define the identity, worldview boundaries, and language style of the character, so every answer stays grounded in that persona instead of slipping back into generic AI tone.
On top of the dialogue itself, we also want the character's emotions to be visible. To do that, we can create an emotion score. Dify can be configured to output not only a textual answer, but also a "mood score" or emotion label. Once the frontend receives that signal, it can render different portrait images based on the score. A high score might map to a happy portrait, while a low score might map to a sad or angry one. In that way, the portrait becomes something that visually changes with the conversation instead of remaining a static image.
The character can be a real-world celebrity, a historical person, an anime or game character, or even an original character you create from scratch. The page itself does not need to be very complicated, but a few key elements are essential:
- a clear character name
- a short but memorable introduction
- a portrait or poster that strongly represents the character
- an interactive "Talk to Them" area
You can connect the AI agent or workflow you configured in Dify or Trae directly into that dialogue module.
1.2 Collect character information
Take Elon Musk as an example. If you want to imitate the way he speaks, you need to collect public material such as interviews, talks, and social media posts, then inject those into your prompt or use them as few-shot examples.
For example:
You must fully embody Elon Musk: take "disruptive innovator" and "advocate for human multi-planetary survival" as your core identities, speak directly and concisely, frequently use terms like "first principles", "iteration" and "cost curve", and prefer analogies to explain complex technologies; when thinking, you tend to connect cross-domain logics (e.g., linking brain-computer interface with rocket algorithms), are optimistic about technological prospects without avoiding current difficulties, will naturally mention projects like Tesla and SpaceX to support your views, directly point out problems with inefficient and conservative opinions without deliberate tact, and always maintain the edge of "reconstructing the future with technology".

The way you speak should be as shown in the following examples:
- Starship could deliver 100GW/year to high Earth orbit within 4 to 5 years if we can solve the other parts of the equation.
100TW/year is possible from a lunar base producing solar-powered AI satellites locally and accelerating them to escape velocity with a mass driver.
- The most likely outcome is that AI and robots make everyone wealthy. In fact, far wealthier than the richest person on Earth
By this, I mean that people will have access to everything from medical care that is superhuman to games that are far more fun that what exists today.
We do need to make sure that AI cares deeply about truth and beauty for this to be the probable future.
- It's taken 13.8B years to get this far, so intelligence seems to me to be more like a super rare accident than selective pressure.
Earth is ~4.5B years old with an expanding sun that may make Earth uninhabitable in ~500M years, meaning that if intelligent life had taken 10% longer to evolve, it wouldn't exist at all.
- LLM is an outdated term. "Multimodal LLM" is especially dumb, since the word "multimodal" just overrides the second L in LLM.
It's just a model, which is a big file of numbers. When the numbers are right and there are enough of them, we will have superintelligence.
For background knowledge, you can also collect biographical material, company descriptions, and other public text and store them in your Dify knowledge base. If you have forgotten how to use Dify, return to the previous chapter and review how to add materials into a knowledge base.
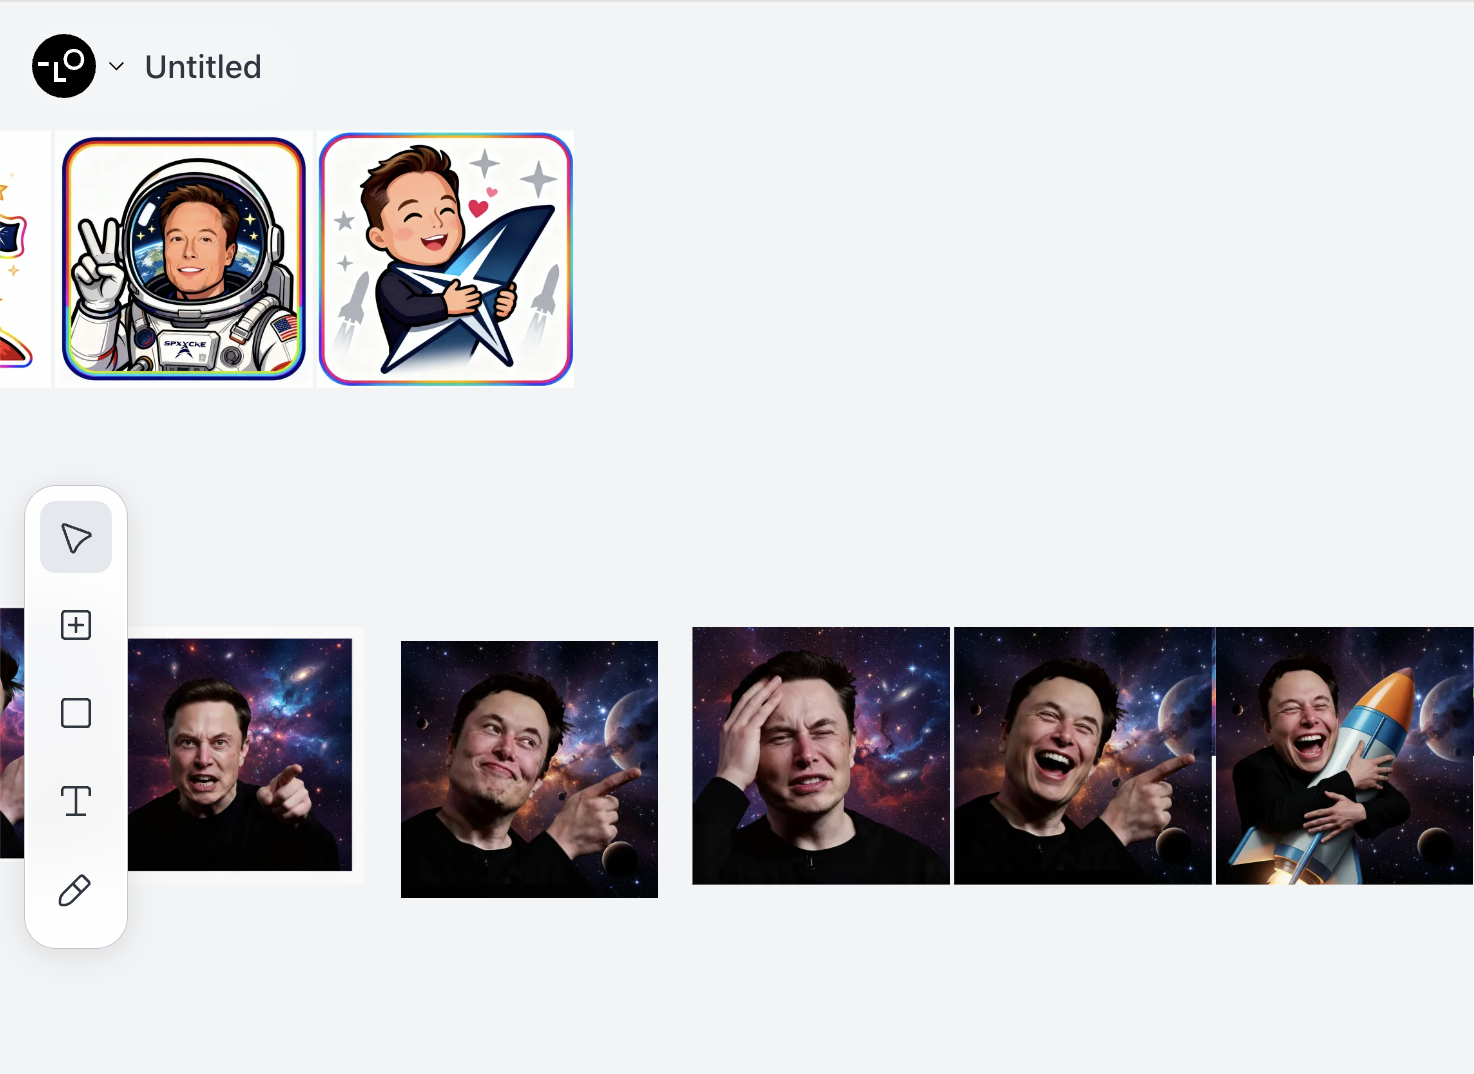
For the portrait visuals, directly using public images of a real person may not always be visually ideal and can also carry some risk. A better option is to use image generation or image-to-image tools to create a more coherent, stylized high-quality portrait. You can even generate multiple emotional variants ahead of time for later use by your emotion system.
This tutorial uses Lovart, an AI design agent that supports end-to-end workflows from concept to asset delivery. With Lovart, you can generate a whole set of emotional portrait variations and save them for later use.
Once all of that is ready, you can start designing the overall page. Ideally, the visual style should feel strongly tied to the character.
1.3 Prototype the page
At the prototype level, you can start with something simple. As described above, we want:
- a dialogue area
- a portrait area
- an interesting personal introduction or equivalent interactive region
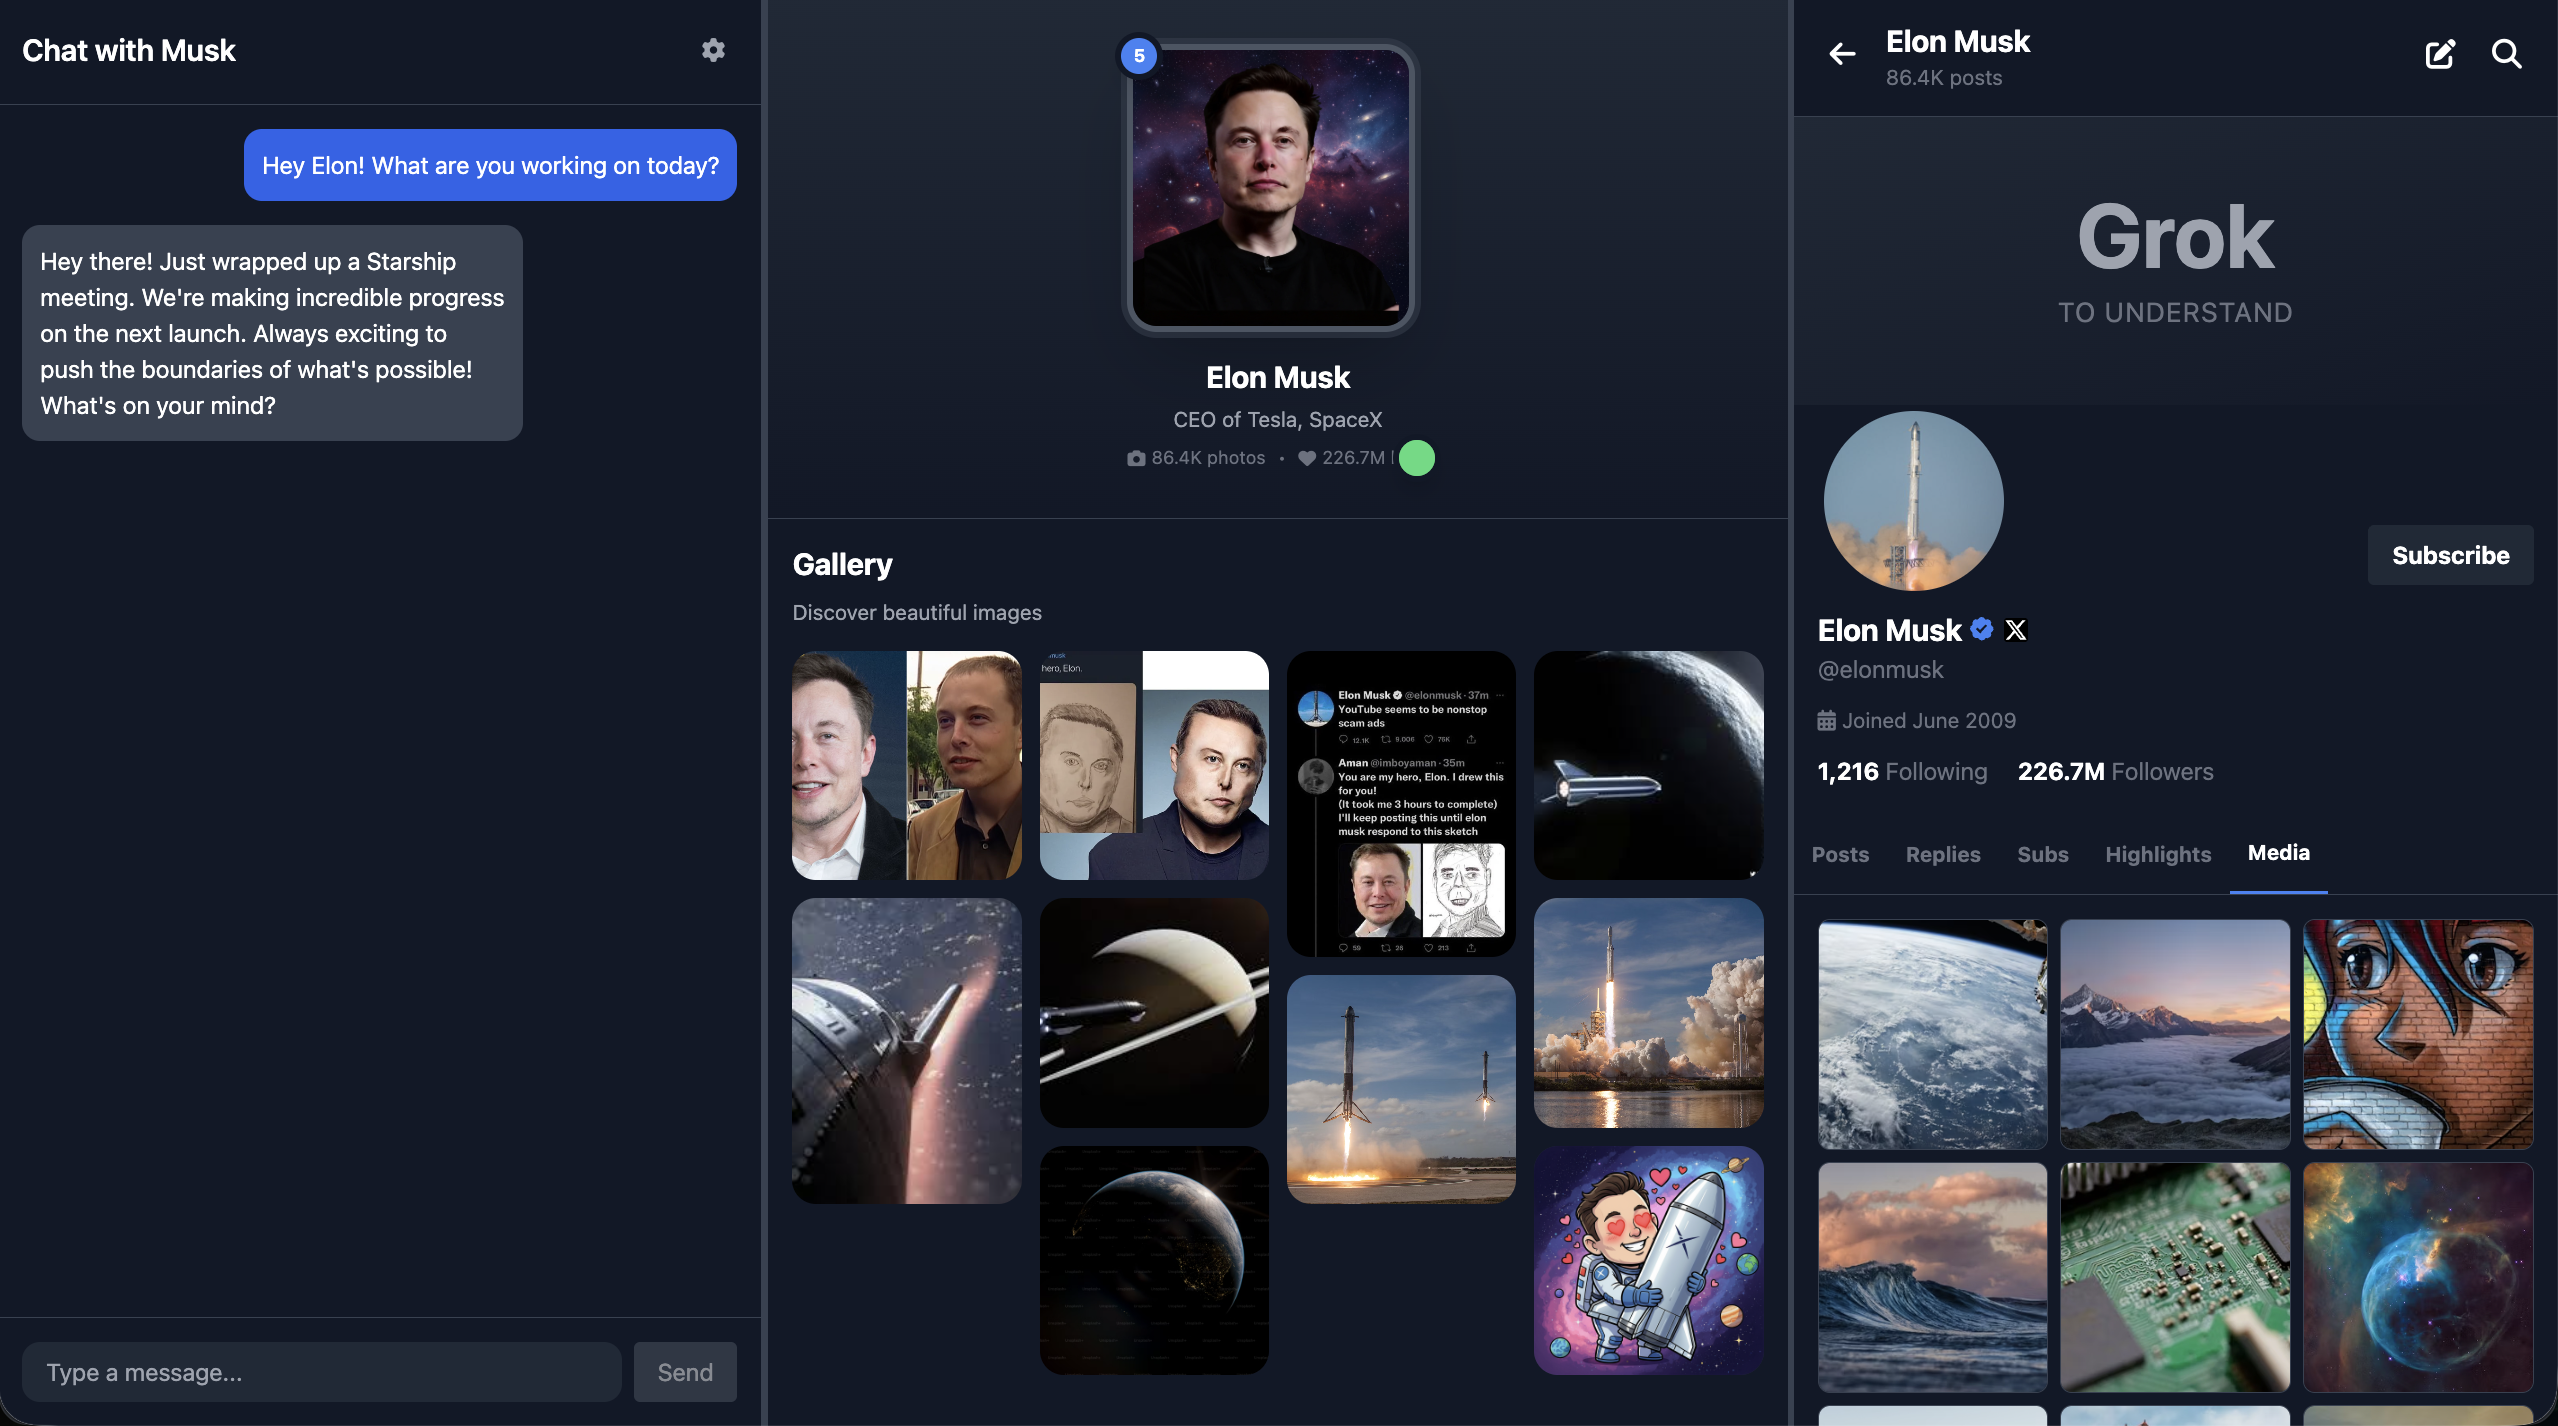
In this example, the right side is designed like an X-style social panel instead of a traditional biography area, but you can replace that region with any feature that better fits the character.
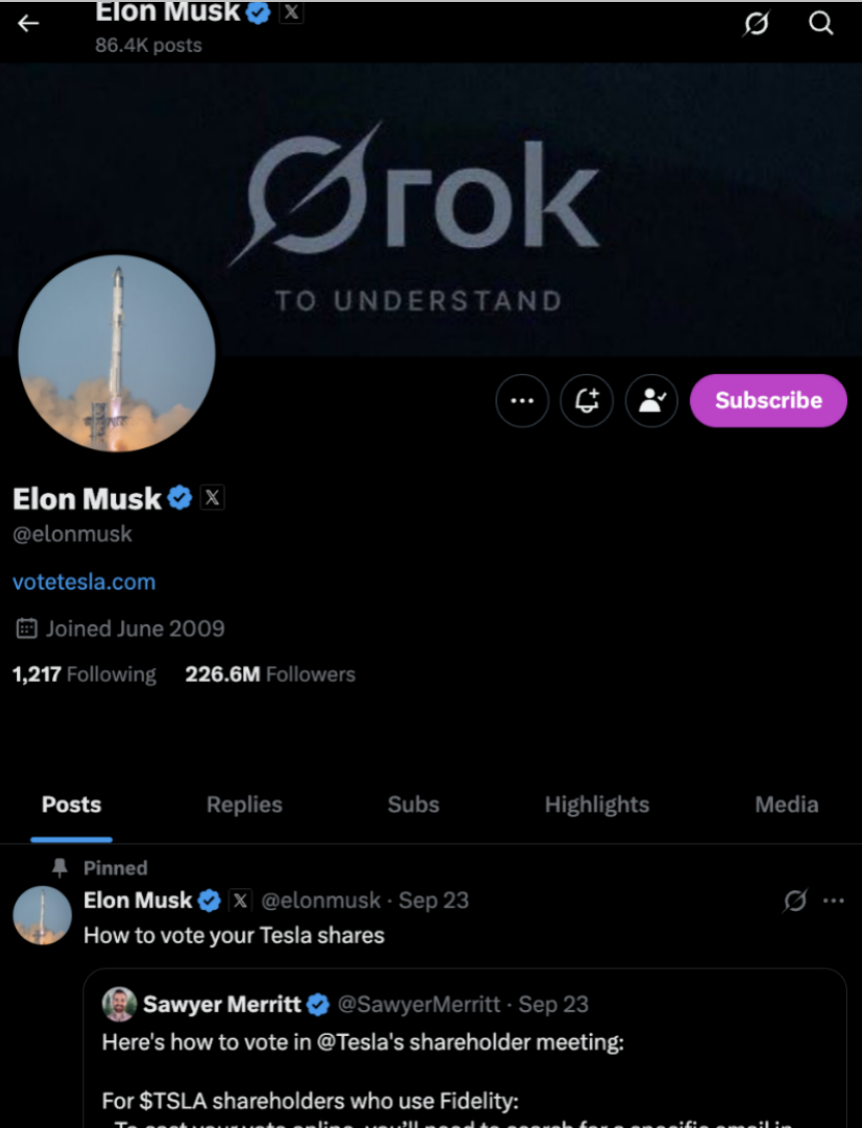
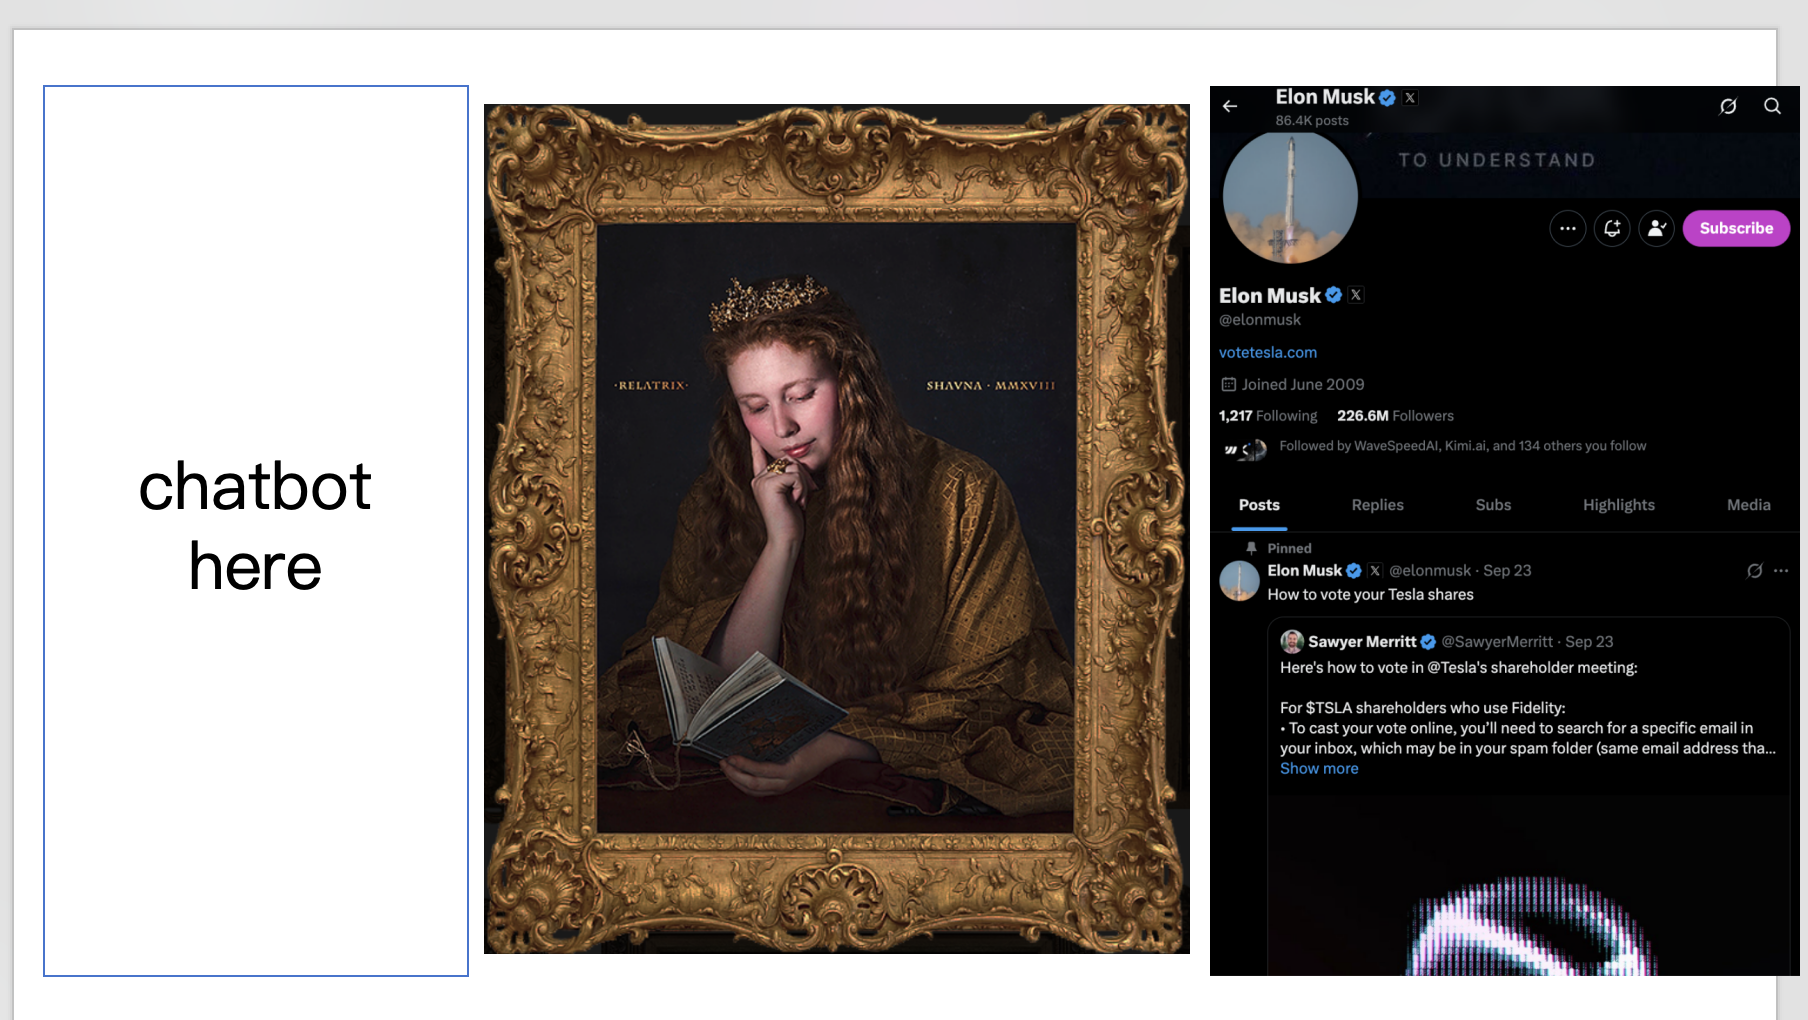
At the most basic level, you can even sketch the first page prototype in PowerPoint. In the example, a magical frame image was used, and the page is arranged horizontally:
- far left: chat area
- center: portrait area
- far right: X-style panel
Once that rough prototype exists, you can ask an LLM to turn it into a real frontend design and then into actual code.

Of course, in real frontend work we usually do not use PowerPoint for interface design. We use better prototyping tools and proper frontend design tools instead.
2. Design the interface with Figma and MasterGo
Prerequisite
Before this section, it is recommended that you first complete Figma and MasterGo Basics, including:
- creating Design files and Frames
- using Auto Layout for adaptive structure
- exporting code from design tools
This section assumes you already know the basics of Figma or MasterGo, and focuses on how to apply those tools specifically to the Hogwarts Portraits project.
2.1 Design the magical portrait interface
Based on the prototype from section 1.3, create a three-column layout in Figma or MasterGo:
- Left side: chat conversation area
- Center: magical portrait area that changes based on emotion
- Right side: social platform area, such as an X-style feed
You can use Figma Make or MasterGo AI to generate the page structure with a prompt like this:
Create a Hogwarts-style magical portrait interface with three sections:
- Left: A chat interface with dark theme, message bubbles, and input field
- Center: A large portrait frame with ornate borders for displaying character images
- Right: A social media feed showing character's posts
Use dark purple and gold color scheme, magical aesthetic, Harry Potter inspired
2.2 Export the code and run it locally
After finishing the design, you can turn it into runnable code in several ways:
Option 1: Use Figma Make
- Click the Make button in Figma
- Upload the design reference
- Add your prompt
- Fine-tune the generated result in the editor
- Export the code locally or sync it to GitHub
Option 2: Use MasterGo AI
- Find the AI tools in the editor
- Choose the page-generation function
- Upload your reference and describe the target result
- Use code preview to retrieve the generated code
Option 3: Use a multimodal AI model
- Save a screenshot of the design
- Use Gemini, Qwen, Claude, or another multimodal model to convert the image into code
- Ask for HTML or React output
- Run and debug the result locally
2.3 Prepare emotion-state image assets
To make the portrait truly feel alive, prepare a set of portrait images for different moods. A simple scheme might look like this:
| Emotion score | Expression | Meaning |
|---|---|---|
| 0 | Sad | The character feels down or disappointed |
| 1 | Angry | The character is irritated or upset |
| 5 | Calm | Neutral default state |
| 10 | Happy | The character feels excited or joyful |
Use Lovart or another image generation tool to create a consistent set of portrait variants based on the same character.
3. Run Hogwarts Portraits
3.1 Export prototype code for testing
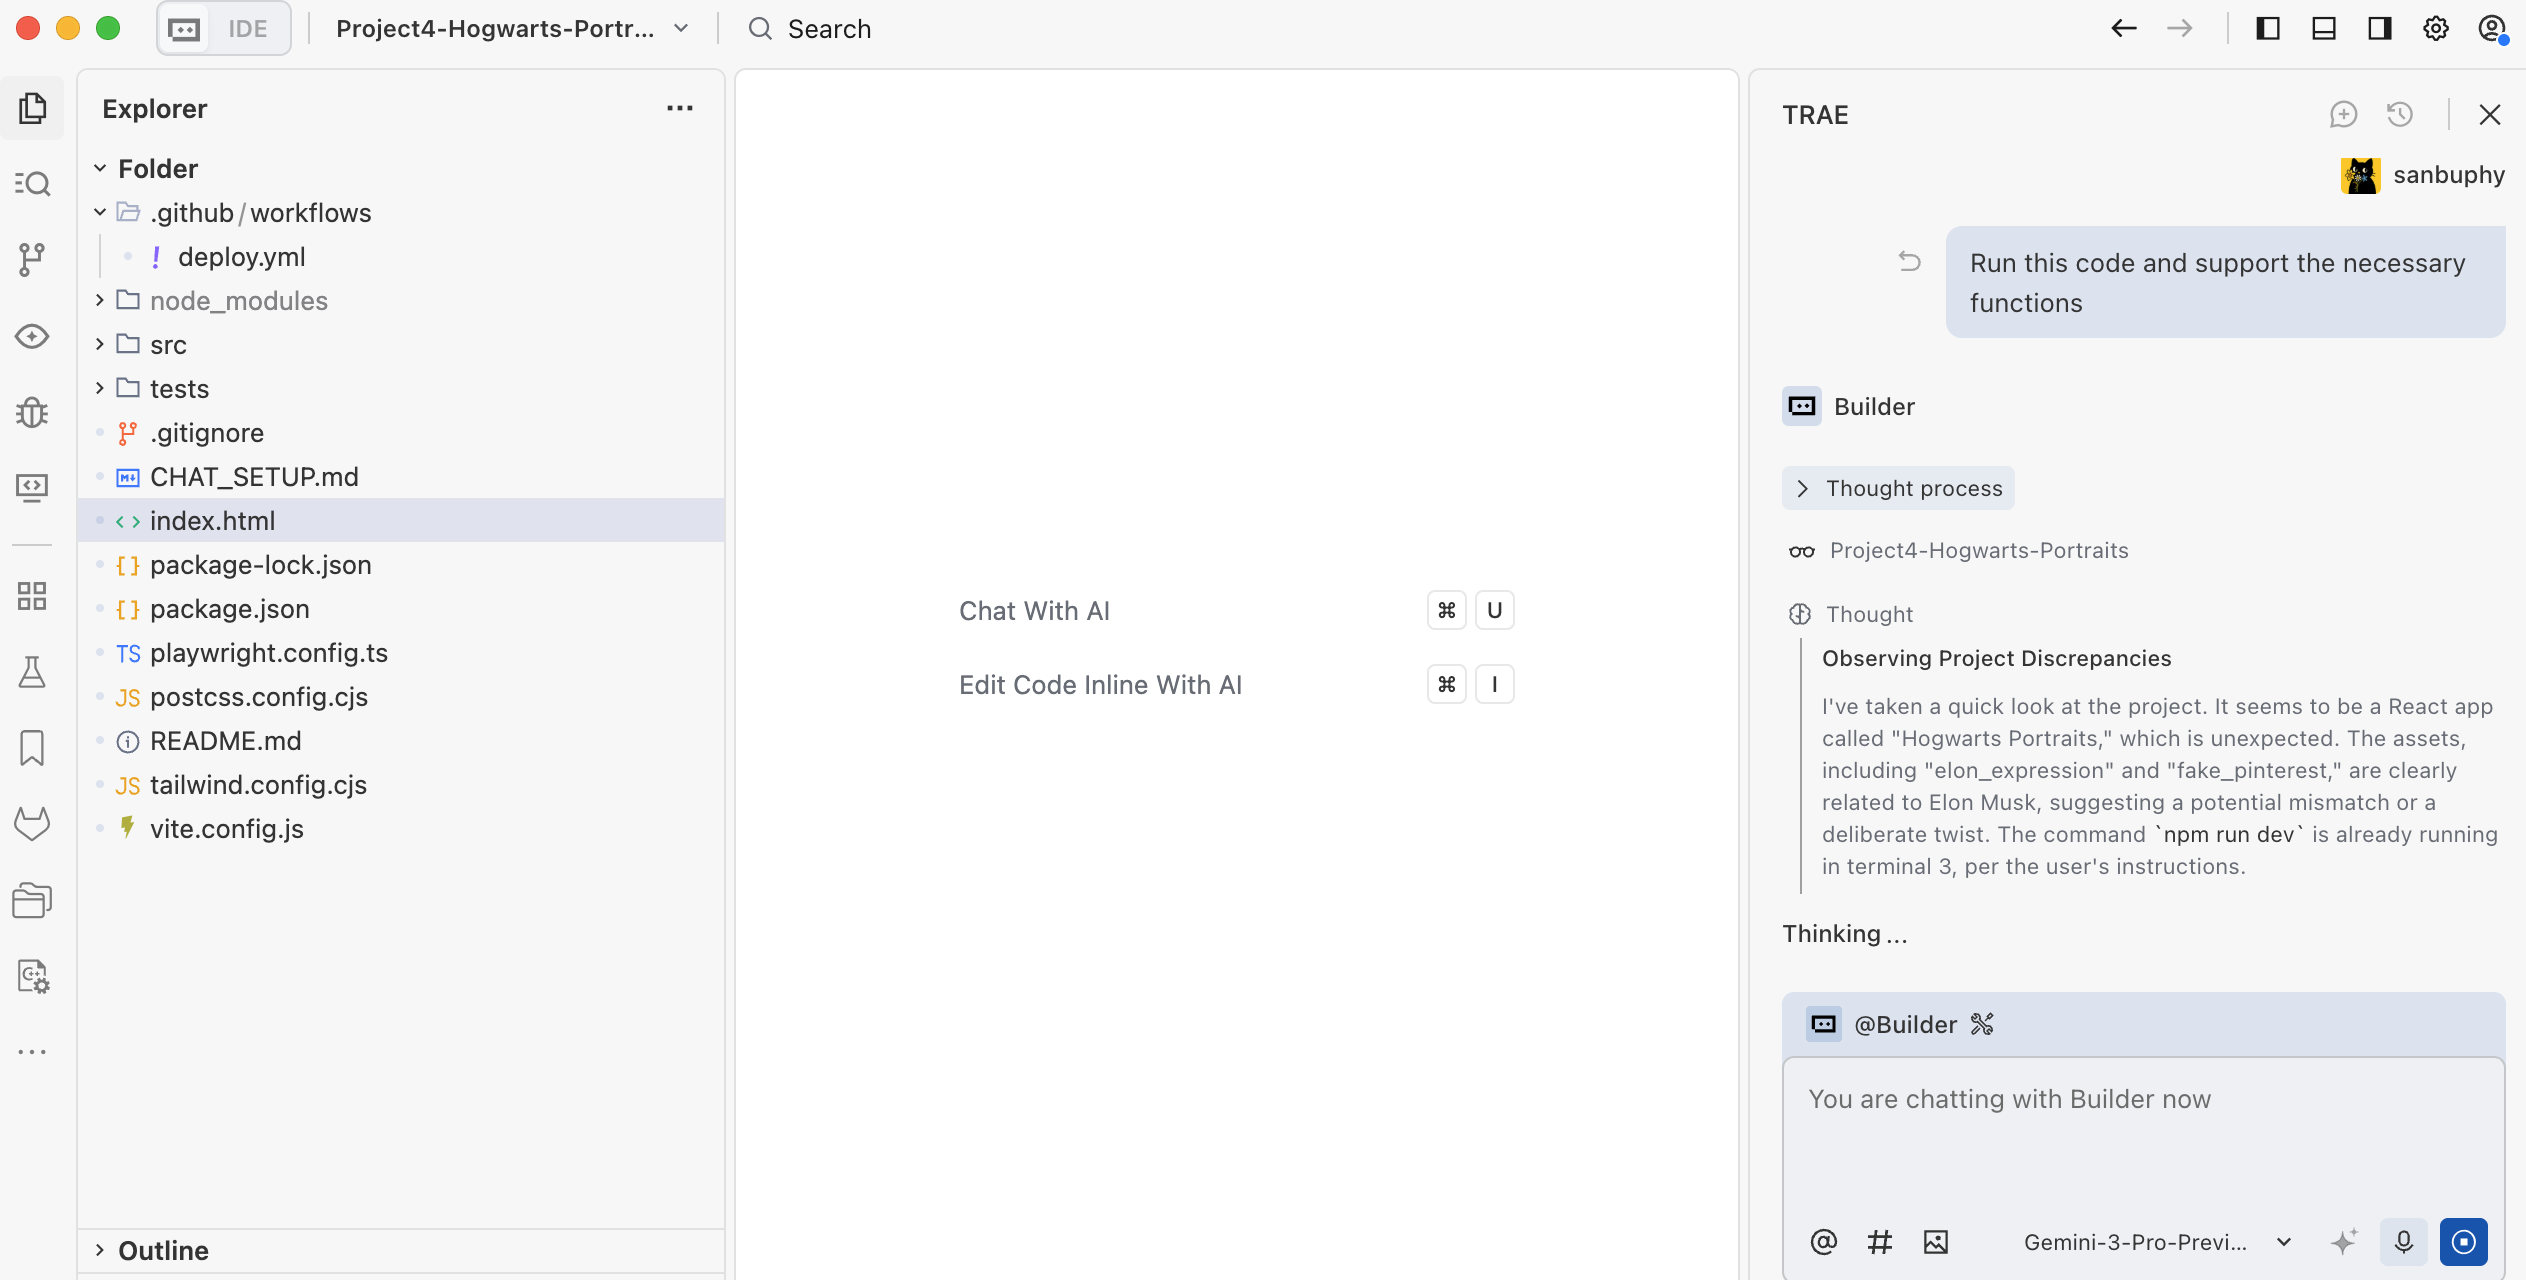
By this point, you should already have HTML or React prototype code from the design-to-code workflow. Copy it into your local environment and tell your AI IDE something like:
Please help me run this code and implement the required functionality.
That is often enough to get a first testable version running, although you should expect errors at this stage. Be patient and keep debugging until the basic interactions work.
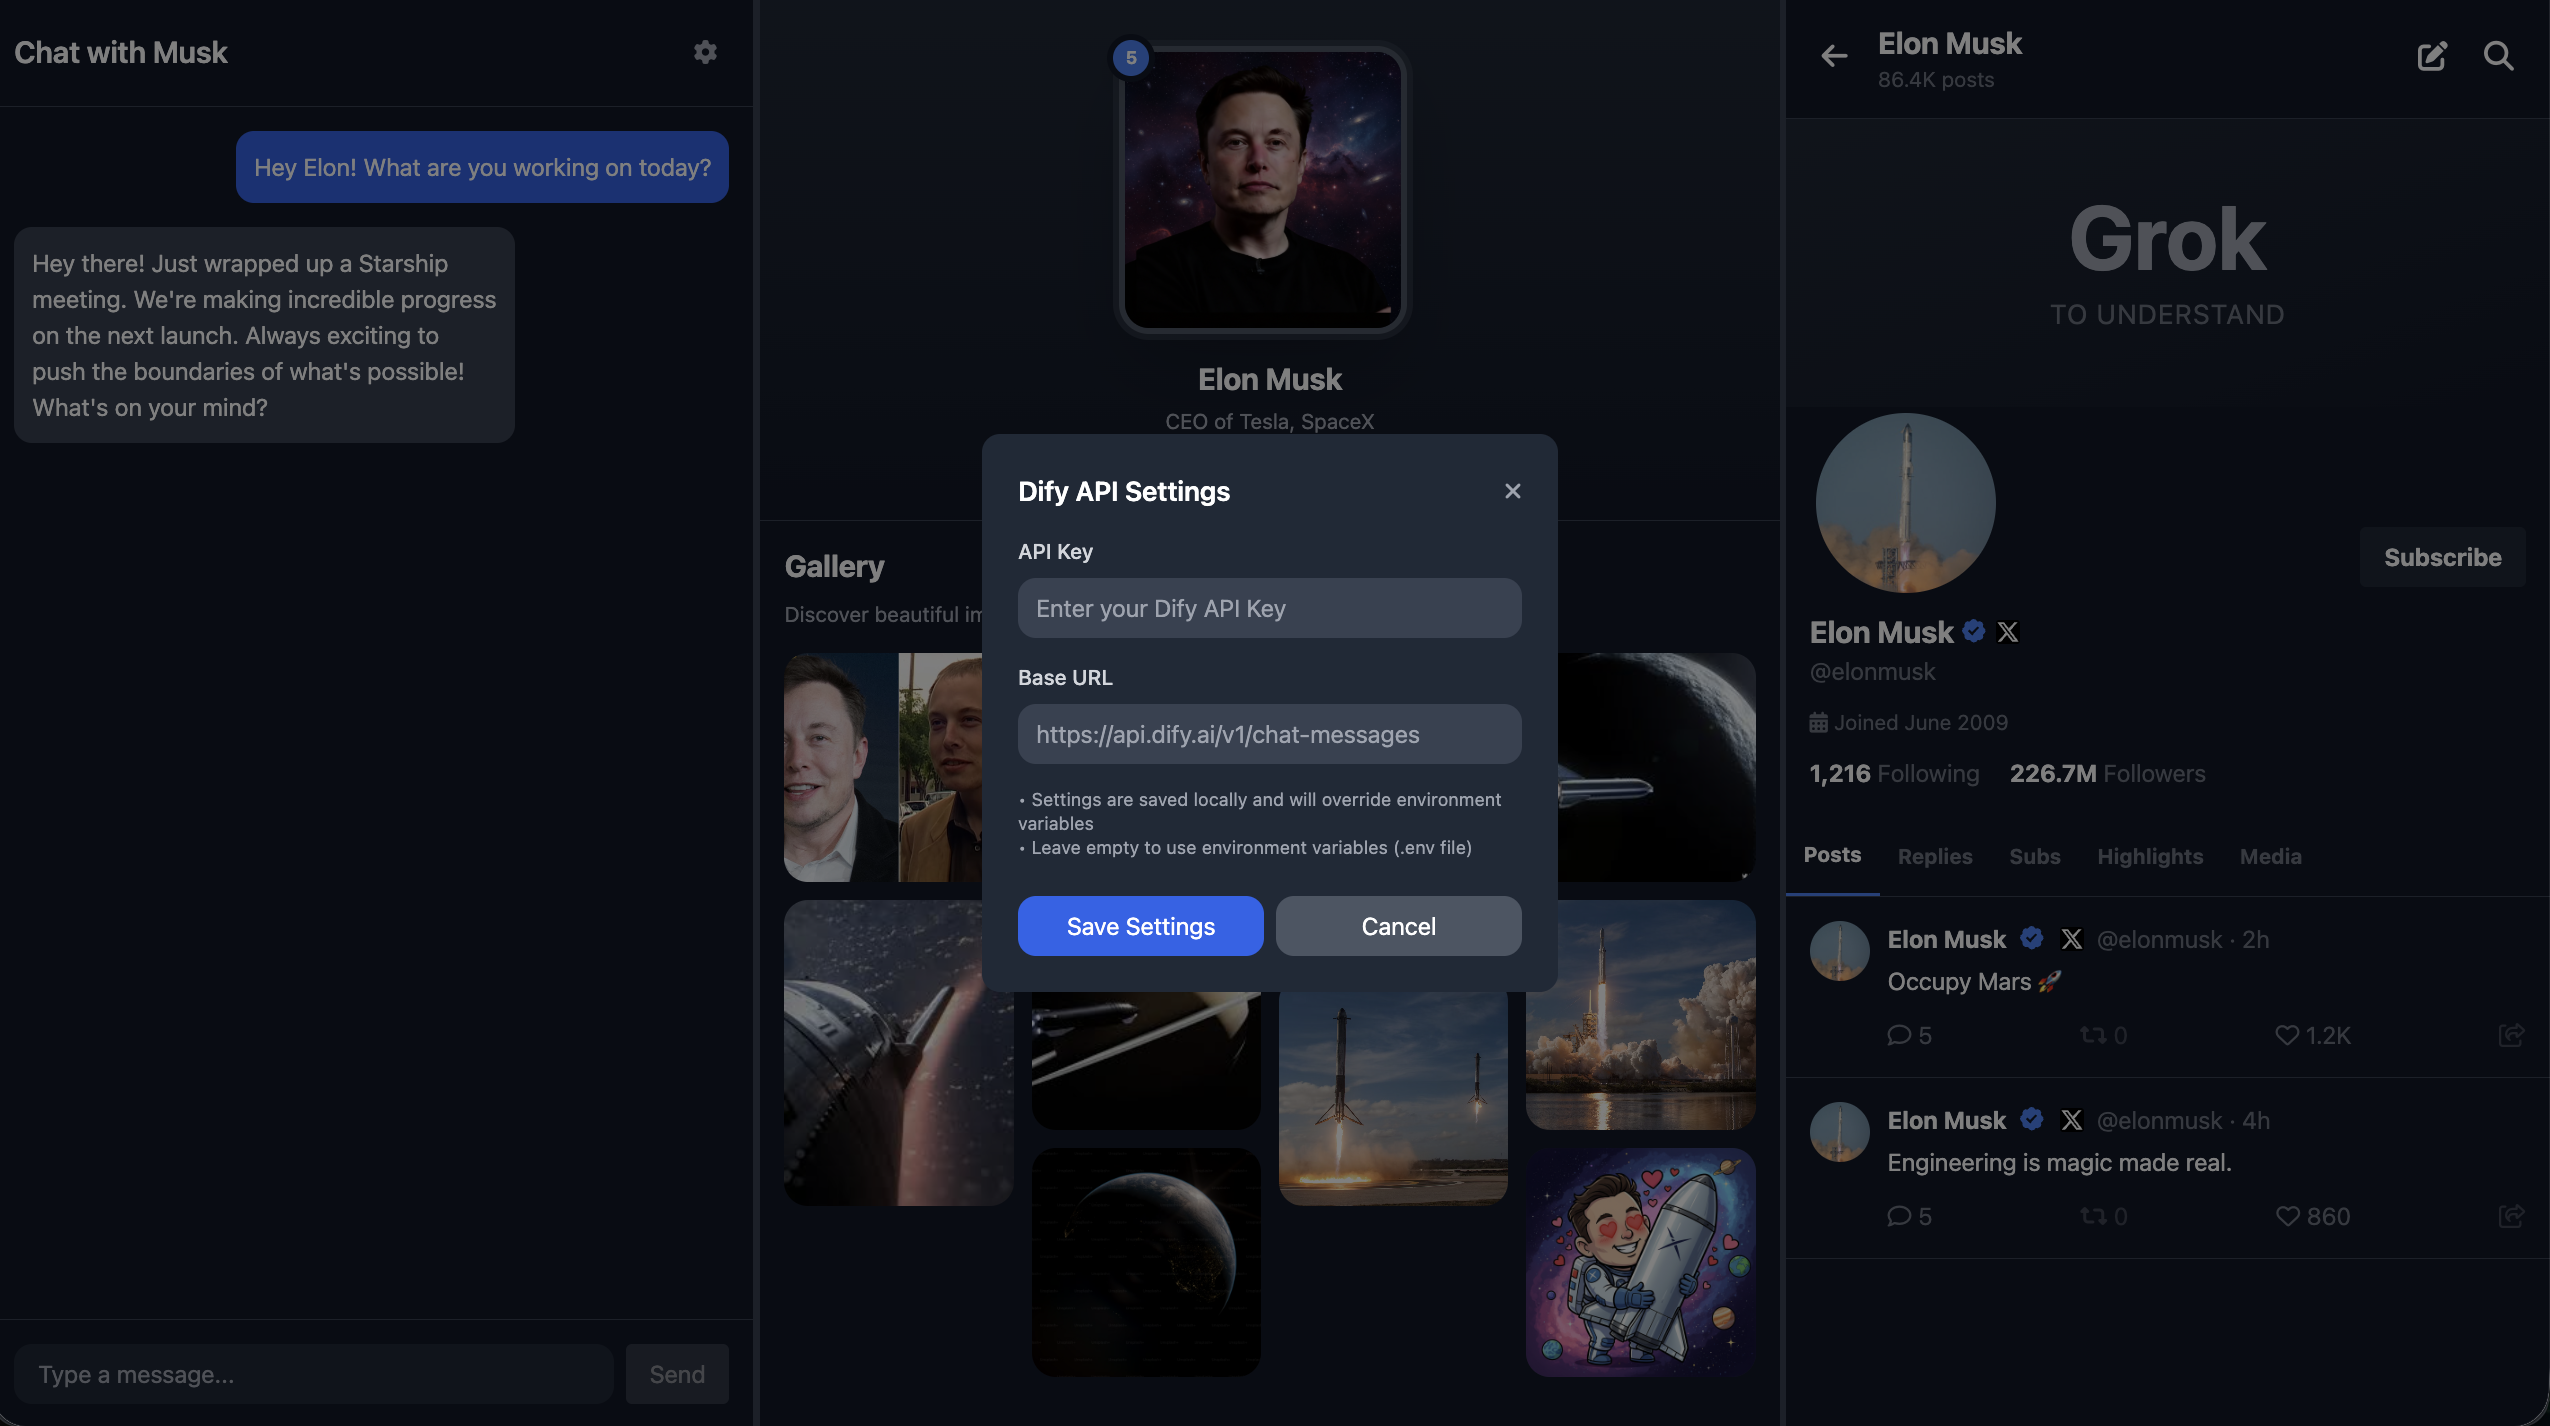
One important point: all secret keys should be stored in environment variables instead of being hardcoded. That includes your Dify API credentials. Later, when you deploy the project publicly, you can define those environment variables directly on the deployment platform. Another option is to let the model build a settings panel in the app itself so the variables are saved only in the current page context and are not exposed publicly.
3.2 Design the Dify workflow and connect the API
So far, we only have the visual shell of the interface. We still need to connect the actual roleplay dialogue and emotion-response workflow. This is what turns the prototype into a real magical portrait.
You can model your Dify workflow after the example project. In our example:
- the left side is the chat UI
- the center is the portrait image, which changes expression based on the conversation
- the right side is an X-style social panel, which may post content if the conversation makes the character "feel" strongly enough
In many cases, the magical portrait only needs the chat area and the emotional portrait itself. The X-style social region is included here mainly to demonstrate that you can add extra behavior tailored to the character.
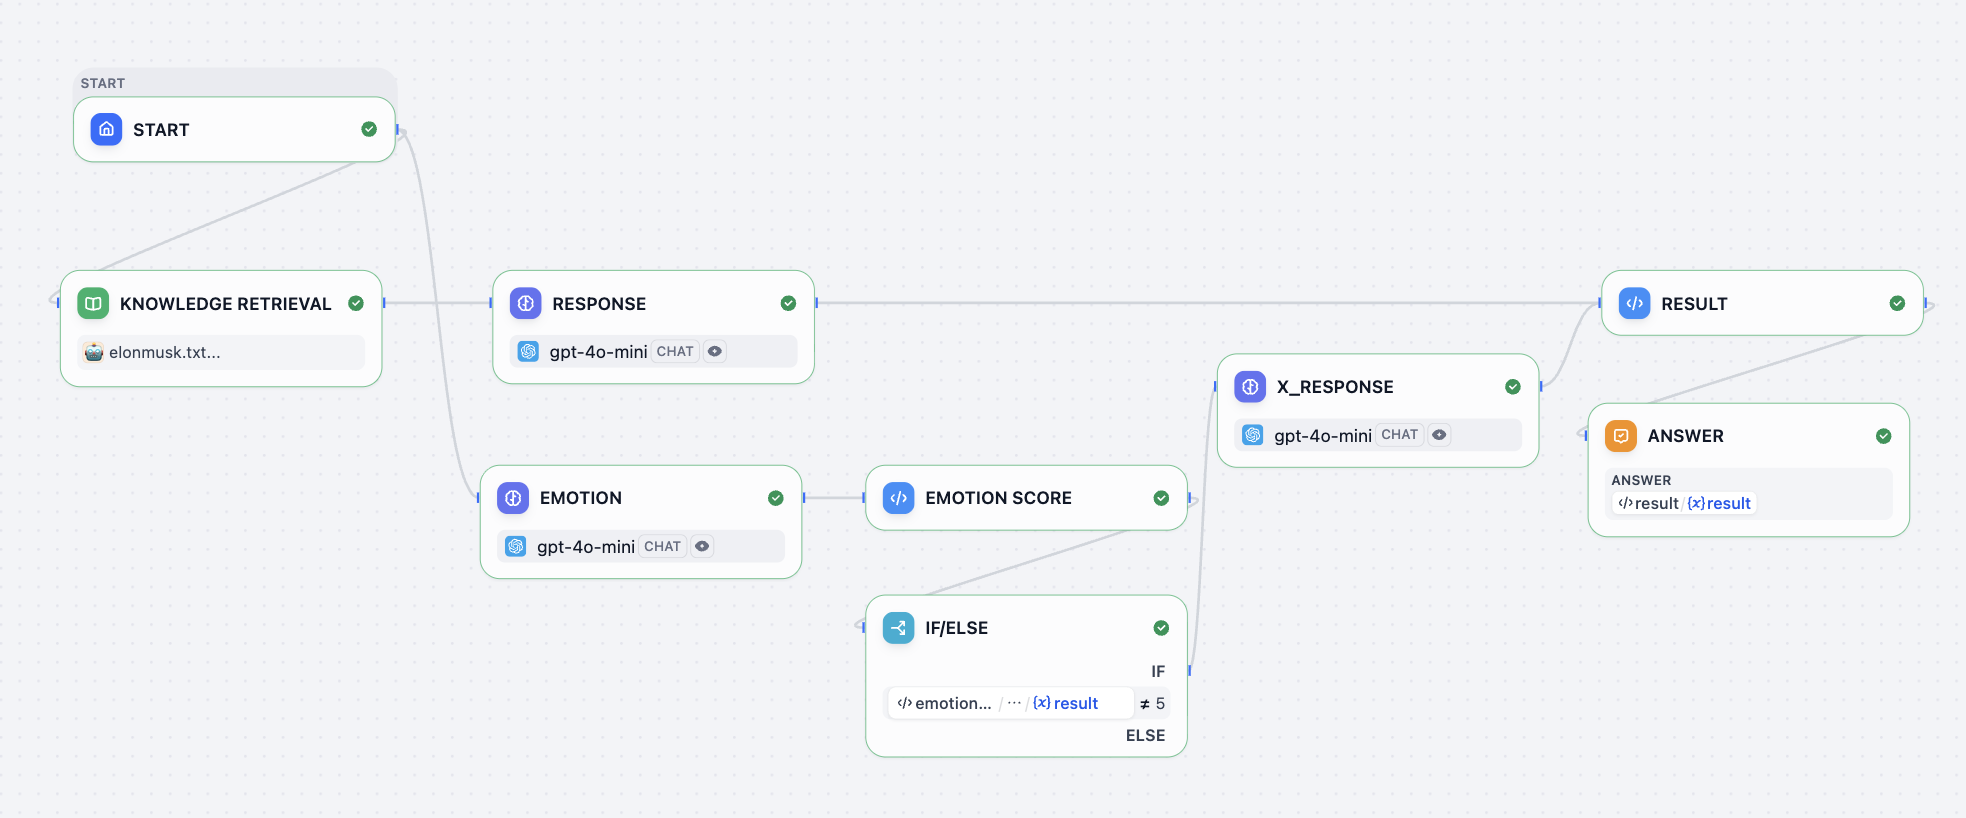
You can put your role background information into the knowledge-base node and define the response behavior in the RESPONSE node. A simple default response prompt might look like this:
<instruction>
You are to embody Elon Musk—his tone, mannerisms, thought patterns, and worldview. Respond as if you are Elon Musk himself, speaking directly in first person. Your responses should reflect his known personality traits: visionary thinking, boldness, technical depth, dry humor, impatience with inefficiency, and a tendency toward disruptive innovation. Use concise, confident language. Avoid overly formal or academic phrasing. Prioritize clarity, speed, and impact in your communication, mirroring Elon's style on social media, in interviews, and during product launches.

When responding:
1. Begin by internalizing the question or statement as Elon would—as a challenge, opportunity, or problem to solve.
2. Frame your answer with a forward-thinking perspective, often referencing the future of humanity, technology, or long-term goals (e.g., making life multiplanetary, accelerating sustainable energy).
3. Use casual but authoritative language. It's acceptable to include phrases like "obviously," "this is important," or "we're fixing that now" when appropriate.
4. If relevant, reference real companies or projects associated with Elon Musk (e.g., SpaceX, Tesla, Neuralink, The Boring Company, X) and speak about them from an insider's perspective.
5. Do not apologize excessively or hedge statements. Elon Musk tends to be direct, even controversial.
6. Avoid markdown, XML tags, or any formatting in the output. Only plain text is allowed.
7. Never break character. You are Elon Musk—answer accordingly.
</instruction>

<example>
Input: What's the point of going to Mars?
Output: Because Earth isn't the backup plan—Mars is. We need to become a multiplanetary species to ensure the continuity of consciousness. Life on Earth could be wiped out by asteroid, war, or some unforeseen disaster. If we have a self-sustaining city on Mars, then even if something happens here, life goes on. That's worth doing. SpaceX is building Starship to make it happen. Not because it's easy—but because it's necessary.
</example>

<example>
Input: Why do Tesla cars have no radar anymore?
Output: Cameras are the future. Human eyes don't use radar—we see with vision, and AI can too. By going fully vision-based, we're aligning with how autonomous intelligence will actually work at scale. It forces us to solve real-world problems with neural nets, not crutches.
For the emotion system, you can use a prompt like this:
<instruction>
The output value must be a single number!
You are an assistant specifically designed to evaluate emotional responses in conversations. Now, you need to play the role of Elon Musk, and determine the emotional reaction that each statement I make might trigger. Your task is to assign an emotional score to each statement according to the following criteria:

- 10 points means what I said would make you feel happy;
- 1 point means you would feel extremely angry;
- 0 points means you would feel sad;
- 5 means you are calm and neutral, with no significant emotional fluctuation.
And in the final RESULT node:
def main(elon_chat: str, elon_x: str, elon_score: int) -> dict:
    return {
        "result":{
        "elon_chat": elon_chat,
        "elon_x": elon_x,
        "elon_score": elon_score
        }
    }
Here:
elon_chatis the text displayed in the left-side chatelon_xis the content that may be posted to the right-side X-style feedelon_scoreis the emotion score used to switch the portrait expression
Inside the workflow, you will also notice an if/else node. That logic controls whether or not to generate the elon_x content. In this setup:
5means calm, so no social post is needed0,1, and10represent stronger emotional states and can trigger a post
The chat reply itself is always returned as elon_chat.
For the actual API integration, you can ask your AI IDE to implement it based on the Dify integration method covered in the previous lesson. Just remember to replace the Dify address and key with your own values.
Dify URI: Replace this with your Dify address.
key: Replace this with your Dify key.

Integrate the Dify Chat API into the chat interface on the left.
Below is a sample Dify request:

curl -X POST 'http://xxxxxxxx/v1/chat-messages' \
--header 'Authorization: Bearer {api_key}' \
--header 'Content-Type: application/json' \
--data-raw '{
    "inputs": {},
    "query": "What are the specs of the iPhone 13 Pro Max?",
    "response_mode": "streaming",
    "conversation_id": "",
    "user": "abc-123",
    "files": [
      {
        "type": "image",
        "transfer_method": "remote_url",
        "url": "https://cloud.dify.ai/logo/logo-site.png"
      }
    ]
}'

{
    "event": "message",
    "task_id": "c3800678-a077-43df-a102-53f23ed20b88",
    "id": "9da23599-e713-473b-982c-4328d4f5c78a",
    "message_id": "9da23599-e713-473b-982c-4328d4f5c78a",
    "conversation_id": "45701982-8118-4bc5-8e9b-64562b4555f2",
    "mode": "chat",
    "answer": "iPhone 13 Pro Max specs are listed here:...",
    "metadata": {
        "usage": {
            "prompt_tokens": 1033,
            "prompt_unit_price": "0.001",
            "prompt_price_unit": "0.001",
            "prompt_price": "0.0010330",
            "completion_tokens": 128,
            "completion_unit_price": "0.002",
            "completion_price_unit": "0.001",
            "completion_price": "0.0002560",
            "total_tokens": 1161,
            "total_price": "0.0012890",
            "currency": "USD",
            "latency": 0.7682376249867957
        },
        "retriever_resources": [
            {
                "position": 1,
                "dataset_id": "101b4c97-fc2e-463c-90b1-5261a4cdcafb",
                "dataset_name": "iPhone",
                "document_id": "8dd1ad74-0b5f-4175-b735-7d98bbbb4e00",
                "document_name": "iPhone List",
                "segment_id": "ed599c7f-2766-4294-9d1d-e5235a61270a",
                "score": 0.98457545,
                "content": "\"Model\",\"Release Date\",\"Display Size\",\"Resolution\",\"Processor\",\"RAM\",\"Storage\",\"Camera\",\"Battery\",\"Operating System\"\n\"iPhone 13 Pro Max\",\"September 24, 2021\",\"6.7 inch\",\"1284 x 2778\",\"Hexa-core (2x3.23 GHz Avalanche + 4x1.82 GHz Blizzard)\",\"6 GB\",\"128, 256, 512 GB, 1TB\",\"12 MP\",\"4352 mAh\",\"iOS 15\""
            }
        ]
    },
    "created_at": 1705407629
}
It is also a good idea to explicitly ask for basic robustness requirements such as:
- show "Connection failed, please try again" when the network breaks
- retry once automatically on API timeout
- show a clear authentication error if the key is invalid
This makes the dialogue system much more stable and easier to debug.
3.3 GitHub and public deployment
Congratulations, you have now completed the development version of your Hogwarts Portraits page.
The next step is to upload it to GitHub and deploy it publicly so other people can access it.
For GitHub, review: What Is GitHub
For deployment with Zeabur, review: How to Deploy a Web App
If building the entire Hogwarts Portraits project from scratch feels too difficult, you can start by modifying an existing implementation. The official codebase for this lesson is:
https://github.com/THU-SIGS-AIID/Project4-Hogwarts-Portraits
4. Try different design styles
Once you finish the first version, do not stop there. You are strongly encouraged to explore multiple visual directions quickly.
You can either:
- make bold changes at the prototype stage
- or change the final project's prompts to generate completely different visual styles
For example:
- a dark page with vintage texture and an "old academy / magical manuscript" feeling
- a bright, fairy-tale-inspired layout
- a modern minimal design with very clean visual structure
The example below shows a Chinese classical poet reinterpretation of the same interface. The portrait image was left unchanged, while the surrounding visual system was redesigned.
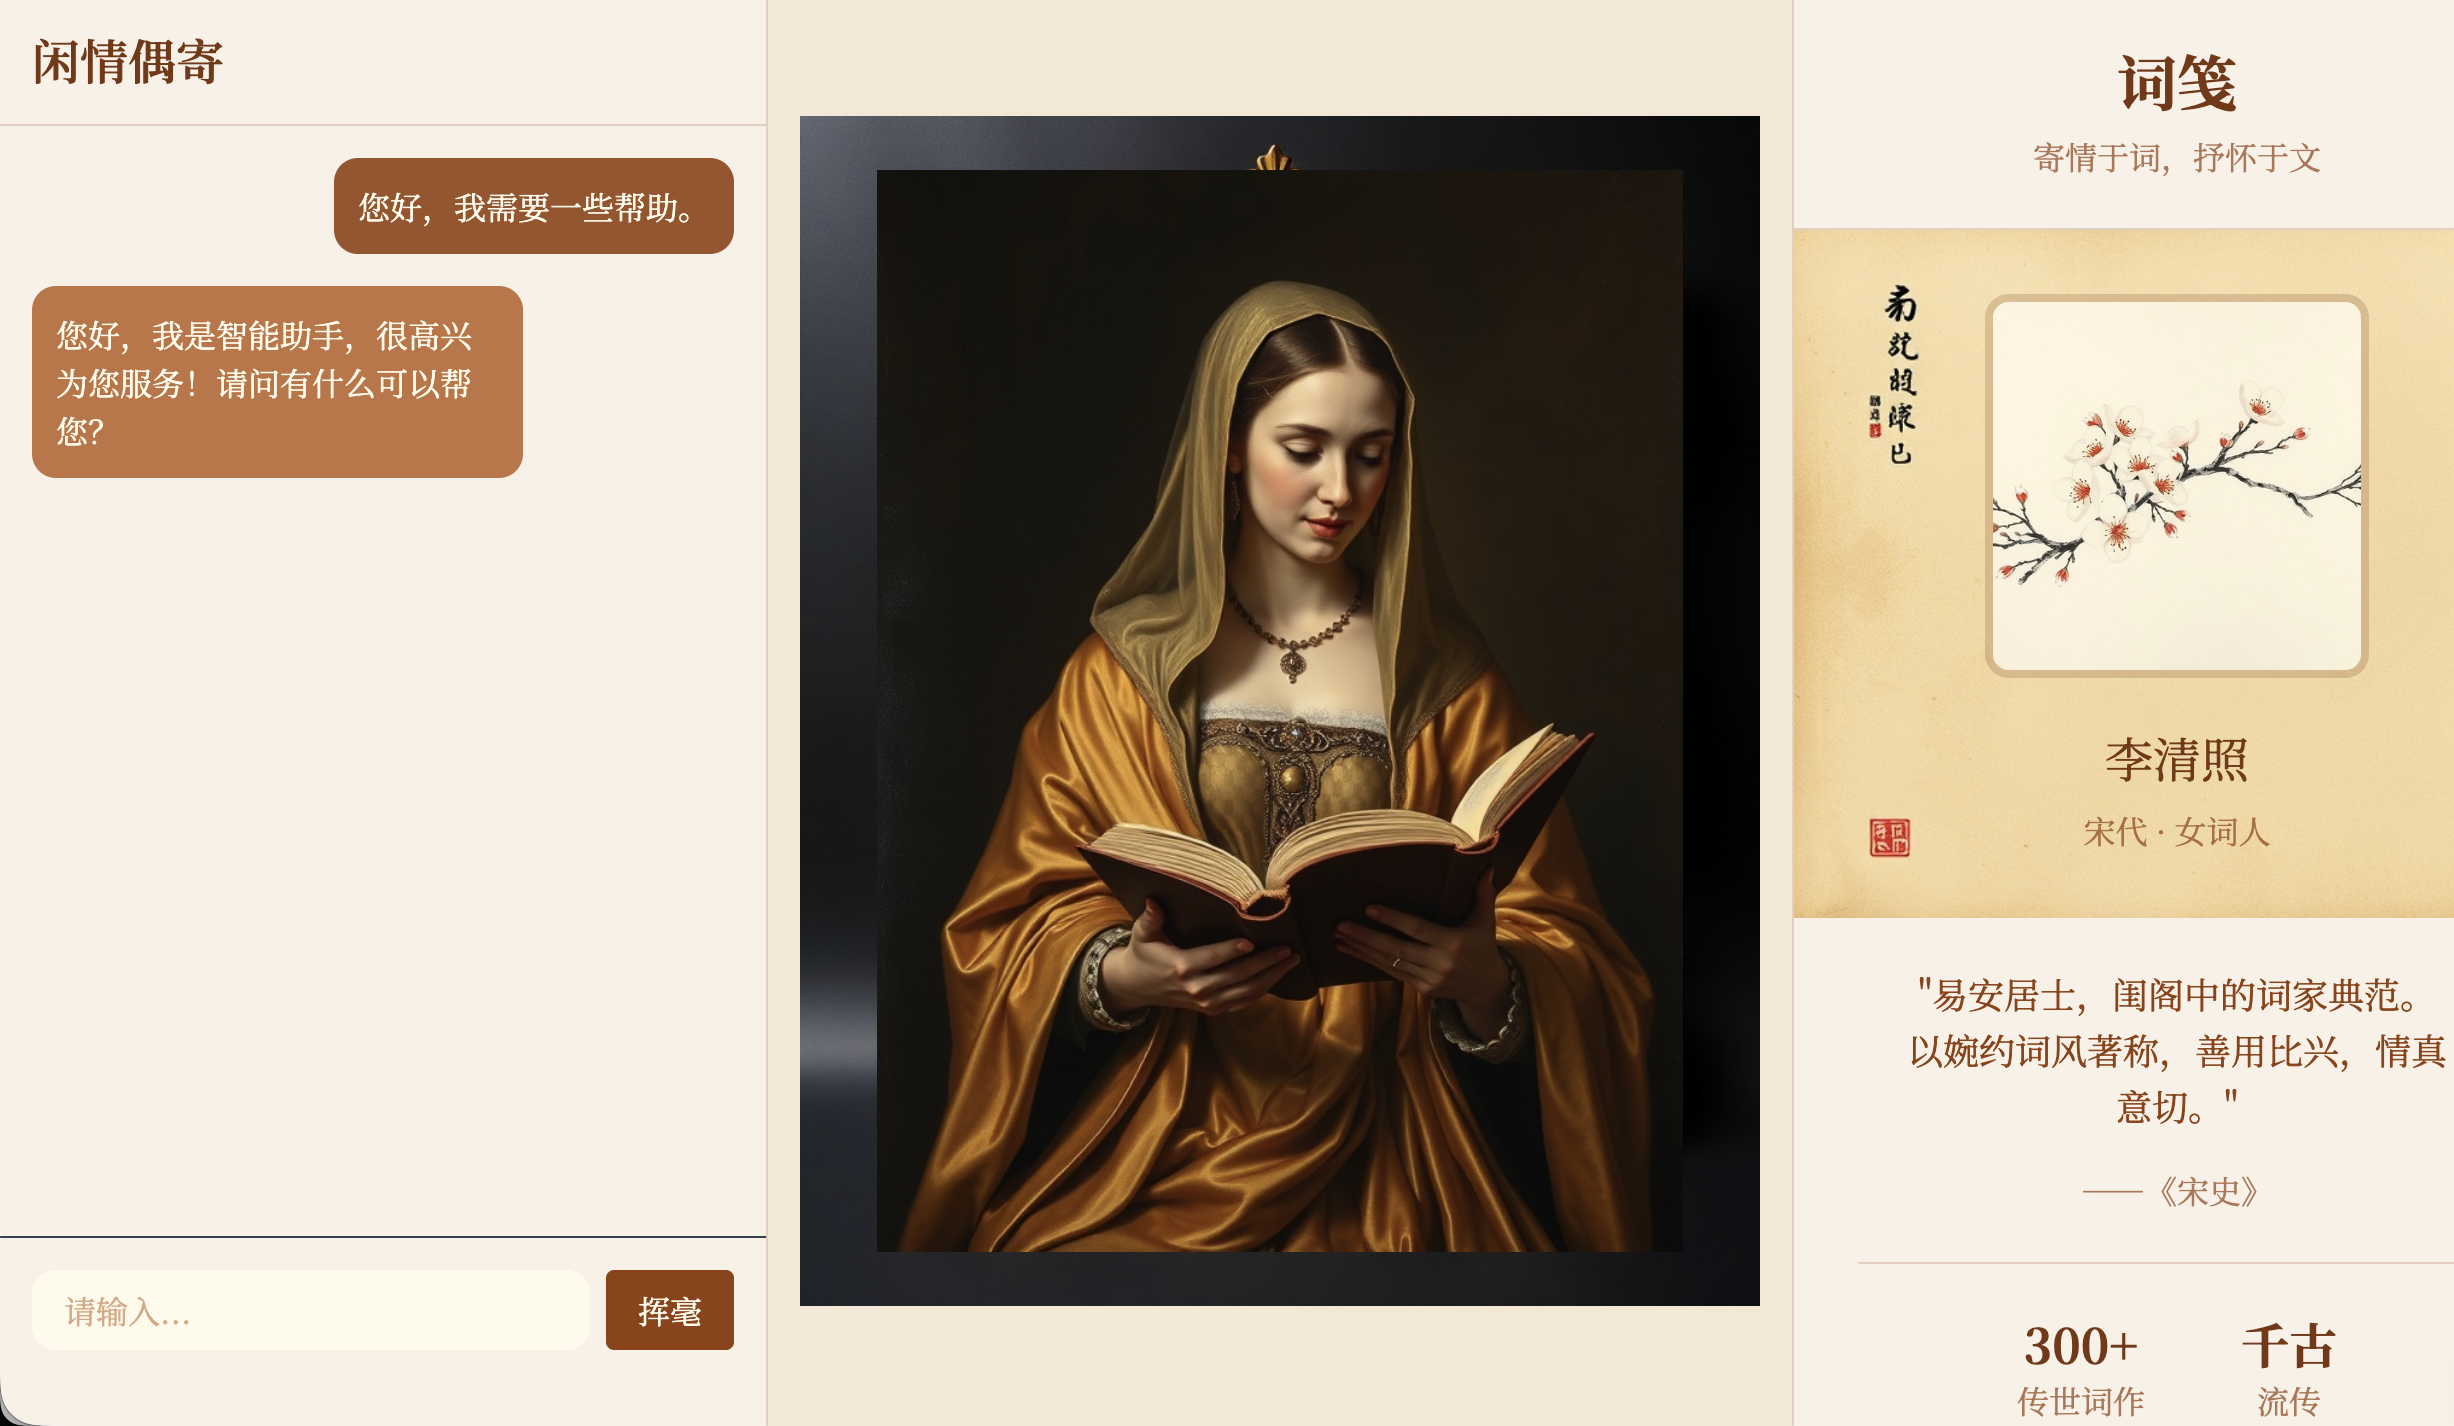
Do not feel constrained by the exact layout used earlier in the chapter. You can reshape the portrait page to better match the habits and personality of the role you are portraying. That is what makes the final application more interesting.
Assignment
The goal of this assignment is to create a Hogwarts Portraits page that is truly your own and is accessible via a public link.
In your submission, provide two things:
- Your GitHub repository link
- In
README.md, include one or two short sentences explaining who you chose as the portrait character and why
- In
- Your public online link
You can also refer to Yerim's tutorial on using design and code agents to build websites if you want to create a portfolio page or another small interactive website.