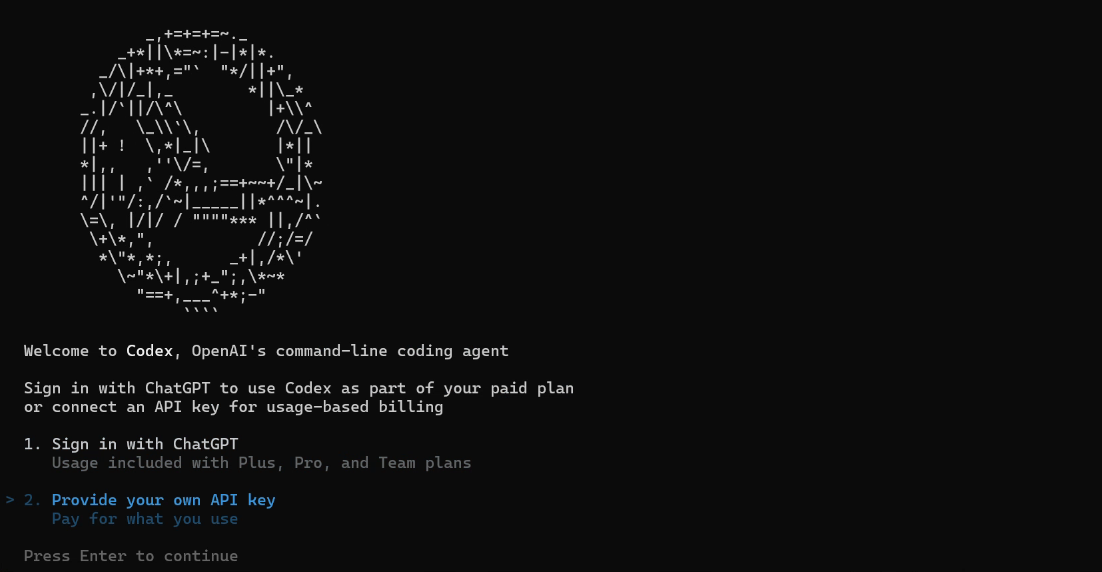
CLI AI Coding Tools
In this tutorial, we introduce AI coding agents that run directly in the command line. They are different from the agents we used earlier in Trae and Cursor. CLI AI coding tools can only be used in the terminal. Compared with agents integrated into AI IDEs, they usually have longer context windows, faster tool-calling speed, and compatibility with a wider range of large models. In the latest AI Vibe Coding practice, we often prioritize CLI AI coding tools over built-in IDE coding agents.
Starting from the CLI
Do you still remember the CLI we introduced before? CLI means using pure text commands in a terminal or command prompt to operate software applications, instead of relying on a graphical interface (GUI. You can simply think of GUI as the clickable interface with buttons on a computer or phone, where you do not need to type commands).
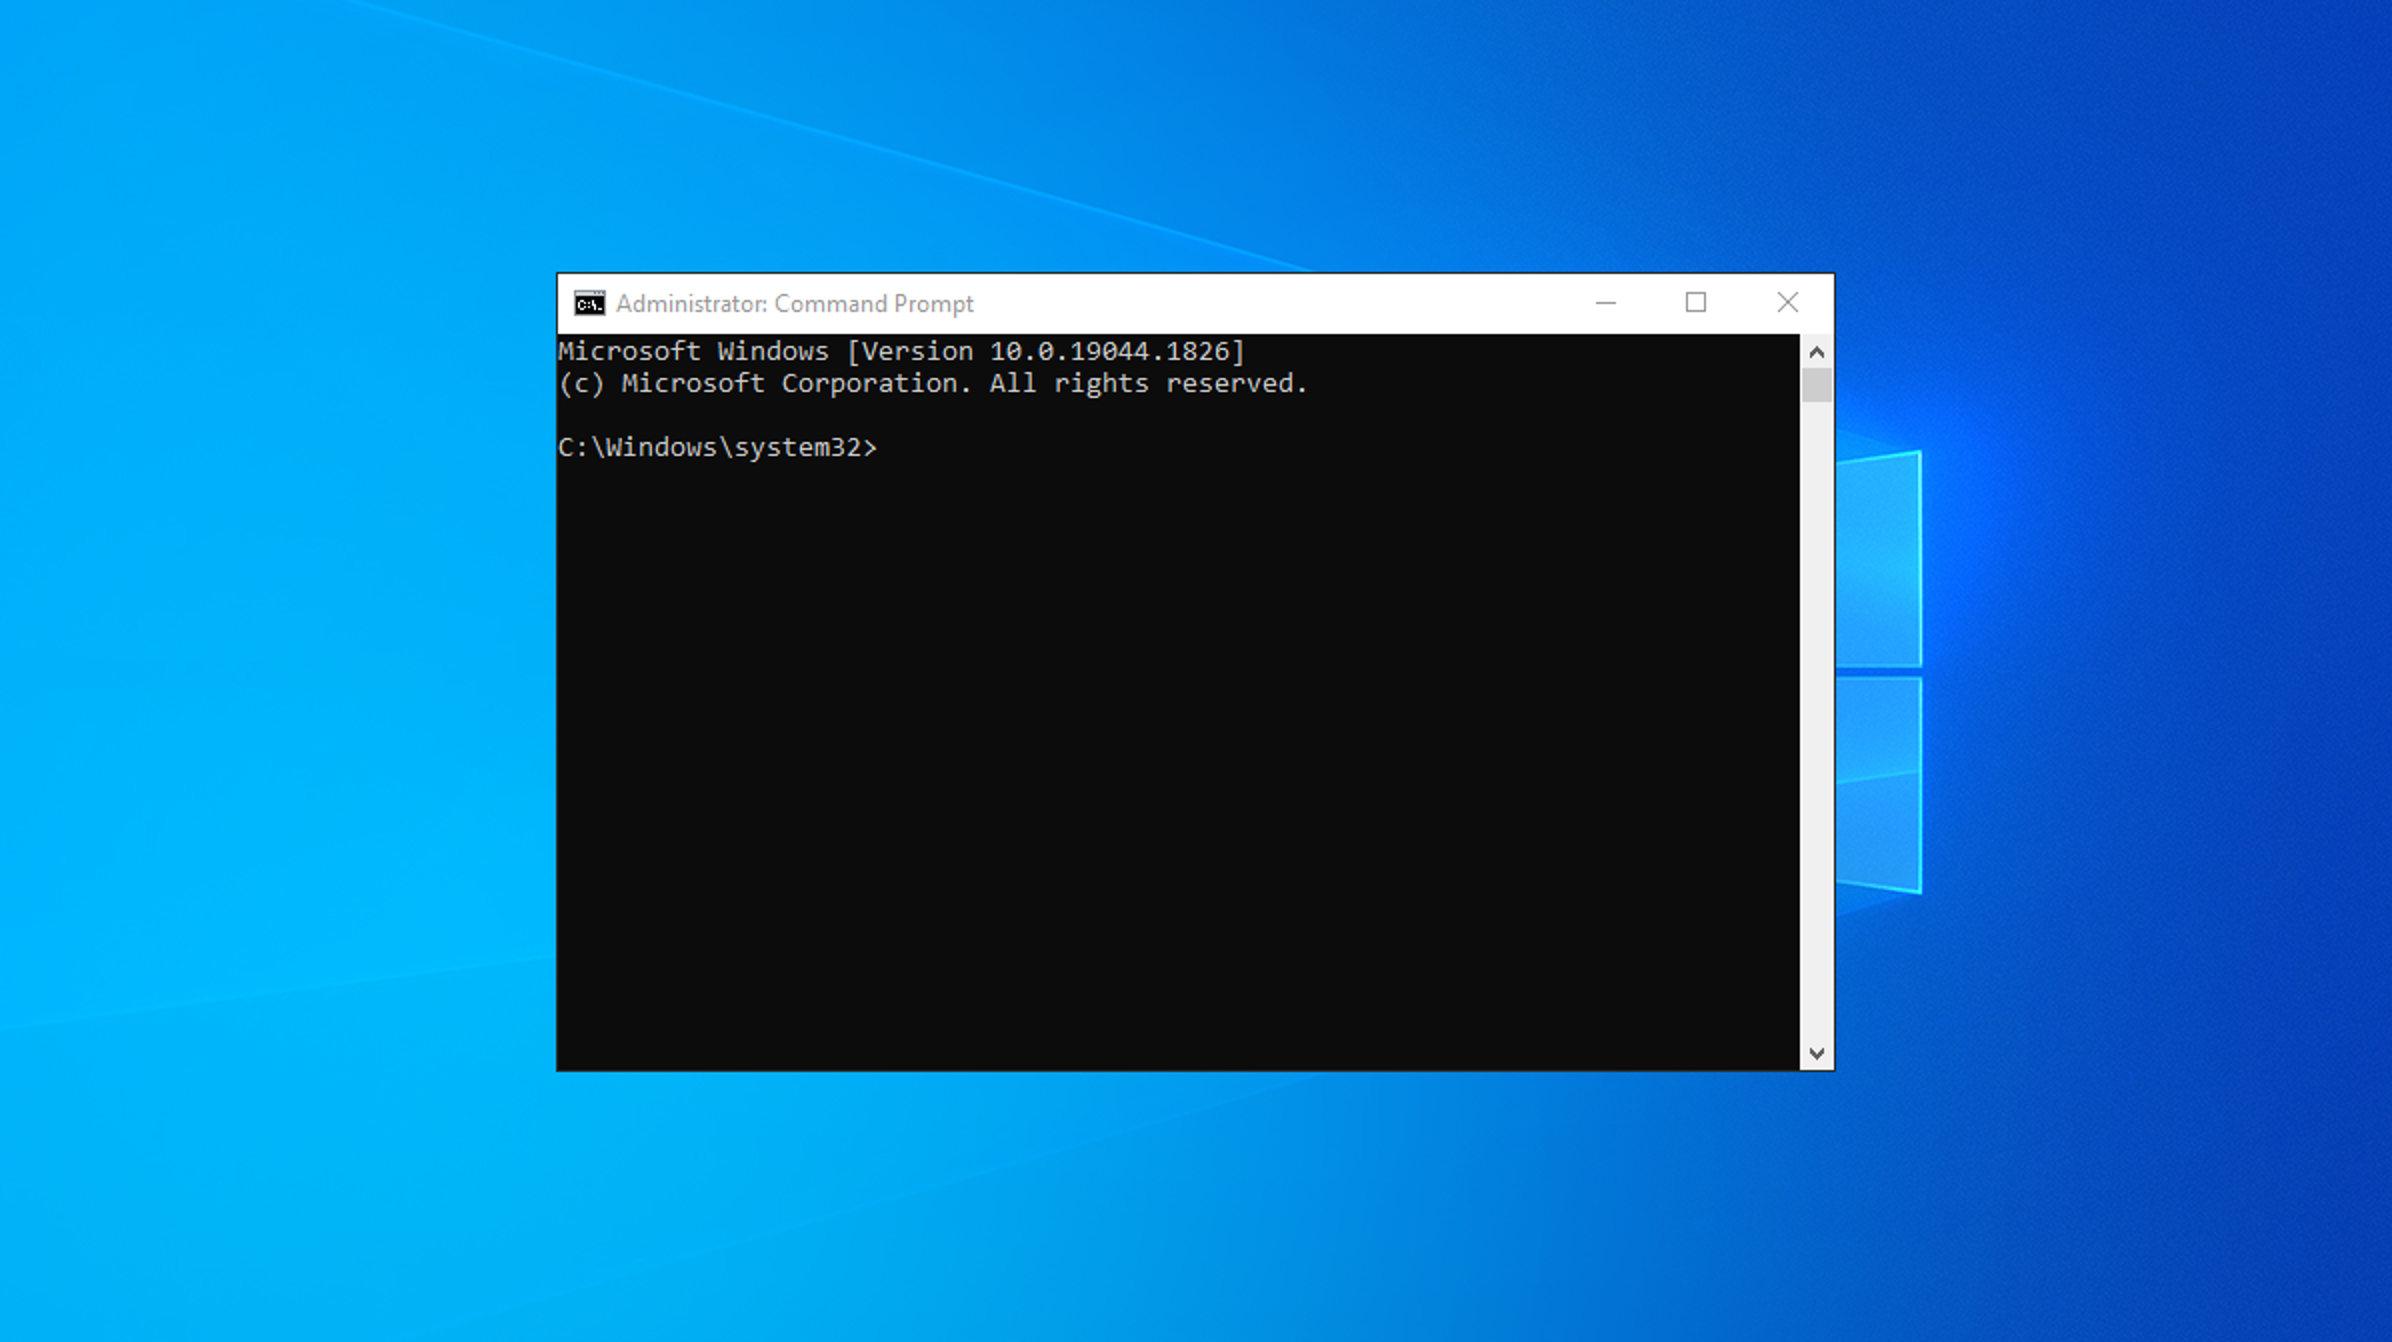
On Windows, common terminals include Command Prompt (
cmd) and PowerShell. You can typecmdorpowershellin the Run/Search box to launch them.
The CLI is naturally good for text-command workflows. Among a small group of geeks (programming enthusiasts pursuing extreme efficiency), CLI is even more popular than GUI. They want to complete everything with the keyboard and feel that moving the mouse can slow down coding efficiency.
In industry, CLI is also often the most common interface form, because GUI requires the operating system to draw interfaces and manage windows, which demands more computer resources. CLI only needs to pass received commands to the system for execution. So when connecting to large-scale server clusters, we usually interact only through CLI.
For many learners with no CLI experience, command-line operations can feel complicated, with too many commands, and even the fear of "accidentally breaking the computer." No need to worry. Remember how, in previous tutorials, we often asked Trae to help with basic operations? We can use exactly the same idea here. We can ask CLI coding tools to perform all CLI operations for us: entering specific folders, searching and processing files, running or copying open-source projects, and so on. The whole process can be completed through conversation with the CLI AI coding tool.
How Is It Different from an AI IDE
We can compare CLI AI coding tools to z.ai and Trae that we used before. In a sense, CLI AI coding tools can be seen as a special kind of z.ai: they also only need a simple chat entry, and then they automatically perform the required operations (sometimes you just need to open a browser manually to check the final result). If compared to AI IDEs, CLI AI coding tools can be seen as the Agent module inside an IDE, which is the side chat panel.
However, because different AI IDEs implement agents in different ways, their capability gaps are large, and AI coding quality is often unstable. CLI AI coding tools are usually developed directly by major tech companies, such as Anthropic behind Claude and OpenAI behind ChatGPT.
Compared with other AI coding agents, directly using products from these major companies is often a better practice. Claude Code in particular is a tool used by Anthropic's own R&D teams, designed from the start around "meeting real engineer needs."
To compare more intuitively, we can look at the difference between Claude Code and one AI IDE agent (Cursor as an example):
| Feature | Claude Code | Cursor | Better Choice |
|---|---|---|---|
| Automatic execution | ✅ Very strong | ❌ Limited | Claude Code |
| IDE integration | ❌ CLI only | ✅ Native VS Code | Cursor |
| Real-time completion | ❌ None | ✅ Excellent | Cursor |
| Multi-file operations | ✅ Very strong | ⚠️ Pretty good | Claude Code |
| GitHub integrated workflow | ✅ Can commit directly | ⚠️ More manual | Claude Code |
| Learning cost | ⚠️ Medium | ✅ Easy to start | Cursor |
| Context length | ✅ Very long | ⚠️ Good | Claude Code |
| Debug assistance | ✅ Automated | ⚠️ More manual work | Claude Code |
Table source: https://northflank.com/blog/claude-code-vs-cursor-comparison
In short, CLI AI coding tools usually can:
- Support much longer continuous conversations (they can even "work for you all day").
- Provide longer context windows (you no longer need to frequently say "continue").
- Respond faster (with support for more custom model APIs).
For coding-related operations, they are usually smarter and more stable than most IDE built-in agents.
Common CLI AI Coding Tools
Although there are many open-source implementations now, in practice we only recommend two major types of CLI AI coding tools as the "preferred combo." You can choose either one based on your habits, and we strongly recommend trying both before deciding which suits you best.
- Codex uses GPT-5 and is stronger overall in capability.
- Claude Code, routed through GLM 4.6 compatible APIs, offers an experience close to Claude 4 at a lower cost.
However, which one works better in your real project can only be determined by hands-on testing. Mastering multiple AI coding tools is always beneficial. Once you are skilled, you can switch flexibly among Claude Code, Codex, or Trae in different scenarios. If one tool does not perform well after multiple tries, just switch to another tool or model and continue experimenting.
At the same time, because model versions update very quickly, we recommend prioritizing whichever option currently performs best in cost-performance (quality / cost).
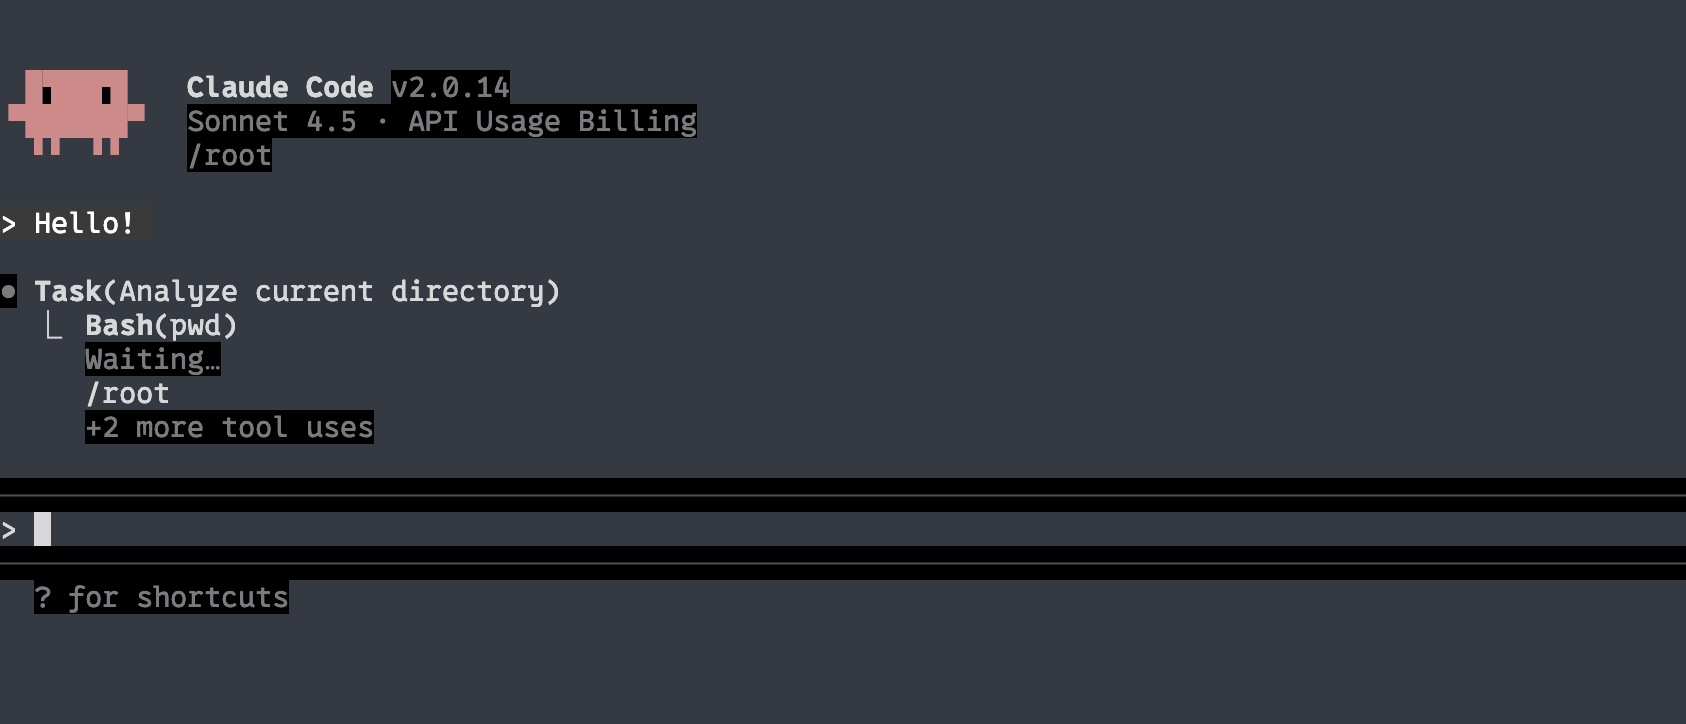
Claude Code
Claude Code is an AI coding tool developed by Anthropic based on Claude model capabilities. Its primary interaction happens in the terminal, and it can also be used as a VS Code extension. Similar to an agent inside an AI IDE, it can deeply understand a developer's repository and complete end-to-end development tasks through natural language instructions, including code editing, bug fixing, running and fixing tests, managing Git workflows (such as resolving merge conflicts and creating PRs), explaining complex code, and executing terminal commands.
Claude Code's main advantages are: very long context windows (it can handle whole files or even small projects), proactively clarifying ambiguous requirements, automatically planning and allocating execution tasks, and deeply understanding and explaining the entire codebase. Compared with ordinary IDE agents, it is better suited for immersive vibe-coding workflows.
In actual use, you can ask it through chat to create new projects, perform CLI operations (such as organizing folders, bulk renaming files, deploying open-source projects), and configure development environments (such as installing and debugging Python environments). If you find some code difficult to understand, or a folder structure unclear, you can directly ask Claude Code to generate structured analysis documentation or explain specific parts step by step.
If you want to systematically learn Claude Code, you can refer to the course jointly launched by Andrew Ng and Anthropic:
https://www.bilibili.com/video/BV176t2zSEpr
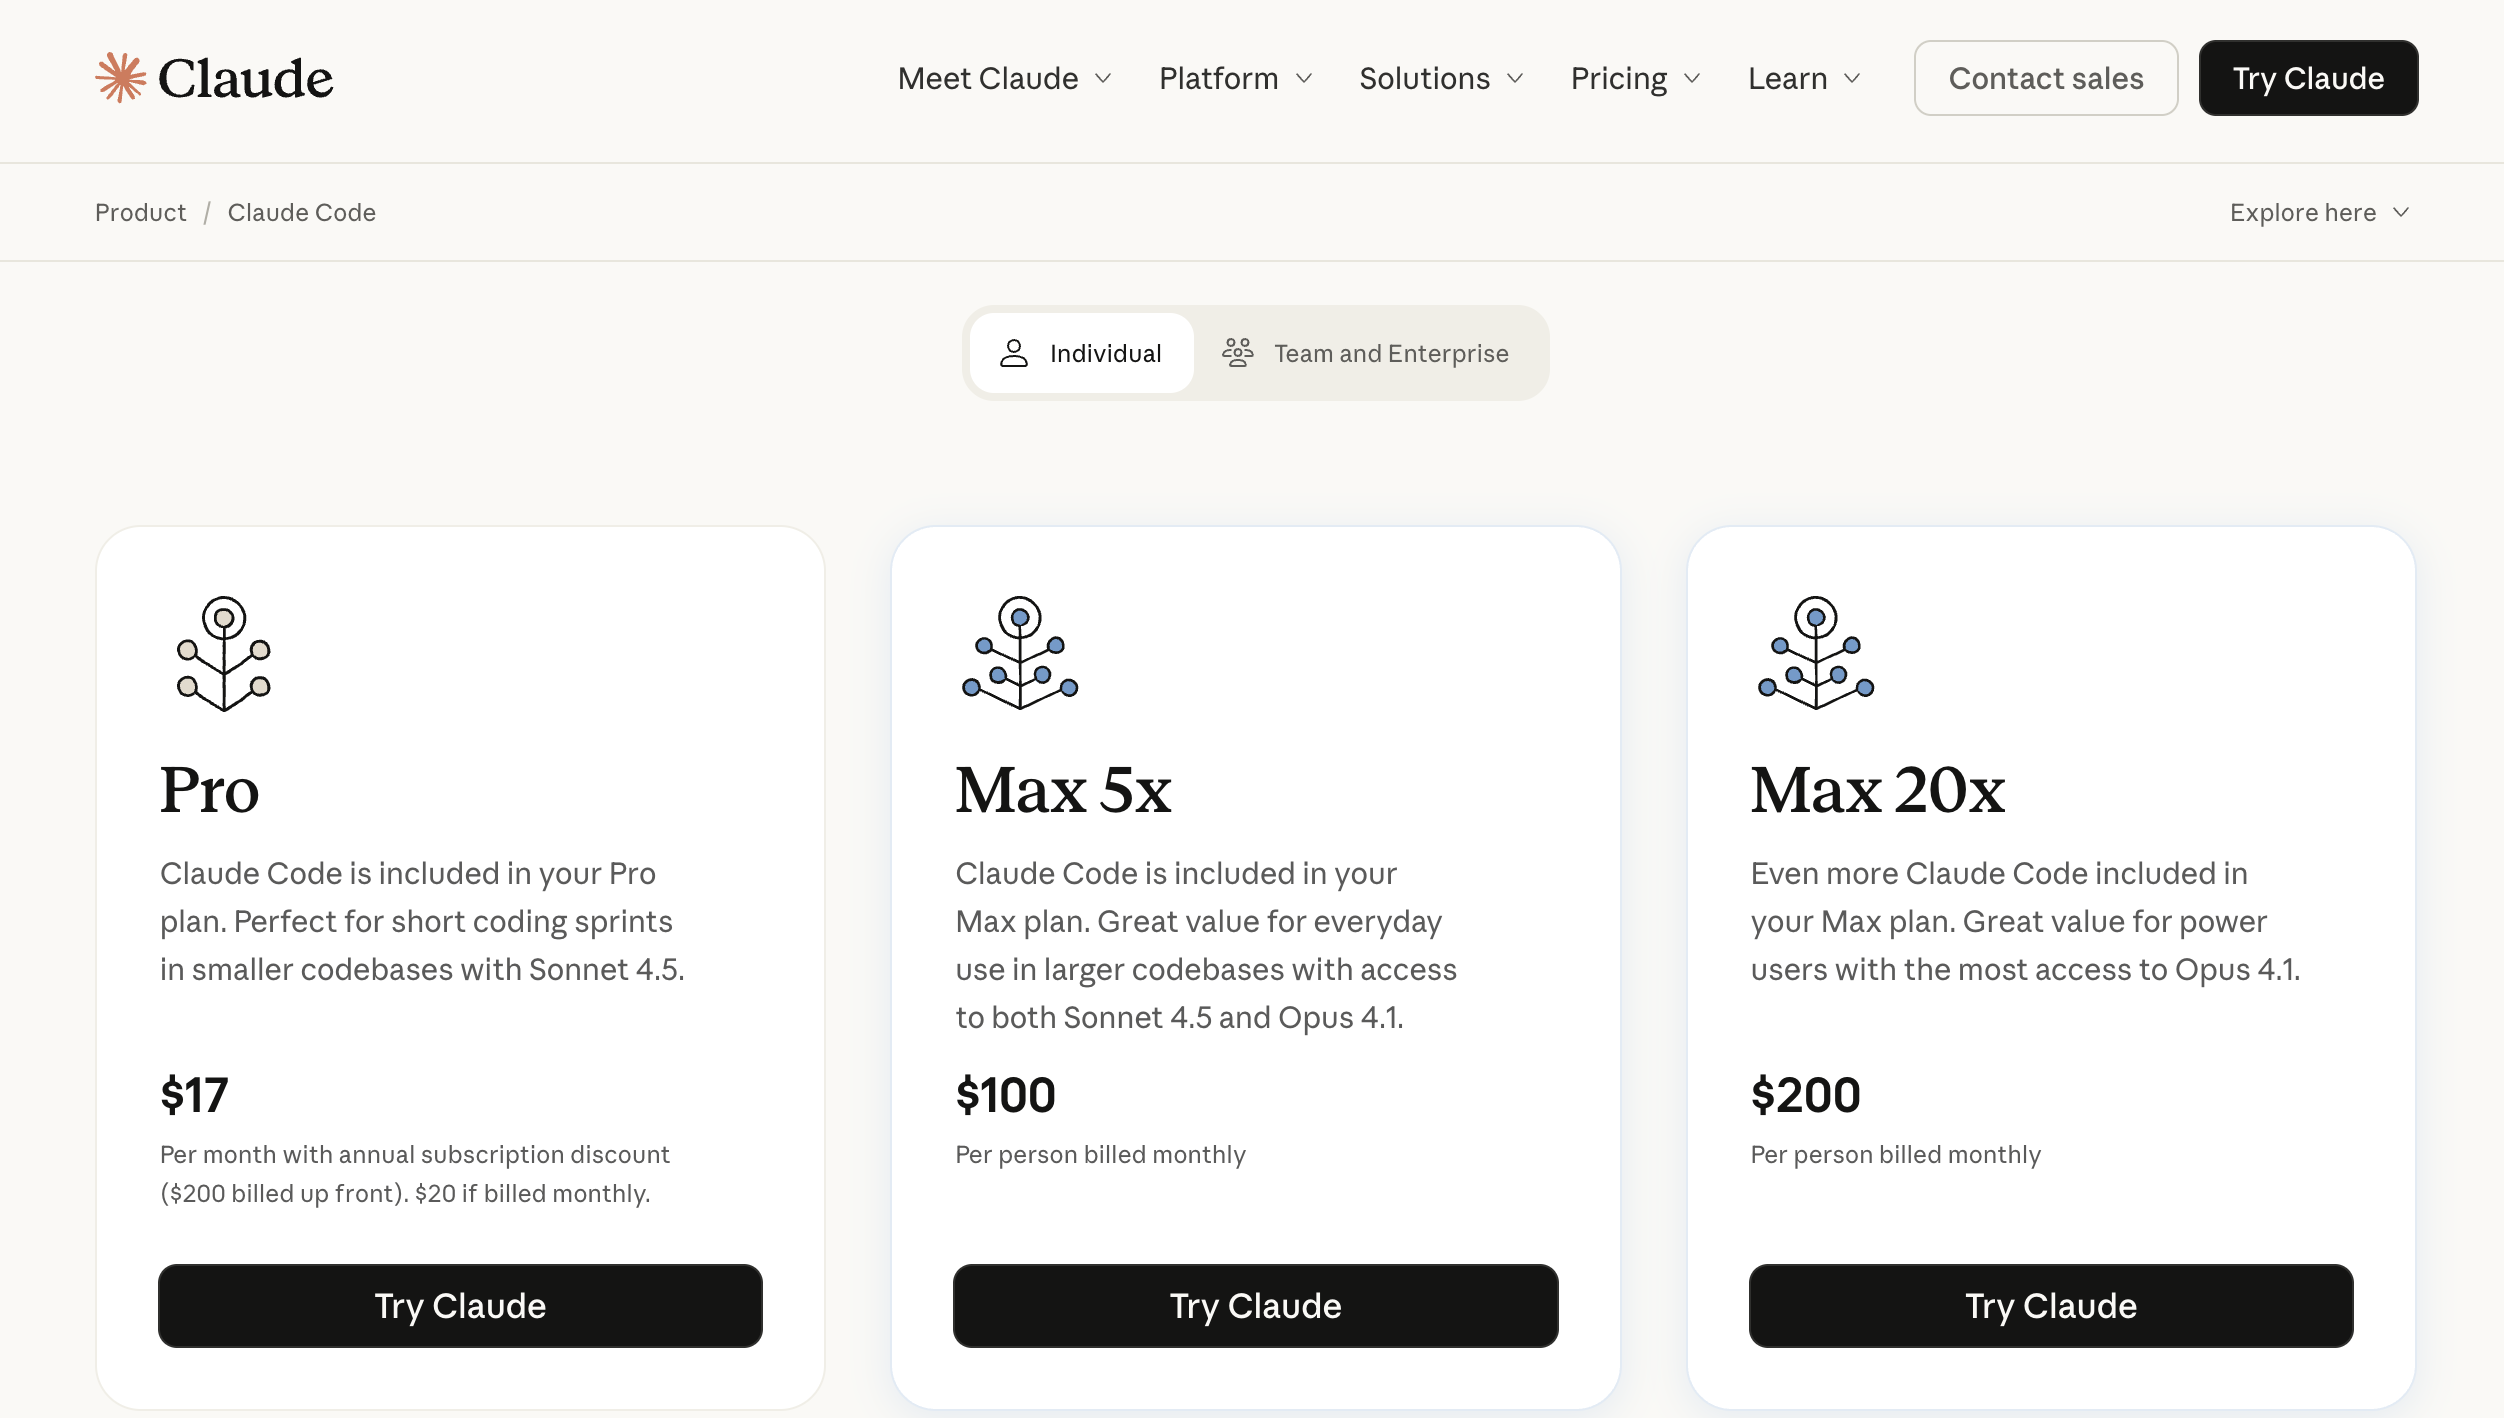
Next, we will learn how to use Claude Code. Because directly using the official Claude Code is often very expensive (as shown below), we will instead use API platforms that are compatible with Claude Code protocol but based on other large models.
You need to learn the different options below (it is best to try all of them), and finally choose the one that suits you best as your main path.
The first approach is to directly use APIs that are "Anthropic-interface compatible." As Claude Code becomes more popular, more model providers now support Anthropic-style invocation. Common providers include GLM, Kimi, DeepSeek, and Siliconflow. They all provide compatible API interfaces. We will explain specific configuration details later.
One thing to note: Claude Code usually consumes a lot of tokens. If you are worried about high API costs, you can consider GLM monthly plans (about 20 RMB/month) to control cost. If you first want to estimate actual spending, you can also recharge 10 RMB for small-scale experiments.
Another approach is using the "Claude Code Route" project. It is an open-source tool that supports all common API invocation interfaces and allows fine-grained model configuration for different scenarios, including local model access. But this option is more complex to configure, so we suggest starting with the first approach.
Use Zhipu GLM as the Backend (Recommended)
GLM (General Language Model) is a series of large language models independently developed by Zhipu AI. GLM-4.6 is currently the latest version in the GLM family. Its core highlight is strong coding performance (benchmarking Claude Sonnet 4 in public benchmarks and real tasks, and considered top-tier domestically).
It also extends the context window to 200K, allowing easier handling of long text and large codebases, while strengthening reasoning and tool-calling capabilities, achieving a good balance between performance and cost.
Before connecting GLM, we first need to install Claude Code.
If command-line installation feels troublesome, or errors appear midway, you can directly ask Trae's Agent to complete installation for you.
# Install Claude Code
npm install -g @anthropic-ai/claude-code

# Enter your project
cd your-awesome-project

# Start Claude Code
claude

# Press Ctrl+C to exit Claude
Next, we need to change Claude Code's default API request endpoint so it supports GLM's API service. You can copy the content below and ask Trae to create the corresponding environment variables for you. You can also choose to write them permanently into system environment variables (if issues occur, you can also ask Agent to help modify them).
First, you need to obtain your GLM API key and store it in whatever way is most convenient for you.
Domestic URL: https://bigmodel.cn/usercenter/proj-mgmt/apikeys
International URL: https://z.ai/manage-apikey/apikey-list
If you are using the domestic GLM service, use the following variable configuration:
# Run the following command in Cmd
# Replace `your_zhipu_api_key` with the API key you just obtained
setx ANTHROPIC_AUTH_TOKEN your_zhipu_api_key
setx ANTHROPIC_BASE_URL https://open.bigmodel.cn/api/anthropic
If you are using the international GLM service, use this configuration:
# Run the following command in Cmd
# Also replace `your_zai_api_key`
setx ANTHROPIC_AUTH_TOKEN your_zai_api_key
setx ANTHROPIC_BASE_URL https://api.z.ai/api/anthropic
You can directly enter a prompt like this in Trae:
⚠️ If you configure "permanent environment variables" through Trae, then after configuration you must restart Trae. Otherwise environment variables in Trae's built-in terminal will not refresh, which may cause login failures or network connection errors.
Based on my environment variable settings:
setx ANTHROPIC_AUTH_TOKEN your_zai_api_key
setx ANTHROPIC_BASE_URL https://api.z.ai/api/anthropic

and my key(Replace it with your own key):
681fea485851d29060cc.13gfaendggaFOhb

please help me configure and start Claude Code
You will see output similar to the following:

💡 What is an environment variable?
Environment variables are essentially key-value configuration entries stored in the operating system, usually in the form "variable name = specific value." If configured in advance in terminal or system settings, programs can read these variables at any time to obtain relevant information. Because environment variables can be written directly in terminal without modifying code, we usually store large-model access keys in environment variables to avoid leakage. Programs only need to read corresponding environment variables to complete model invocation.
In Windows, besides storing model access keys, environment variables are also commonly used to store executable "path locations" for command-line tools.
We know the terminal itself is also a program. Sometimes we want to launch an external program from terminal. For example, typing
claudein terminal to launch Claude Code. The reason this works is that terminal reads system environment variables, and the PATH variable contains the directory where Claude Code executable resides, so terminal can find and execute it (equivalent to pasting that program's absolute path into terminal and pressing Enter).A typical environment variable may look like this:
PATH=C:\Windows\system32;C:\Program Files\Python. Then we can execute those programs from any directory, for example directly typingpythonin command line to start the Python interpreter.If you want to view current system environment variables, type "environment variables" in Windows Search, then in the "Edit the system environment variables" window you can see all variables and their values. Some store model keys, while others add program directories for invocation from any path.
Now you can use the latest GLM for Claude Code development. You can try rerunning previous projects, or retry tasks that Trae did not complete well, and compare the experience differences.
🎉 Rebuilding repeatedly is not a waste of time. Every repetition makes your skills more solid.
Using exactly the same logic as with GLM, you can also connect other interfaces that support Anthropic-compatible formats.
Use Kimi K2 as the Backend (Recommended)
Kimi K2 is a new-generation large language model released by Moonshot AI, with excellent performance in code understanding and generation. Kimi K2 supports ultra-long context windows (up to 200K tokens), and can easily handle large repositories and complex projects.
Core advantages:
- Ultra-long context: Supports 200K context window, enabling one-pass handling of whole-project code
- Strong coding ability: Performs very well in generation, refactoring, and debugging
- Better Chinese understanding: More accurate understanding of Chinese programming requirements
- Stable tool invocation: Supports reliable function-calling and tool usage
Get API Key:
Visit https://platform.moonshot.cn/console/account to register and obtain an API key.
Configuration method:
Reference docs: https://platform.moonshot.cn/docs/guide/agent-support
export ANTHROPIC_BASE_URL=https://api.moonshot.cn/anthropic
export ANTHROPIC_AUTH_TOKEN=sk-YOURKEY
Use Minimax as the Backend (Recommended)
Minimax is a new-generation large language model released by MiniMax, with excellent performance on programming tasks. Minimax models are known for strong reasoning and code-generation quality, especially suitable for complex programming scenarios.
Core advantages:
- Strong reasoning: Performs well in complex logic reasoning and code architecture design
- High code quality: Generated code is clear in structure and readable
- Multi-language support: Supports code generation and conversion across multiple languages
- Fast response speed: API responds quickly, suitable for high-frequency invocation scenarios
Get API Key:
Visit https://platform.minimax.io/ to register and obtain an API key.
Configuration method:
export ANTHROPIC_BASE_URL=https://api.minimax.io/anthropic
export ANTHROPIC_AUTH_TOKEN=YOUR_MINIMAX_API_KEY
export ANTHROPIC_MODEL=MiniMax-M2.7
Use DeepSeek as the Backend (Recommended)
DeepSeek is an open-source large language model released by DeepSeek, popular among developers for strong coding capabilities and high cost-performance. DeepSeek Coder is specially optimized through training for programming tasks.
Core advantages:
- Outstanding coding capability: Strong performance in code generation, understanding, and bug fixing
- Open-source and customizable: Open-source model, can be fine-tuned based on needs
- High cost-performance: Relatively low API pricing, suitable for high-frequency use
- Good Chinese support: Accurate understanding of Chinese programming scenarios
Get API Key:
Visit https://platform.deepseek.com/usage to register and obtain an API key.
Configuration method:
export ANTHROPIC_BASE_URL=https://api.deepseek.com/anthropic
export ANTHROPIC_AUTH_TOKEN=YOU_DEEPSEEK_API_KEY
export API_TIMEOUT_MS=600000
export ANTHROPIC_MODEL=deepseek-chat
export ANTHROPIC_SMALL_FAST_MODEL=deepseek-chat
export CLAUDE_CODE_DISABLE_NONESSENTIAL_TRAFFIC=1
Use Volcano Engine Coding Plan as the Backend (Recommended)
Volcano Engine is ByteDance's cloud service platform, providing enterprise-level AI model services. Volcano Engine's Coding Plan is specially optimized for coding scenarios, offering stable and efficient code-generation capability.
Core advantages:
- Enterprise-grade stability: Provides SLA guarantees for service stability
- Coding-scenario optimization: Specifically optimized for programming tasks
- Rich model choices: Supports multiple models including Doubao-pro and Doubao-lite
- Fast domestic access: Domestic node deployment with faster access speed
Get API Key:
Visit https://console.volcengine.com/ark/region:ark+cn-beijing/apiKey to register and obtain an API key.
Configuration method:
export ANTHROPIC_BASE_URL=https://ark.volces.com/api/anthropic
export ANTHROPIC_AUTH_TOKEN=YOUR_VOLCANO_API_KEY
export ANTHROPIC_MODEL=doubao-pro-32k
Other Anthropic-Compatible APIs
Siliconflow:
export ANTHROPIC_BASE_URL="https://api.siliconflow.cn/"
export ANTHROPIC_MODEL="moonshotai/Kimi-K2-Instruct-0905"    # You can change to the model you need
export ANTHROPIC_API_KEY="YOUR_SILICONCLOUD_API_KEY"    # Replace with your API key
Aliyun DashScope (Aliyuncs): https://help.aliyun.com/zh/model-studio/get-api-key
export ANTHROPIC_BASE_URL="https://dashscope.aliyuncs.com/apps/anthropic"
export ANTHROPIC_API_KEY="YOUR_DASHSCOPE_API_KEY"
Use Claude Code Route as the Backend (Advanced Usage)
Above we explained how to replace Claude Code's Anthropic interface with the official GLM API. Next, let's look at how Claude Code Router allows Claude Code to adapt to more model APIs.
Claude Code Router is an intelligent routing enhancement tool designed specifically for Claude Code. Its core function is helping users distribute AI requests to models across different platforms as needed, with a high degree of customization. It supports access to dozens of platforms including OpenRouter, DeepSeek, Ollama, Gemini, and more. It can also route tasks to specific models by scenario, such as GLM-4.5, Kimi-K2, and Qwen3-Coder. For example, you can route background tasks to local Ollama to save cost, route long text / long code tasks to Gemini-2.5-Pro, and route code explanation to DeepSeek.
This tool also provides convenient UI/CLI configuration management and uses converters to adapt API formats from different platforms. It supports automation integration such as GitHub Actions and custom extensions, solving the problems of "one single model cannot cover all scenarios" and "frequent platform switching is troublesome," helping users use AI tools more flexibly and at lower cost.
Below is a quick introduction to installing Claude Code Router. The rough steps are as follows (you can also ask Trae to execute them) to prepare the environment:
npm install -g @anthropic-ai/claude-code
npm install -g @musistudio/claude-code-router
After installation, you need to confirm the ccr command is available locally. If you see output similar to the following, installation is successful:
Next, there are two ways to initialize and configure models:
- Use CCR's built-in UI and configure on its browser page.
- Directly edit CCR's default configuration file (the UI essentially edits the config file as well, just with a more intuitive interface).
If you choose CCR UI, you will see an interface similar to this:
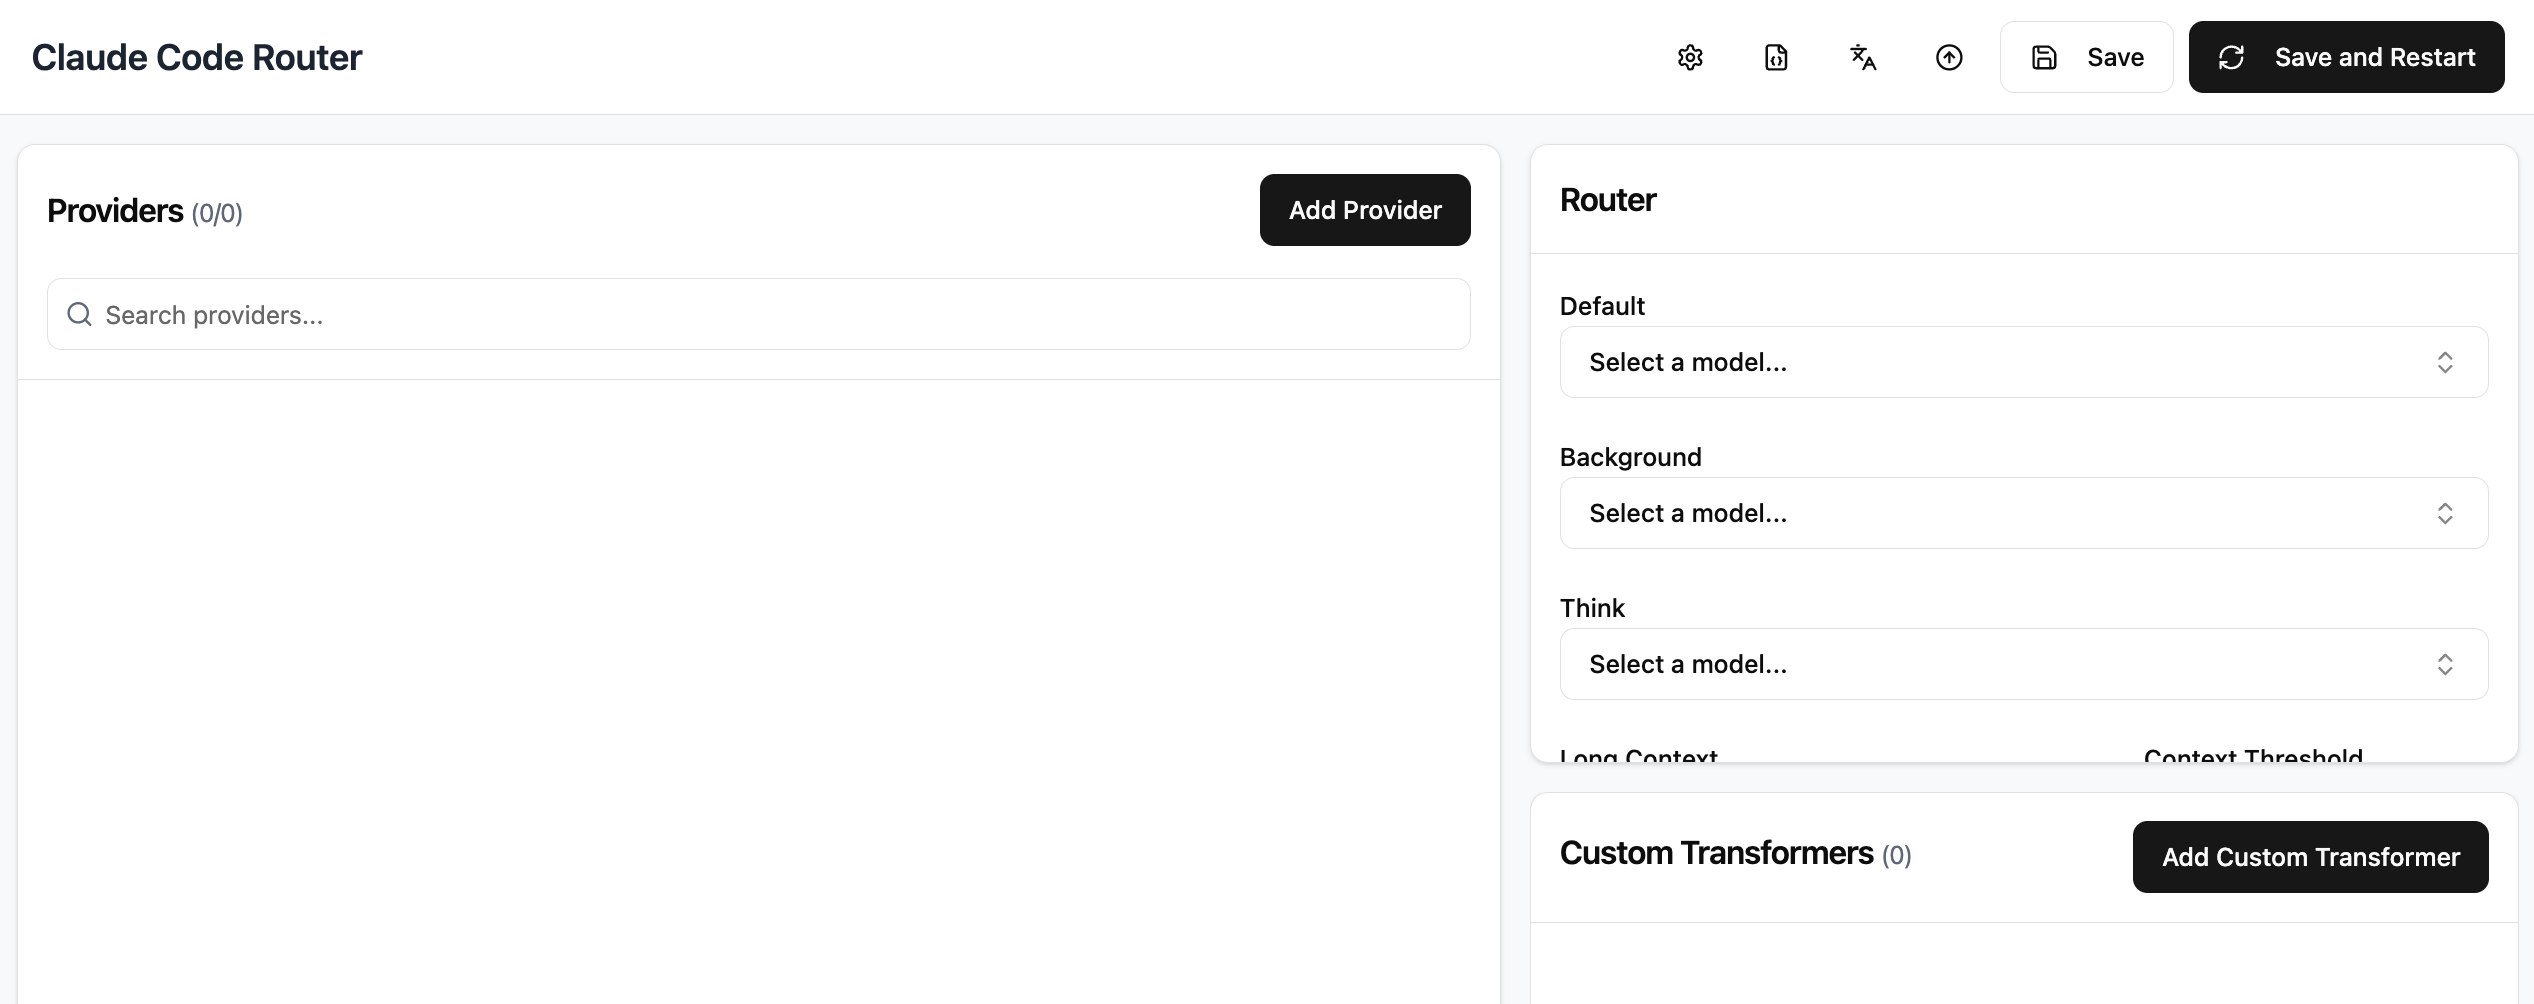
At this point, click the "Add Provider" button to see the following interface. You need to:
- Enter the provider name in Name;
- Fill in that provider's OpenAI-compatible endpoint in API Full URL;
- Fill in the corresponding platform API key in API Key;
- Fill model names in Models area, then click "Add Model";
- Finally click "Save" to persist configuration.
(If you scroll downward there are many advanced options, but you can ignore them for now.)
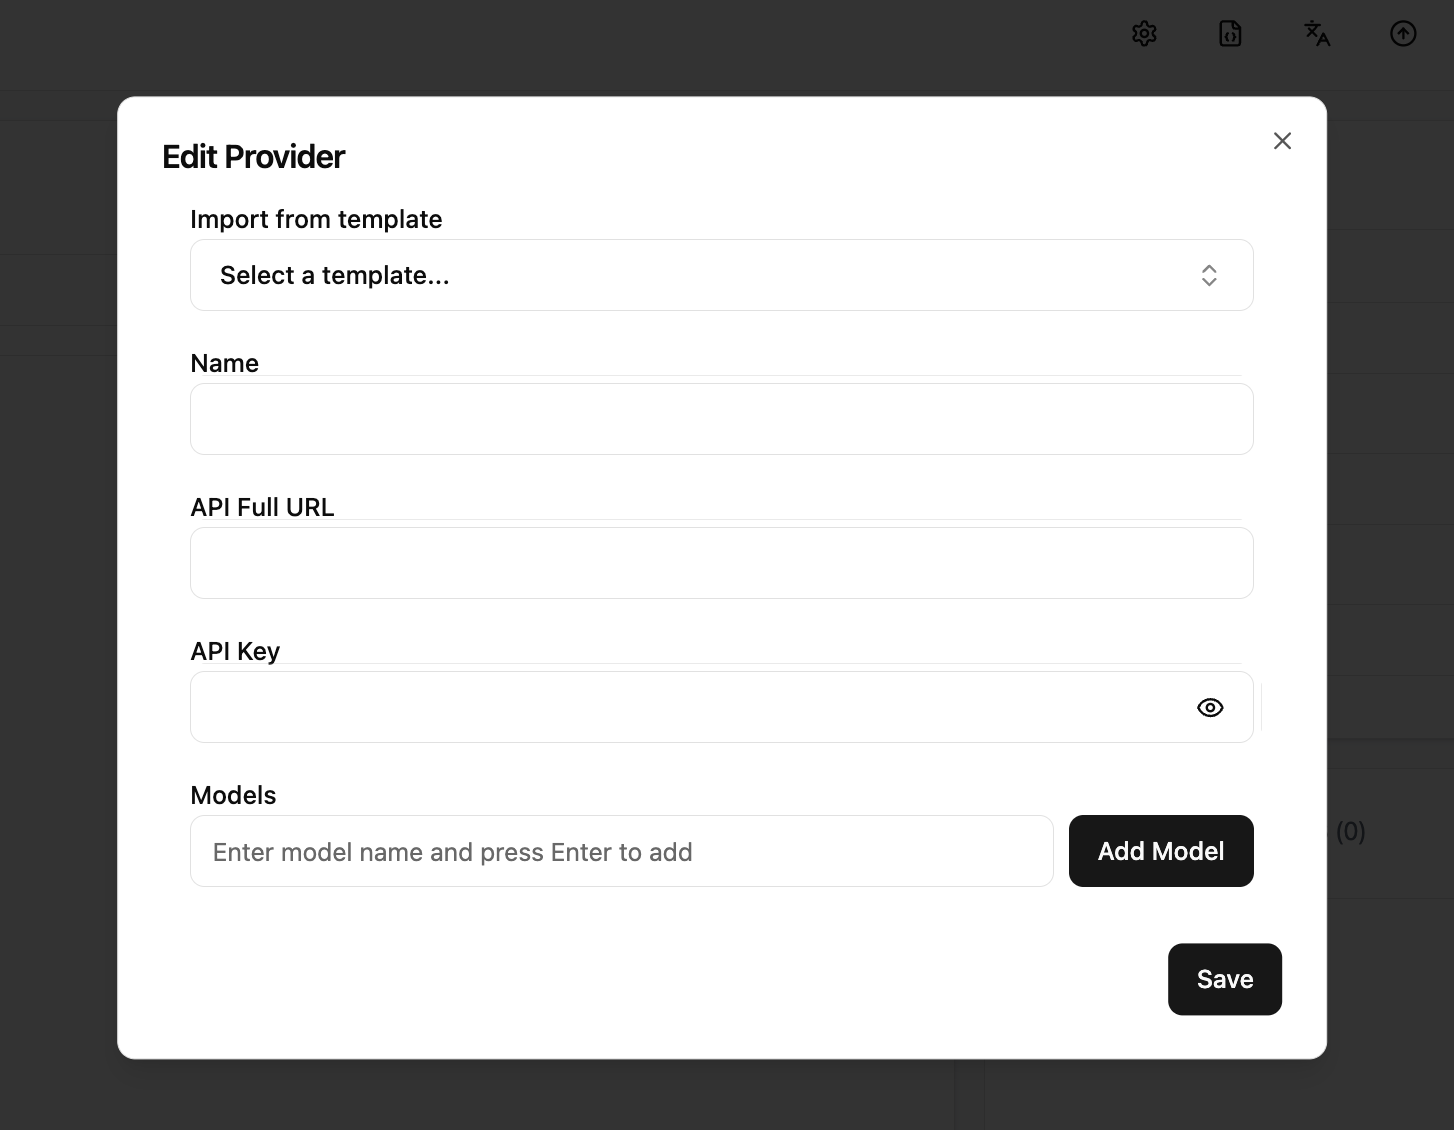
Here are configuration examples for DeepSeek and Kimi:
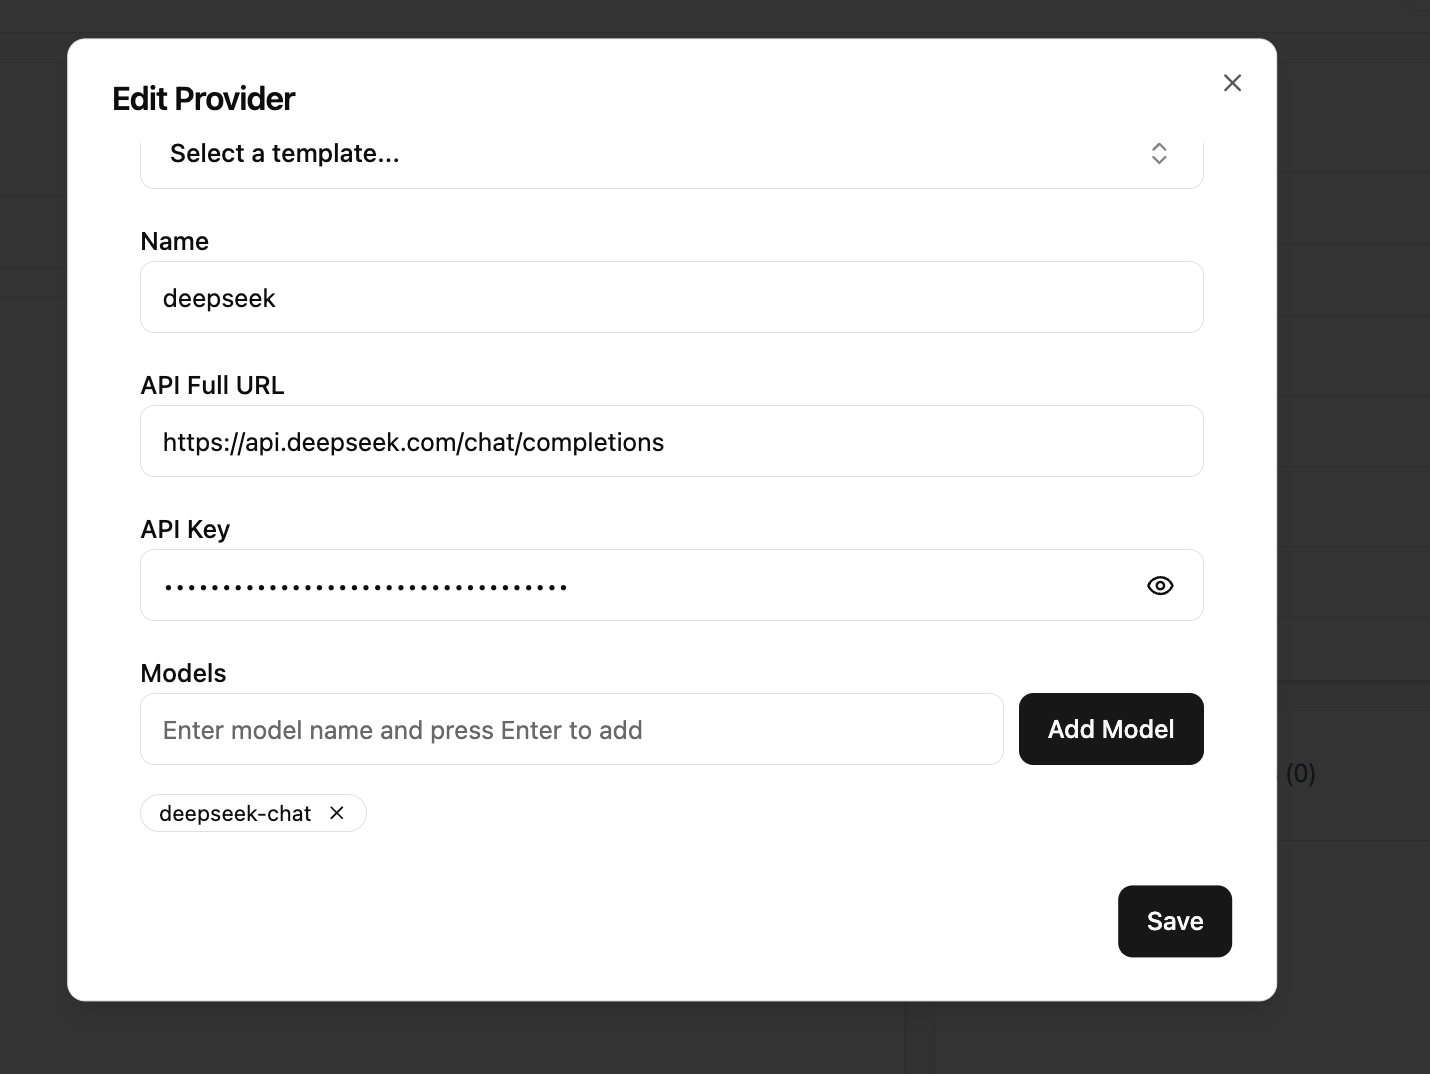

After saving model configuration, you also need to specify the default model in the Router area on the right. Select from the dropdown and set it to kimi (recommended), then click Save and Restart in the top-right corner.
After that, simply run ccr code in terminal to start Claude Code workflow through Claude Code Router.
Advanced Usage of Claude Code
Many people initially use Claude Code only as a normal chat tool. But in fact it has many built-in capabilities that can make your workflow more efficient and flexible. Here are common commands and usage examples:
Reference docs:
https://docs.claude.com/en/docs/claude-code/cli-reference
https://docs.claude.com/en/docs/claude-code/slash-commands
| Command | Purpose | Example |
|---|---|---|
| claude | Start interactive mode | claude |
| claude "query" | Run one-off task and output result | claude "explain this project" |
| claude -p "query" | Ask one-off question and auto-exit | claude -p "explain this function xxxx" |
| claude -c | Continue most recent session | claude -c |
| claude -r | Resume previous session | claude -r |
| /resume | Switch to previous session in current chat | claude -c, /resume |
| /plugin | Manage plugins and install submit/review extensions | /plugin |
| /init | Initialize project description with CLAUDE.md | /init |
| /clear | Clear current context to prevent overload | /clear |
| /compact | Compress history and reduce context token usage | /compact |
| /cost | View current cost usage | /cost |
| /model | Switch model (usually ignorable with compatible APIs) | /model |
| /memory | Manage CLAUDE.md memory file | |
| /help | Show available command list | /help |
| exit or Ctrl+C | Exit Claude Code | exit or Ctrl+C |
| /agents | Advanced feature, explained later | |
| /mcp | Advanced feature, explained later |
CLAUDE.md
Reference: https://www.anthropic.com/engineering/claude-code-best-practices
CLAUDE.md is a special file that Claude automatically reads and includes in context at the beginning of a session. So it is very suitable for recording:
- Common bash commands
- Core files and utility functions
- Code style conventions
- Testing method notes
- Repository collaboration conventions (for example branch naming, merge vs rebase, etc.)
- Development environment setup notes (for example whether to use pyenv, preferred compiler, etc.)
- Behaviors or pitfalls that need extra attention in the project
- Any information you want Claude to "remember"
CLAUDE.md itself has no strict format requirement, as long as it is concise and human-readable. For example:
# Bash commands
- npm run build: Build the project
- npm run typecheck: Run the typechecker

# Code style
- Use ES modules (import/export) syntax, not CommonJS (require)
- Destructure imports when possible (eg. import { foo } from 'bar')

# Workflow
- Be sure to typecheck when you’re done making a series of code changes
- Prefer running single tests, and not the whole test suite, for performance
Internal Principles of Claude Code
Reference: https://github.com/shareAI-lab/analysis_claude_code
If you are curious why Claude Code performs better than Trae or Cursor agent tools in many scenarios, we can briefly look at its internal working mechanism.
The overall implementation style of other CLI AI coding tools is broadly similar.
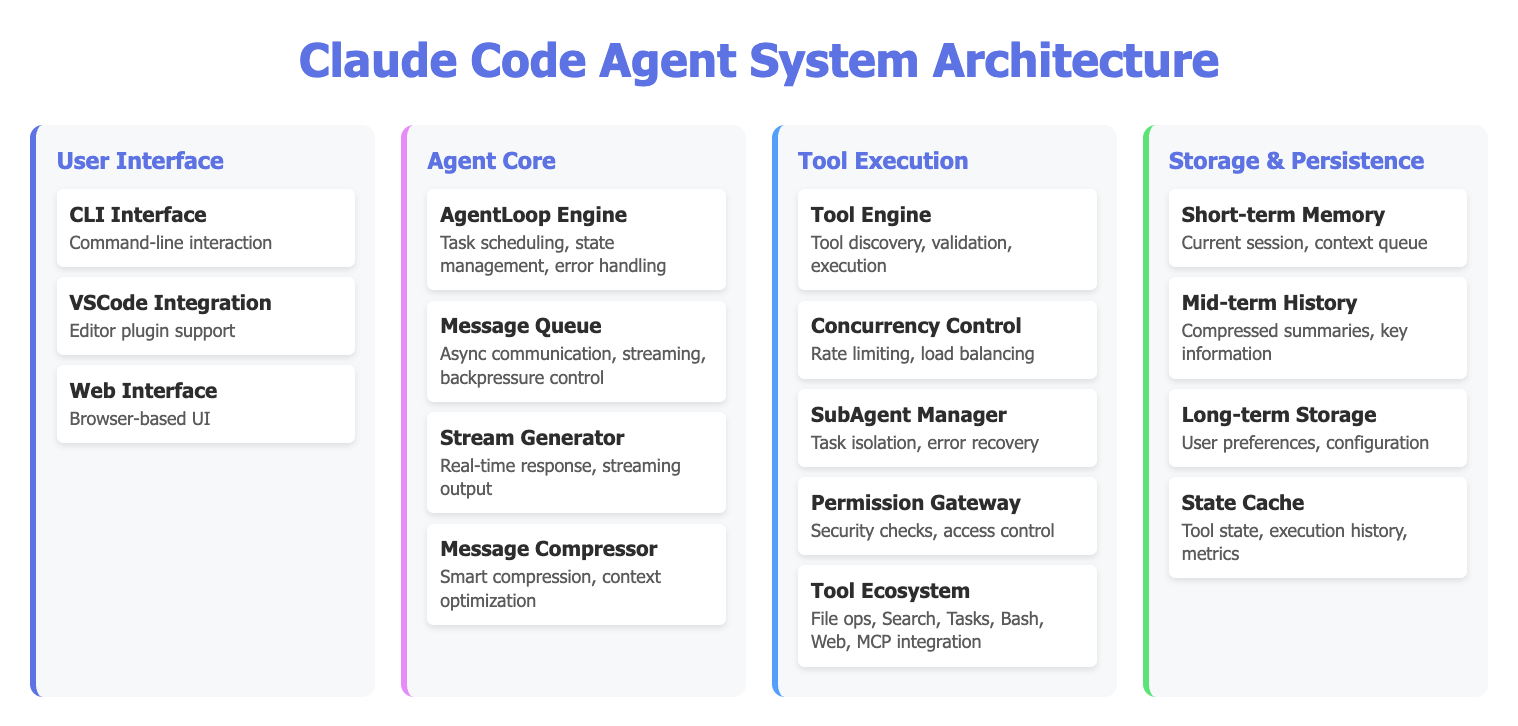
Claude Code decomposes coding tasks into a continuous "perceive - think - act - verify" loop and invokes different tools in the loop to complete work. It imitates human developer workflow: continuously "write code -> run -> inspect result -> improve again." Internally, a main task loop continuously executes steps. In each cycle, Claude can call different tools, such as reading/writing files, executing commands, and searching code, then decide next actions based on real tool outputs.
Several key characteristics are worth noting:
- Stream Processing: Claude can think while outputting results, instead of waiting to finish all code before execution.
- Intelligent Compression: Long conversations can make context too large. Claude compresses history into key information to reduce "forgetting," and distinguishes long-term vs short-term memory to keep execution efficient.
- Concurrency Control: Internal parallel design allows multiple tasks to proceed simultaneously without interference.
- Sub-agent Management: In real work it is not just one single "role" handling everything. You can manage multiple sub-agents collaboratively, each responsible for different tasks, such as dedicated testing or documentation agents.
Codex
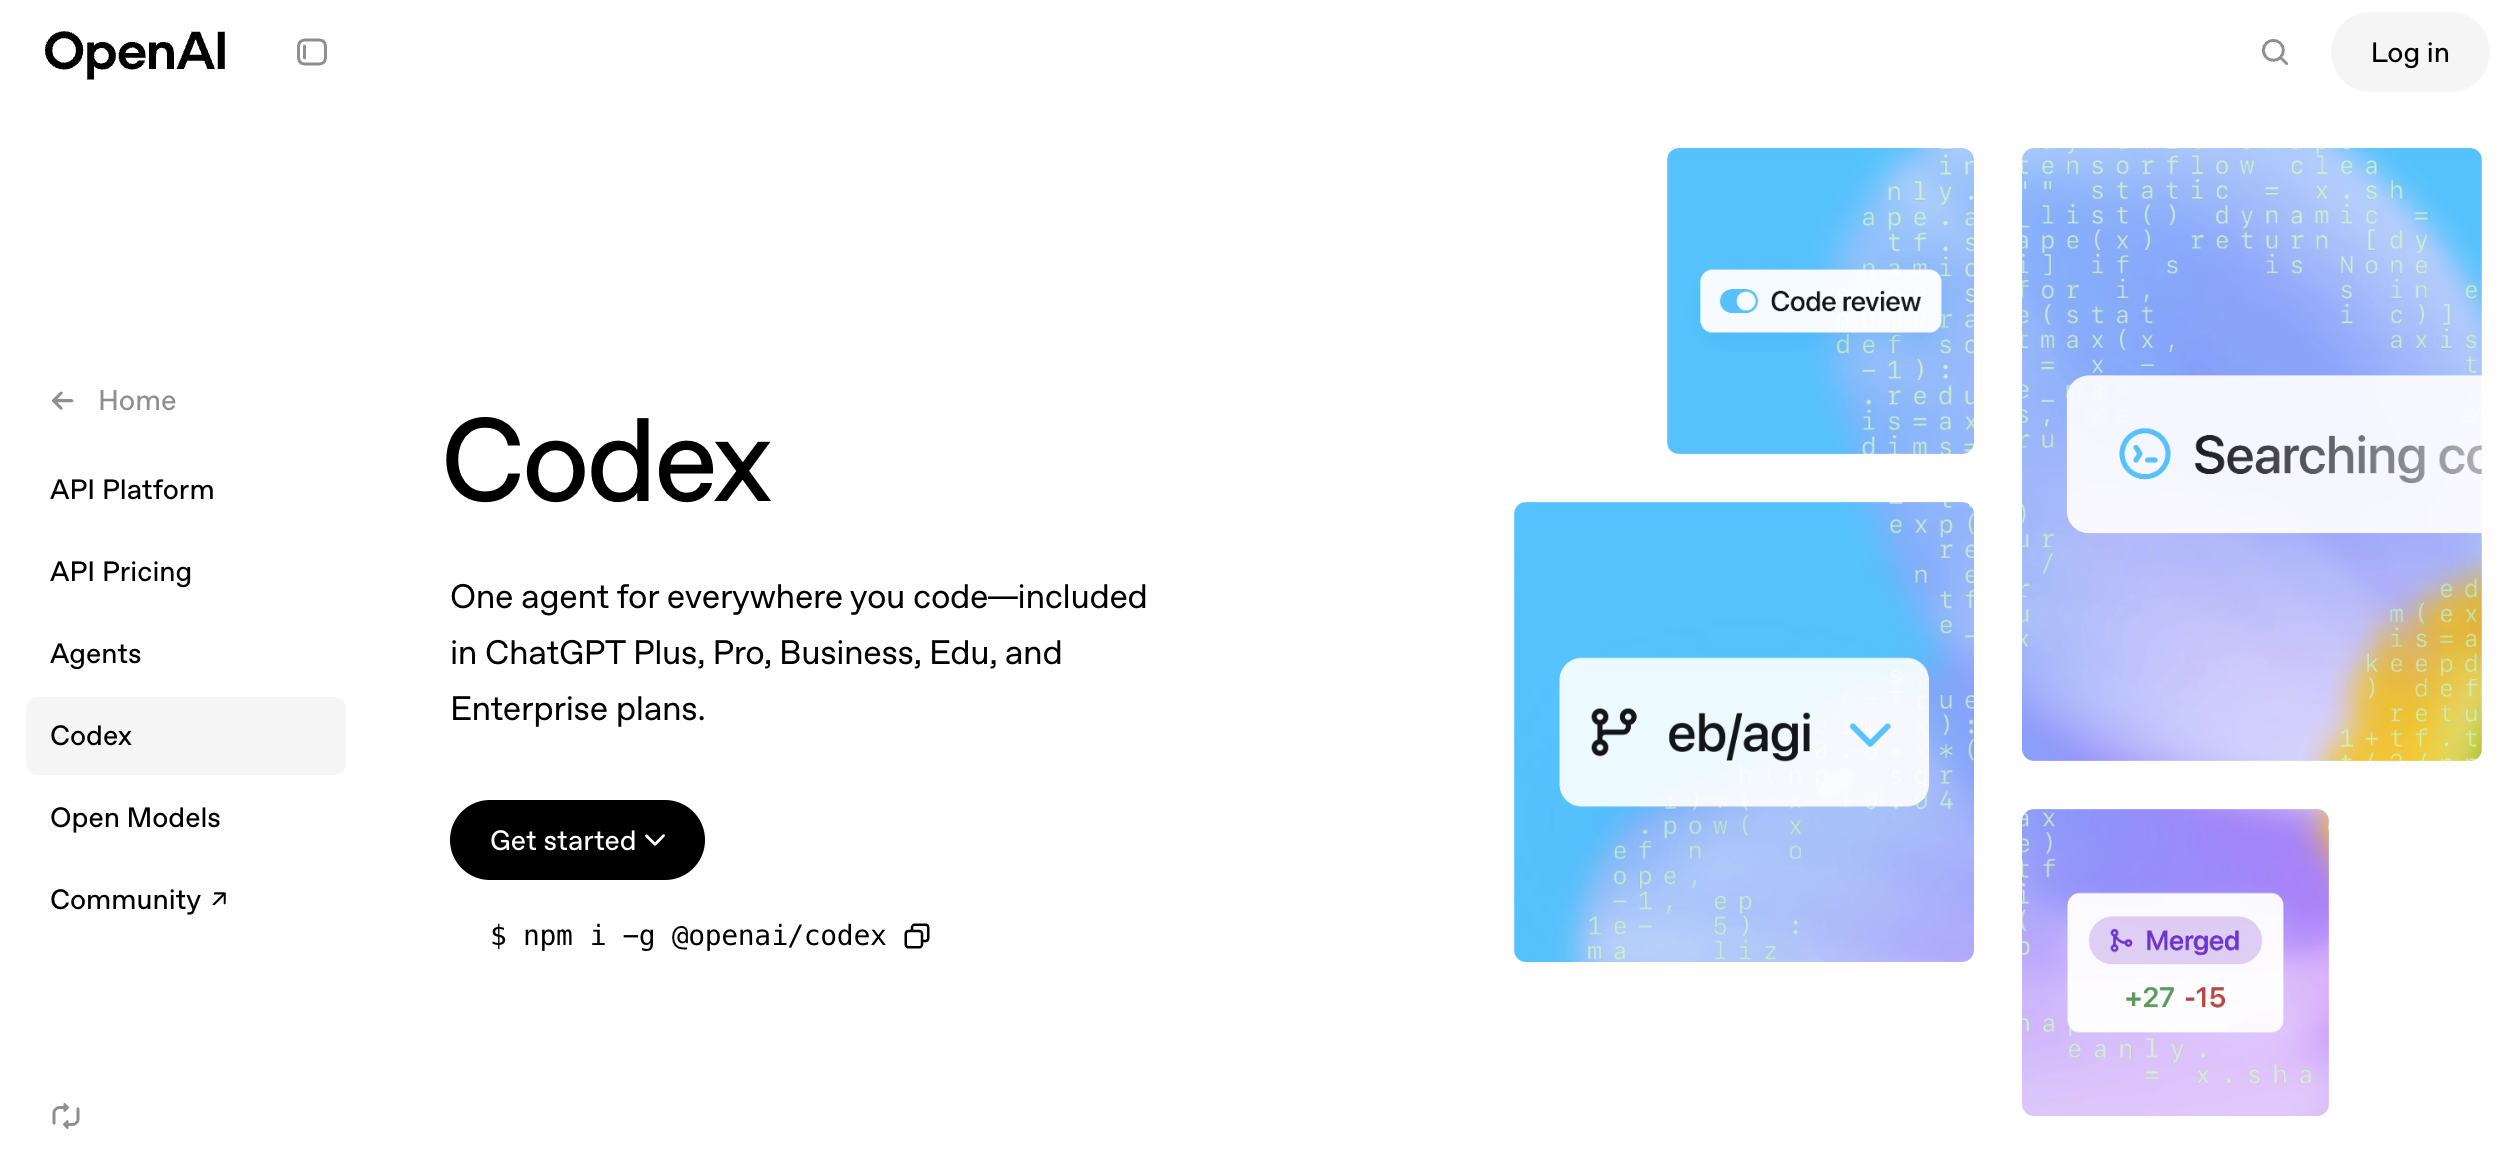

Similar to Claude Code, Codex is an AI collaborative coding tool developed by OpenAI. You can think of it as the "OpenAI version of Claude Code." Its biggest advantage is efficient adaptation to GPT-5.
From practical experience, GPT-5 currently responds faster and makes fewer mistakes (higher success probability in complex multi-round tasks). One drawback is that explanations can feel more "academic" and technical, sometimes too rigorous and information-dense, which can be slightly harder for beginners.
You can install Codex with the following command:
npm i -g @openai/codexUse Official OpenAI API as the Backend
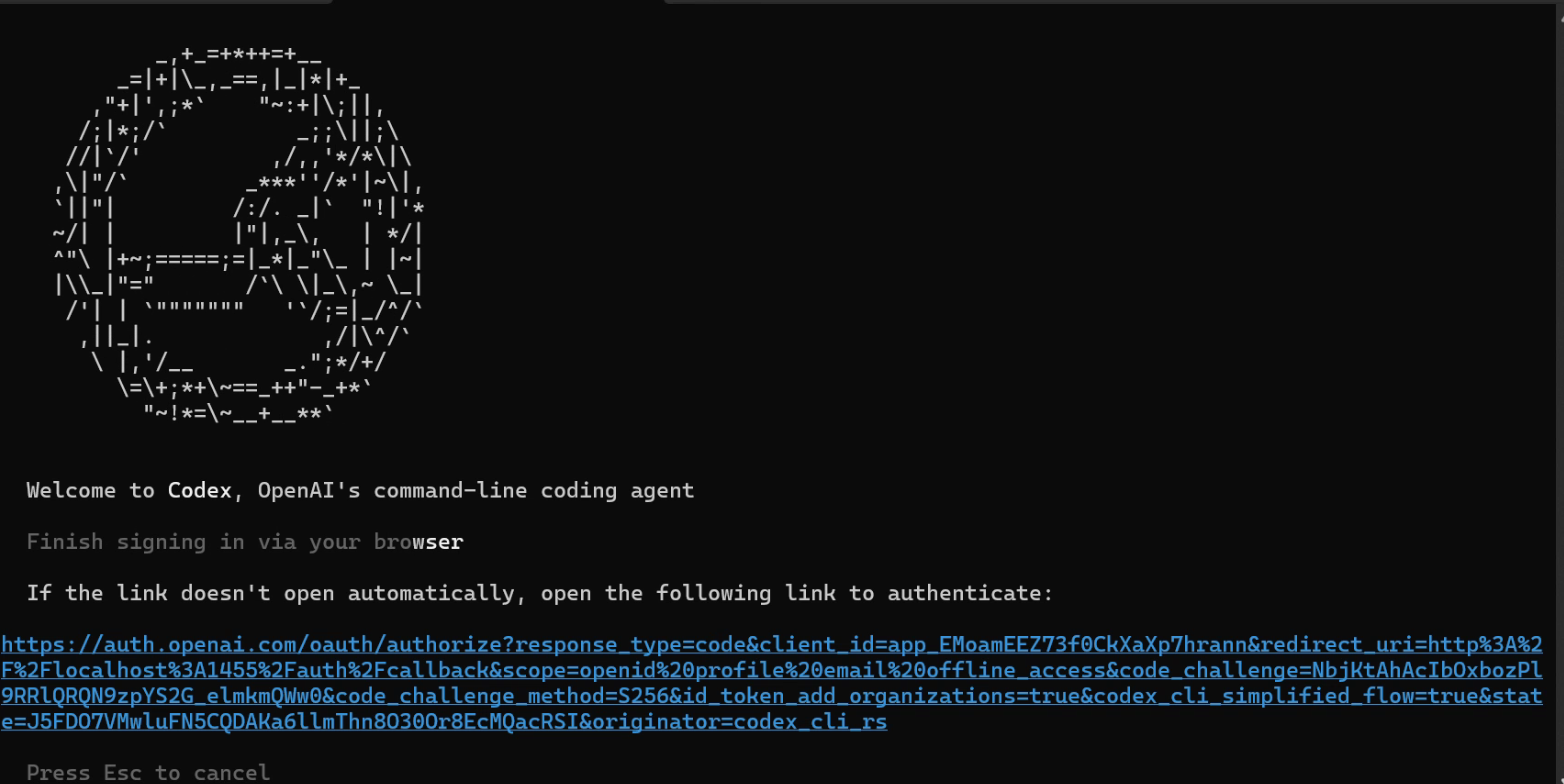
If you directly use the official OpenAI entry for Codex, setup is very simple. Once you have OpenAI subscription access or corresponding API quota, you only need to run codex in command line and follow the prompts to complete login.
Use Relayed OpenAI API as the Backend
Because official OpenAI API can have issues such as high cost and strict network requirements, we can also avoid those restrictions by routing through other API gateway services.
With this approach, we only need to buy corresponding Codex API quota on a third-party relay platform, and we can get an experience close to native OpenAI Codex.
Reference: https://open-dev.feishu.cn/wiki/PAqUwWG4IiuwTvkQ2sGcaQuPnXc
Recharge URL: https://api.zyai.online/account/topup/recharge
One thing to note: after obtaining token quota, we still need to configure the API key locally.
In key-group settings, make sure you choose the item specifically for Codex.

Next, we need to fill the key you obtained into the prompt below, then give the entire prompt to Trae so it can complete the whole configuration process for you:
My API key is: [Paste your obtained sk-xxxxx key here]

Please help me complete the following configuration tasks:

1. Create configuration directory
   - Create a `.codex` folder under my user directory
   - Windows path should be: `C:\Users\[My Username]\.codex`
2. Backup existing configuration (if exists)
   - Check if `.codex\config.toml` exists
   - If it exists, rename it to `config.toml.bak.[current timestamp]` (timestamp format: yyyyMMddHHmmss)
3. Create configuration file
   - Create `config.toml` in the `.codex` directory
   - Write the following complete content:
   ```toml
   preferred_auth_method = "apikey"

   [model_providers.myrelay]
   name = "My Relay Station"
   base_url = "https://api.zyai.online/v1"
   env_key = "MYRELAY_API_KEY"
   wire_api = "responses"
   request_max_retries = 4
   stream_max_retries = 10
   stream_idle_timeout_ms = 300000

   [profiles.myrelay]
   model_provider = "myrelay"
   model = "gpt-5"
   model_reasoning_effort = "medium"

   [tools]
   web_search = true

4. Set system environment variable
Variable name: MYRELAY_API_KEY
Variable value: The key I gave you

5. Confirm completion and report back:

The full path of the configuration file
Whether the environment variable was set successfully
I can use the command `codex --profile myrelay` to run it
After configuration, you can launch Codex with relayed API through codex --profile myrelay. Usage afterward is similar to Claude Code: just keep entering your ideas and requirements in chat at any time.
More Use Cases for CLI AI Coding Tools
Use AI to Write Requirement Documents: Learn to "Concretize Requirements"
For large language models, abstract requirements should be "concretized." For example, "I'm hungry" is an abstract requirement. We need to convert it into: "My stomach is a little hungry. I may need a red-bean bun and a cup of soy milk." That becomes an executable, concrete requirement.
But turning abstract requirements into concrete ones is actually a process that costs a lot of energy. If we have not seen enough examples, it is hard to quickly think of how to break abstract problems into detailed modules. In such cases, the best approach is to let AI help with this "concretization" step.
For example, if I want to build a daily planner app, the most basic idea might be:
Please help me write a daily planning app where I can write my plans each day and get reminders.
AI can indeed split tasks directly from this requirement and complete them step by step, but errors or understanding drift can occur in the middle. To reduce this risk, we can ask AI to expand the requirement first:
Based on my needs, please elaborate and provide a more detailed Product Requirement Document for reference. My idea is: Please help me write a daily planner app that supports daily plan-writing and provides reminders .
At this point, AI may produce a complete PRD like the following:
Product Requirements Document (PRD): “Today’s Plan” App
Document Version: 1.0
Creation Date: October 27, 2023
Author: (Your Name/Product Manager)

1. Product Introduction
1.1 Product Name
Today's Plan
1.2 Product Vision
“Today’s Plan” is a minimalist and highly efficient daily planning and reminder tool, dedicated to helping users eliminate procrastination and forgetfulness, plan every day clearly, and ensure tasks are carried out through an intelligent reminder system—ultimately enabling users to gain a stronger sense of control and achievement over their time.
1.3 Target Users (User Personas)
We mainly serve three types of users:
Students (Xiao Ming):
Characteristics: Multiple tasks such as courses, assignments, club activities, exam prep, needing organized time arrangement.
Pain Points: Easily forget small tasks or assignment deadlines; feel overwhelmed switching between tasks; want to build regular study and life habits.
Needs: A simple tool to list daily to-dos and provide reminders before class/self-study.
Office Workers (Zhang Wei):
Characteristics: Fast-paced work, many meetings, reports, project milestones, and personal affairs (fitness, picking up children).
Pain Points: Easily forget important meetings or work milestones; get interrupted by urgent tasks and forget the original plan; feel busy but inefficient at end of day.
Needs: Need a tool to quickly record and schedule daily work and send strong reminders at key times (e.g., 15 minutes before meetings).
Freelancers/Self-disciplined Seekers (Li Na):
Characteristics: High freedom of time, but strong self-management required for work output and personal growth.
Pain Points: Easily procrastinate, lack external supervision; start the day without a clear plan, leading to low time utilization.
Needs: Need a tool to help build a daily fixed routine (Morning Routine) and review daily achievements for positive feedback.

2. User Stories
As a user, I want to quickly create today’s plan list so I have an overview of all my tasks for the day.
As a user, I want to set specific start and end times for each task so I can create a visual timeline.
As a user, I want to receive push notification reminders before a task starts so I won’t miss any important arrangements.
As a user, I want to customize the reminder time (such as 5, 15, or 60 minutes in advance) so reminders better fit my habits.
As a user, I want to easily mark completed tasks so I can feel accomplished and clearly see my progress.
As a user, I want to see a summary of my completed plans at the end of each day for reviewing and self-motivation.
As a user, I want to conveniently edit and delete tasks to handle last-minute changes.
As a user, I want to view plans and achievements from previous days to review my efficiency and habits.

3. Feature Breakdown
Core Features (MVP - Minimum Viable Product)
Module 1: Plan Management
3.1.1 Daily Plan Homepage
Interface: “Today” as the core view, current date shown at the top.
View: Timeline list, clearly showing tasks scheduled from morning to evening. Tasks without a time can be listed in the top or bottom “To-do List” section.
Interactions:
Click the “+” button in the bottom right to quickly create a new task.
Pull down to refresh the page.
Swipe left/right to view yesterday’s and tomorrow’s plans.
3.1.2 Create/Edit Task
Entry: Click “+” on the homepage or a time slot in the list.
Fields:
Task title (required): Briefly describe the task, e.g., “10 AM Weekly Product Meeting.”
Task time (optional):
Set “start time” and “end time.”
Provide “all-day” option for unspecified time tasks.
Default time picker should be quick and convenient.
Reminder setting (required, with default value): See Module 2.
Notes (optional): Add further descriptions, links, or location info.
Actions: Save, cancel, delete task.
3.1.3 Task Interaction
Mark as complete: Checkbox before each task; checking adds a strikethrough and gray background, indicating completion. Can unmark if needed.
Edit task: Click the task itself to enter edit page.
Delete task: Swipe left on a task to reveal “Delete” button.
Module 2: Smart Reminder System
3.2.1 Reminder Trigger
Mechanism: Based on task’s set “start time” and the user’s “reminder lead time,” send a push notification from device.
Offline Support: Locally scheduled reminders must trigger even if user is offline.
3.2.2 Reminder Content & Format
Notification title: App name “Today’s Plan.”
Body: “Reminder: [Task Title] will start at [Start Time].” E.g., “Reminder: Product Meeting will start at 10:00.”
Sound: Use system default or offer several simple, effective tones.
3.2.3 Reminder Settings
Global Settings (in Settings page):
User can set a default reminder time, e.g., “15 minutes before task starts.” New tasks adopt this by default.
Single Task Settings (in create/edit page):
Users can override global settings for important tasks, choosing specific reminder times like "on time," "5 minutes early," "30 minutes early," or "1 hour early."
Provide “no reminder” option.
Subsequent Features (V1.1, V2.0)
3.3 Daily Review & Statistics
Push a summary notification at a set time every night (e.g., 22:00): “How was your day? Take a look at your achievements!”
Generate a simple daily report card: shows total planned tasks, completed tasks, completion rate, plus an encouraging message.
3.4 History Review
Calendar view to click on any past day and check its plans and completion status. Days with high completion rates marked with a special color.
3.5 Templates
Allow users to save a successful daily plan as a template, e.g., “Efficient Workday,” “Relaxing Weekend.”
When creating tomorrow’s plan, one-click import a template, modify slightly to save time.
3.6 Themes & Personalization
Offer dark mode.
Allow changing several primary color themes.

4. Non-Functional Requirements
4.1 Performance
Response: App launch time under 2 seconds; adding/editing tasks must be smooth and lag-free.
Resource Use: Low battery and memory consumption in background; do not over-consume resources waiting for reminders.
4.2 Usability
Minimal & intuitive: UI must be minimal, primary functions accessible within 3 clicks. No tutorial needed for new users.
Error tolerance: Offer undo (e.g. brief undo after mistakenly deleting a task).
4.3 Reliability
Reliable reminders: Reminder function is the product’s lifeline; must guarantee 99.99% timely and accurate delivery.
Data loss-free: User plans must be reliably stored locally. Future versions can support cloud sync to prevent data loss on device change.
4.4 Compatibility
Platform: Support major iOS and Android versions (latest 3-4 releases).
Screen: Layout must fit various phone screen sizes.

5. Roadmap
V1.0 (MVP):
Goal: Validate core value—planning & reminders.
Features: Complete all “Core Features” described above (Plan management, smart reminders).
V1.1 (Quick Optimization):
Goal: Improve retention and achievement.
Features: Add “Daily Review & Statistics,” “History Review.”
V2.0 (Enhanced Experience):
Goal: Increase efficiency and personalization.
Features: Add “Templates,” “Themes & Personalization,” and start developing “Cloud Sync.”
Compared with our initial sentence "help me write an app where I can record plans and get reminders every day," this document is now far more detailed. You can add, remove, and revise content based on real needs. For modules you are unsure about, you can keep asking AI for more alternatives, then select and merge them into a final version.
In this way, we can easily turn abstract ideas into concrete descriptions. For AI development, "concrete" means productivity. The more concrete the requirement is, the easier it is to get stable structure and higher-quality project output. You can try redoing one of your previous small projects in this way and compare the difference.
If you feel this kind of "requirement prompt" is too long, a very natural approach is to write it into a standalone Markdown document as your requirement document / development document / PRD. Then each time you ask AI to build a project, you only need to ask it to "refer to this document" instead of retyping long prompts every time. You can also continuously improve this document across iterations so future projects benefit directly.
Below are some other common use cases:
Manage Folders
We can try using CLI AI coding tools to manage various files in the current folder. For example, if you have a pile of messy files that need sorting and grouping, you can tell Claude Code or Codex:
Please help me organize the contents of the current folder. I want to group files with the same content together & I want to group files from the same time period together. Please help me handle this.
Develop New Projects
This is almost exactly the same as how we previously used z.ai and Trae. We can directly use CLI AI coding tools to develop brand-new projects from scratch. Of course, it is best to prepare a requirement document in advance.
The more detailed the requirement document, the better the final result. You can optimize that document across multiple rounds as your ideas evolve. The more complete the document, the more stable and mature the implementation usually becomes.
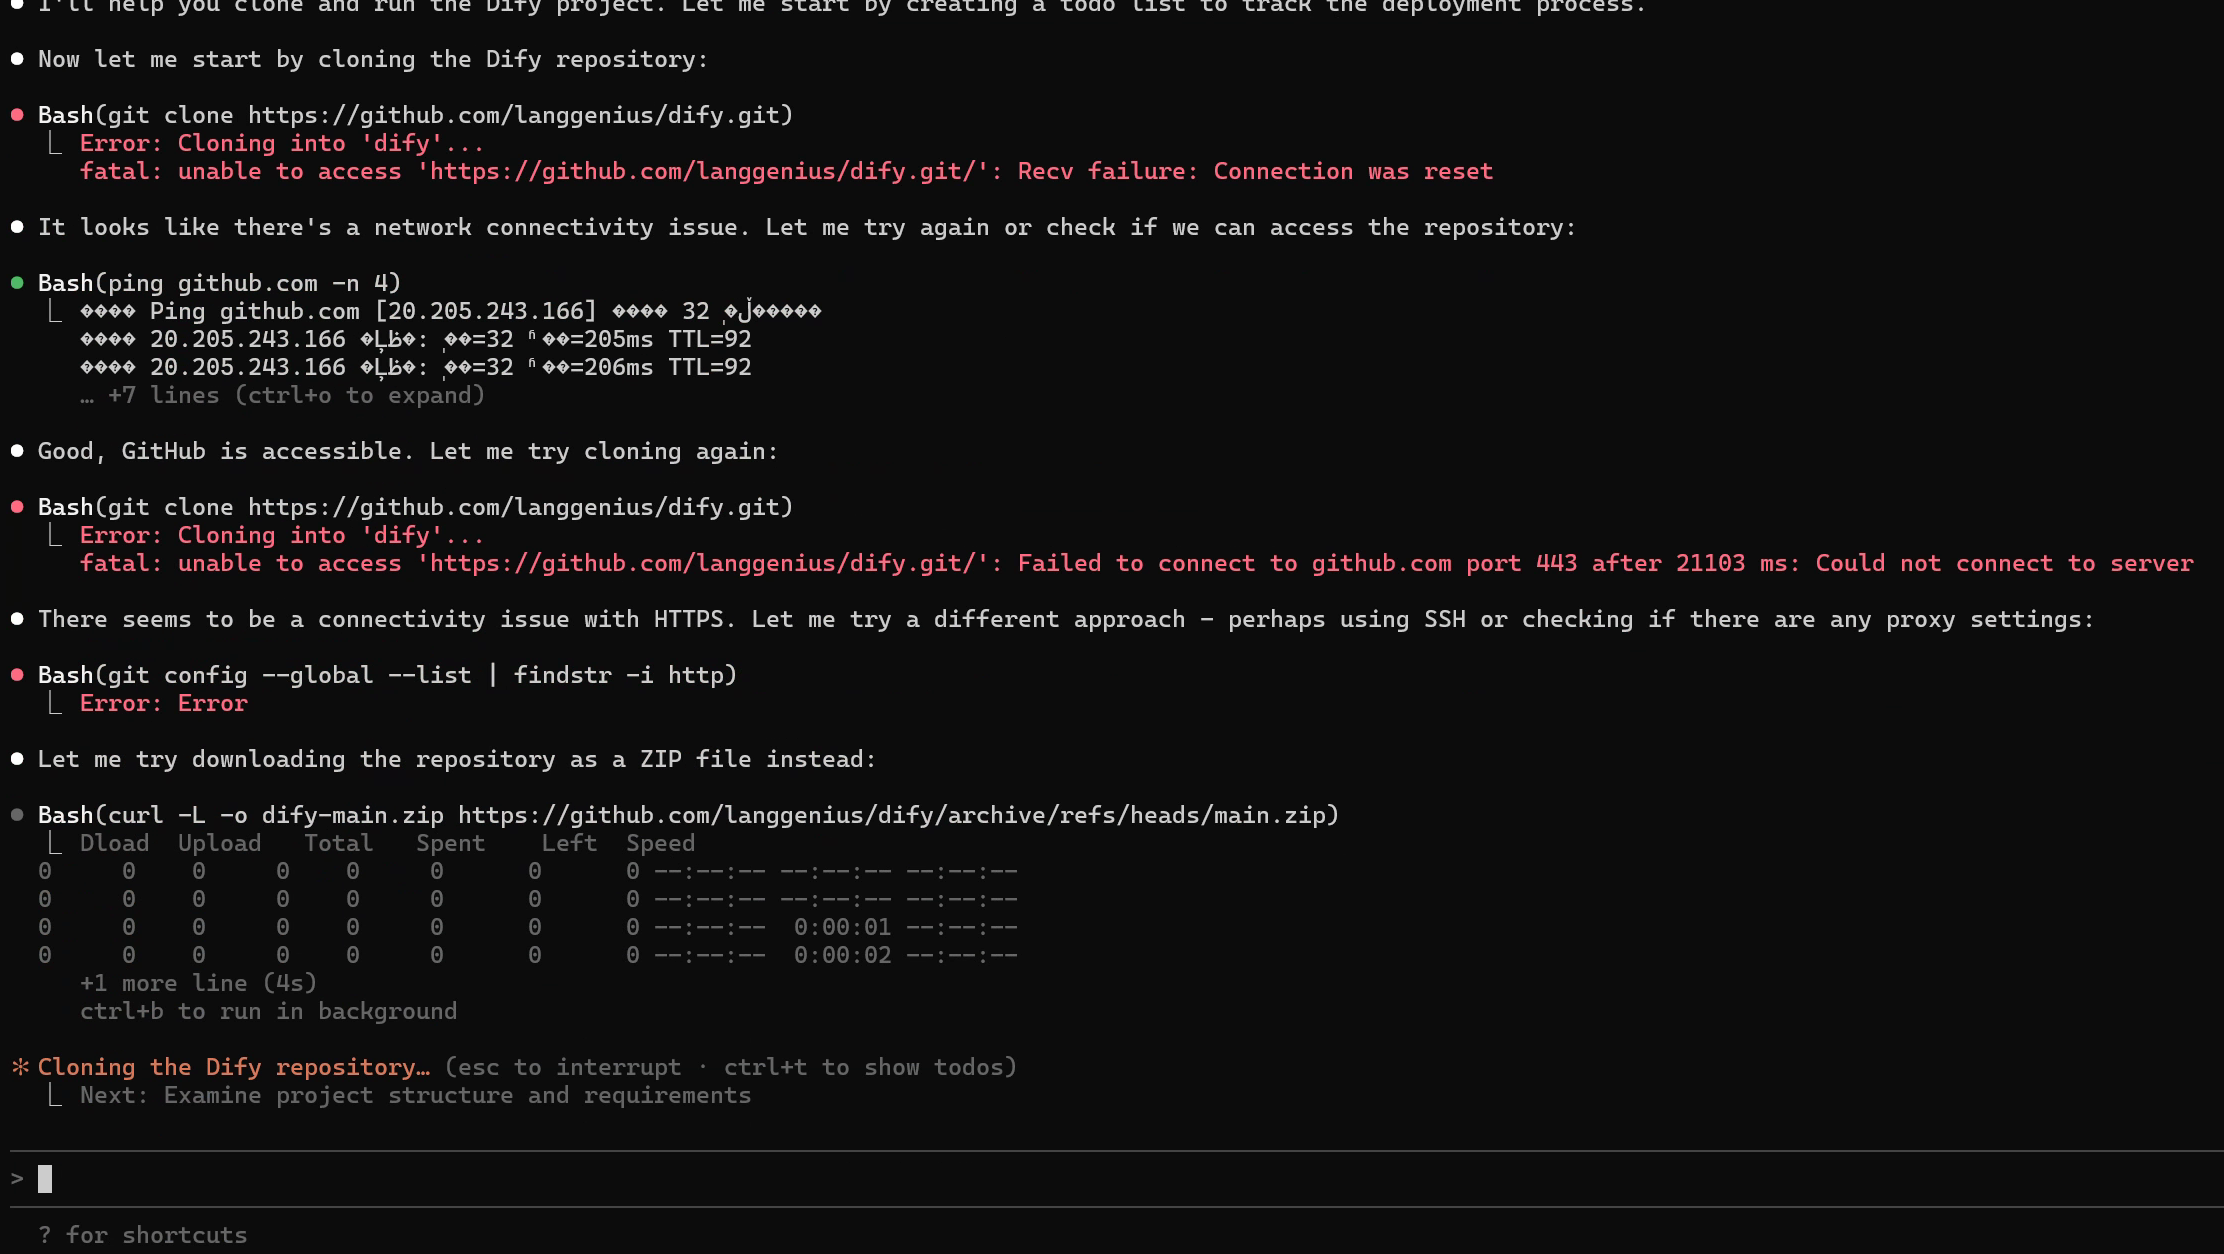
Deploy Open-Source Projects (for example Dify)
For learners who are new to computers, deploying an open-source project from GitHub is often difficult. But we can fully hand this over to Claude Code, just as we did in the Dify tutorial:
https://github.com/langgenius/dify
If I want to run my own local Dify, I only need to throw this link to Claude Code, then type:
I want to deploy this GitHub project ``https://github.com/langgenius/dify`` . Please help me clone the project and run it.
After receiving your request, Claude Code will automatically complete a series of operations, including pulling code from GitHub, configuring runtime environments, and starting the project. If any step fails or startup status is abnormal, you only need minor manual handling based on prompts. Beyond Dify, you can also ask Claude Code to deploy most common open-source GitHub projects for you. You just need one chat box and the time to drink a cup of coffee ☕️.
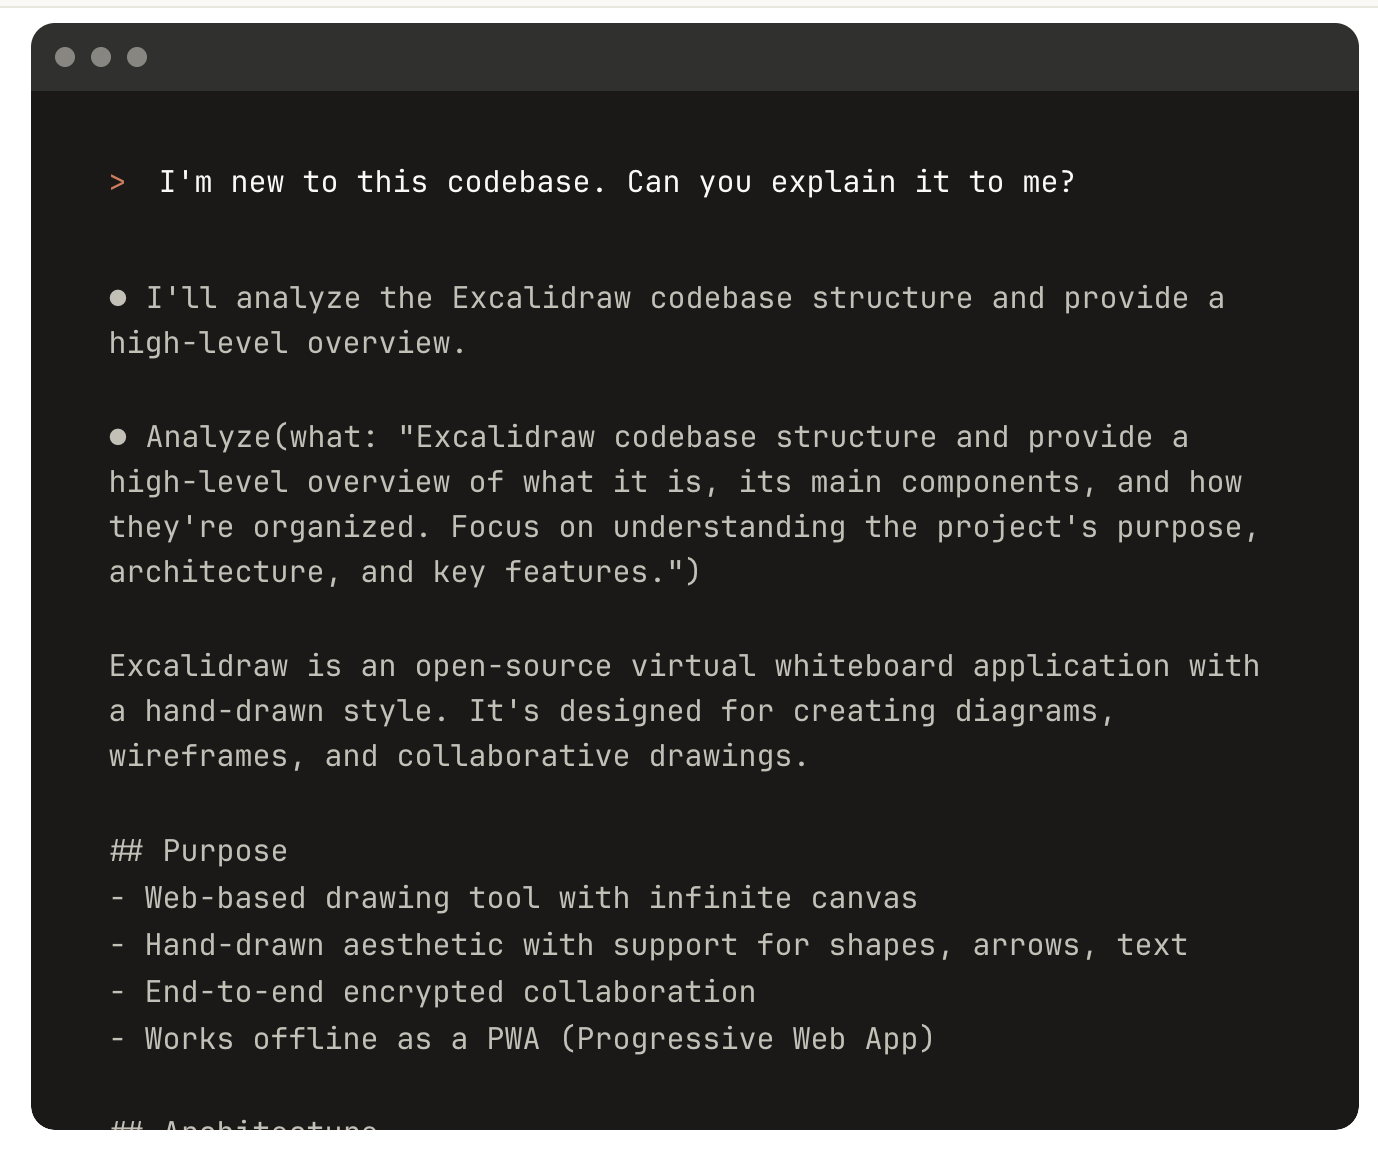
Explain Code and Write Documentation
For some complex projects, or large projects generated by AI, you may feel the code is too long and logic is too dense to understand. At this time, you can ask CLI AI coding tools to "read code" for you. You can ask like this:
- Please explain this project to me: how to run it, how to use it, and how to modify and continue developing it later.
- Please explain the overall workflow of this project: how does the program run, and what actions can users perform in the interface?
- Please write complete documentation for this project, including development docs and run docs.
- Based on everything in my current folder, write a detailed explanation and save it into a specified Markdown document.
More Use Cases
Of course, CLI AI coding tools can do far more than what we listed above. Do not treat them only as "code-writing tools." Treat them as intelligent agents with independent action capabilities. You can ask them to:
- Manage and organize local files;
- Write journals and summaries;
- Analyze and fix system errors;
- Execute various repetitive command-line tasks.
In the near future, it may become your most important and most understanding AI companion on your computer.