
How to Build a Cross-Platform App with Flutter
Flutter is useful when one team wants to deliver Android and iOS applications—and often web or desktop versions—from one Dart project. It works especially well for products whose screens, interaction, and brand styling should remain consistent across devices.
In this chapter we build a small store expense ledger. A staff member enters an expense, sees the daily total, and can still find the record after reopening the application.
1. What Flutter is
Flutter is Google's UI toolkit. The application language is Dart. Instead of composing a screen from the platform's standard controls, Flutter draws a consistent interface through its own rendering system.
That gives the team strong control over layout and animation. It does not remove platform work: permissions, payment, notifications, signing, accessibility, and store rules still have to be tested on every target platform.
Flutter is a good choice when:
- Android and iOS need nearly the same product;
- a custom visual system matters;
- the team is willing to use Dart;
- most work is forms, lists, dashboards, media, or business workflows.
Choose native SwiftUI or Jetpack Compose when the product depends heavily on the newest platform APIs, deeply platform-specific interaction, or a large existing native codebase.
2. Look at three production products
My BMW: a vehicle companion app
My BMW brings vehicle status, charging, service, and remote controls into one mobile product. The interface places the car and its current state before secondary actions.

For our ledger, borrow the same information order: today's amount first, the latest records second, and the add action always easy to reach.
Reference: Flutter customer story for BMW.
Google Pay: immediate confirmation after an action
Payment products must make it obvious whether an action succeeded. Google Pay uses clear state changes and feedback rather than leaving the user to guess.
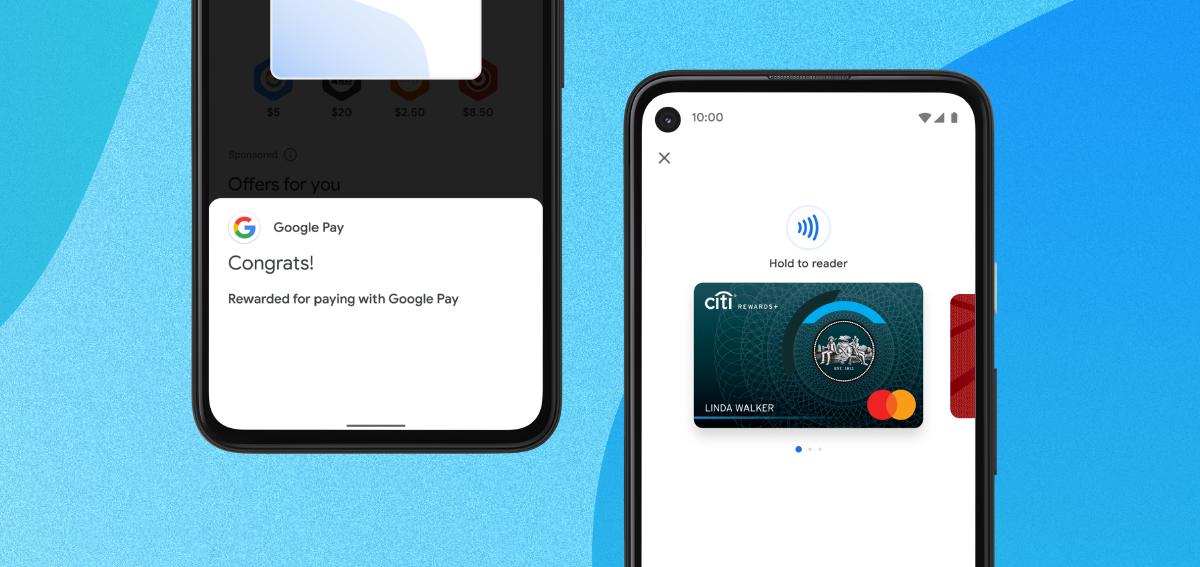
Our ledger will do the same after saving: update the total, add the row, clear the form, and show a success message.
Reference: Flutter customer stories.
Nubank: a financial product with a calm hierarchy
Nubank's app groups account information and help actions without turning every function into a competing card.
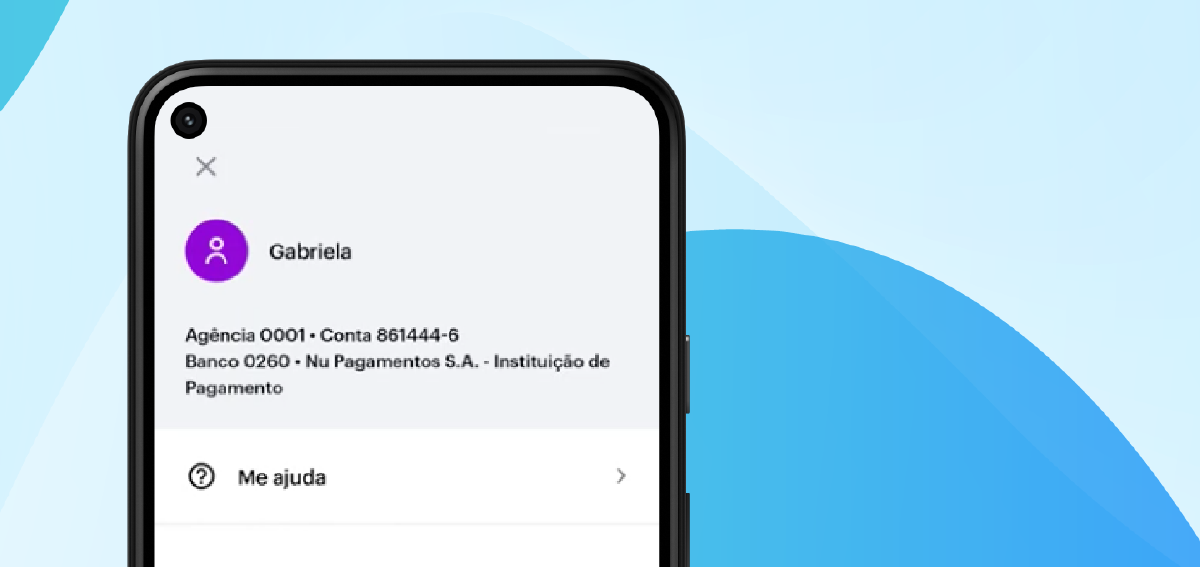
The useful lesson is restraint. An expense tool needs readable numbers and predictable actions more than decoration.
Reference: Nubank engineering on Flutter.
3. Install Flutter and verify the environment
Install the stable Flutter SDK from the official guide, then run:
flutter doctorflutter doctor lists the targets your computer can actually build. A green web toolchain does not prove that Android Studio, an Android SDK, Xcode, CocoaPods, and mobile signing are ready.
Create the project:
flutter create store_expense_ledger
cd store_expense_ledger
flutter run -d chrome
When the counter sample opens in Chrome, keep it working before making changes.
4. Build the first useful screen
Ask your coding assistant:
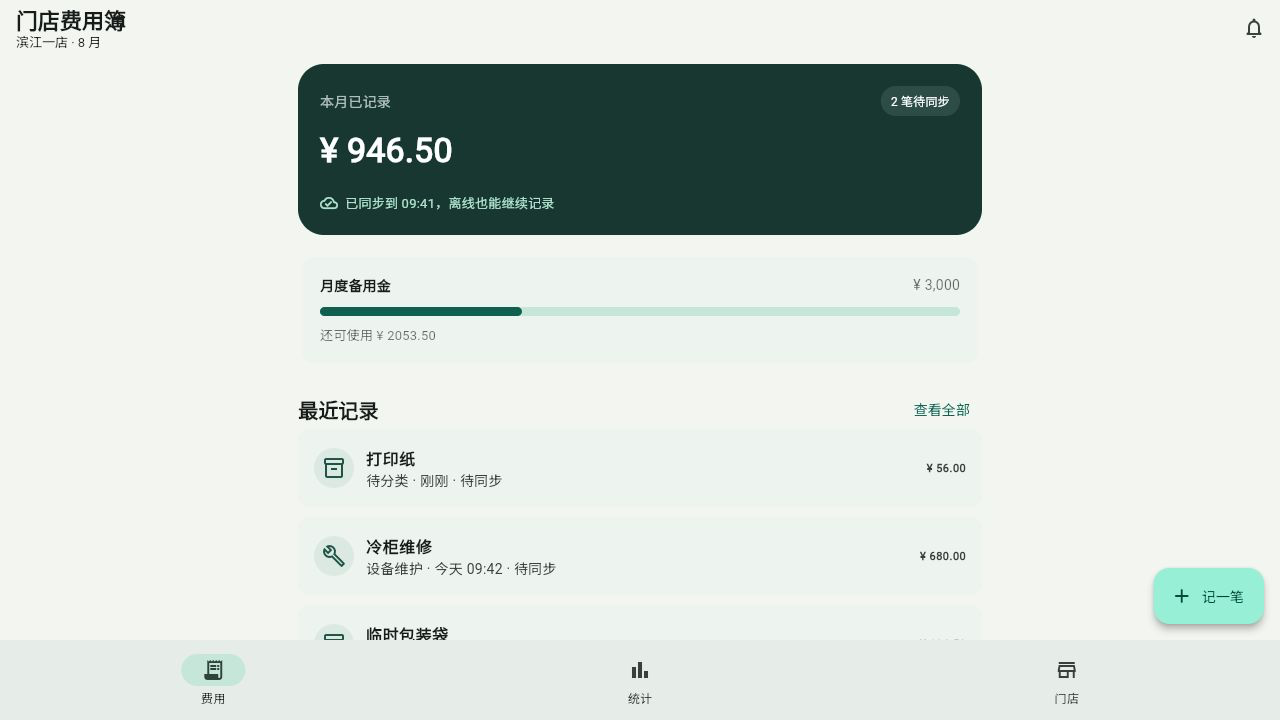
Replace the counter sample with a store expense home page. Show today's total, a short expense list, and an Add Expense button.
Run the app and check both a wide and narrow browser window. Numbers must not be clipped and the main button must remain visible.
5. Add the expense form
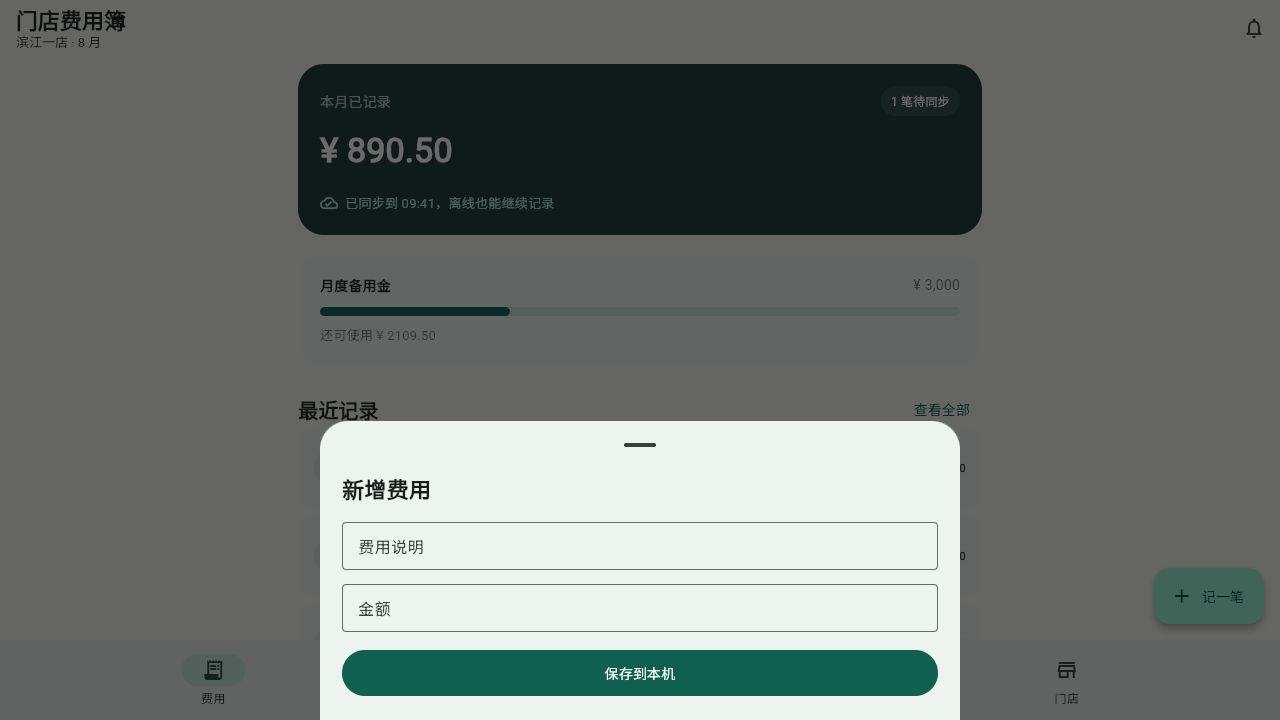
The first form only needs a category, note, and amount.
Open an expense form from the Add Expense button. Add category, note, and amount fields plus Save and Cancel.
Now test empty and invalid input:
Show a short message below each invalid field. Do not save an empty category or an amount that is zero or negative.
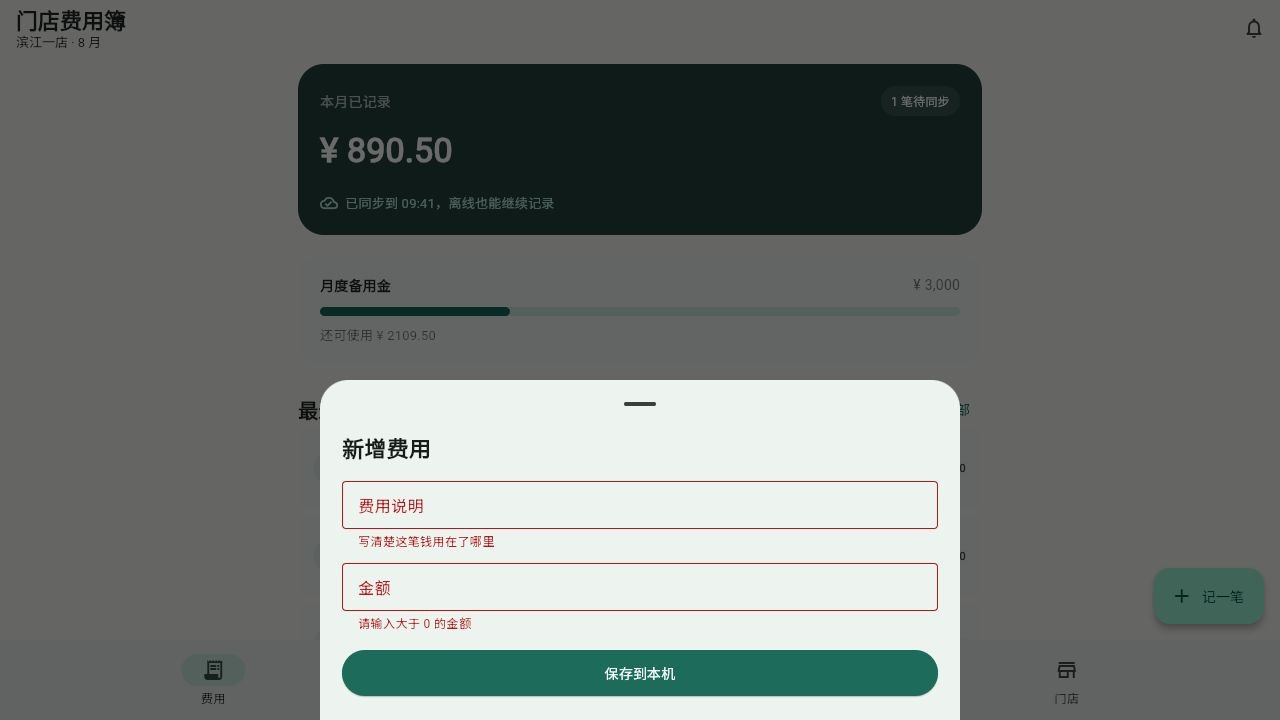
A useful error belongs beside the field that needs attention. A generic “Something went wrong” banner is not enough.
6. Make saving update the whole screen
When Save succeeds, close the form, add the expense to the top of the list, update today's total, and show a confirmation message.
Enter “Office supplies,” “Printer paper,” and 56. The total, row, and message should all change once.
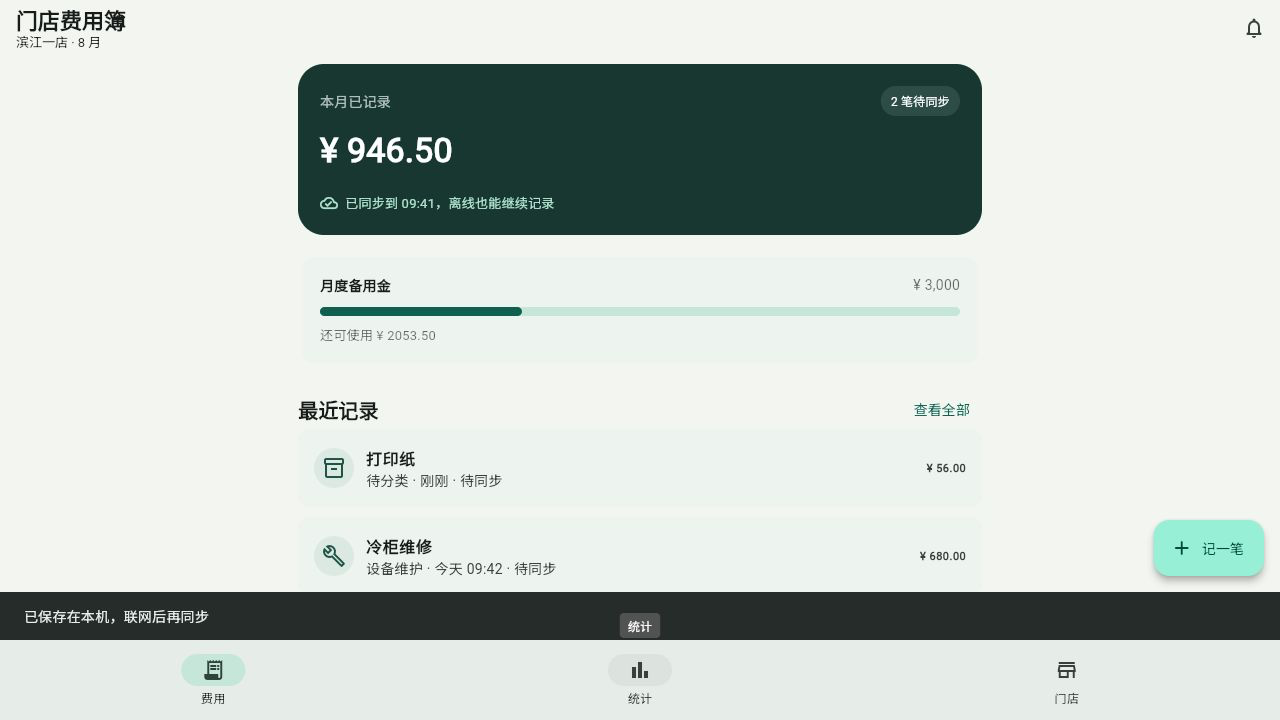
If a double click creates two rows, fix that before adding more features.
7. Keep records after the app closes
Start with local persistence. This means the current device stores the records and reloads them at startup.
Save expense records locally and restore them when the application starts. Do not add accounts or a server yet.
Small prototypes can serialize a simple list. A longer-lived product should place storage behind a repository layer so SQLite or a remote API can replace the first implementation without rewriting every screen.
Test persistence yourself:
- save two expenses;
- refresh the browser;
- close the tab and open it again;
- verify the total and both rows.
For architecture guidance, read Flutter's application architecture guide.
8. Add editing and deletion carefully
Let the user edit one expense. Reuse the existing form and recalculate the total after saving.
After that works:
Add Delete with a confirmation dialog. Cancel must keep the record unchanged.
Editing and deleting are useful tests of the data model. If the screen uses a list position as identity, rows may change unexpectedly after sorting. Give every expense a stable ID.
9. Prepare for a real backend
A shared company ledger needs accounts, permissions, server-side records, and audit history. Begin by explaining the boundary:
Describe the data model for users, stores, expenses, categories, and audit events. Do not write code yet.
Then connect one operation at a time:
Load the signed-in user's stores from the existing API. Do not let the client choose its own role.
Send one expense to the backend. Keep the local copy if the network fails and let the user retry.
Secrets that authorize the whole company never belong inside the Flutter package. The server must decide which stores and records each account may access.
10. Test before packaging
Run static analysis and tests:
flutter analyze
flutter test
Add a widget test that enters a valid expense and confirms the total changes. Add another for an invalid amount.
For responsive screens, follow Flutter's adaptive and responsive design guidance.
11. Build for each target
A successful web build is useful, but it is not an Android or iOS release.
flutter build webFor Android, install Android Studio and the Android SDK, accept the required licenses, create a signed release build, and test it on a real phone. For iOS, use a Mac with Xcode and a valid simulator runtime or device, configure signing, create an archive, and test through TestFlight.
Desktop targets also need their own packaging, signing, and clean-machine tests. Follow the official deployment guides.
12. What was verified here
This prototype ran with Flutter 3.44.9 and Dart 3.12.2. flutter analyze, the widget test, and flutter build web passed. The built web application was opened, an expense for printer paper was saved, validation was triggered, and the record remained after a refresh.
The machine did not have a working Android SDK. Xcode did not have an iOS Simulator runtime or CocoaPods. Android and iOS builds, signing, device behavior, and store submission are therefore not claimed as complete.
The right first finish line is modest: enter one expense, see a clear error for invalid input, save successfully, and find the same record after reopening the app. Once that is dependable, move on to accounts, synchronization, and release builds.